1.使用npm下载webpack-dev-server
npm i webpack-dev-server -D
2.配置webpack.config.js文件
const { resolve } = require('path');
const HtmlWebpackPlugin = require('html-webpack-plugin');

module.exports = {
  entry: './src/index.js',
  output: {
    filename: 'built.js',
    path: resolve(__dirname, 'build')
  },
  module: {
    rules: [
      {
        test: /.css$/,
        use: ['style-loader', 'css-loader']
      },
      // 打包其他资源(除了html/js/css资源以外的资源)
      {
        // 排除css/js/html资源
        exclude: /.(css|js|html|less)$/,
        loader: 'file-loader',
        options: {
          name: '[hash:10].[ext]'
        }
      }
    ]
  },
  plugins: [
    new HtmlWebpackPlugin({
      template: './src/index.html'
    })
  ],
  mode: 'development',

  // 开发服务器 devServer:用来自动化(自动编译,自动打开浏览器,自动刷新浏览器~~)
  // 特点:只会在内存中编译打包,不会有任何输出
  // 启动devServer指令为:npx webpack-dev-server
  devServer: {
    // 项目构建后路径
    contentBase: resolve(__dirname, 'build'),
    // 启动gzip压缩
    compress: true,
    // 端口号
    port: 3000,
    // 自动打开浏览器
    open: true
  }
};
3.使用npx webpack-dev-server命令
npx webpack-dev-server
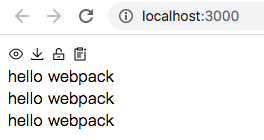
4.运行效果

综合前5篇文章的配置信息:
/*
  开发环境配置:能让代码运行
    运行项目指令:
      webpack 会将打包结果输出出去
      npx webpack-dev-server 只会在内存中编译打包,没有输出
*/

const { resolve } = require('path');
const HtmlWebpackPlugin = require('html-webpack-plugin');

module.exports = {
  entry: './src/js/index.js',
  output: {
    filename: 'js/built.js',
    path: resolve(__dirname, 'build')
  },
  module: {
    rules: [
      // loader的配置
      {
        // 处理less资源
        test: /.less$/,
        use: ['style-loader', 'css-loader', 'less-loader']
      },
      {
        // 处理css资源
        test: /.css$/,
        use: ['style-loader', 'css-loader']
      },
      {
        // 处理图片资源
        test: /.(jpg|png|gif)$/,
        loader: 'url-loader',
        options: {
          limit: 8 * 1024,
          name: '[hash:10].[ext]',
          // 关闭es6模块化
          esModule: false,
          outputPath: 'imgs'
        }
      },
      {
        // 处理html中img资源
        test: /.html$/,
        loader: 'html-loader'
      },
      {
        // 处理其他资源
        exclude: /.(html|js|css|less|jpg|png|gif)/,
        loader: 'file-loader',
        options: {
          name: '[hash:10].[ext]',
          outputPath: 'media'
        }
      }
    ]
  },
  plugins: [
    // plugins的配置
    new HtmlWebpackPlugin({
      template: './src/index.html'
    })
  ],
  mode: 'development',
  devServer: {
    contentBase: resolve(__dirname, 'build'),
    compress: true,
    port: 3000,
    open: true
  }
};