原文地址:http://create.msdn.com/en-US/education/quickstarts/Screen_Orientations
【译者注:这篇文章是翻译自微软官方的WP7 QuickStart的第八篇,讲述WP下的处理横屏和纵屏切换的技巧。部分内容加入了自己的理解和表达习惯。而翻译此系列的主要目的一是为了练习英语,二是让自己作为一个 BI开发者对WP7的开发有一个了解。部分翻译不当的地方望各位高人指出批评指正】
此篇主要描述Windows Phone的Silverlight对横屏和竖屏的支持技巧。
其中主要阐述以下内容:
屏幕方向
滚动技巧
Grid布局技巧
屏幕方向
Windows Phone支持下面几种方式:
纵向
左向水平
右向水平
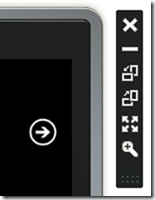
用户可以很简单的更改设备的方向。当在模拟器中测试你的应用的时候,可以通过单击模拟器工具栏的方向切换按钮实现。方向按钮是一个带箭头的矩形来显示屏幕的方向。
在屏幕纵向的时候,页面的方向是纵向的所以页面的高度要大于宽度。
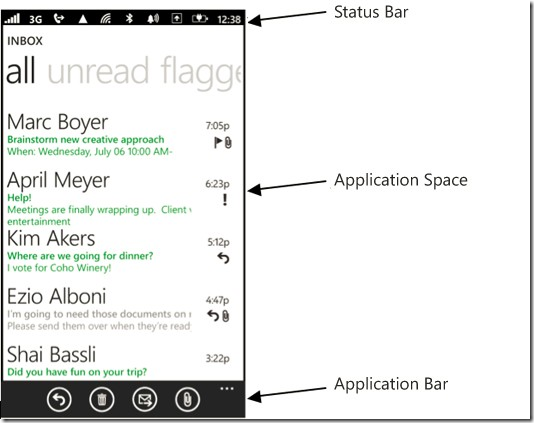
无论是左向横向和右向横向,状态栏和应用程序栏仍然是在屏幕的边缘的。左向横向,状态栏在左面,右向横向的时候,状态栏在右侧。【译者注:关于应用程序栏和状态栏参考本文末尾的译注。】
屏幕纵向是默认支持的,所以当屏幕横向的时候需要额外写些代码。不能只指定左向或者右向的横向,如果需要支持屏幕横向,那么就需要对这两种横向都支持。如果需要程序支持横向或者纵向,需要设置SupportedOrientations属性为PortraitOrLandscape,在XAML里和代码里设置都可以。
显示横屏和纵屏的内容有很多方式。其中的两个技巧就是通过滚动和Grid布局。
滚动技巧
这个技巧需要在ScrollViewer控件中使用StackPanel,适用于需要显示列表数据或者一个控件接着一个控件显示的情况。StackPanel允许将其内部的控件一个接一个地显示,ScrollViewer控件允许转屏的过程中当控件超出屏幕的时候在StackPanel中显示滚动条。
这个技巧按如下方式操作。
1.更改SupportedOrientations属性为PortraitOrLandscape。
2.替换Grid为ScrollViewer和StackPanel。
代码演示:
XAML
<ScrollViewer x:Name="ContentGrid" Grid.Row="1" VerticalScrollBarVisibility="Auto">
<!--You must apply a background to the StackPanel control or you
will be unable to pan the contents.-->
<StackPanel Background="Transparent" >
<!--Adding various controls and UI elements.-->
<Button Content="This is a Button" />
<Rectangle Width="100" Height="100" Margin="12,0"
HorizontalAlignment="Left" Fill="{StaticResource PhoneAccentBrush}"/>
<Rectangle Width="100" Height="100" HorizontalAlignment="Center"
Fill="{StaticResource PhoneAccentBrush}"/>
<Rectangle Width="100" Height="100" Margin="12,0"
HorizontalAlignment="Right" Fill="{StaticResource PhoneAccentBrush}"/>
<TextBlock Text="This is a line of text that will wrap in portrait
orientation but not landscape orientation." TextWrapping="Wrap" />
<CheckBox Content="A CheckBox"/>
<RadioButton Content="A RadioButton" />
</StackPanel>
</ScrollViewer>
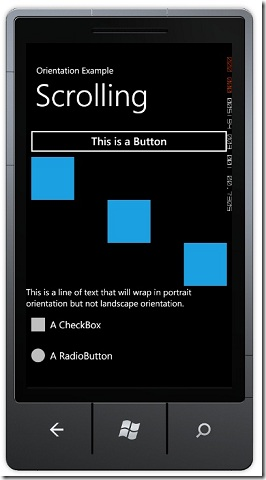
下图是运行效果。在纵屏中是不需要滚屏的,但是在横屏中就需要滚屏。
Grid布局技巧
这个技巧的元素布局在Grid中。当方向改变的时候,通过编程的方式对元素的在Grid中的行和列重新定位。
这个技巧按如下方式操作:
1. 更改SupportedOrientations属性为PortraitOrLandscape。
2. 使用Grid作为内容面板
3. 为OrientationChanged事件定义事件处理程序来重新定位Grid中的元素。
下面的示例是两行两列的Grid中定位一个图片和一些按钮。OrientationChanged事件处理代码在屏幕方向改变的时候对Grid内的元素进行重新定位。【译者注:也就是更改子元素的Grid.Row和Grid.Column属性】
XAML
<Grid x:Name="ContentPanel" Grid.Row="1" Margin="12,0,12,0">
<!--Create a 2 x 2 grid to store an image and button layout.-->
<Grid.RowDefinitions>
<RowDefinition Height="Auto"/>
<RowDefinition Height="*"/>
</Grid.RowDefinitions>
<Grid.ColumnDefinitions>
<ColumnDefinition Width="Auto"/>
<ColumnDefinition Width="*"/>
</Grid.ColumnDefinitions>
<!--Add an image to the grid. Ensure the image height and width
are set to 300 and 500 respectively for this example.-->
<Image x:Name="Image1" Grid.Row="0" Grid.Column="0"
Stretch="Fill" HorizontalAlignment="Center" Source="licorice.jpg"
Height="300" Width="500"/>
<!--Add a StackPanel with buttons to the row beneath the image.-->
<StackPanel x:Name="buttonList" Grid.Row="1" Grid.Column="0"
HorizontalAlignment="Center" >
<Button Content="Action 1" />
<Button Content="Action 2" />
<Button Content="Action 3" />
<Button Content="Action 4" />
</StackPanel>
</Grid>
C#
private void PhoneApplicationPage_OrientationChanged(
object sender, OrientationChangedEventArgs e)
{
// Switch the placement of the buttons based on an orientation change.
if ((e.Orientation & PageOrientation.Portrait) == (PageOrientation.Portrait))
{
Grid.SetRow(buttonList, 1);
Grid.SetColumn(buttonList, 0);
}
// If not in portrait, move buttonList content to visible row and column.
else
{
Grid.SetRow(buttonList, 0);
Grid.SetColumn(buttonList, 1);
}
}
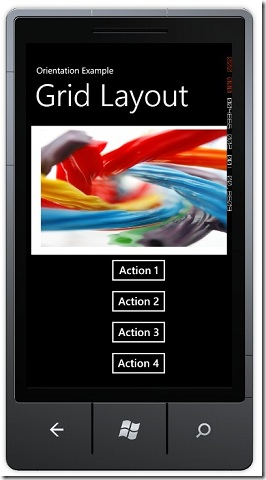
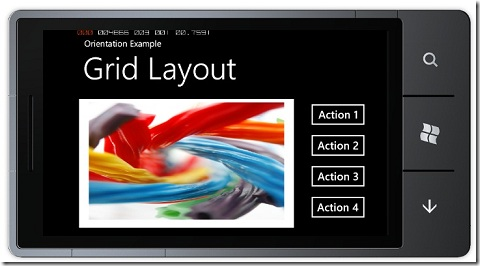
效果如下图。在纵向屏幕中,按钮定位在底端。在横向屏幕中,按钮定位在右端。
【译者注:这部分的技巧是Windows Phone下的Silverlight特有的,开发的时候为了使用户界面更友好一些,就需要支持屏幕的不同方向。另这里有两个概念被提到,原文是Application Bar和Status Bar,直译就是应用程序栏和状态栏,具体它们都是什么请参考下面的图片:
】
