查询了网上的资料,结合自己的项目记录的笔记,供自己复习使用。
1.GoJs
插件下载地址:https://gojs.net/latest/download.html
效果图
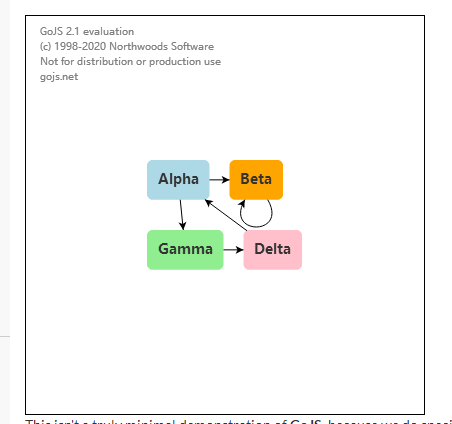
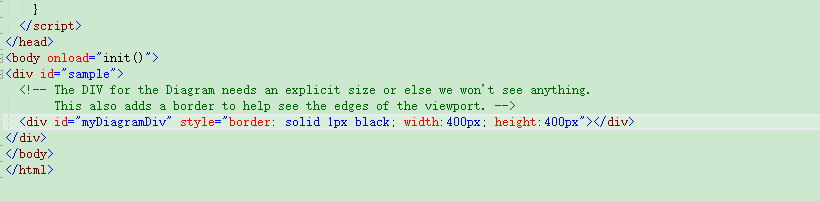
代码:

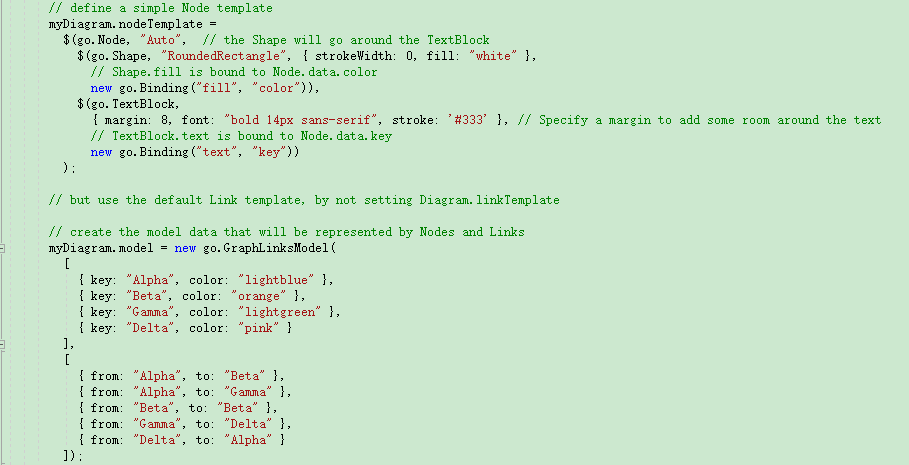
完整的方法:
function init(set, data) {
        var $ = go.GraphObject.make;  // for conciseness in defining templates
        myDiagram = $(go.Diagram, "goJs_container",  // create a Diagram for the DIV HTML element
            {
                "undoManager.isEnabled": true  // enable undo & redo
            });

        // define a simple Node template 新建节点
        myDiagram.nodeTemplate =
            $(go.Node, "Auto",  // the Shape will go around the TextBlock
                $(go.Shape, "RoundedRectangle", {fill: "white"},// Shape.fill is bound to Node.data.color
                    new go.Binding("fill", "color")),
                $(go.TextBlock,
                    { margin: 8, font: "bold 14px sans-serif", stroke: '#fff' }, // Specify a margin to add some room around the text// TextBlock.text is bound to Node.data.key
                    new go.Binding("text", "key"))
         );
        // 新建线条和箭头
        myDiagram.linkTemplate = $(go.Link,
            $(go.Shape, // the link shape
                { strokeWidth: 2, stroke: 'white' }),
            $(go.Shape, // the arrowhead
                {
                    toArrow: 'OpenTriangle',
                    fill: null, stroke: 'white'
                })
        );
        // 其他设置,图表在画布中居左显示
        myDiagram.initialContentAlignment = go.Spot.Left;
        //通过节点数据和关系数组完成关系图。
        myDiagram.model = new go.GraphLinksModel(set, data);
    }
横向走向的流程图:
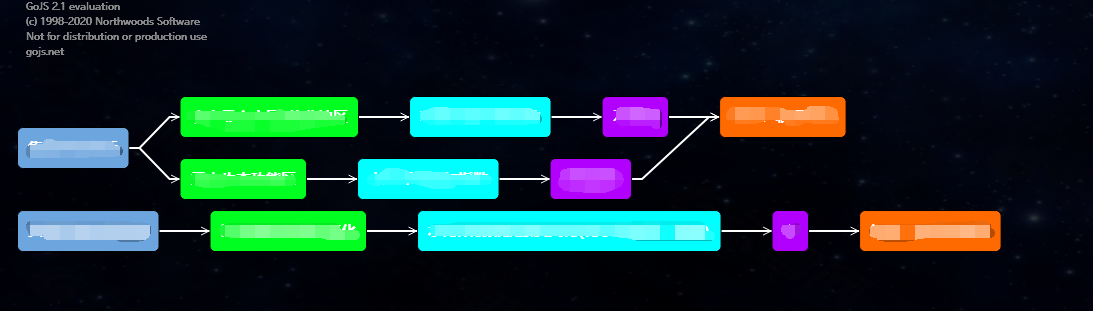
设置布局类型可实现
 myDiagram = $(go.Diagram, "goJs_container",  // create a Diagram for the DIV HTML element
            {
                "undoManager.isEnabled": true,  // enable undo & redo
                 layout: $(go.TreeLayout) // 树形布局可朝着一个方向绘图。
            });