在建立项目中一般会默认建立assets文件,当然我们还可以在res文件下面建立raw文件夹,这里面都可以存放一些图片,音频或者文本信息,可以供我们在程序当中进行使用,不过他们两个也有不同点;
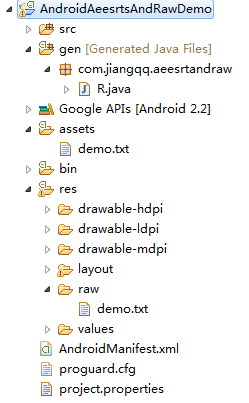
assets下面的文件不会被编译,通过路径可以去访问其中的内容。raw中文件会自动编译,我们可以在R.java文件中找到对应的ID,
看下面截图:

那么既然这样那我们平时该怎么样进行把资源放入这两个文件当中呢?
我个人平时喜欢比较文件的大小,如果文件比较大一点的会放入到aeests文件中,因为用这个文件文件当中的信息,相当于要去进行IO流操作,比较耗时的操作
其中比较重要的是获取到Assets和Raw文件夹中的资源方法:
Assets:AssetManager assetManager = getAssets();
Raw: InputStream inputStream = getResources().openRawResource(R.raw.demo);
下面该Demo的Activity源代码:
- package com.jiangqq.aeesrtandraw;
- import java.io.ByteArrayOutputStream;
- import java.io.IOException;
- import java.io.InputStream;
- import android.app.Activity;
- import android.content.res.AssetManager;
- import android.os.Bundle;
- import android.widget.EditText;
- /**
- * 该Demo演示Assets和Raw文件夹中文件的使用方法
- *
- * @author jiangqq
- *
- */
- public class AeesrtsAndRawActivity extends Activity {
- private EditText et1, et2;
- @Override
- public void onCreate(Bundle savedInstanceState) {
- super.onCreate(savedInstanceState);
- setContentView(R.layout.main);
- readAssets();
- readRaw();
- }
- /**
- * 使用Assets中的文件
- */
- private void readAssets() {
- et1 = (EditText) findViewById(R.id.et1);
- AssetManager assetManager = getAssets();
- try {
- InputStream inputStream = assetManager.open("demo.txt");
- et1.setText(read(inputStream));
- } catch (IOException e) {
- e.printStackTrace();
- }
- }
- /**
- * 使用Raw中的文件
- */
- private void readRaw() {
- et2 = (EditText) findViewById(R.id.et2);
- InputStream inputStream = getResources().openRawResource(R.raw.demo);
- et2.setText(read(inputStream));
- }
- /**
- * 进行IO流读写
- *
- * @param inputStream
- * @return oStream.toString() or “文件读写失败”
- */
- private String read(InputStream inputStream) {
- try {
- ByteArrayOutputStream oStream = new ByteArrayOutputStream();
- int length;
- while ((length = inputStream.read()) != -1) {
- oStream.write(length);
- }
- return oStream.toString();
- } catch (IOException e) {
- return "文件读写失败";
- }
- }
- }
布局文件:
- <?xml version="1.0" encoding="utf-8"?>
- <LinearLayout xmlns:android="http://schemas.android.com/apk/res/android"
- android:layout_width="fill_parent"
- android:layout_height="fill_parent"
- android:orientation="vertical" >
- <LinearLayout
- android:layout_width="fill_parent"
- android:layout_height="wrap_content"
- android:orientation="horizontal" >
- <TextView
- android:layout_width="wrap_content"
- android:layout_height="wrap_content"
- android:text="@string/et1" />
- <EditText
- android:id="@+id/et1"
- android:layout_width="fill_parent"
- android:layout_height="wrap_content" />
- </LinearLayout>
- <LinearLayout
- android:layout_width="fill_parent"
- android:layout_height="wrap_content"
- android:orientation="horizontal" >
- <TextView
- android:layout_width="wrap_content"
- android:layout_height="wrap_content"
- android:text="@string/et2" />
- <EditText
- android:id="@+id/et2"
- android:layout_width="fill_parent"
- android:layout_height="wrap_content" />
- </LinearLayout>
- </LinearLayout>
Demo运行效果截图: