CentOS 7 最小化安装及优化
目录
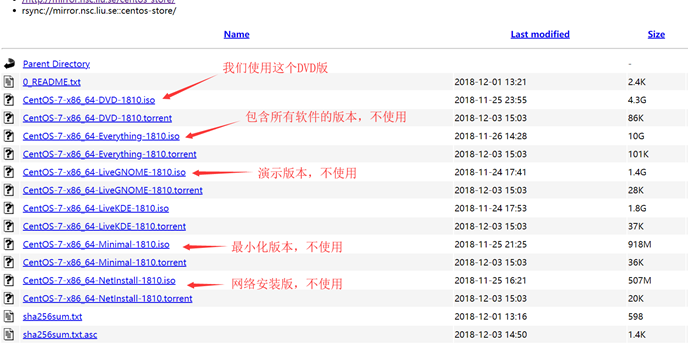
一、下载镜像文件
官方网站
新版本下载链接:https://wiki.centos.org/Download
旧版本下载链接:http://vault.centos.org/
CentO S7.6 :http://vault.centos.org/7.6.1810/isos/x86_64/
国内镜像源
阿里云镜像:https://opsx.alibaba.com/mirror
科技大学:http://mirrors.ustc.edu.cn/
清华大学:https://mirrors.tuna.tsinghua.edu.cn/
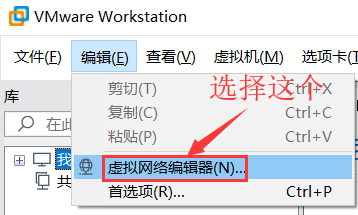
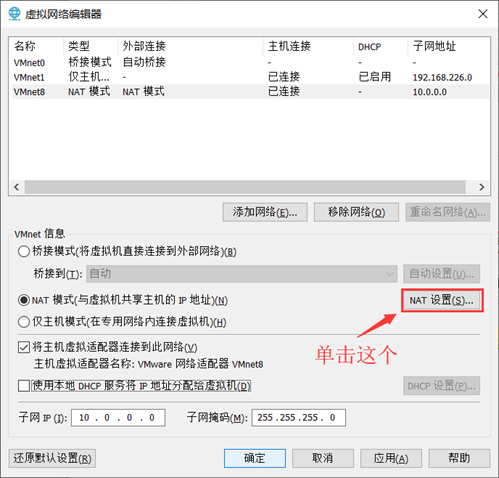
一、VMware 配置虚拟网络
配置虚拟网络编辑器
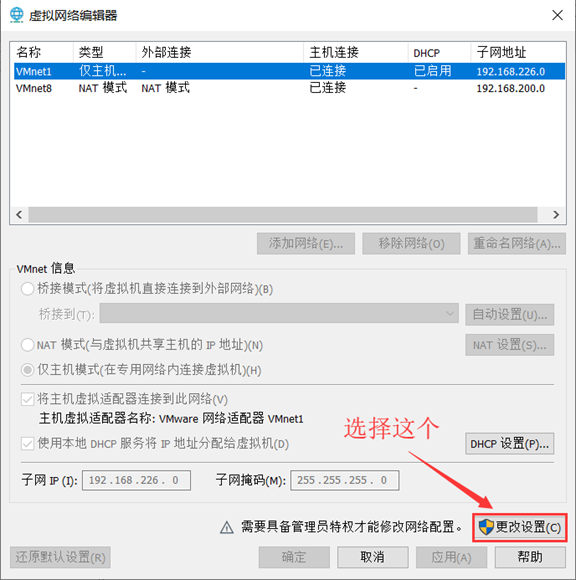
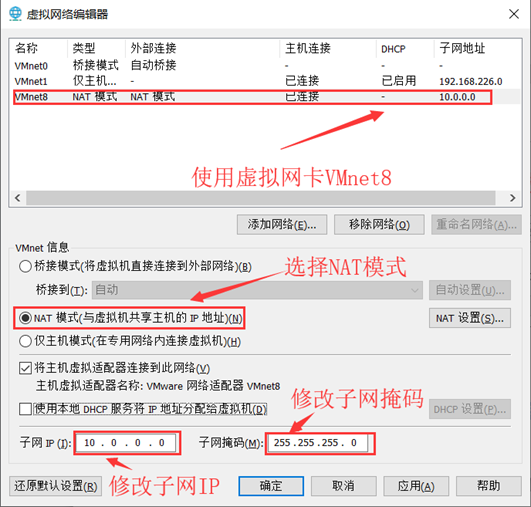
- 选择VMnet8使用NAT模式
- 子网IP:10.0.0.0
- 子网掩码:255.255.255.0
- NAT设置:
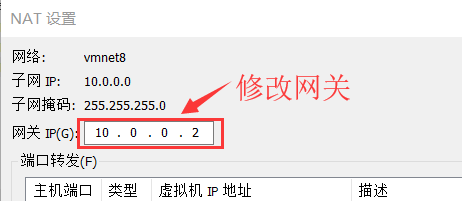
-
网关IP:10.0.0.2
-
完成后确定两次即可。
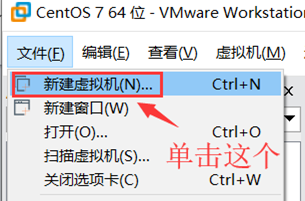
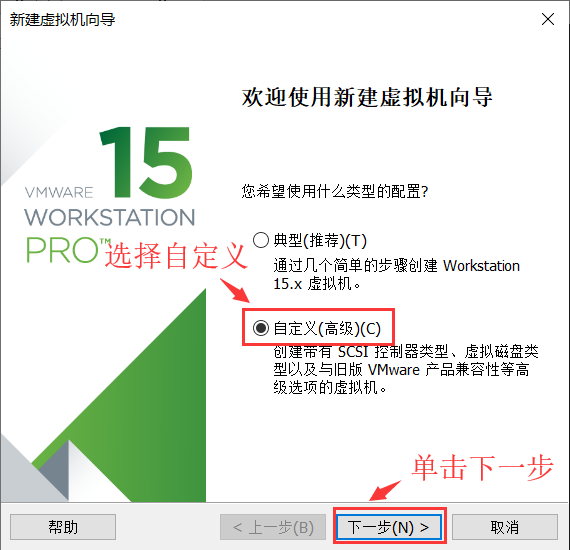
二、VMware 新建虚拟机
- 自定义模式
- 硬件兼容性:默认

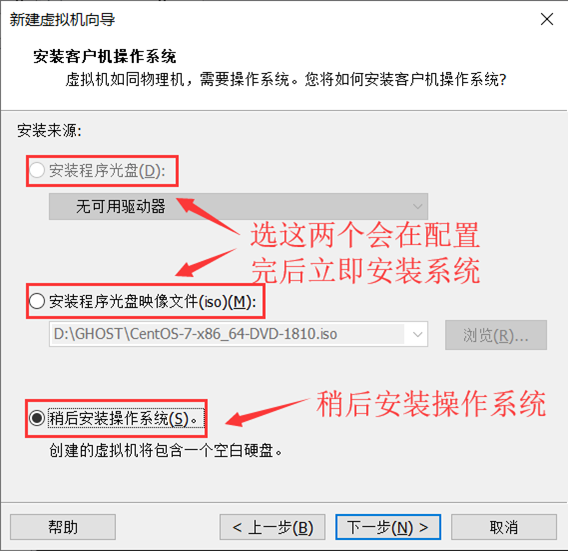
- 安装来源:稍后安装操作系统
- 客户机操作系统:Linux;版本:CentOS7 64 位

- 虚拟机名称:Linux运维模版机;位置:不要放在C盘

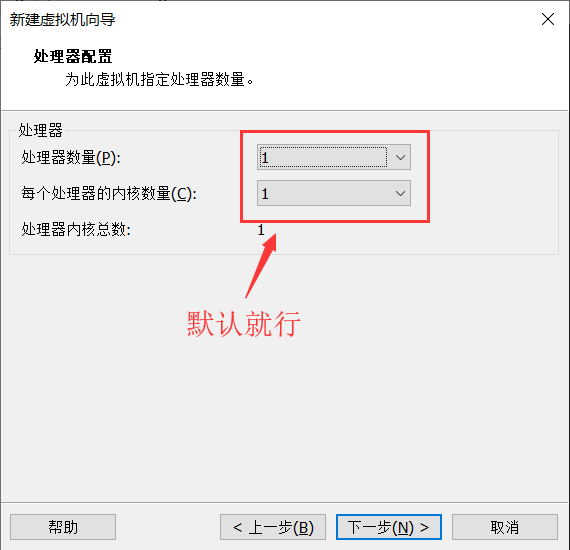
- 处理器:默认
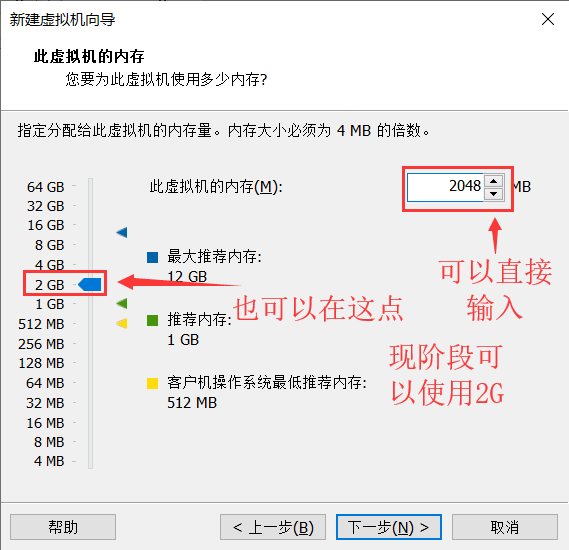
- 内存:2G
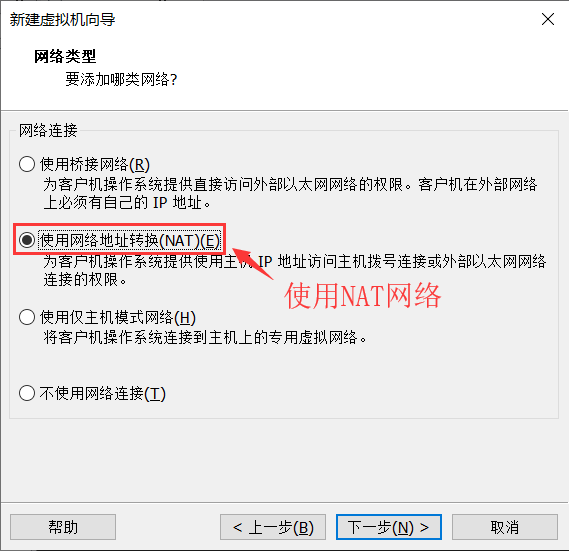
- 网络:NAT
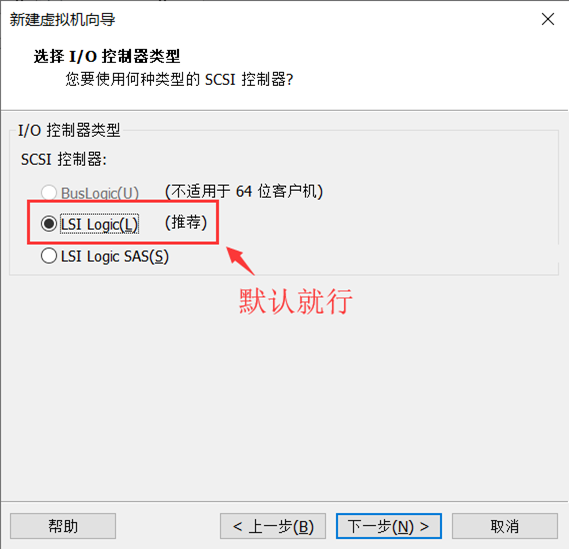
- 选择I/O控制器类型:默认
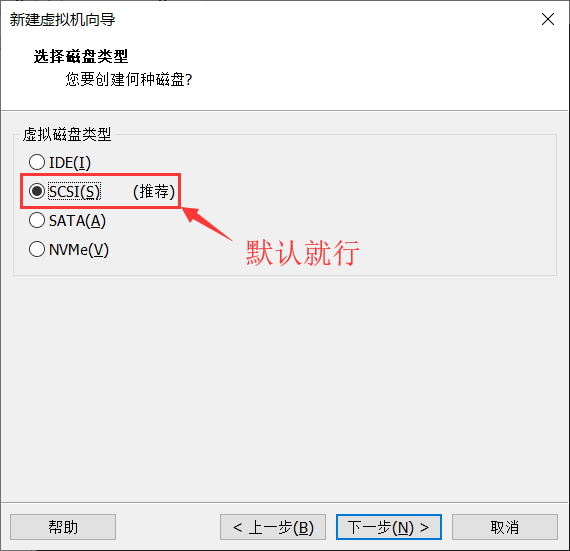
- 虚拟磁盘类型:默认
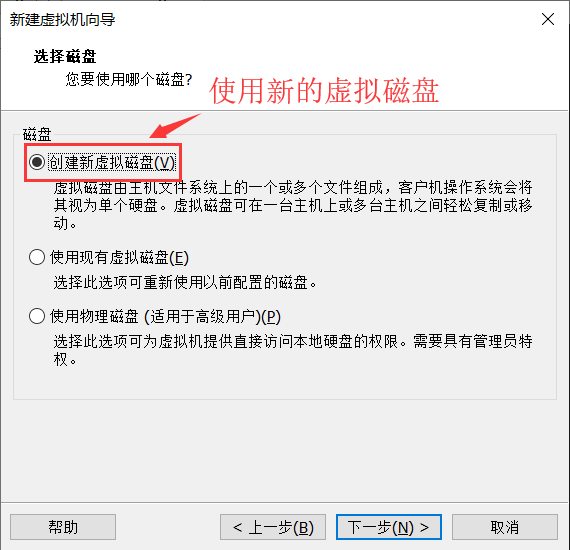
- 选择磁盘:创建新虚拟磁盘
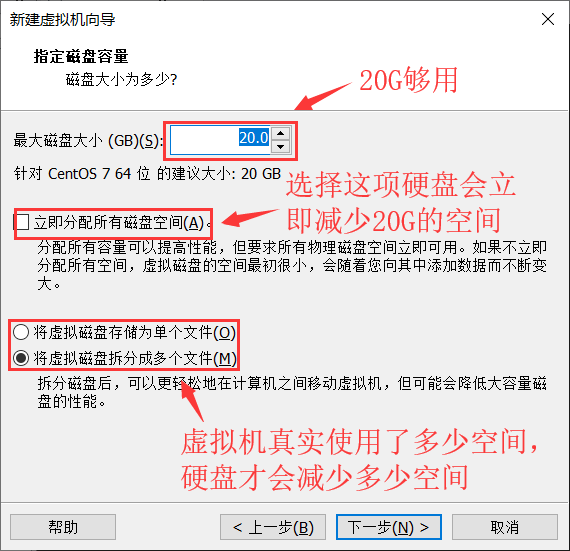
- 指定磁盘容量:20G 将虚拟磁盘拆分为多个文件
- 指定磁盘文件储存路径:不要放在C盘!
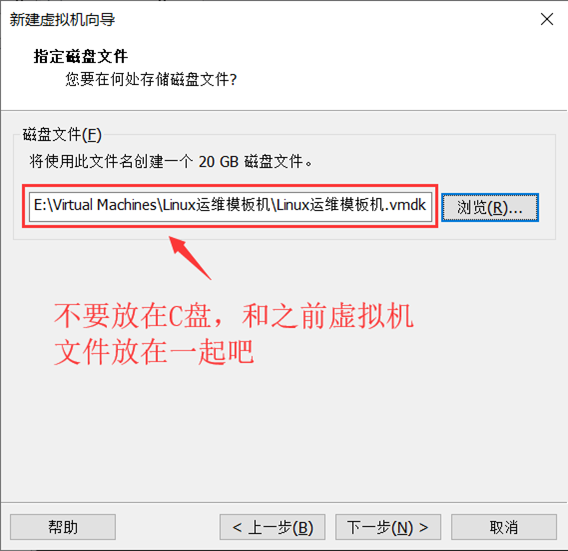
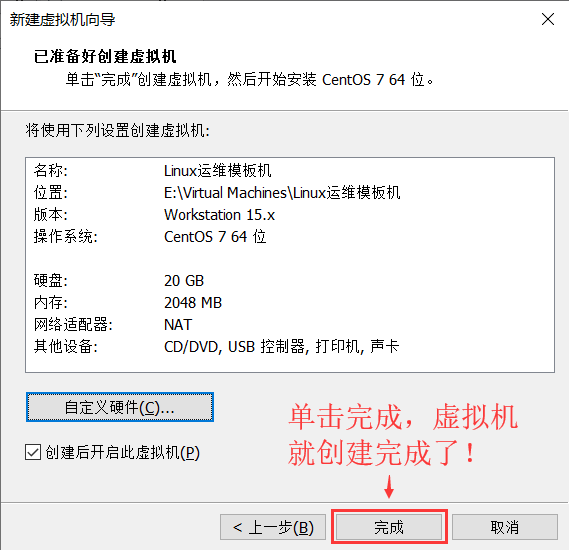
- 完成
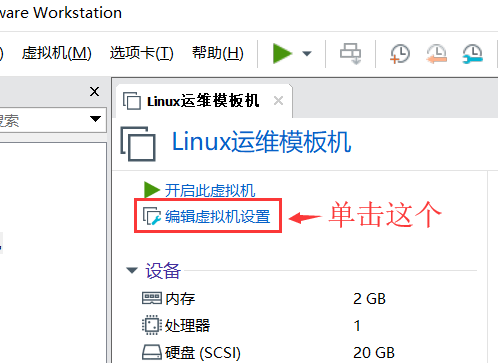
- 挂载镜像文件

三、CentOS 7 最小化安装
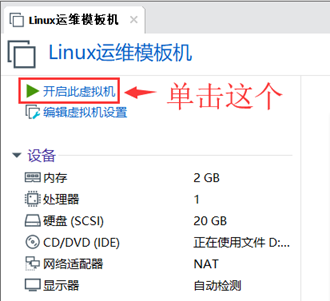
- 开启虚拟机
- 进入虚拟机界面
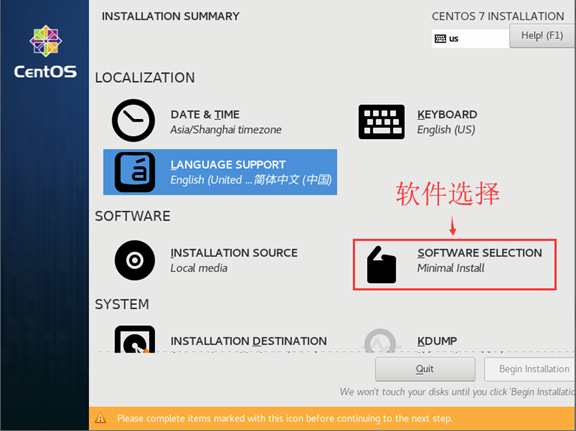
- 安装选择
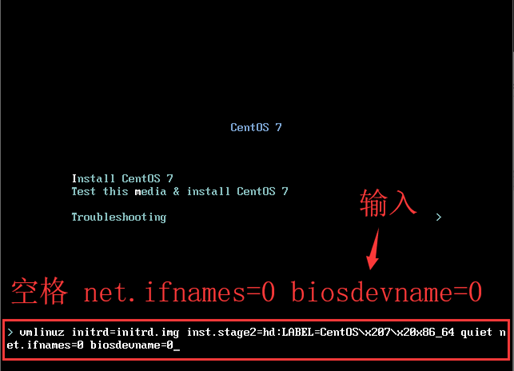
4. 修改网卡名称为ethX
1、传递内核参数 net.ifnames=0 biosdevname=0 以 更改 网卡名称为 ethX
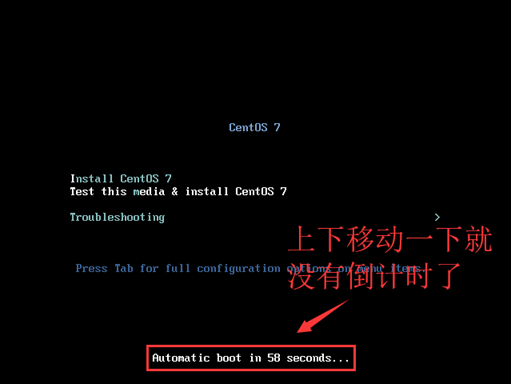
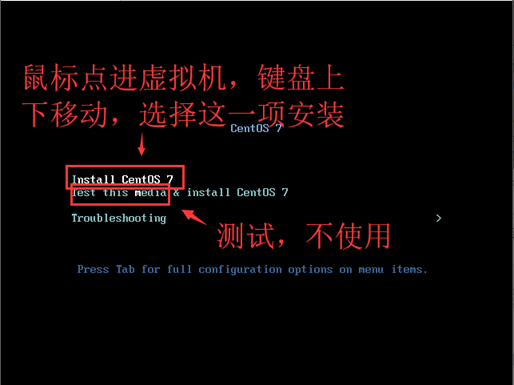
- 出现安装界面时,使用键盘 上下键 移动到第一行,即 Install Centos Linux 7
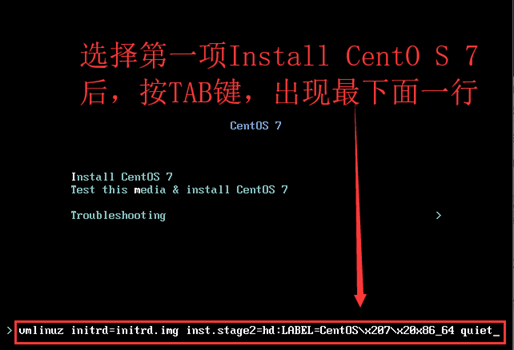
- 然后按 tab 键,即可出现 传递 参数界面。
- 在最后输入:空格 net.ifnames=0 biosdevname-0
- 修改完成后,回车!
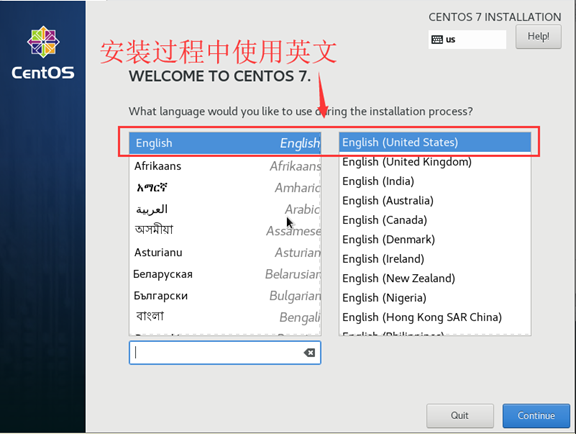
- 选择安装过程中使用的语言
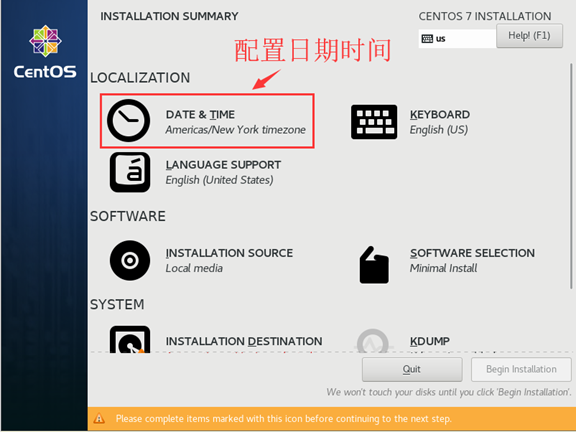
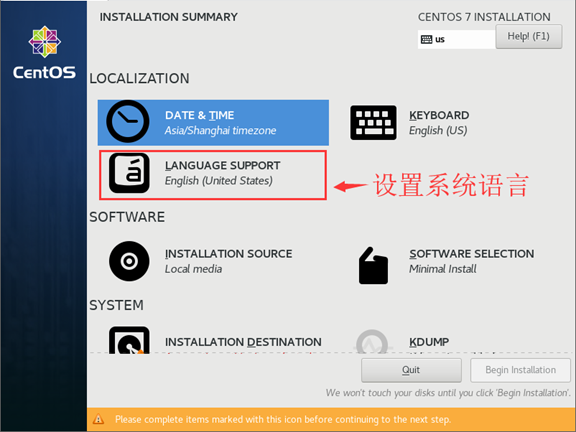
- 配置日期时间

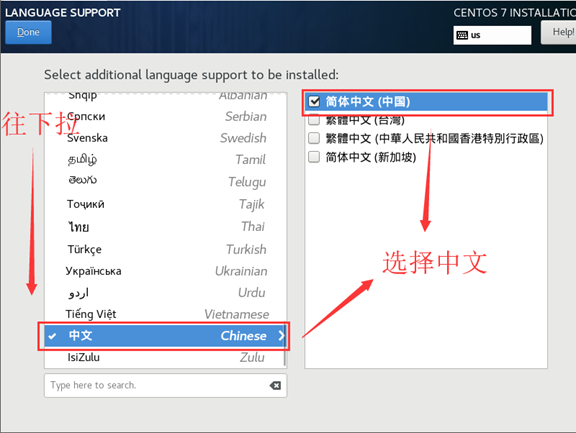
- 设置系统语言
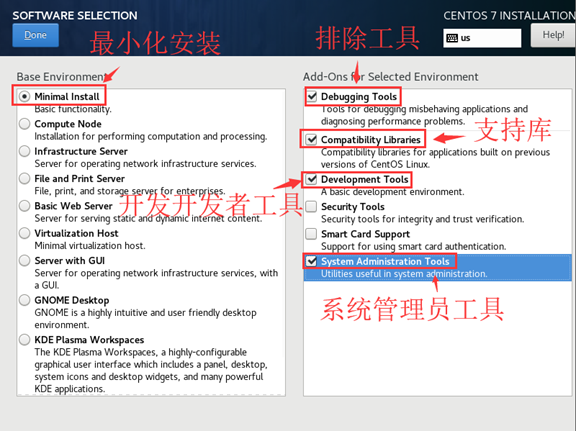
- 软件选择
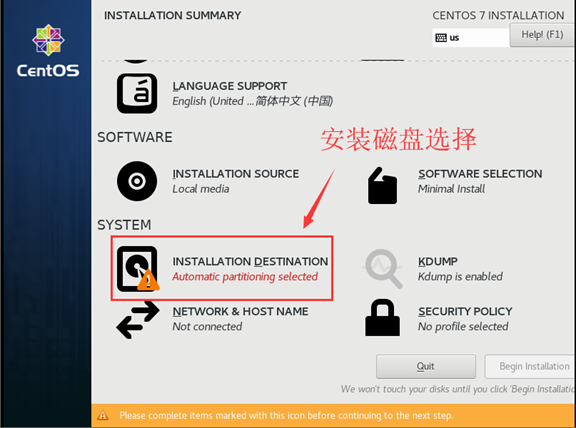
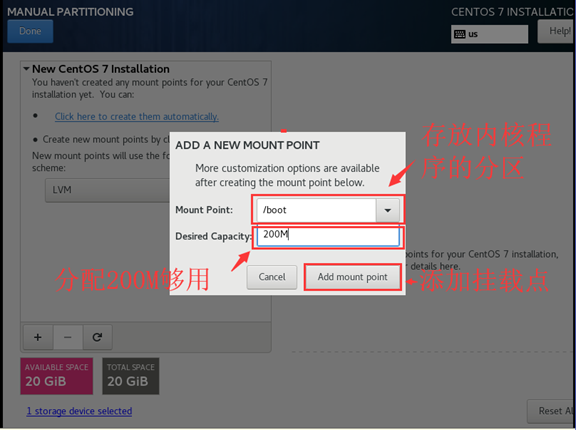
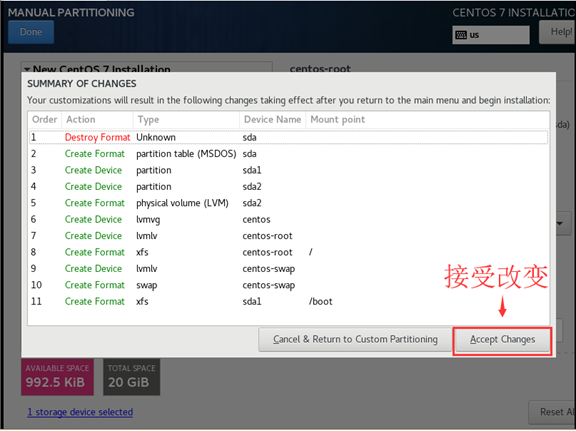
10. 安装磁盘选择(分区)

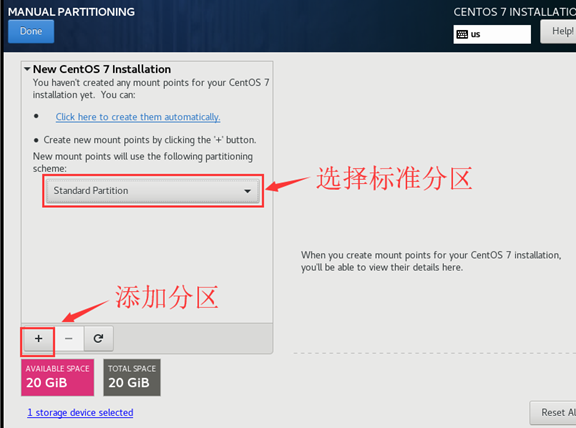
-
/boot 分区 200M 存放系统内核及引导程序
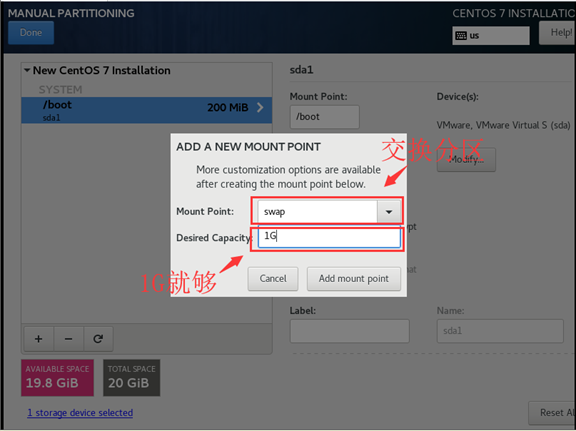
-
swap 分区 1G 交换分区 把磁盘空间临时充当内存使用
- 一般设为内存的1-1.5倍,内存大于8G的设为8G
- 可以在安装系统时进行分配,也可以在系统中进行分配
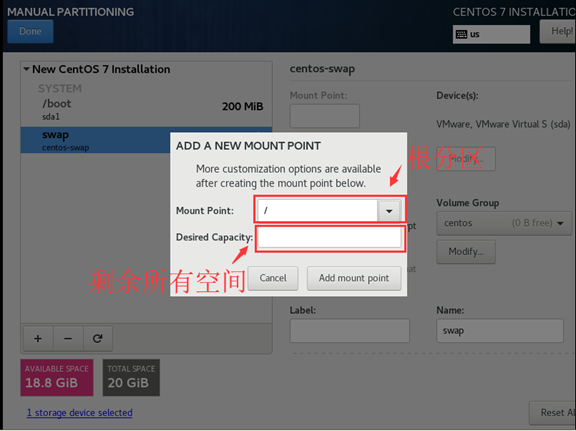
-
/ 其他所有剩余分区 根分区
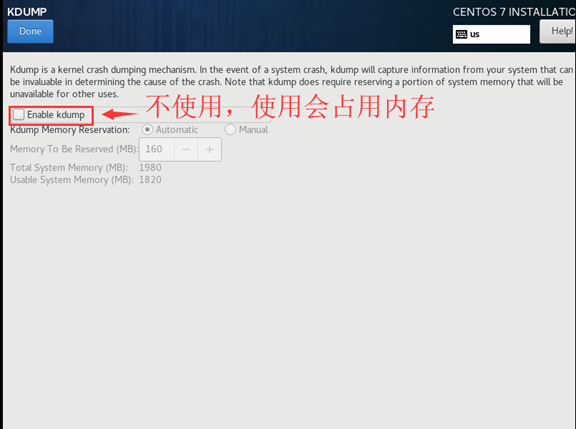
- KDUPB:不使用

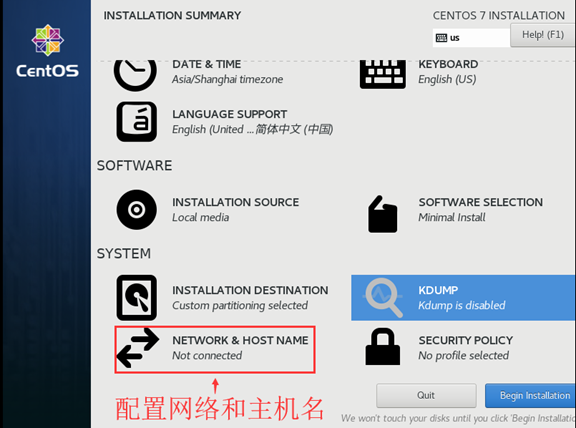
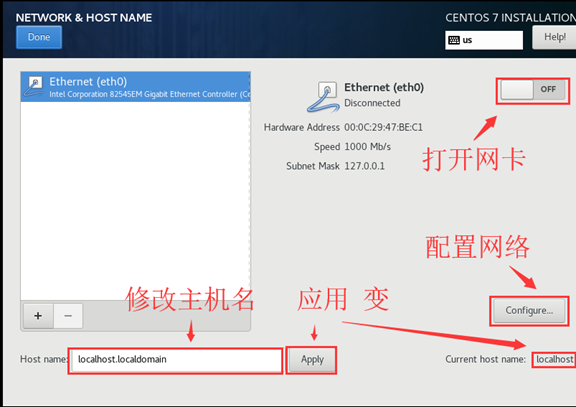
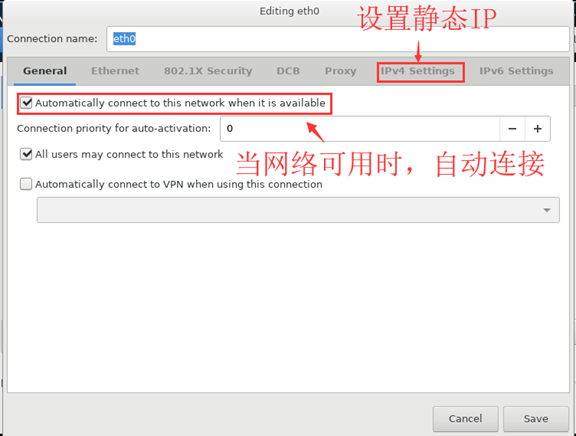
12. 配置网络和主机名
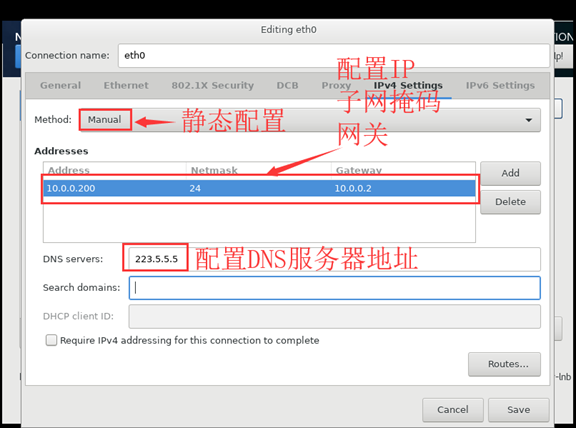
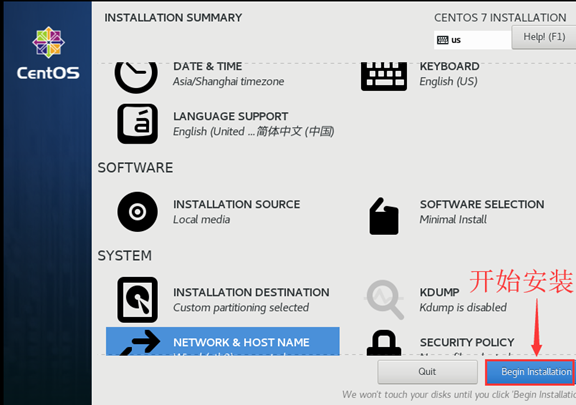
- 开始安装
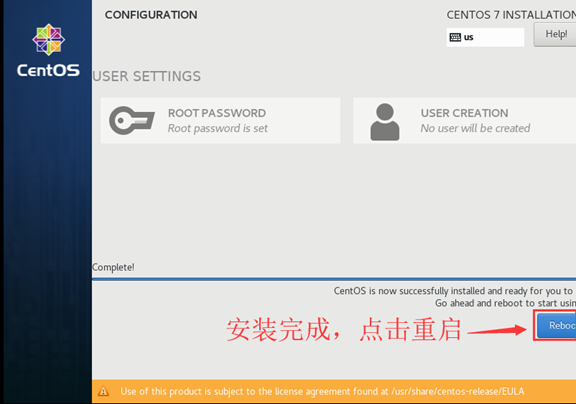
14. 用户配置
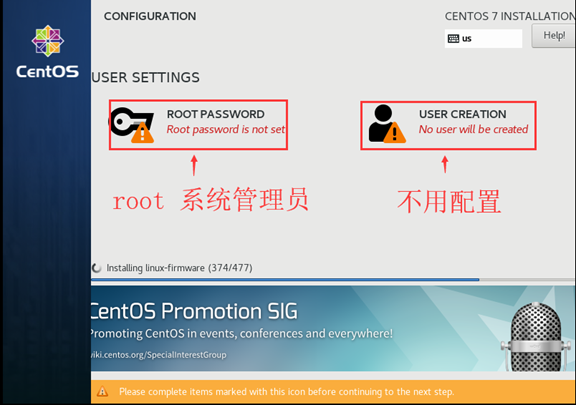
接下来就等待吧!
- 完成
四、优化
- 修改yum源
sudo mv /etc/yum.repos.d/CentOS-Base.repo /etc/yum.repos.d/CentOS-Base.repo.backup
curl -o /etc/yum.repos.d/CentOS-Base.repo https://mirrors.aliyun.com/repo/Centos-7.repo
- 安装常用软件
yum -y install wget make automake cmake gcc gcc-c++ kernel-devel pcre pcre-devel zlib-devel
openssl openssl-devel patch libffi-devel python-devel bzip2-devel ncurses-devel
sqlite-devel readline-devel tk-devel gdbm-devel db4-devel libpcap-devel xz-devel
glibc glibc-devel systemd-devel libevent libevent-devel ntpdate yum-utils lrzsz
net-tools sysstat htop nc iotop iftop lsof nmap glances nethogs bind-utils nfs-utils
tcpdump vim mtr traceroute quagga bc tree telnet screen dos2unix mlocate ncompress
psmisc zip unzip bash-completion bash-completion-extras
- yum更新、清理、缓存
yum -y update
yum clean all
yum makecache
- 关闭防火墙
firewalld,并设置为开机不启动
systemctl stop firewalld
systemctl disable firewalld
- 关闭网络管理
NetworkManager,避免和network服务冲突,导致网络不通,或者网卡启动不成功等
systemctl stop NetworkManager
systemctl disable NetworkManager
- 关闭
selinux,修改配置文件
[root@openstack network-scripts]# cat /etc/sysconfig/selinux

# This file controls the state of SELinux on the system.
# SELINUX= can take one of these three values:
#     enforcing - SELinux security policy is enforced.
#     permissive - SELinux prints warnings instead of enforcing.
#     disabled - No SELinux policy is loaded.
SELINUX=disabled
# SELINUXTYPE= can take one of three values:
#     targeted - Targeted processes are protected,
#     minimum - Modification of targeted policy. Only selected processes are protected.
#     mls - Multi Level Security protection.
SELINUXTYPE=targeted
- 配置内核参数优化
[root@openstack network-scripts]# cat /etc/sysctl.conf
# Controls source route verification
net.ipv4.conf.default.rp_filter = 1
net.ipv4.ip_nonlocal_bind = 1
net.ipv4.ip_forward = 1

# Do not accept source routing
net.ipv4.conf.default.accept_source_route = 0

# Controls the System Request debugging functionality of the kernel
kernel.sysrq = 0

# Controls whether core dumps will append the PID to the core filename.
# Useful for debugging multi-threaded applications.
kernel.core_uses_pid = 1

# Controls the use of TCP syncookies
net.ipv4.tcp_syncookies = 1

# Disable netfilter on bridges.
net.bridge.bridge-nf-call-ip6tables = 0
net.bridge.bridge-nf-call-iptables = 0
net.bridge.bridge-nf-call-arptables = 0

# Controls the default maxmimum size of a mesage queue
kernel.msgmnb = 65536

# Controls the maximum size of a message, in bytes
kernel.msgmax = 65536

# Controls the maximum shared segment size, in bytes
kernel.shmmax = 68719476736

# Controls the maximum number of shared memory segments, in pages
kernel.shmall = 4294967296

# TCP kernel paramater
net.ipv4.tcp_mem = 786432 1048576 1572864
net.ipv4.tcp_rmem = 4096        87380   4194304
net.ipv4.tcp_wmem = 4096        16384   4194304
net.ipv4.tcp_window_scaling = 1
net.ipv4.tcp_sack = 1

# socket buffer
net.core.wmem_default = 8388608
net.core.rmem_default = 8388608
net.core.rmem_max = 16777216
net.core.wmem_max = 16777216
net.core.netdev_max_backlog = 262144
net.core.somaxconn = 20480
net.core.optmem_max = 81920

# TCP conn
net.ipv4.tcp_max_syn_backlog = 262144
net.ipv4.tcp_syn_retries = 3
net.ipv4.tcp_retries1 = 3
net.ipv4.tcp_retries2 = 15

# tcp conn reuse
net.ipv4.tcp_tw_reuse = 1
net.ipv4.tcp_tw_recycle = 1
net.ipv4.tcp_fin_timeout = 1

net.ipv4.tcp_max_tw_buckets = 20000
net.ipv4.tcp_max_orphans = 3276800
net.ipv4.tcp_timestamps = 1 #?
net.ipv4.tcp_synack_retries = 1
net.ipv4.tcp_syncookies = 1

# keepalive conn
net.ipv4.tcp_keepalive_time = 300
net.ipv4.tcp_keepalive_intvl = 30
net.ipv4.tcp_keepalive_probes = 3
net.ipv4.ip_local_port_range = 10001    65000

# swap
vm.overcommit_memory = 0
vm.swappiness = 10

#net.ipv4.conf.eth1.rp_filter = 0
#net.ipv4.conf.lo.arp_ignore = 1
#net.ipv4.conf.lo.arp_announce = 2
#net.ipv4.conf.all.arp_ignore = 1
#net.ipv4.conf.all.arp_announce = 2
- 配置资源控制,每个用户可以同时打开的最大文件数nofile、最大进程数nproc ... ....
[root@openstack network-scripts]# cat /etc/security/limits.conf
... ...
*                soft    core          unlimited
*                hard    core          unlimited
*                soft    nproc         1000000
*                hard    nproc         1000000
*                soft    nofile        100000
*                hard    nofile        100000
*                soft    memlock       32000
*                hard    memlock       32000
*                soft    msgqueue      8192000
*                hard    msgqueue      8192000
- poweroff关机,保存快照,此时centos7整个系统安装配置完成,可以使用了。