场景
Vue+Openlayers实现地图上绘制线:
https://blog.csdn.net/BADAO_LIUMANG_QIZHI/article/details/121252960
在上面的基础上实现点击地图,弹窗显示并获取点击处的坐标,并实现坐标转换经纬度。
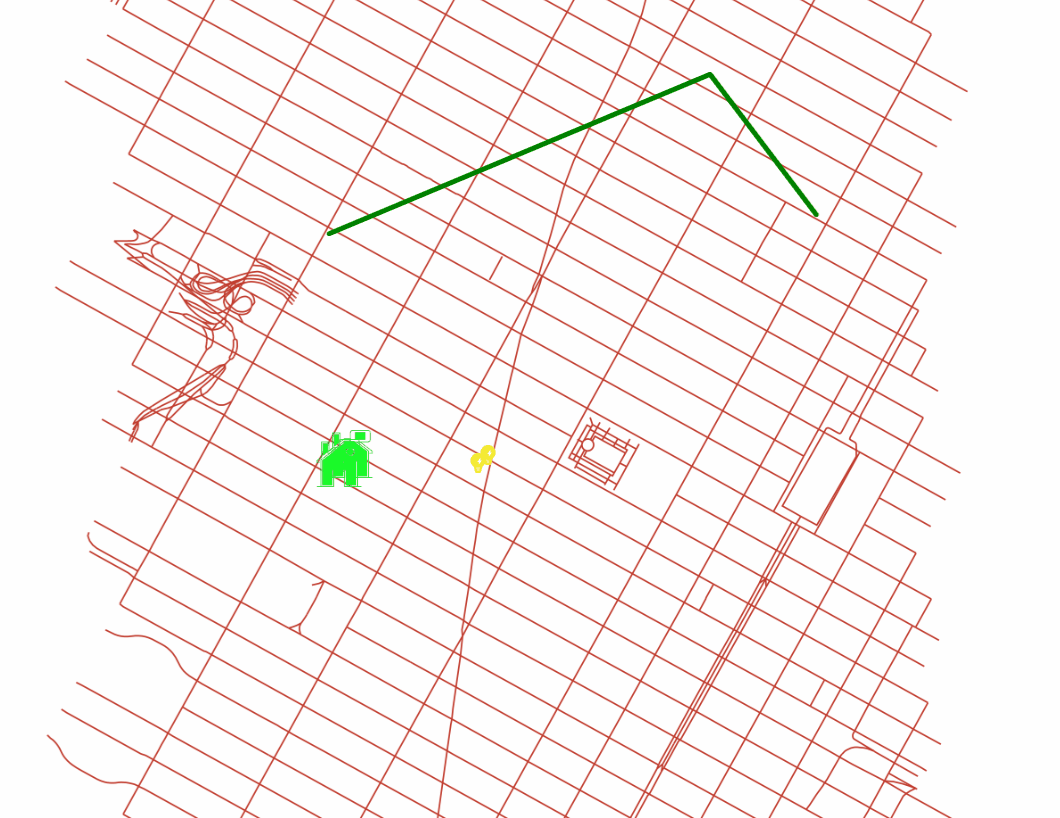
效果

加载显示地图的流程
Vue中使用Openlayers加载Geoserver发布的TileWMS:
https://blog.csdn.net/BADAO_LIUMANG_QIZHI/article/details/115916949
注:
博客:
https://blog.csdn.net/badao_liumang_qizhi
关注公众号
霸道的程序猿
获取编程相关电子书、教程推送与免费下载。
实现
1、页面上添加弹窗的元素
<template>
    <div id="app">
      <div id="map" class="map"></div>
      <div id="popup" class="ol-popup">
        <a href="#" id="popup-closer" class="ol-popup-closer">X</a>
        <div id="popup-content" class="popup-content"></div>
      </div>
    </div>
</template>
2、添加弹窗样式
<style scoped>
.map {
   100%;
  height: 800px;
}
.ol-popup {
    position: absolute;
    background-color: white;
    -webkit-filter: drop-shadow(0 1px 4px rgba(0, 0, 0, 0.2));
    filter: drop-shadow(0 1px 4px rgba(0, 0, 0, 0.2));
    padding: 15px;
    border-radius: 10px;
    border: 1px solid #cccccc;
    bottom: 12px;
    left: -50px;
}
.popup-content {
     400px;
}
.ol-popup-closer {
    text-decoration: none;
    position: absolute;
    top: 2px;
    right: 8px;
}
</style>
3、导入相关模块
//导入基本模块
import "ol/ol.css";
import Map from "ol/Map";
import Overlay from "ol/Overlay";
import View from "ol/View";
import { Point,LineString } from "ol/geom";
import Feature from "ol/Feature";
import { Icon,Style,Stroke} from "ol/style";
//导入相关模块
import { Tile as TileLayer , Vector as VectorLayer } from 'ol/layer'
import { TileWMS ,Vector as VectorSource } from 'ol/source'
import { toStringHDMS } from "ol/coordinate";
import { toLonLat } from "ol/proj";
4、声明overlay与容器
      overlay: null,
      container: null, // 弹框
5、在mounted中调用初始化地图的方法
  mounted() {
    this.initMap();
  },
在方法中获取到弹窗的节点DOM
      // 获取到弹框的节点DOM
      var container = document.getElementById("popup");
      var content = document.getElementById("popup-content");
      var closer = document.getElementById("popup-closer");

然后创建一个弹窗Overlay对象

      // 创建一个弹窗 Overlay 对象
      this.overlay = new Overlay({
          element: container, //绑定 Overlay 对象和 DOM 对象的
          autoPan: true, // 定义弹出窗口在边缘点击时候可能不完整 设置自动平移效果
          autoPanAnimation: {
              duration: 250 //自动平移效果的动画时间 9毫秒
          }
      });
6、创建弹窗对象并将弹窗添加到地图中
      this.map = new Map({
        //地图容器ID
        target: "map",
        //引入地图
        layers: [this.layer,this.lightLayer,this.houseLayer,this.lineLayer],
        view: new View({
          //地图中心点
          center: [987777.93778, 213834.81024],
          zoom: 12,
          minZoom:6, // 地图缩放最小级别
          maxZoom:19,
          rotation: 0.76
        }),
      });

      // 将弹窗添加到 map 地图中
      this.map.addOverlay(this.overlay);
7、监听地图的单击事件,在回调函数中获取坐标值并将内容赋值给dom
并且设置弹窗的位置就是当前鼠标点击的位置
// 将弹窗添加到 map 地图中 this.map.addOverlay(this.overlay); //必须 要重新赋值this,不然再回调函数中指针会变,overlay会undefined let _that = this; // 监听singleclick事件 this.map.on('singleclick', function(e) { let coordinate = e.coordinate // 点击尺 (这里是尺(米),并不是经纬度); let hdms = toStringHDMS(toLonLat(e.coordinate)); // 转换为经纬度显示 content.innerHTML = ` <p>你点击了这里:</p> <p>经纬度:<p><code> ${hdms} </code> <p> <p>坐标:</p>X:${coordinate[0]} Y: ${coordinate[1]}`; _that.overlay.setPosition(coordinate); //把 overlay 显示到指定的 x,y坐标 console.log(e.coordinate) })
8、这里尤其要注意的是,单击事件的回调方法中要对overplay设置其显示位置
这里不能再直接使用this.overplay.setPosition了,因为在回调函数中指针会变,
此时会提示overlay为undefined。所以先重新赋值再使用
let _that = this;
_that.overlay.setPosition(coordinate); //把 overlay 显示到指定的 x,y坐标
7、设置弹窗关闭事件
将overlay对象的setPosition赋值为undefined即可隐藏。
      //弹窗关闭事件
      closer.onclick=function(){
        _that.overlay.setPosition(undefined);
        closer.blur();
        return false;
      };
8、完整示例代码
<template>
<div id="app">
<div id="map" class="map"></div>
<div id="popup" class="ol-popup">
<a href="#" id="popup-closer" class="ol-popup-closer">X</a>
<div id="popup-content" class="popup-content"></div>
</div>
</div>
</template>
<script>
//导入基本模块
import "ol/ol.css";
import Map from "ol/Map";
import Overlay from "ol/Overlay";
import View from "ol/View";
import { Point,LineString } from "ol/geom";
import Feature from "ol/Feature";
import { Icon,Style,Stroke} from "ol/style";
//导入相关模块
import { Tile as TileLayer , Vector as VectorLayer } from 'ol/layer'
import { TileWMS ,Vector as VectorSource } from 'ol/source'
import { toStringHDMS } from "ol/coordinate";
import { toLonLat } from "ol/proj";
export default {
name: "olMapImageWMSMulLayers",
data() {
return {
map: null, // map地图
layer:null, //地图图层
lightLayer:null, //灯图层
houseLayer:null, //房子图层
lineLayer:null, //线图层
lineSource:null, //线数据源
overlay: null,
container: null, // 弹框
//红绿灯数据
lightData:[
{x:"987798.93778", y:"213885.81024"},
{x:"987710.93778", y:"213810.81024"},
],
//房子数据
houseData:[
{x:"986610.93778", y:"213885.81024"},
{x:"986510.93778", y:"213810.81024"},
],
//线的数据
lineData:[
[986434.4063822062, 215782.0959711917],
[989701.5290279881,217149.84072807242],
[990613.3107184113,215946.4192185118],
],
};
},
mounted() {
this.initMap();
setInterval(() => {
this.initLightData();
}, 1000)
},
methods: {
//初始化红绿灯数据
initLightData(){
this.lightLayer.getSource().clear();
this.lightData.forEach((item, index) => {
var feature = new Feature({
geometry: new Point([Number(item.x), Number(item.y)]),
});
let url = "images/light.png";
const zoom = this.map.getView().getZoom();
let style = new Style({
image: new Icon({
scale: 0.15 * (zoom -13) ,
src: url,
anchor: [0.48, 0.52],
}),
});
feature.setStyle(style);
this.lightLayer.getSource().addFeature(feature);
});
},
//初始化房子数据
initHouseData(){
this.houseLayer.getSource().clear();
this.houseData.forEach((item, index) => {
var feature = new Feature({
geometry: new Point([Number(item.x), Number(item.y)]),
});
let url = "images/house.png";
let style = new Style({
image: new Icon({
scale: 0.3,
src: url,
anchor: [0.48, 0.52],
}),
});
feature.setStyle(style);
this.houseLayer.getSource().addFeature(feature);
});
},
//画线
drawLine(){
let pointData = this.lineData; // 所有点位信息
//下边来添加一线feature
var feature = new Feature({
type: "lineStyle",
geometry: new LineString(
pointData // 线的坐标
),
});
let color = 'green';
let lineStyle = new Style({
stroke: new Stroke({
color: color,
4,
}),
});
// 添加线的样式
feature.setStyle(lineStyle);
// 添加线的fature
this.lineSource.addFeature(feature);
},
initMap() {
// 获取到弹框的节点DOM
var container = document.getElementById("popup");
var content = document.getElementById("popup-content");
var closer = document.getElementById("popup-closer");
//地图图层
this.layer = new TileLayer({
source: new TileWMS({
//不能设置为0,否则地图不展示。
ratio: 1,
url: "http://localhost:8000/geoserver/nyc/wms",
params: {
LAYERS: "nyc:nyc_roads",
STYLES: "",
VERSION: "1.1.1",
tiled: true
},
serverType: "geoserver",
}),
});
// 红绿灯的图层
this.lightLayer = new VectorLayer({
source: new VectorSource(),
});
//房子的图层
this.houseLayer = new VectorLayer({
source: new VectorSource(),
});
//线的图层
this.lineSource = new VectorSource({ wrapX: false });
this.lineLayer = new VectorLayer({
source: this.lineSource,
});
// 创建一个弹窗 Overlay 对象
this.overlay = new Overlay({
element: container, //绑定 Overlay 对象和 DOM 对象的
autoPan: true, // 定义弹出窗口在边缘点击时候可能不完整 设置自动平移效果
autoPanAnimation: {
duration: 250 //自动平移效果的动画时间 9毫秒
}
});
this.map = new Map({
//地图容器ID
target: "map",
//引入地图
layers: [this.layer,this.lightLayer,this.houseLayer,this.lineLayer],
view: new View({
//地图中心点
center: [987777.93778, 213834.81024],
zoom: 12,
minZoom:6, // 地图缩放最小级别
maxZoom:19,
rotation: 0.76
}),
});
// 将弹窗添加到 map 地图中
this.map.addOverlay(this.overlay);
//必须 要重新赋值this,不然再回调函数中指针会变,overlay会undefined
let _that = this;
// 监听singleclick事件
this.map.on('singleclick', function(e) {
let coordinate = e.coordinate
// 点击尺 (这里是尺(米),并不是经纬度);
let hdms = toStringHDMS(toLonLat(e.coordinate)); // 转换为经纬度显示
content.innerHTML = `
<p>你点击了这里:</p>
<p>经纬度:<p><code> ${hdms} </code> <p>
<p>坐标:</p>X:${coordinate[0]} Y: ${coordinate[1]}`;
_that.overlay.setPosition(coordinate); //把 overlay 显示到指定的 x,y坐标
console.log(e.coordinate)
})
//弹窗关闭事件
closer.onclick=function(){
_that.overlay.setPosition(undefined);
closer.blur();
return false;
};
this.initLightData();
this.initHouseData();
this.drawLine();
},
},
};
</script>
<style scoped>
.map {
100%;
height: 800px;
}
.ol-popup {
position: absolute;
background-color: white;
-webkit-filter: drop-shadow(0 1px 4px rgba(0, 0, 0, 0.2));
filter: drop-shadow(0 1px 4px rgba(0, 0, 0, 0.2));
padding: 15px;
border-radius: 10px;
border: 1px solid #cccccc;
bottom: 12px;
left: -50px;
}
.popup-content {
400px;
}
.ol-popup-closer {
text-decoration: none;
position: absolute;
top: 2px;
right: 8px;
}
</style>