最近因为一个比赛项目用了段时间的PhysX,来总结下如何在Directx11中使用PhysX吧。
首先是PhysX的部署。这个在PhysX SDK的第一页的Installation也有讲了。
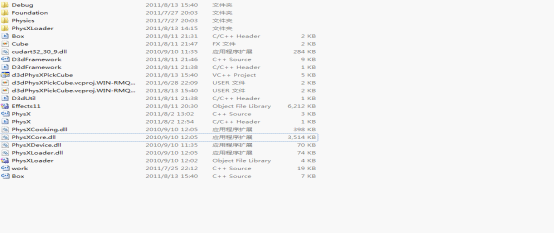
1:在PhysX的SDK里面找到PhysXCore.dll, PhysXCooking.dll, PhysXDevice.dll and the cudartXX_XX_X.dll (e.g. cudart32_30_9.dll or cudart_64_30.9.dll),PhysXLoader.dll PhysXLoader.lib几个库,放到你自己工程的working directory下。
2:在Linker->Input->Additional Dependencies里面输入PhysXLoader.lib表示要使用这个静态库。

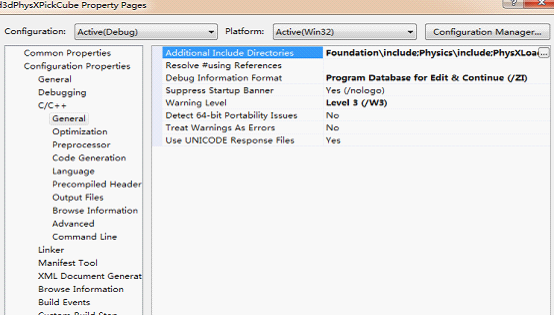
3:在c/c++->Genenal->Additional Include Directories里面引用'SDKs\Foundation\include', 'SDKs\Physics\include', and 'SDKs\PhysXLoader\include'几个头文件。
然后就可以开始编写代码了。如何Directx中使用PhysX(Opengl,OGRE等也一样),基本上都遵循一个大原则,就是每帧中PhysX负责物理逻辑运算,然后把所有物体的位置,旋转角度等告知Directx,Directx就负责渲染就好了。我们先初始化PhysX(其实就是初始化最关键的两个变量NxPhysicsSDK m_pPhysicsSDK和NxScene* m_pScene ;)
bool PhysX::InitNx()
{
// Initialize PhysicsSDK
NxPhysicsSDKDesc desc;
NxSDKCreateError errorCode = NXCE_NO_ERROR;
m_pPhysicsSDK = NxCreatePhysicsSDK(NX_PHYSICS_SDK_VERSION, NULL, NULL, desc, &errorCode);
if(m_pPhysicsSDK == NULL)
{
printf("Unable to initialize the PhysX SDK, exiting the sample.\n");
return false;
}
m_pPhysicsSDK->setParameter(NX_SKIN_WIDTH, 0.03f);
// Create a scene
NxSceneDesc sceneDesc;
sceneDesc.gravity = NxVec3(0.0f, -9.81f, 0.0f);
m_pScene = m_pPhysicsSDK->createScene(sceneDesc);
if(m_pScene == NULL)
{
printf("Unable to create a PhysX scene, exiting the sample.\n");
return false;
}
// Set default material
NxMaterial* defaultMaterial = m_pScene->getMaterialFromIndex(0);
defaultMaterial->setRestitution(0.0f);
defaultMaterial->setStaticFriction(0.5f);
defaultMaterial->setDynamicFriction(0.5f);
// Create ground plane
NxPlaneShapeDesc planeDesc;
NxActorDesc actorDesc;
actorDesc.shapes.pushBack(&planeDesc);
m_pScene->createActor(actorDesc);
return true;
}
创建一个简单的盒子,注意这里的size是一半的边长。
NxActor* PhysX::CreateCube(const NxVec3& pos, int size=2, const NxVec3* initialVelocity)
{
if(m_pScene == NULL) return NULL;
NxActor* actor;
// Create body
NxBodyDesc bodyDesc;
bodyDesc.angularDamping = 0.5f;
if(initialVelocity) bodyDesc.linearVelocity = *initialVelocity;
NxBoxShapeDesc boxDesc;
boxDesc.dimensions = NxVec3((float)size, (float)size, (float)size);
NxActorDesc actorDesc;
actorDesc.shapes.pushBack(&boxDesc);
actorDesc.body = &bodyDesc;
actorDesc.density = 10.0f;
actorDesc.globalPose.t = pos;
actor=m_pScene->createActor(actorDesc);
actor->userData = (void*)size_t(size);
//printf("Total: %d actors\n", gScene->getNbActors());
return actor;
}
剩下的主要就是Directx中每帧调用的渲染函数:
HRESULT D3dFrameWork::Render()
{
HRESULT hr=S_OK;
if( m_pScene == NULL)
{
hr=E_FAIL;
return hr;
}
// Start simulation (non blocking)
m_pScene->simulate(1.0f/60.0f);
// Clear the back buffer
float ClearColor[4] = { 0.0f, 0.125f, 0.3f, 1.0f }; // red,green,blue,alpha
m_pContext->ClearRenderTargetView( m_pRTV, ClearColor );
//
int nbActors = m_pScene->getNbActors();
NxActor** actors = m_pScene->getActors();
while(nbActors--)
{
NxActor* actor = *actors++;
if(!actor->userData) continue;
//得到物体的位置和旋转角度等信息
float glMat[16];
actor->getGlobalPose().getColumnMajor44(glMat);
box.Render(glMat,&m_View,&m_Projection,1.0f,1.0f,1.0f);
}
// Fetch simulation results
m_pScene->flushStream();
m_pScene->fetchResults(NX_RIGID_BODY_FINISHED, true);
//
// Present our back buffer to our front buffer
//
m_pSwapChain->Present( 0, 0 );
return hr;
}
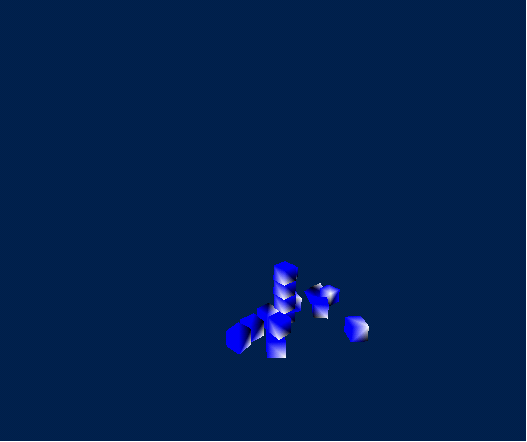
(因为Directx的代码实在很长,就算贴上来也很乱,所以我就不全部都贴上来了,但是我把这个Directx11与PhysX的程序打包上传到csdn了,有兴趣的朋友可以直接下载) 来看看效果: