在开发的很多电商类型的项目中,免不了会遇到三级联动选择地址信息,如果单纯的使用文本框给用户选择,用户体检可能就会差很多。今天我给大家整理了关于小程序开发利用picker-view组件和animation来实现省市区的三级联动
效果如图:


首先我觉的大家需要先去阅读下小程序有关picker-view和animation相关的api,然后再跟着这篇文章来理一下思路,一定会有深刻的理解。
文档连接传送门:https://developers.weixin.qq.com/miniprogram/dev/component/picker-view.html?search-key=picker-view
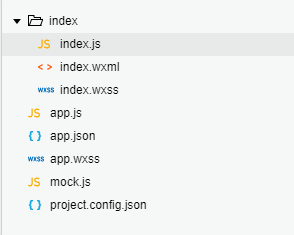
demo目录如下:

下来,我们就一起从头到尾来看看三级联动是如何实现的
第一步:先布局wml页面:
<view class="picker-view" animation="{{animationAddressMenu}}" style="visibility:{{addressMenuIsShow ? 'visible':'hidden'}}">
    <!-- 确认取消按钮 -->
    <view class='btn'>
        <text catchtap="cityCancel">取消</text>
        <text style="float: right" catchtap="citySure">确定</text>
    </view>
    <!-- 选择地址 -->
    <picker-view class='cont' bindchange="cityChange" value="{{value}}" wx:key="">
    <!-- 省 -->
        <picker-view-column>
            <view wx:for="{{provinces}}" class="picker-item" wx:key="{{index}}">{{item.name}}</view>
        </picker-view-column>
<!-- 市 -->
        <picker-view-column>
            <view wx:for="{{citys}}" class="picker-item" wx:key="index">{{item.name}}</view>
        </picker-view-column>
<!-- 区 -->
        <picker-view-column>
            <view wx:for="{{areas}}" class="picker-item" wx:key="index">{{item.name}}</view>
        </picker-view-column>
    </picker-view>
</view>

<button bindtap='select' class='select'>地址选择</button>
<view class='address'>{{areaInfo}}</view>
picker-view作为外层标签包裹picker-view-column,有几个picker-view-column就有几列数据。
第二步:设置其样式:
.picker-view {
     100%;
    display: flex;
    z-index:12;
    background-color: #fff;
    background: rgba(0, 0, 0, .2);
    flex-direction: column;
    justify-content: center;
    align-items: center;
    position: fixed;
    bottom: 0;
    left: 0rpx;
    height: 40vh;
}
.btn {
     100%;
    height: 90rpx;
    padding: 0 24rpx;
    box-sizing: border-box;
    line-height: 90rpx;
    text-align: center;
    display: flex;
    background: rgba(255,255,255,.8);
    justify-content: space-between;
}
.cont {
     100%;
    height: 389rpx;
}
.picker-item {
    line-height: 70rpx;
    margin-left: 5rpx;
    margin-right: 5rpx;
    text-align: center;
}
.address {
     100%;
    height: 90rpx;
    line-height: 90rpx;
    text-align: center;
    border-bottom: 1rpx solid #f1f1f1;
}
wxss中值得注意的是vh单位:
vh:viewpoint height,视窗高度,1vh等于视窗高度的1%。
第三步:实现省市区选择的业务逻辑和动画画出的实现:
var address = require("../mock.js")
Page({
    /**
    * 控件当前显示的数据
    * provinces:所有省份
    * citys 选择省对应的所有市,
    * areas 选择市对应的所有区
    * areaInfo:点击确定时选择的省市县结果
    * animationAddressMenu:动画
    * addressMenuIsShow:是否可见
    */
    data: {
        animationAddressMenu: {},
        addressMenuIsShow: false,
        value: [0, 0, 0],
        provinces: [],
        citys: [],
        areas: [],
        areaInfo: ''
    },

    /**
    * 生命周期函数--监听页面加载
    */
    onLoad: function (options) {
        // 默认联动显示北京
        var id = address.provinces[0].id
        this.setData({
        provinces: address.provinces,
        citys: address.citys[id],
        areas: address.areas[address.citys[id][0].id],
        })
    },
    // 点击所在地区弹出选择框
    select: function (e) {
        // 如果已经显示,不在执行显示动画
        if (this.data.addressMenuIsShow) {
        return false
        } else {
            // 执行显示动画
            this.startAddressAnimation(true)
        }
    },
    // 执行动画
    startAddressAnimation: function (isShow) {
        if (isShow) {
            // vh是用来表示尺寸的单位,高度全屏是100vh
            this.animation.translateY(0 + 'vh').step()
         } else {
                this.animation.translateY(40 + 'vh').step()
          }
        this.setData({
            animationAddressMenu: this.animation.export(),
            addressMenuIsShow: isShow,
        })
    },
    // 点击地区选择取消按钮
    cityCancel: function (e) {
        this.startAddressAnimation(false)
    },
    // 点击地区选择确定按钮
    citySure: function (e) {
        var that = this
        var city = that.data.city
        var value = that.data.value
        this.startAddressAnimation(false)
        // 将选择的城市信息显示到输入框
        var areaInfo = that.data.provinces[value[0]].name + '·' + that.data.citys[value[1]].name + '·' + that.data.areas[value[2]].name
        that.setData({
            areaInfo: areaInfo,
        })
    },
    // 处理省市县联动逻辑
    cityChange: function (e) {
        var value = e.detail.value
        var provinces = this.data.provinces
        var citys = this.data.citys
        var areas = this.data.areas
        var provinceNum = value[0]
        var cityNum = value[1]
        var countyNum = value[2]
        // 如果省份选择项和之前不一样,表示滑动了省份,此时市默认是省的第一组数据,
        if (this.data.value[0] != provinceNum) {
            var id = provinces[provinceNum].id
            this.setData({
                value: [provinceNum, 0, 0],
                citys: address.citys[id],
                areas: address.areas[address.citys[id][0].id],
            })
        } else if (this.data.value[1] != cityNum) {
        // 滑动选择了第二项数据,即市,此时区显示省市对应的第一组数据
            var id = citys[cityNum].id
            this.setData({
                value: [provinceNum, cityNum, 0],
                areas: address.areas[citys[cityNum].id],
            })
        } else {
            // 滑动选择了区
            this.setData({
                value: [provinceNum, cityNum, countyNum]
            })
        }
    },
    onShow: function () {
        var animation = wx.createAnimation({
            duration: 500,
            timingFunction: 'linear',
        })
        this.animation = animation
    }
})
难点:
主要是再实现省市区联动的时候,需要根据省份的id去查找对应的市,然后根据选择的市查找对应的区。这里比较复杂,提供方法:多打断点,明确输出结果是什么。
动画的实现:通过实例化对象,再onShow中将animation放到全局中,然后创建方法,将方法通过 this.animation.translateY(0 + 'vh').step()导出,然后通过将 this.setData({animationAddressMenu: this.animation.export()})导出就可以了,不过,别忘了在wxml中引入哦。
有问题记得评论哦,24小时之内回复,我们一起进步