我在之前的文章中只是说过,利用 Dockerfile 去拉去镜像,而这些镜像的拉取都是从 Docker Hub 上拉取下来,而现在我有个想法,我制作好了一个漏洞环境集成的镜像,我又该如何进行开源共享,提供给别人使用呢?这就是我们今天的主题了。
首先我们得准备一个 Docker Hub 的帐号, Docker Hub 的官网在这里:https://hub.docker.com
我们在上面注册一个账号,似乎注册功能好像被墙了,你可能需要借助一个梯子,考虑使用 lanten 或者 XX-Net 科学上网即可。
lanten 的项目链接在这里:https://github.com/getlantern/lantern
XX-Net 的项目链接在这里:https://github.com/XX-net/XX-Net
然后我们注册好了以后,在 Docker Hub 那里新建一个仓库,这个和 Github 很类似,同样是 Create -> Create Repository ,然后取个名字,由于我事先已经集成好了一个 ubuntu/17.04.amd64 的测试环境,已经打包成了容器快照,所以我们以 ubuntu17.04.amd64 为名字,路径就是 ubuntu17.04.amd64 了。

然后我们直接将我们集成好的容器快照导入成镜像使用即可,导入命令如下:
cat ubuntu.17.04.amd64.tar | docker import - ubuntu/17.04.amd64

成功导入后,我们可以通过 docker images 命令可以看到镜像仓库里面出现了一个新的镜像。

然后我们运行 docker ps -a 查看容器

因为我们需要将容器制作成为镜像才可以上传,所以我们需要使用commit命令提交说明信息,类似于 Git bash 里面的 commit 命令,不清楚的可以移步至这里:https://www.cnblogs.com/ECJTUACM-873284962/p/9195471.html
commit 命令如下:
docker commit [OPTIONS] CONTAINER [REPOSITORY[:TAG]]
所以根据获取到 CONTAINER ID 的属性信息,我们可以进行 commit 操作:
docker commit 1f4bda3bdd02 873284962/ubuntu17.04.amd64

其中 1f4bda3bdd02 是容器的 ID , 873284962 是我的 Docker Hub 的用户名, ubuntu17.04.amd64 是我创建的一个仓库名。
接下来,我们需要登录我们的 Docker Hub 帐号了,我们使用如下命令即可:
docker login
成功结果如下:

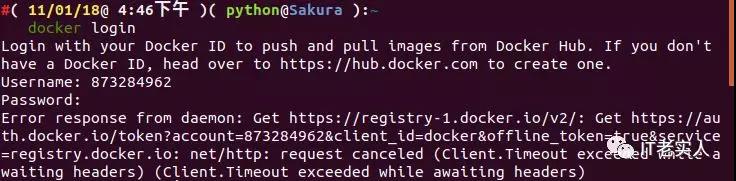
可是往往我总是没有这么幸运,相信看我文章的你也可能会碰到如下类似的问题:
Error1
Login with your Docker ID to push and pull images from Docker Hub. If you don't have a Docker ID, head over to https://hub.docker.com to create one.Username: 873284962Password: Error response from daemon: Get https://registry-1.docker.io/v2/: net/http: TLS handshake timeout

或者Error2
Login with your Docker ID to push and pull images from Docker Hub. If you don't have a Docker ID, head over to https://hub.docker.com to create one.Username: 873284962Password: Error response from daemon: Get https://registry-1.docker.io/v2/: Get https://auth.docker.io/token?account=873284962&client_id=docker&offline_token=true&service=registry.docker.io: net/http: request canceled (Client.Timeout exceeded while awaiting headers) (Client.Timeout exceeded while awaiting headers)
大概这两类问题都是因为访问超时出错,怎么办呢?类似于 Github 访问速度过慢的问题,我们直接修改 hosts 即可。
关于 Github 无法访问或者访问速度的最新解决解决方案请移步至这里:https://www.cnblogs.com/ECJTUACM-873284962/p/9884536.html
Step1
我们可以通过 dig @114.114.114.114 registry-1.docker.io 找到可用 IP:
; <<>> DiG 9.11.3-1ubuntu1.3-Ubuntu <<>> @114.114.114.114 registry-1.docker.io
; (1 server found)
;; global options: +cmd
;; Got answer:
;; ->>HEADER<<- opcode: QUERY, status: NOERROR, id: 11647
;; flags: qr rd ra; QUERY: 1, ANSWER: 8, AUTHORITY: 4, ADDITIONAL: 1

;; OPT PSEUDOSECTION:
; EDNS: version: 0, flags:; udp: 4096
; COOKIE: 9275bd962324ebff (echoed)
;; QUESTION SECTION:
;registry-1.docker.io.    IN A

;; ANSWER SECTION:
registry-1.docker.io. 30 IN A 34.205.207.96
registry-1.docker.io. 30 IN A 52.70.175.131
registry-1.docker.io. 30 IN A 52.22.201.61
registry-1.docker.io. 30 IN A 52.22.67.152
registry-1.docker.io. 30 IN A 52.54.155.177
registry-1.docker.io. 30 IN A 34.233.151.211
registry-1.docker.io. 30 IN A 52.206.40.44
registry-1.docker.io. 30 IN A 34.206.236.31

;; AUTHORITY SECTION:
docker.io.    170395 IN NS ns-1168.awsdns-18.org.
docker.io.    170395 IN NS ns-1827.awsdns-36.co.uk.
docker.io.    170395 IN NS ns-421.awsdns-52.com.
docker.io.    170395 IN NS ns-513.awsdns-00.net.

;; Query time: 23 msec
;; SERVER: 114.114.114.114#53(114.114.114.114)
;; WHEN: Thu Nov 01 16:50:05 CST 2018
;; MSG SIZE  rcvd: 329
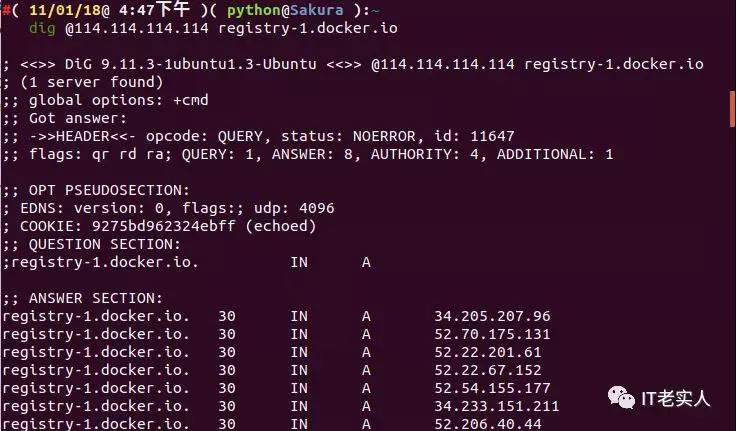
我们通过列表可以看到有很多可用的 IP ,我们选择其中一个就行了。
Step2
我们通过修改/etc/hosts强制 docker.io 相关的域名解析到其它可用 IP
sudo vim /etc/hosts
我们添加一个可用 IP 即可:
# Docker Start
52.22.67.152 registry-1.docker.io
# Docker End

添加完后,退出 vim 编辑器:按下 Esc 键,英文输入法输入: wq (是" :wq"啊,一定要记得有冒号),回车即可。更新 DNS 缓存,输入 sudo /etc/init.d/networking restart , Mac OS 的话输入 sudo dscacheutil -flushcache 即可更新 DNS 缓存,Windows的话直接用管理员权限修改 C:WindowsSystem32driversetchosts 文件即可。可能你会遇到无法修改的情况,请参看Windows10没有修改hosts文件权限的解决方案(亲测有效):https://www.cnblogs.com/ECJTUACM-873284962/p/8858384.html
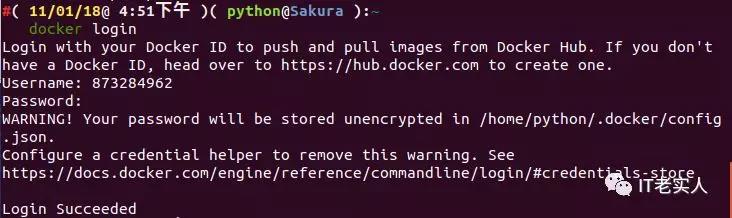
然后我们再次尝试登录即可。
我们再将刚才的镜像 push 到你的 Docker Hub 上去。我们可以使用如下命令:
docker push 873284962/ubuntu17.04.amd64:latest
这个 latest 其实就是一个 tag name ,会在 Docker Hub 的 Tags 那里显示。

有时候可能会因为各种不确定的因素,导致 push 超时,没关系,我们再 push 一次就好了。
现在我们可以用如下命令进行验证:
docker inspect 873284962/ubuntu17.04.amd64

docker inspect 命令是用于获取容器/镜像的元数据,我们可以看到 Tags 信息
最后我们返回到 Docker Hub 中查看 Tags 是否有了新的更新

最后我们很成功的将镜像 push 上去了。
这时我们可以去测试拉去一下这个镜像,看看能不能成功。
docker pull 873284962/ubuntu17.04.amd64

此时我们可以看到,这个容器已经导入到镜像里面,任何人都可以使用上面这个 pull 命令来下载这个我已经打包好的镜像了。