经过以前做完的产品,受前公司几位前辈技术大拿指点,来自己动手实现并总结一下web端的负载解决方法,高手请略过,个人认知有限,请各位指正错误。
下面是结构图:

我的系统环境是Fedora22(适用readhat,centos)
2台物理机分别用于nginx的master和slaver
192.168.10.244
192.168.10.245
0.准备keepalived,nginx,
可以使用wget下载,也可直接去官网下载,这里我下载的版本是:
keepalived-1.2.19.tar.gz (官方下载地址:http://www.keepalived.org/download.html)
nginx-1.9.3.tar.gz (官方下载地址:http://nginx.org/en/download.html)
压缩包授权
1 chmod 755 keepalived-1.2.19.tar.gz
2 chmod 755 nginx-1.9.3.tar.gz
解压到相应的目录(随便哪个目录,注意这里不是安装目录,我的是/home/ops/tools/)
1 tar -zxvf keepalived-1.2.19.tar.gz
2 tar -zxvf nginx-1.9.3.tar.gz
1.安装nginx(nginx依赖其它组件,因此需要先安装依赖,官网文档有详细说明)
进入解压后的nginx所在目录:
cd /usr/local/nginx/nginx-1.9.3
检查nginx依赖是否安装:
./configure
出现:
checking for C compiler ... not found

./configure : error: C compiler cc is not found
缺少gcc依赖,安装gcc,执行:
dnf -y install gcc
安装完之后再次检查依赖是否齐全:
./configure
出现:
./configure: error :the HTTP rewrite module requires the PCRE library . 后面巴拉巴拉一片
缺少pcre库依赖,安装pcre-devel
dnf -y install pcre-devel
安装完之后再次检查依赖是否齐全命令同上,出现:
1 ./configure: error: the HTTP gzip module requires the zlib library.
2 You can either disable the module by using --without-http_gzip_module
3 option, or install the zlib library into the system, or build the zlib library
4 statically from the source with nginx by using --with-zlib=<path> option.
依次同上,再次安装zlib
1 dnf -y install zlib-devel
安装完,出现如下类似日志,说明nginx依赖安装成功(http://nginx.org/en/docs/configure.html,最新版本的doc文档上没有提到openssl可以不安装,原因不明,烦请知道的大哥告知一声)。
Configuration summary
+ using system PCRE library
+ OpenSSL library is not used
+ using builtin md5 code
+ sha1 library is not found
+ using system zlib library
nginx path prefix: "/usr/local/nginx"
nginx binary file: "/usr/local/nginx/sbin/nginx"
nginx configuration prefix: "/usr/local/nginx/conf"
nginx configuration file: "/usr/local/nginx/conf/nginx.conf"
nginx pid file: "/usr/local/nginx/logs/nginx.pid"
nginx error log file: "/usr/local/nginx/logs/error.log"
nginx http access log file: "/usr/local/nginx/logs/access.log"
nginx http client request body temporary files: "client_body_temp"
nginx http proxy temporary files: "proxy_temp"
nginx http fastcgi temporary files: "fastcgi_temp"
nginx http uwsgi temporary files: "uwsgi_temp"
nginx http scgi temporary files: "scgi_temp"
OK,此时开始编译安装nginx,配置nginx的安装目录,个人习惯将其所有配置都安装在固定的目录下/usr/local/nginx,目录不存在时,安装中自动创建(官网上根据职责安装到不同的目录),分别执行:
./configure --prefix=/usr/local/nginx/
make && make install
configure的作用不知道的烦请自行查阅,安装完成后出现如下类似界面,说明安装成功,此时可以删除下载和解压的nginx源码包了.

我习惯用源码安装
官网推荐源码安装的例子有这么一段:
1 ./configure
2     --sbin-path=/usr/local/nginx/nginx
3     --conf-path=/usr/local/nginx/nginx.conf
4     --pid-path=/usr/local/nginx/nginx.pid
5     --with-http_ssl_module
6     --with-pcre=../pcre-8.40
7     --with-zlib=../zlib-1.2.11
所以我就直接拷贝下来,进入源码解压目录执行:
1 ./configure --sbin-path=/usr/local/nginx/nginx --conf-path=/usr/local/nginx/nginx-1.13.3/nginx.conf --pid-path=/usr/local/nginx/nginx-1.13.3/nginx.pid --with-http_ssl_module --with-pcre=../pcre-8.40 --with-zlib=../zlib-1.2.11 --with-openssl=../openssl
进入nginx安装目录,启动nginx测试一下
cd /usr/local/nginx/sbin
./nginx
查看一下进程:
1 ps -aux | grep nginx
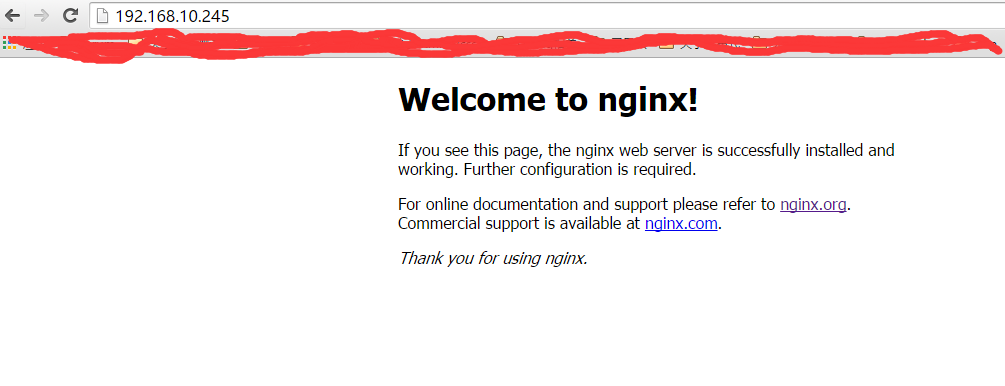
外部浏览器访问出现如下图,表示nginx启动成功
2.安装keepalived
进入解压后的keepalived的目录,同上先检查依赖是否安装
1 ./configure
若出现:
configure: error:
  !!! OpenSSL is not properly installed on your system. !!!!!! Can not include OpenSSL headers files.            !!!
安装openssl依赖
dnf -y install openssl-devel
再次检查依赖,若出现如下类似说明依赖安装成功
 1 Keepalived configuration
 2 ------------------------
 3 Keepalived version       : 1.2.19
 4 Compiler                 : gcc
 5 Compiler flags           : -g -O2
 6 Extra Lib                : -lssl -lcrypto -lcrypt
 7 Use IPVS Framework       : Yes
 8 IPVS sync daemon support : Yes
 9 IPVS use libnl           : No
10 fwmark socket support    : Yes
11 Use VRRP Framework       : Yes
12 Use VRRP VMAC            : Yes
13 SNMP support             : No
14 SHA1 support             : No
15 Use Debug flags          : No
OK,此时可以正式安装keepalived了,个人安装在/usr/local/keepalived目录
./configure --prefix=/usr/local/keepalived
make && make install
安装成功后进入安装后的目录,检测
cd /usr/local/keepalived/sbin
./keepalived
查看是否启动成功
1 ps -aux | grep keepalived
另一台机器以同样的方式安装nginx和keepalived
3.配置keepalived和nginx(测试时可以先略过这一步)
进入目录/usr/local/keepalived/sbin/,查看keepalived的启动配置参数
cd /usr/local/keepalived/sbin
./keepalived --help
注:该help参数可以在/usr/local/keepalived/etc/sysconfig/keepalived这个文件中查看)
keepalived启动时默认加载/etc/keepalived/keepalived.conf。此处个人遇到很大的坑,以为keepalived跟nginx一样安装到指定目录后会从这个安装后的目录去加载配置文件,没想到启动后日志一直停留在start...使用 ip a 查看虚拟IP也绑定不了。最后没办法只好在etc下新建keepalived目录,把keepalived.conf拷过去才解决。
mkdir /etc/keepalived
cp /usr/local/keepalived/etc/keepalived/keepalived.conf  /etc/keepalived
我的2台nginx配置文件nginx.conf部分配置片段如下:(这里我在118的机器上起了4个tomcat实例,nginx不配负载方式默认是轮询),用作测试
 1 # blentle add
 2 upstream www.test.dev {
 3         server 192.168.10.118:8081;
 4         server 192.168.10.118:8082;
 5         server 192.168.10.118:8083;
 6         server 192.168.10.118:8084;
 7 }
 8
 9 server {
10         listen 80;
11         server_name 127.0.0.1;
12         location / {
13         index index.php index.html index.jsp;
14         proxy_pass http://www.test.dev;
15         proxy_set_header   X-Real-IP  $remote_addr;
16         proxy_set_header   X-Forwarded-For $proxy_add_x_forwarded_for;
17         }
18
19 }
4.配置keepalived,实现nginx负载
(1)主从(master-slaver)
所谓主从即master的nginx正常提供服务时,永远轮不到slaver的nginx来提供服务。只有当master挂掉时,slaver的nginx才接管虚拟IP,提供正常服务。貌似有点浪费服务器。
(a)配置master(192.168.10.244)
vi /etc/keepalived/keepalived.conf
将以下内容替换keepalived.conf里面的内容
 1 ! Configuration File for keepalived
 2 global_defs {
 3     notification_email {
 4         admin@milipp.com
 5     }
 6     notification_email_from dev@milipp.com
 7     smtp_server mail.milipp.com
 8     smtp_connect_timeout 30
 9     router_id LVS_DEVEL
10 }
11 vrrp_script chk_nginx {
12     script "/home/ops/scripts/monitor-nginx.sh"  #这个即使监控nginx宕机的脚本实现自动切换
13     interval 2
14     weight -5
15     fall 3
16     rise 2
17 }
18 vrrp_instance VI_1 {
19     state MASTER
20     interface eth0  #主nginx ip对应的网卡名,使用ifconfig查看
21     mcast_src_ip 192.168.10.244 #主nginx的ip
22     virtual_router_id 51   #虚拟路由id,主从必须一致
23     priority 101         #优先级,主比从大
24     advert_int 2
25     authentication {
26         auth_type PASS
27         auth_pass 1111
28     }
29     virtual_ipaddress {
30         192.168.10.246  #虚拟ip,主从必须一致,可以陪配置多个
31     }
32     track_script {
33        chk_nginx  #上面配的监控nginx的脚本
34     }
35 }
(b).配置slaver(192.168.10.245)
vi /etc/keepalived/keepalived.conf
将以下内容替换keepalived.conf里面的内容
 1 ! Configuration File for keepalived
 2 global_defs {
 3     notification_email {
 4         renhuan@milipp.com
 5     }
 6     notification_email_from xuyongming@milipp.com
 7     smtp_server mail.example.com
 8     smtp_connect_timeout 30
 9     router_id LVS_DEVEL
10 }
11 vrrp_script chk_nginx {
12     script  "/home/ops/scripts/monitor_nginx.sh"
13     interval 2
14     weight -5
15     fall 3
16     rise 2
17 }
18 vrrp_instance VI_1 {
19     state BACKUP
20     interface enp3s0
21     mcast_src_ip 192.168.10.245
22     virtual_router_id 51
23     priority 100
24     advert_int 2
25     authentication {
26         auth_type PASS
27         auth_pass 1111
28     }
29     virtual_ipaddress {
30         192.168.10.246
31     }
32     track_script {
33        chk_nginx
34     }
35 }
监控脚本/home/ops/scripts/monitor_nginx.sh的内容:
 1 #!/bin/bash
 2 counter=$(ps -C nginx --no-heading|wc -l)
 3 if [ "${counter}" = "0" ]; then
 4     /usr/local/nginx/sbin/nginx
 5     sleep 2
 6     counter=$(ps -C nginx --no-heading|wc -l)
 7     if [ "${counter}" = "0" ]; then
 8         /usr/local/keepalived/sbin/keepalived stop
 9     fi
10 fi
即当nginx挂掉后,停掉keepalived
测试:
分别启动两台nginx和两台keepalived,使用虚拟ip 192.168.10.246访问。
在244上执行:
ip a
得到结果:

虚拟ip绑定到244上,以同样的方式查看245,结果245没有绑定虚拟ip

此时停掉245的keepalived或者nginx,使用虚拟ip 246访问,没有问题,查看绑定情况,发现245绑定了虚拟ip。至此测试成功。
(2)主主(master master)
TODO: