一.本文介绍
如果Web项目是完全前后端分离的话(我认为现在完全前后端分离已经是趋势了)一般前端和后端交互都是通过接口的,对接口入参和出参描述的文档就是Mock文档。随着接口数量的增多和参数的个数增加接口文档会变的越来越难维护,最后甚至会出现文档和实际出现不统一,Swagger出现解决了这个问题,通过一些简单的配置和注解的使用Swagger会自动为我们生成接口文档,本文会以上篇文章为基础整合Swagger到Spring Boot项目中。
二.Spring Boot整合Swagger
首先要做的还是引入Swagger相关的依赖如下
      <!-- Swagger需要引入的依赖 -->
        <dependency>
            <groupId>io.springfox</groupId>
            <artifactId>springfox-swagger-ui</artifactId>
            <version>2.4.0</version>
        </dependency>
        <dependency>
            <groupId>io.springfox</groupId>
            <artifactId>springfox-swagger2</artifactId>
            <version>2.4.0</version>
        </dependency>
接下来需要写一个Swagger的配置文件,我在cn.test下新建了一个config包专门放配置文件包结构和代码如下
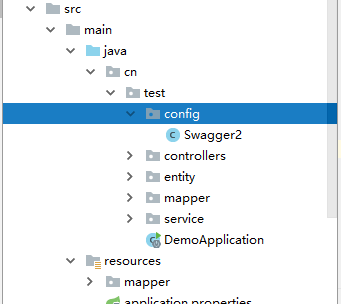
package cn.test.config;


import org.springframework.context.annotation.Bean;
import org.springframework.context.annotation.Configuration;
import springfox.documentation.builders.ApiInfoBuilder;
import springfox.documentation.builders.PathSelectors;
import springfox.documentation.builders.RequestHandlerSelectors;
import springfox.documentation.service.ApiInfo;
import springfox.documentation.service.Contact;
import springfox.documentation.spi.DocumentationType;
import springfox.documentation.spring.web.plugins.Docket;
import springfox.documentation.swagger2.annotations.EnableSwagger2;

@Configuration
@EnableSwagger2
public class Swagger2 {
    //swagger2的配置文件,这里可以配置swagger2的一些基本的内容,比如扫描的包等等
    @Bean
    public Docket createRestApi() {
        return new Docket(DocumentationType.SWAGGER_2)
                .apiInfo(apiInfo())
                .select()
                //为当前包路径
                .apis(RequestHandlerSelectors.basePackage("cn.test.controllers"))
                .paths(PathSelectors.any())
                .build();
    }
    //构建 api文档的详细信息函数,注意这里的注解引用的是哪个
    private ApiInfo apiInfo() {
        return new ApiInfoBuilder()
                //页面标题
                .title("Spring Boot 测试使用 Swagger2 构建RESTful API")
                //创建人
                .contact(new Contact("MarryFeng", "http://www.baidu.com", ""))
                //版本号
                .version("1.0")
                //描述
                .description("API 描述")
                .build();
    }


}
网上有说Swagger2的配置文件需要在项目的启动类的同级文件建立,但是我没这样做也是可以的。@Configuration这个注解可以帮我们把一个类当成一个配置文件,原来用Spring需要配置bean的时候还需要专门写一个xml的配置文件,现在直接使用@Configuration就可以了,对用的加一个@Bean注解的意思是往Spring里注入一个我们需要的Bean实例。@EnableSwagger2注解相当于一个开关,意思是能使用Swagger的相关注解。
接下来就可以使用Swagger的相关注解为我们的Api生成接口文档,示例如下
package cn.test.controllers;

import cn.test.entity.UserTagInfo;
import cn.test.service.UserTagInfoService;
import io.swagger.annotations.Api;
import io.swagger.annotations.ApiImplicitParam;
import io.swagger.annotations.ApiOperation;
import io.swagger.annotations.ApiResponse;
import io.swagger.annotations.ApiResponses;
import org.springframework.beans.factory.annotation.Autowired;
import org.springframework.web.bind.annotation.PostMapping;
import org.springframework.web.bind.annotation.RequestBody;
import org.springframework.web.bind.annotation.RequestMapping;
import org.springframework.web.bind.annotation.RequestParam;
import org.springframework.web.bind.annotation.RestController;

@RestController
@RequestMapping("/usertag")
@Api("UserTagInfoController相关的api")
public class UserTagInfoController {

    @Autowired
    private UserTagInfoService userTagInfoService;

    @ApiOperation(value = "根据id查询用户标签信息", notes = "查询数据库中某个用户的标签信息")
    @ApiResponses({
            @ApiResponse(code = 400,message = "入参错误")
    })
    @ApiImplicitParam(name = "id", value = "ID", required = false, paramType = "query",dataType = "Integer")
    @RequestMapping("/select")
    public UserTagInfo select(@RequestParam("id")Integer id){
        UserTagInfo result = userTagInfoService.select(id);
        return result;
    }

    //使用@PostMapping支持post请求方式
    //使用@RequestBody支持把提交的json数据自动封装成对象
    @PostMapping("/insert")
    public int insert(@RequestBody UserTagInfo userTagInfo){
        int id = userTagInfoService.insert(userTagInfo);
        return id;
    }
}
访问http://localhost:8080/swagger-ui.html效果如下

在这里输入入参

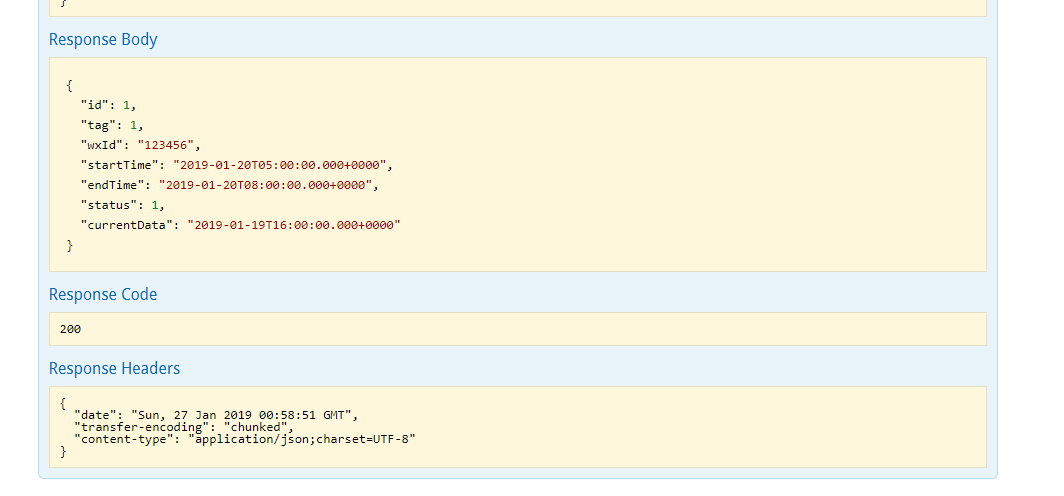
查询结果如下
Swagger里常用的注解含义如下
- @Api()用于类;
表示标识这个类是swagger的资源
- @ApiOperation()用于方法;
表示一个http请求的操作
- @ApiParam()用于方法,参数,字段说明;
表示对参数的添加元数据(说明或是否必填等)
- @ApiModel()用于类
表示对类进行说明,用于参数用实体类接收
- @ApiModelProperty()用于方法,字段
表示对model属性的说明或者数据操作更改
- @ApiIgnore()用于类,方法,方法参数
表示这个方法或者类被忽略
- @ApiImplicitParam() 用于方法
表示单独的请求参数
- @ApiImplicitParams() 用于方法,包含多个 @ApiImplicitParam
我遇到一个坑就是使用@ApiImplicitParam注解的时候paramType如果不指定为query的话,dataType无论你指定为什么最后都是String类型的。
三.总结
Spring Boot整合Swagger还是很简单的,第一要引入相关的依赖,第二要写相关的配置文件,然后在Controller上加上Swagger的注解就能够自动生成你需要的Api接口文档了。