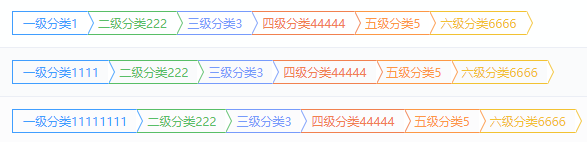
ui设计图大概长这样↓
因为这是在表格里展示的对应的样式的,我直接写成了一个组件
下面是一个.vue文件,可以直接使用
<template>
  <div class="column-row">
    <!--#409eff-->
    <div class="one">{{ column[0] || '' }}</div>
    <!--#58BE67-->
    <div class="two">{{ column[1] || '' }}</div>
    <!--#779bfb-->
    <div class="three">{{ column[2] || '' }}</div>
    <!--#f18150-->
    <div class="four">{{ column[3] || '' }}</div>
    <!--#fd9846-->
    <div class="five">{{ column[4] || '' }}</div>
    <!--#f2c233-->
    <div class="six">{{ column[5] || '' }}</div>
  </div>
</template>

<script>
export default {
  props: {
    column: {
      type: Array,
      default: () => []
    }
  },
};
</script>

<style lang="less" scoped>
.column-row {
  display: flex;
  div {
    padding: 0 10px;
    height: 24px;
    position: relative;
    &::before, &::after{
      display: inline-block;
      content:'';
      position: absolute;
      border: 12px solid transparent;
      border-left- 6px;
    }
    &::before{
      top: -1px;
      right: -18px;
      border-left-color:#000;
    }
    &::after{
      top: -1px;
      right: -17px;
      border-left-color:#fff;
    }
  }
  .one {
    color: #409eff;
    border: 1px solid #409eff;
    border-right- 0;
    &::before{
      border-left-color: #409eff;
    }
  }
  .two {
    color: #58BE67;
    border-top: 1px solid #58BE67;
    border-bottom: 1px solid #58BE67;
    &::before{
      border-left-color: #58BE67;
    }
  }
  .three {
    color: #779bfb;
    border-top: 1px solid #779bfb;
    border-bottom: 1px solid #779bfb;
    &::before{
      border-left-color: #779bfb;
    }
  }
  .four {
    color: #f18150;
    border-top: 1px solid #f18150;
    border-bottom: 1px solid #f18150;
    &::before{
      border-left-color: #f18150;
    }
  }
  .five {
    color: #fd9846;
    border-top: 1px solid #fd9846;
    border-bottom: 1px solid #fd9846;
    &::before{
      border-left-color: #fd9846;
    }
  }
  .six {
    color: #f2c233;
    border-top: 1px solid #f2c233;
    border-bottom: 1px solid #f2c233;
    &::before{
      border-left-color: #f2c233;
    }
  }
}
</style>
核心代码也就是这一段,先把前后伪元素画成两个三角形,然后通过伪元素的前后遮挡,实现尖角
div {
    padding: 0 10px;
    height: 24px;
    position: relative;
    &::before, &::after{
      display: inline-block;
      content:'';
      position: absolute;
      border: 12px solid transparent;
      border-left- 6px;
    }
    &::before{
      top: -1px;
      right: -18px;
      border-left-color:#000;
    }
    &::after{
      top: -1px;
      right: -17px;
      border-left-color:#fff;
    }
  }
写成动态通用的组件
<template>
  <div class="column-row">
    <div
      v-for="(item, index) in column"
      :key="index"
      :class="dealClass(index)">
      {{ item }}
    </div>
  </div>
</template>

<script>
export default {
  props: {
    column: {
      type: Array,
      default: () => []
    }
  },
  data() {
    return {
      color: ['one', 'two', 'three', 'four', 'five', 'six'],
      colorArr: ['two', 'three', 'four', 'five', 'six']
    };
  },
  methods: {
    dealClass(v) {
      let cName = '';
      if (v < 6) {
        cName = this.color[v % 6];
      } else {
        cName = this.colorArr[(v - 6) % 5];
      }
      return cName;
    },
  }
};
</script>