ReadWrite.java
package main.java;

import java.io.*;
public class ReadWrite {

      static String readFileName;
      static String writeFileName;


      public static void main(String args[]){
           readFileName = args[0];
           writeFileName = args[1];
          try {
             // readInput();
            readFileByLines(readFileName);
          }catch(Exception e){
          }
      }

    public static void readFileByLines(String fileName) {
        FileInputStream fis = null;
        InputStreamReader isr = null;
        BufferedReader br = null;
        String tempString = null;
        try {
            System.out.println("以行为单位读取文件内容,一次读一整行:");
            fis = new FileInputStream(fileName);// FileInputStream
            // 从文件系统中的某个文件中获取字节
            isr = new InputStreamReader(fis,"GBK");
            br = new BufferedReader(isr);
            int count=0;
            while ((tempString = br.readLine()) != null) {
                count++;
                // 显示行号
                Thread.sleep(300);
                String str = new String(tempString.getBytes("UTF8"),"GBK");
                System.out.println("row:"+count+">>>>>>>>"+tempString);
                method1(writeFileName,tempString);
                //appendMethodA(writeFileName,tempString);
            }
            isr.close();
        } catch (IOException e) {
            e.printStackTrace();
        } catch (InterruptedException e) {
            e.printStackTrace();
        } finally {
            if (isr != null) {
                try {
                    isr.close();
                } catch (IOException e1) {
                }
            }
        }
    }

//    public static void appendMethodA(String fileName, String content) {
//        try {
//            // 打开一个随机访问文件流,按读写方式
//            //logger.info("file line >>>>>>>>>>>>>>>>>>>>>>>>>:"+content);
//            RandomAccessFile randomFile = new RandomAccessFile(fileName, "rw");
//
//            // 文件长度,字节数
//            long fileLength = randomFile.length();
//            //将写文件指针移到文件尾。
//            randomFile.seek(fileLength);
//            //randomFile.writeUTF(content);
//            randomFile.writeUTF(content);
//            randomFile.writeUTF("
");
//           // randomFile.wri;
//
//            randomFile.close();
//        } catch (IOException e) {
//            e.printStackTrace();
//        }
//    }

    public static void method1(String file, String conent) {
        BufferedWriter out = null;
        try {
            out = new BufferedWriter(new OutputStreamWriter(
                    new FileOutputStream(file, true)));
            out.write("
");
            out.write(conent);
        } catch (Exception e) {
            e.printStackTrace();
        } finally {
            try {
                out.close();
            } catch (IOException e) {
                e.printStackTrace();
            }
        }
    }


}
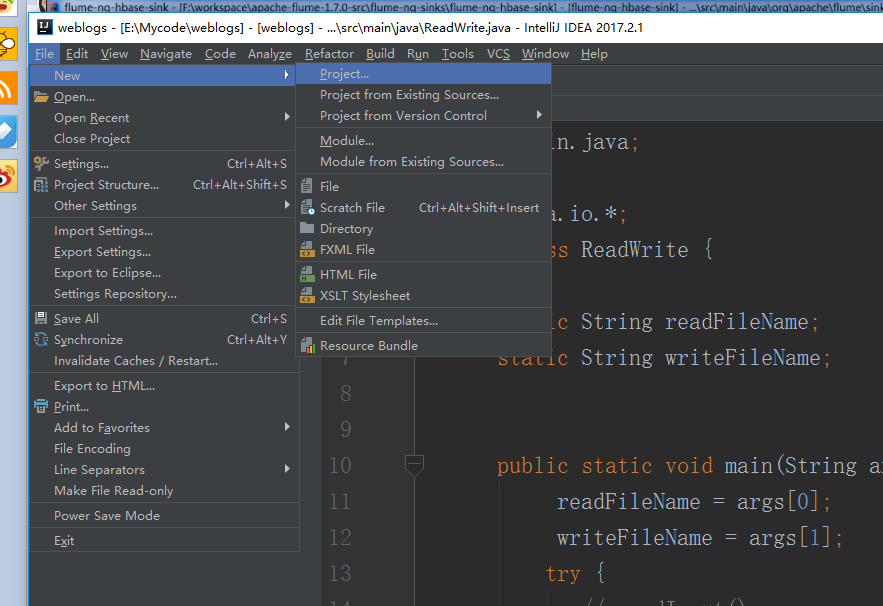
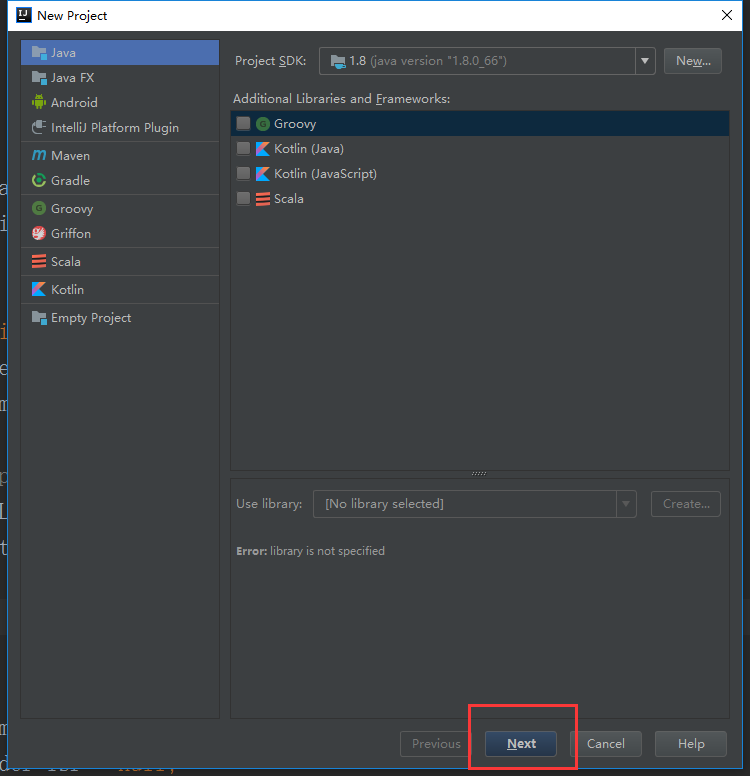
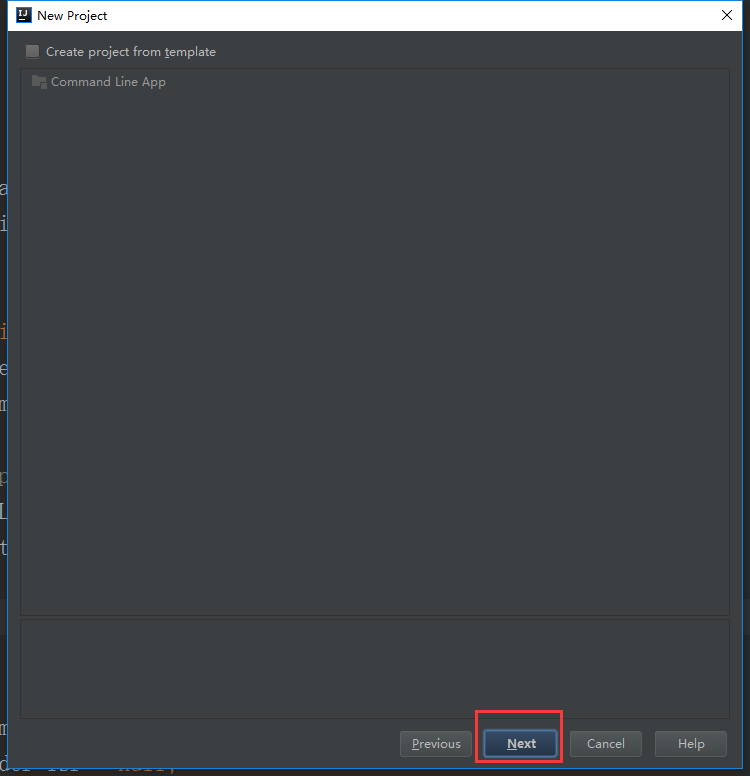
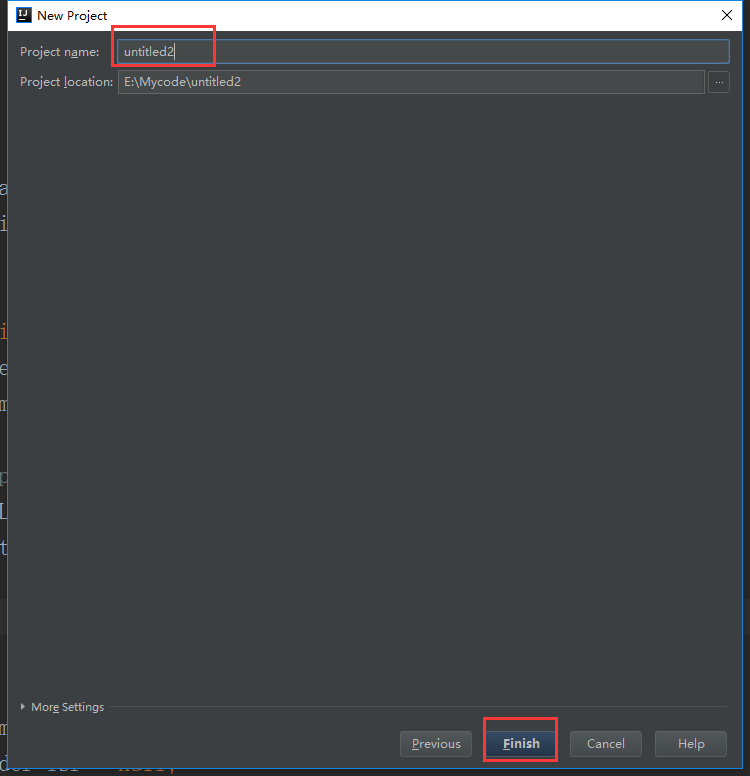
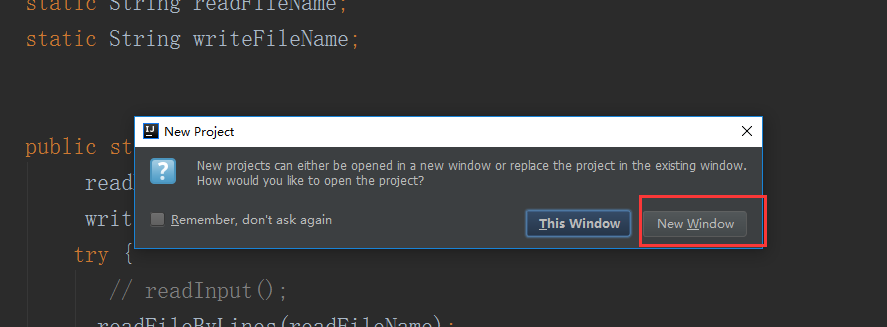
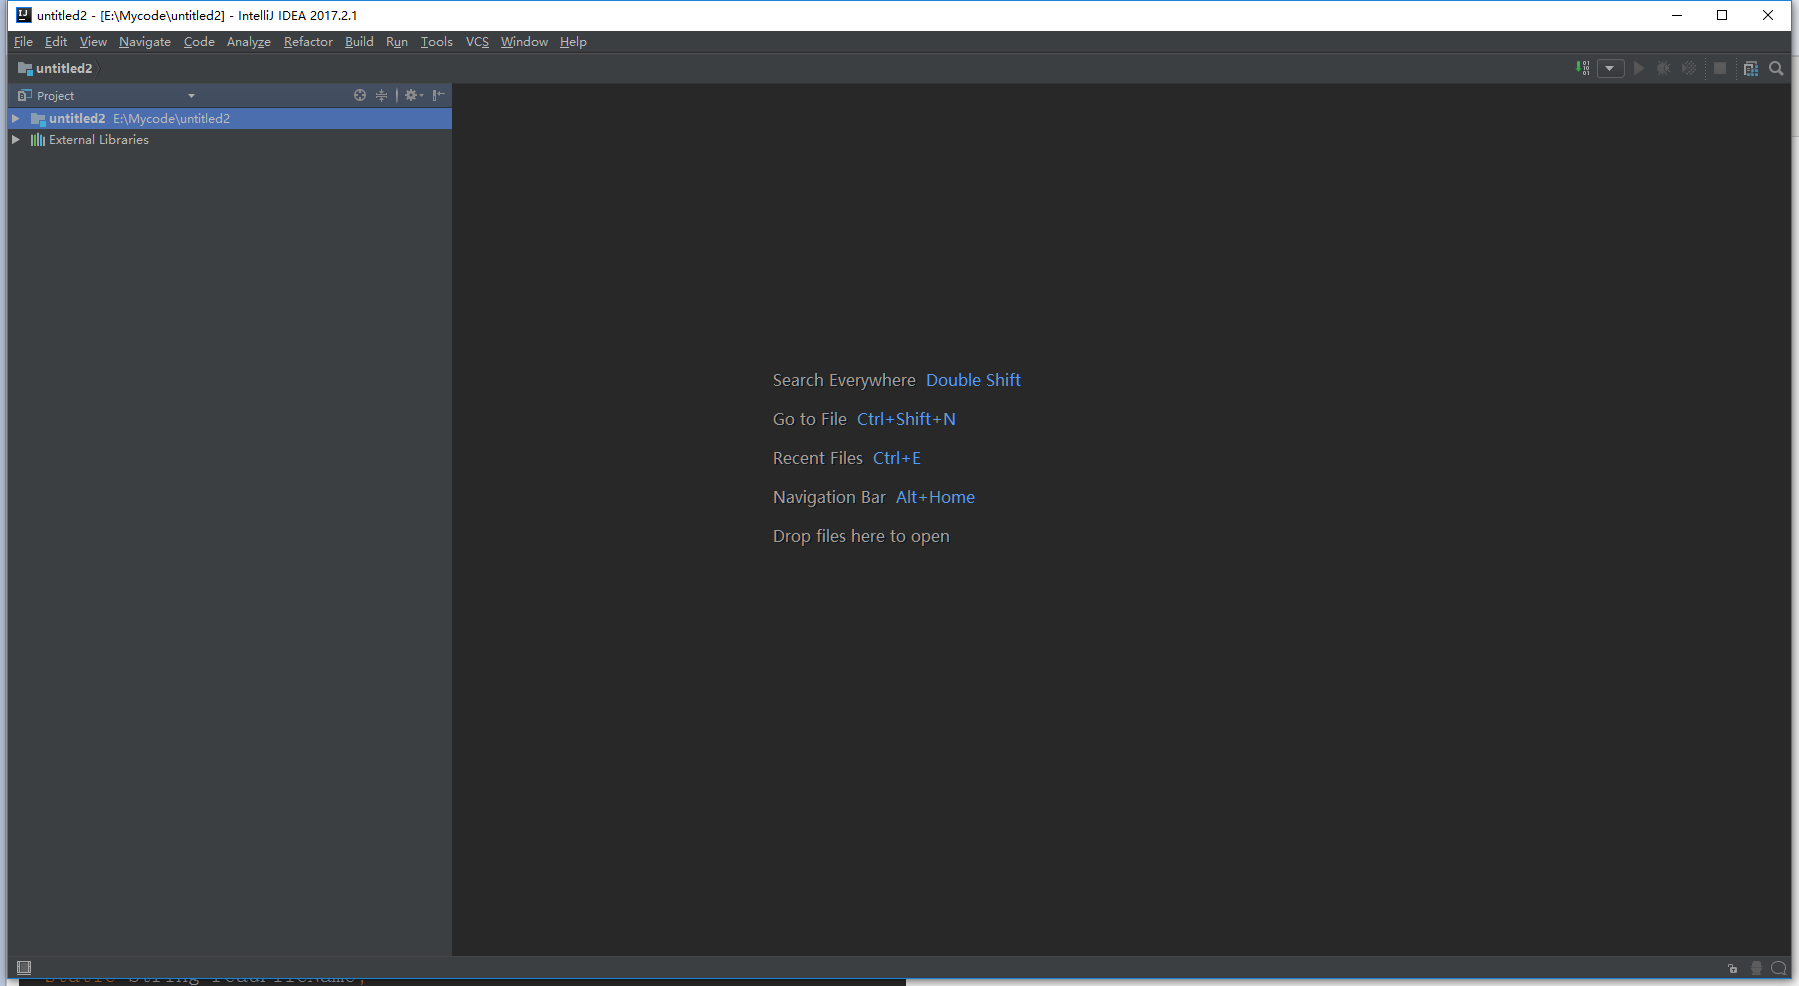
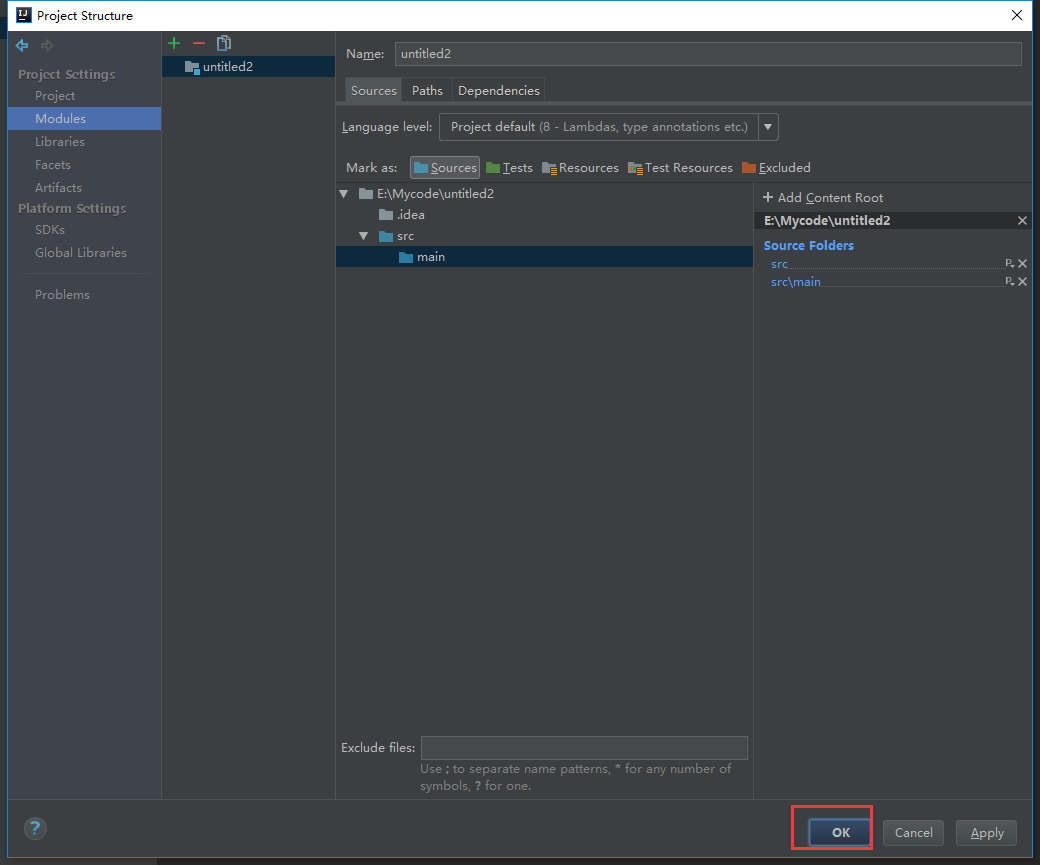
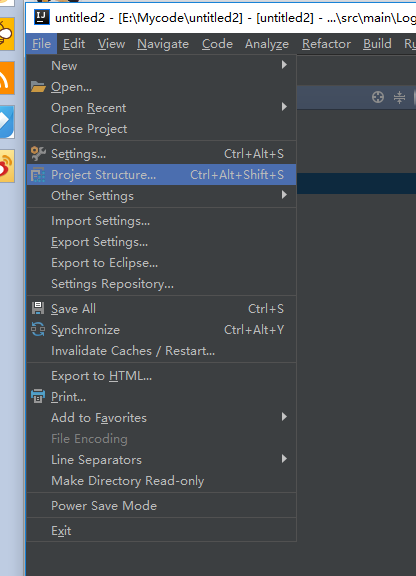
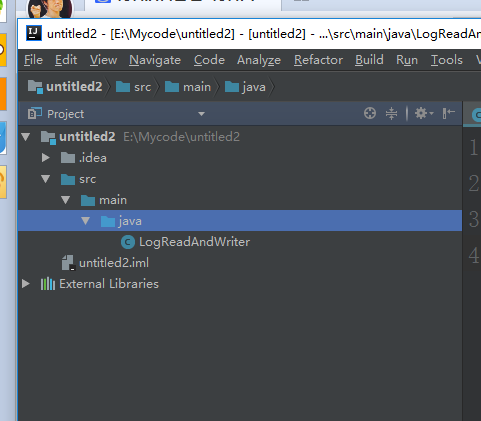
下面讲下idea怎么创建工程
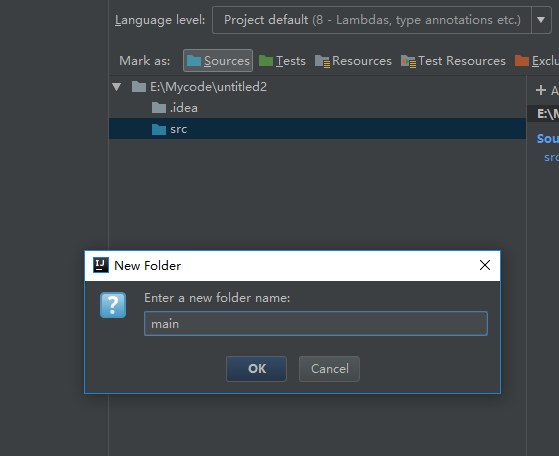
这里可以根据自己的实际需求来命名

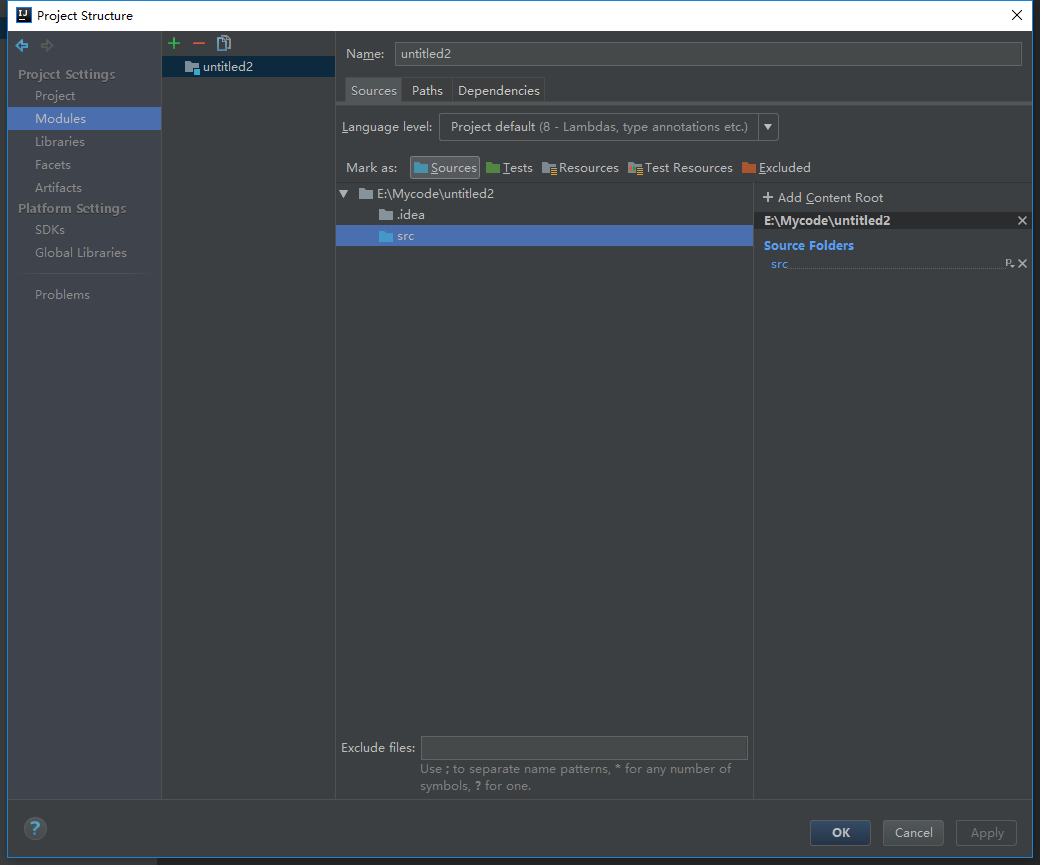
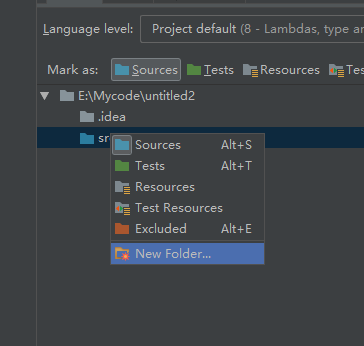
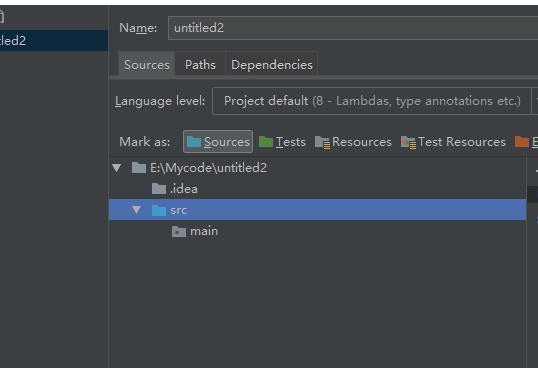
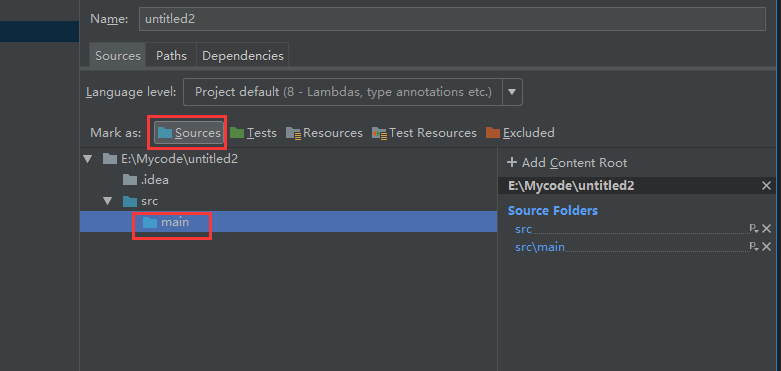
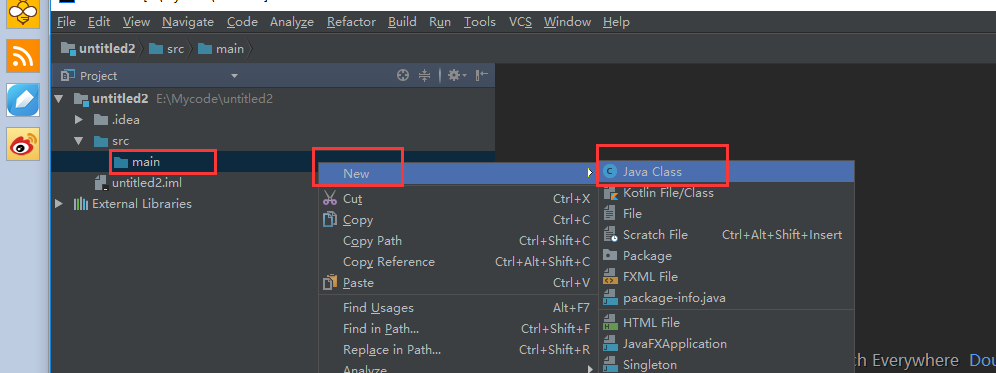
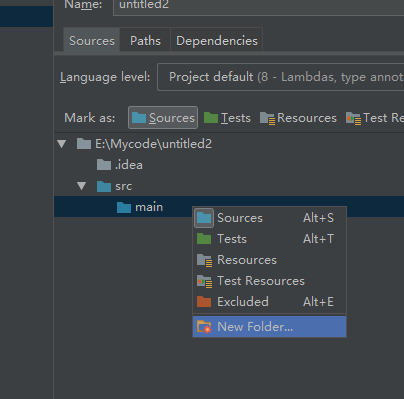
选中main点击Sorouce
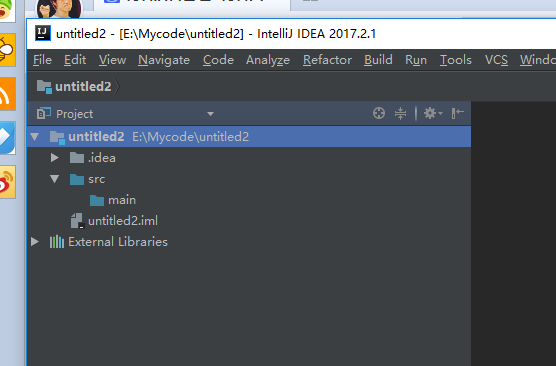

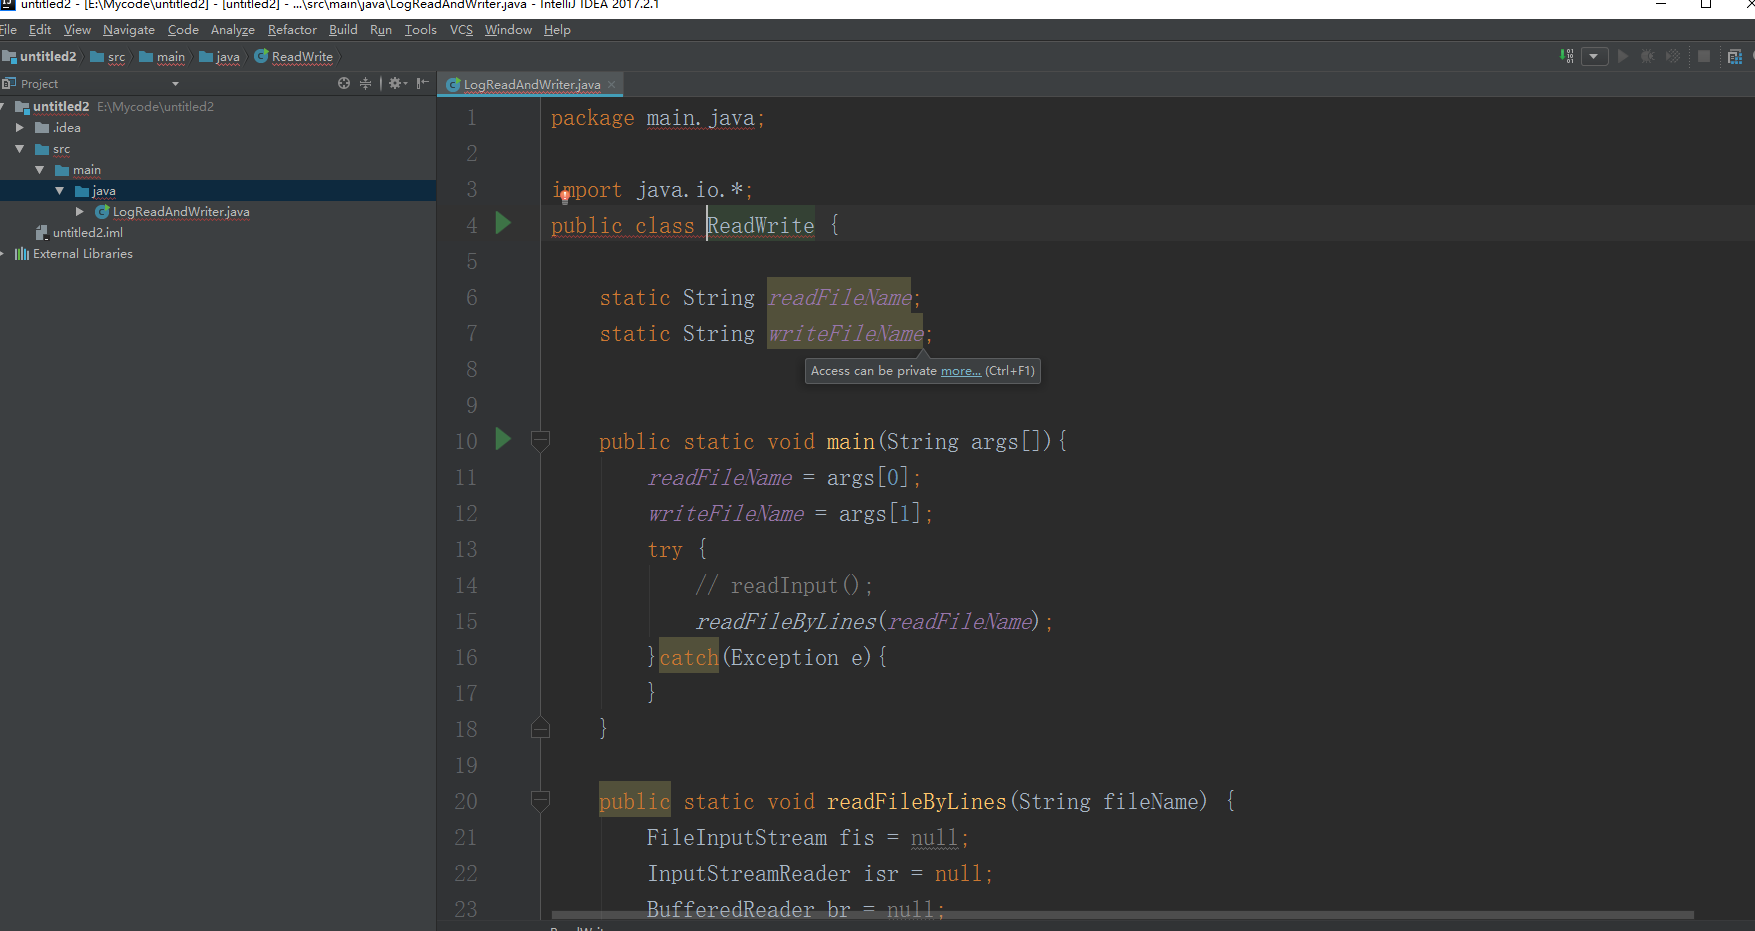
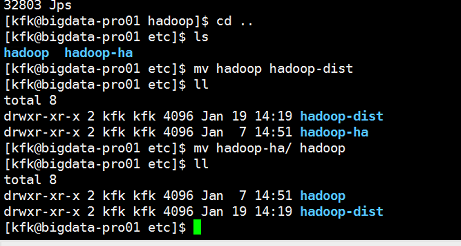
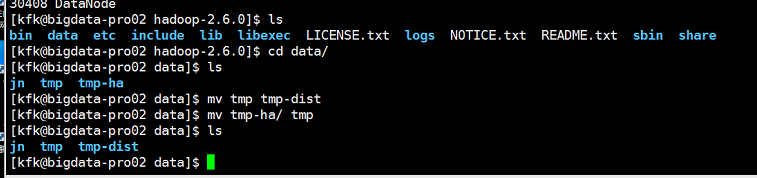
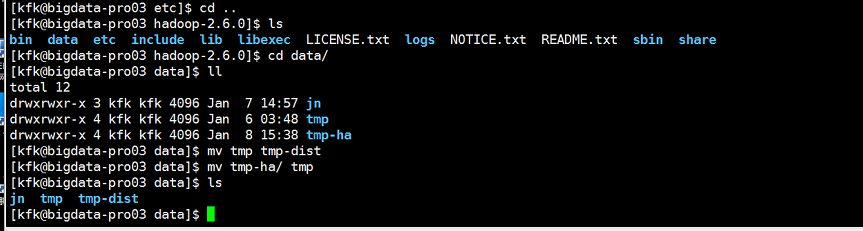
这个是一个简单的java程序工程的创建,现在我们把前面的代码copy过来,我们先把工程目录规范一下
把我前面给出的代码复制过来
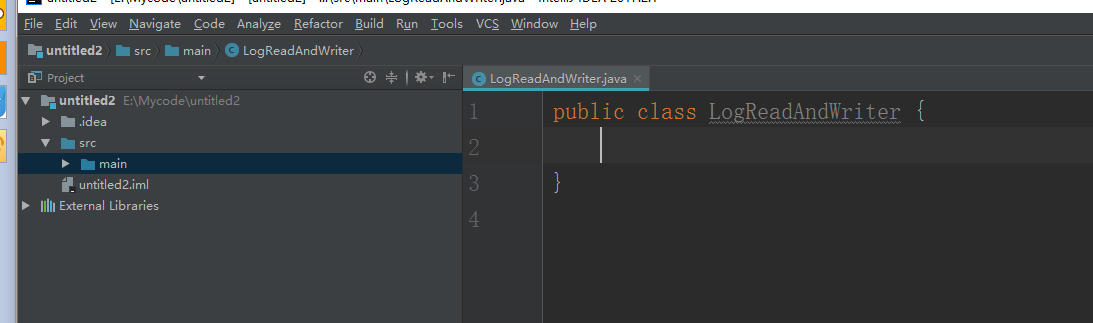
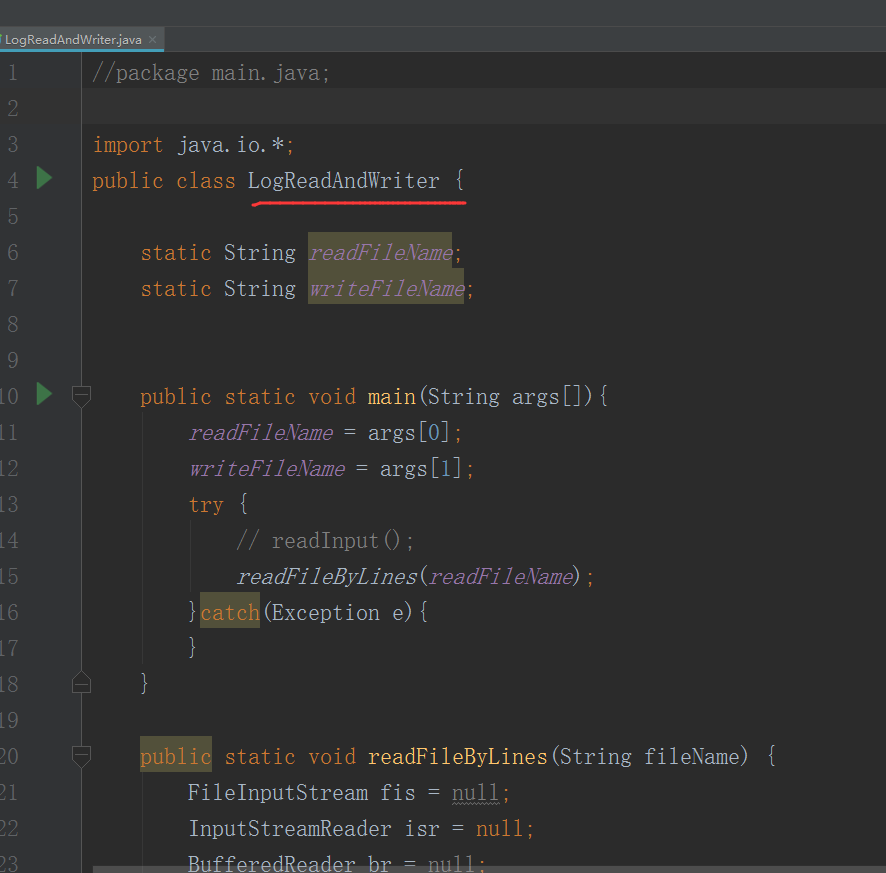
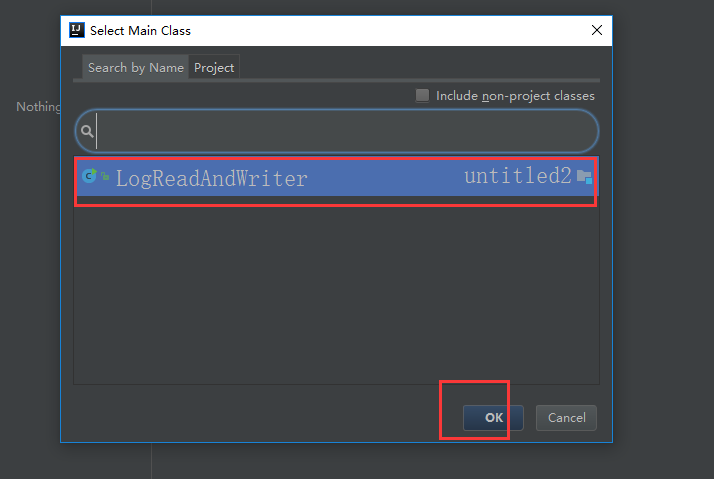
把名字改了
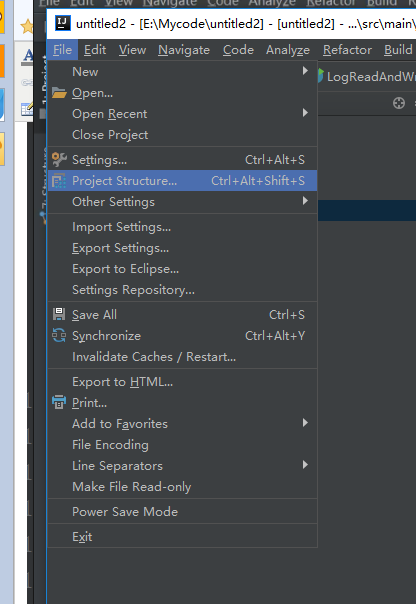
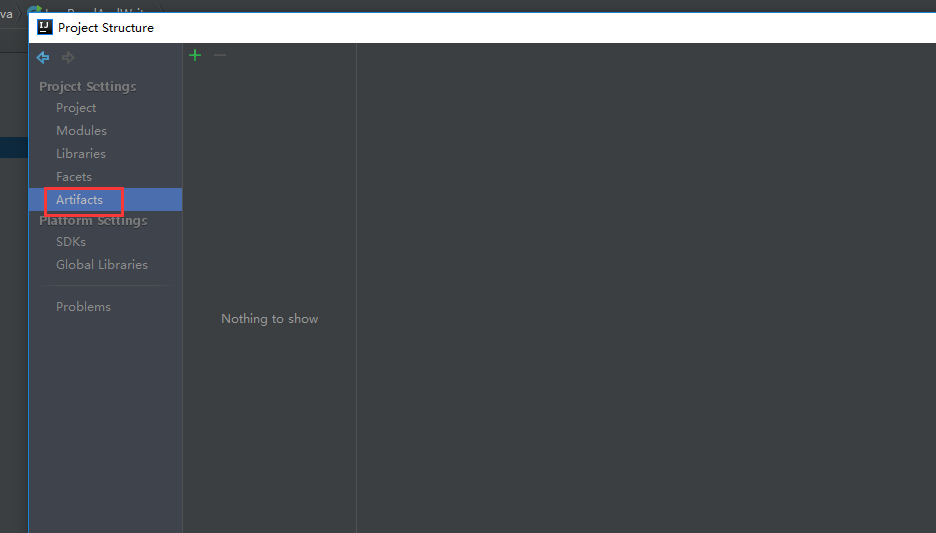
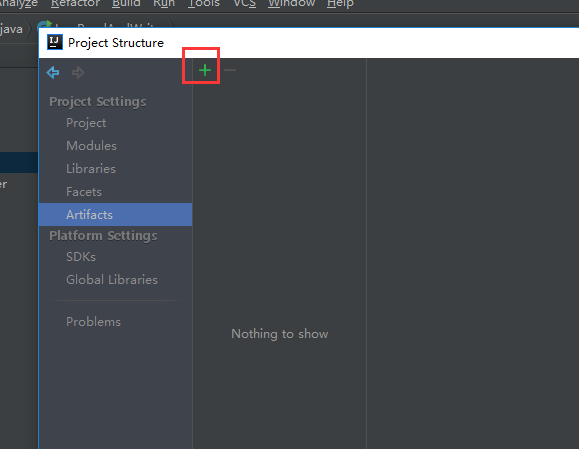
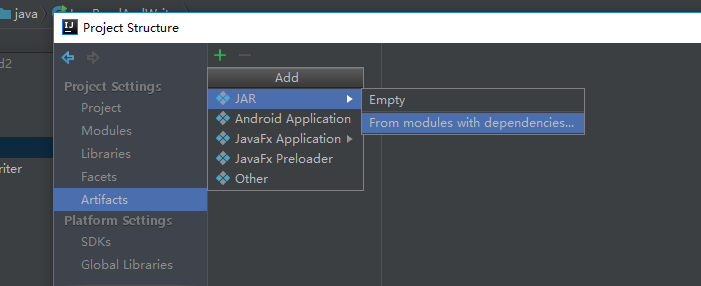
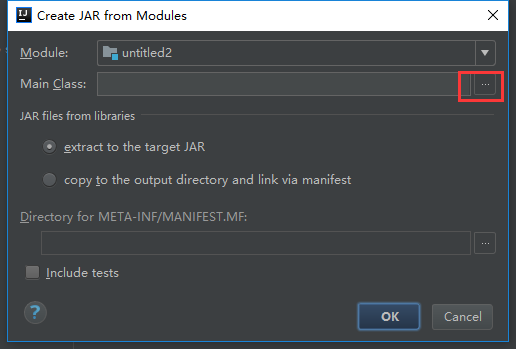
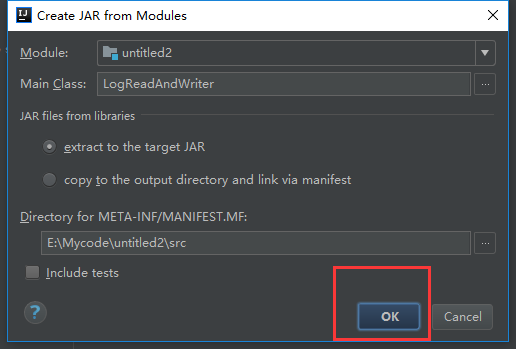
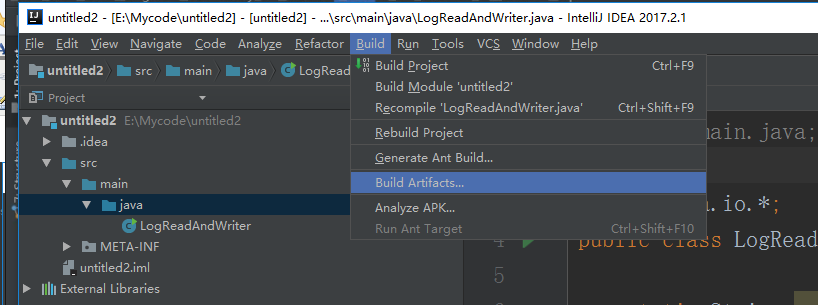
下面是给代码打包
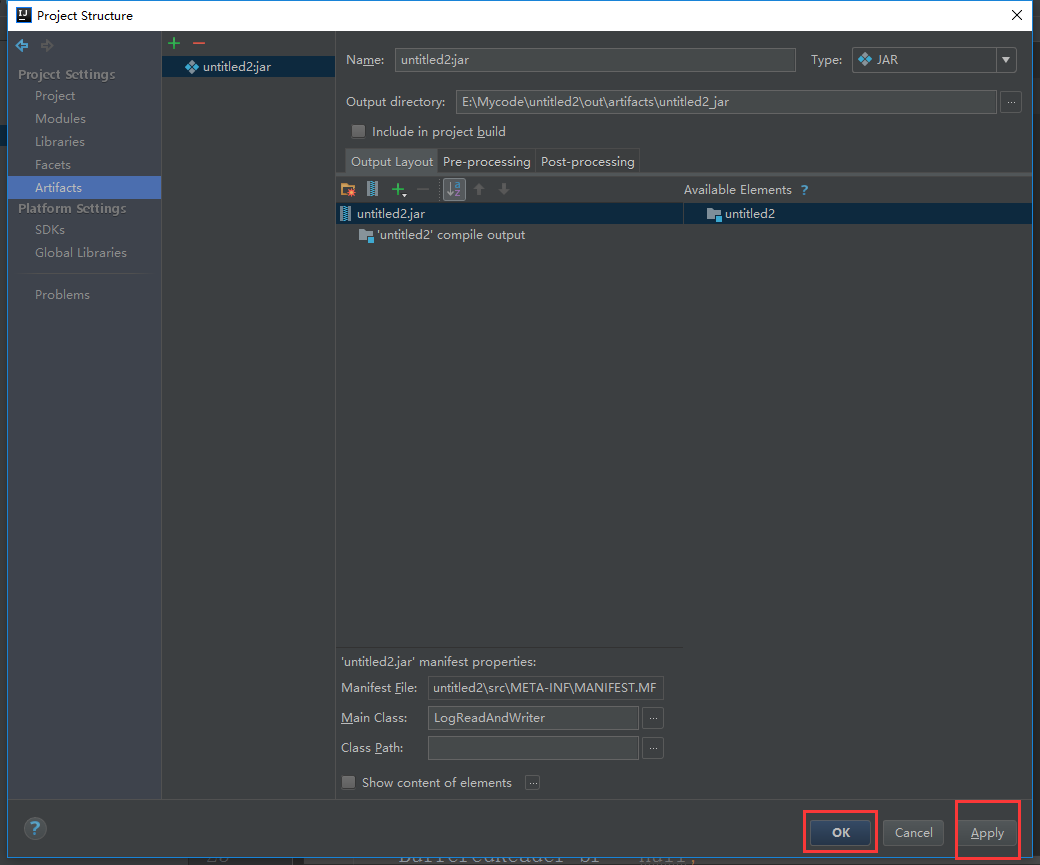

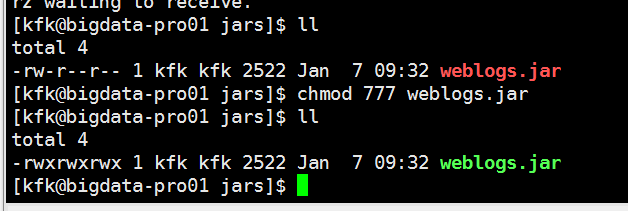
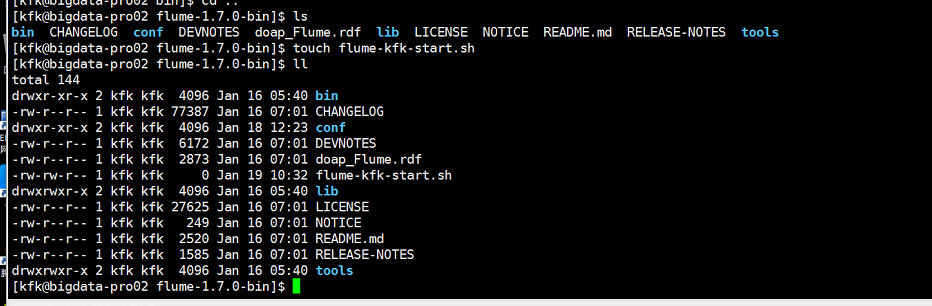
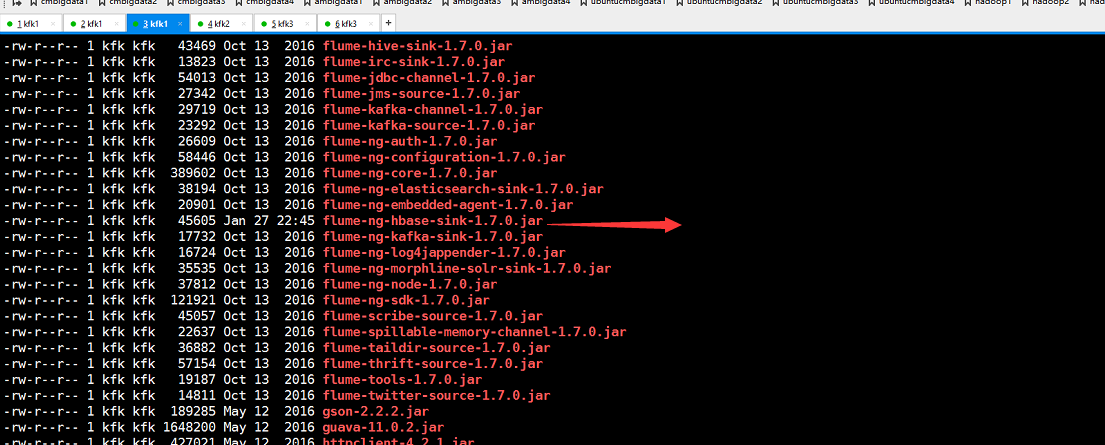
到这里就打包完成了,接下来把项目自带的打好的架包上传上来
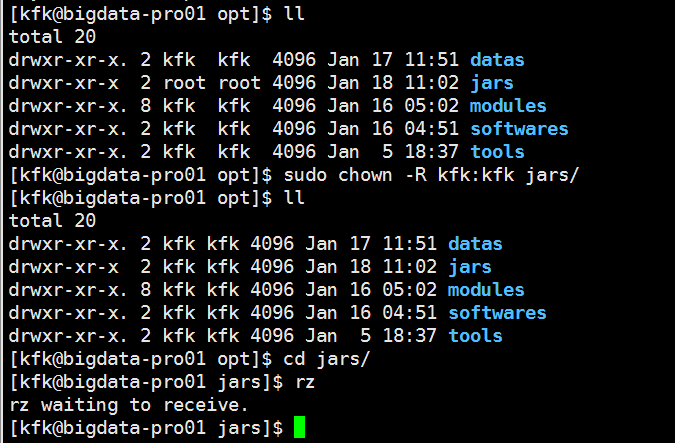
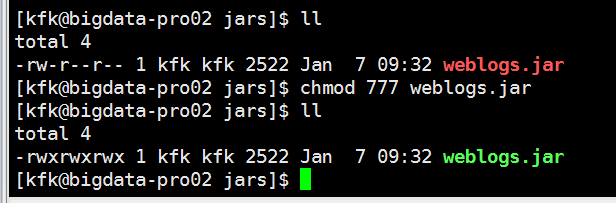
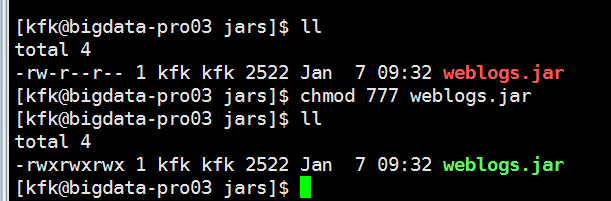
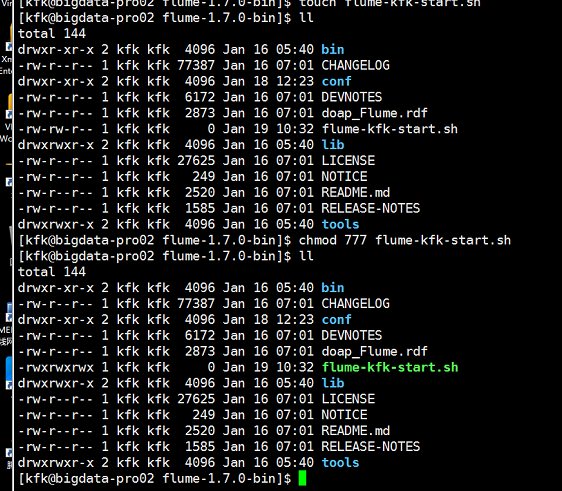
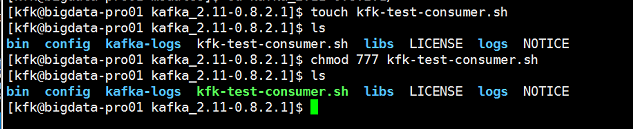
赋予权限
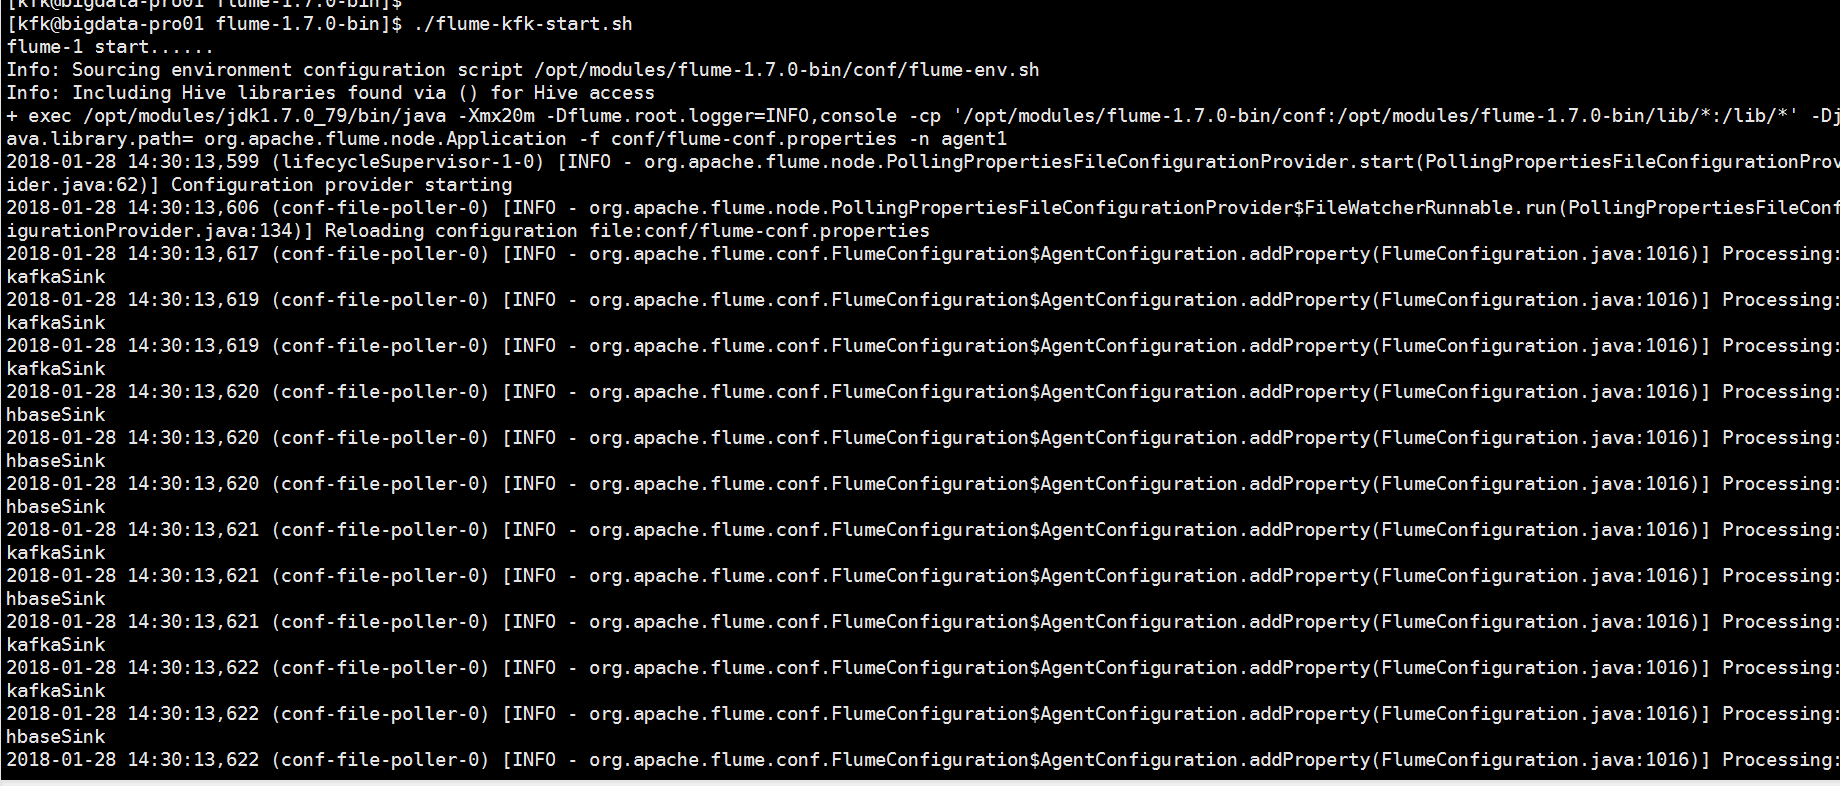
编写启动flume的脚本


把文件的权限修改一下
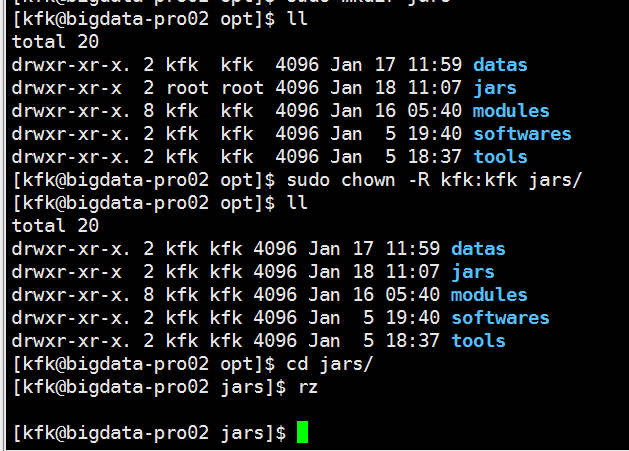
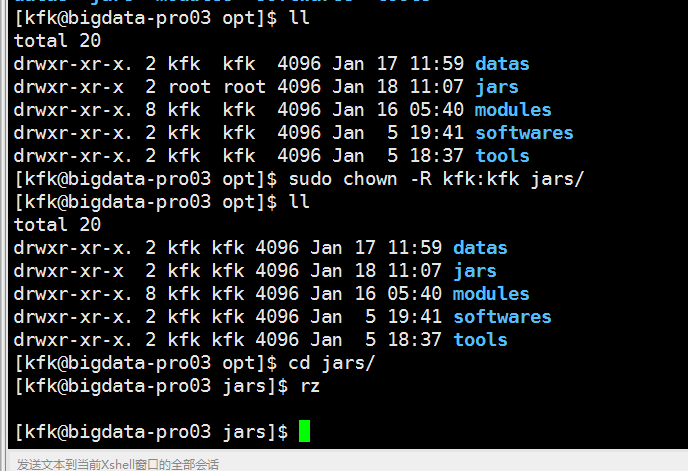
把脚本文件发到我们的第三台机器上去


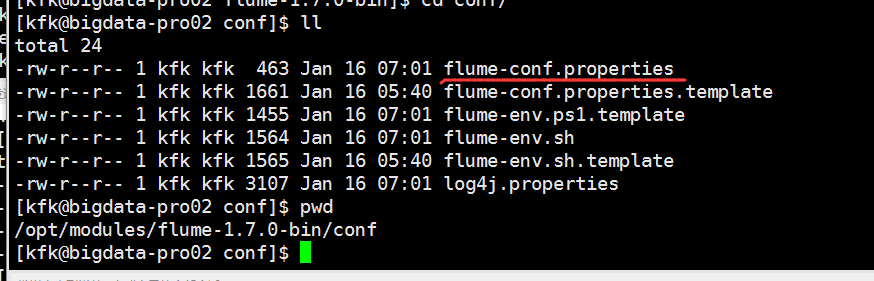
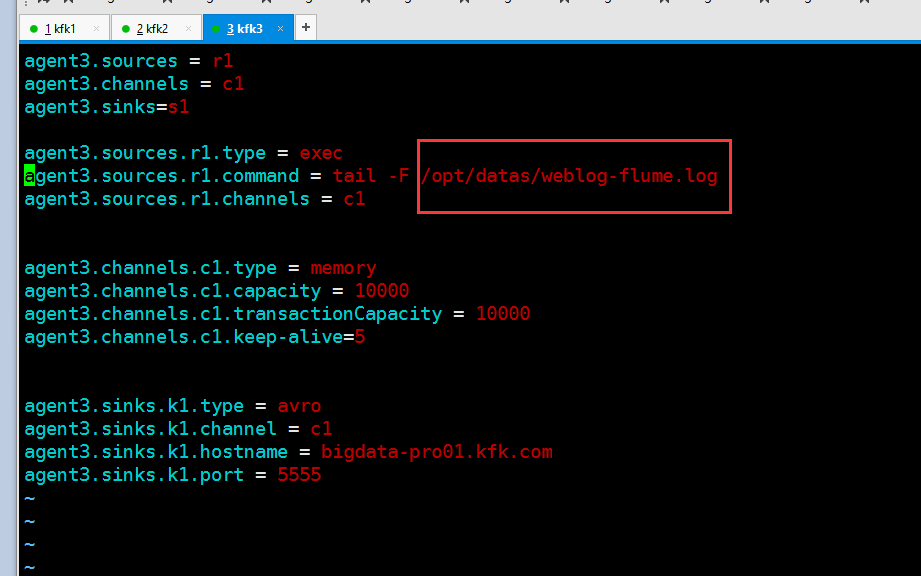
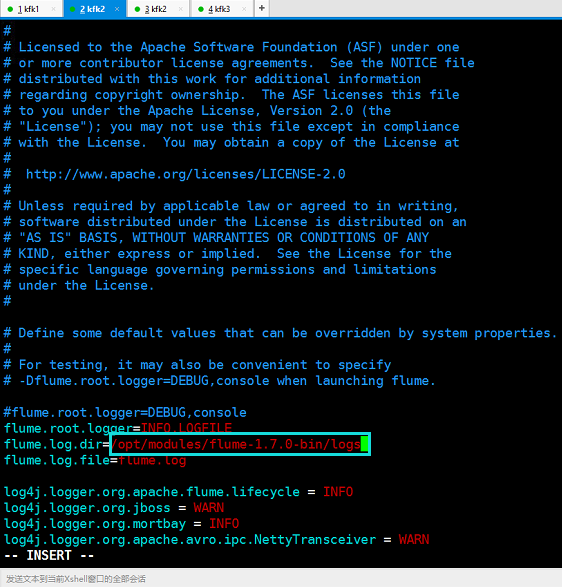
现在我们修改一下节点2的flume的配置文件
修改后的配置文件如下
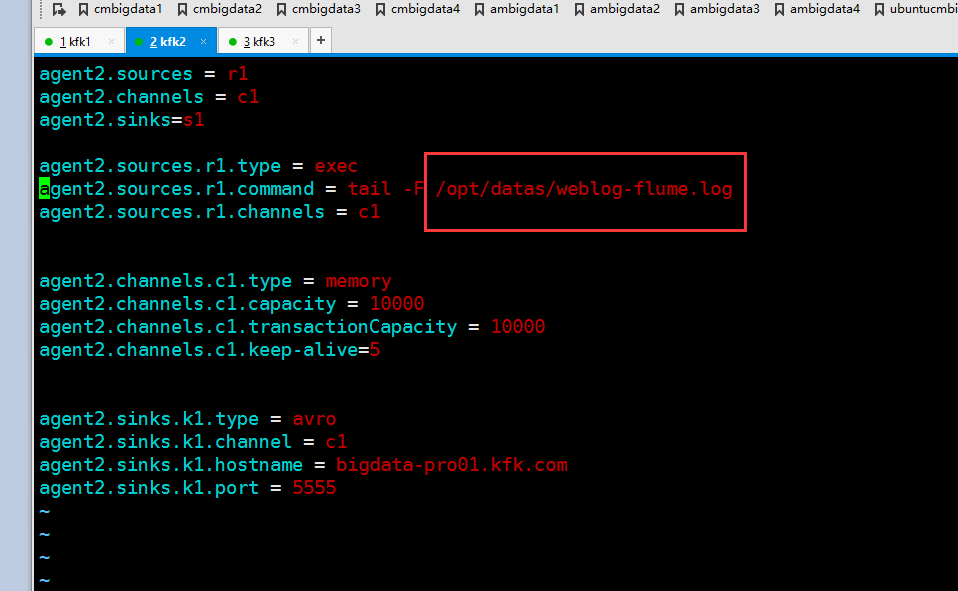
节点3的flume的配置文件一样也要修改了
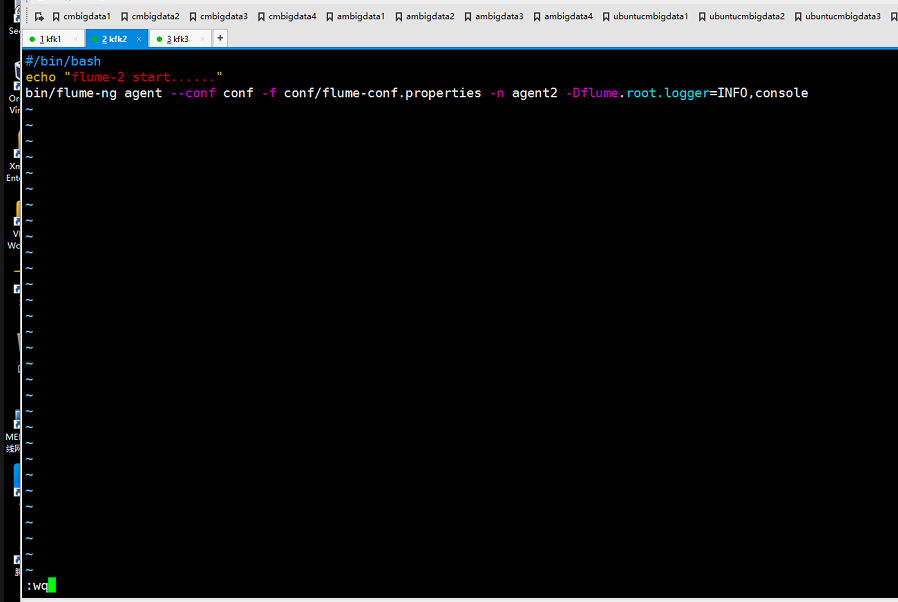
在节点2编写启动脚本
先创建脚本文件
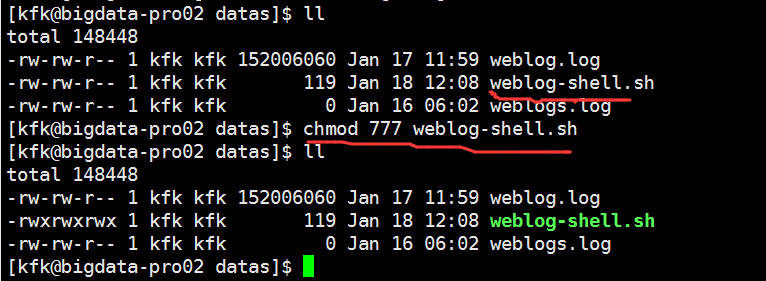
赋予权限
编辑脚本文件

在节点2创建logs目录

把路径改成刚刚创建logs的绝对路径

我们测试一下我们写的脚本是否能启动

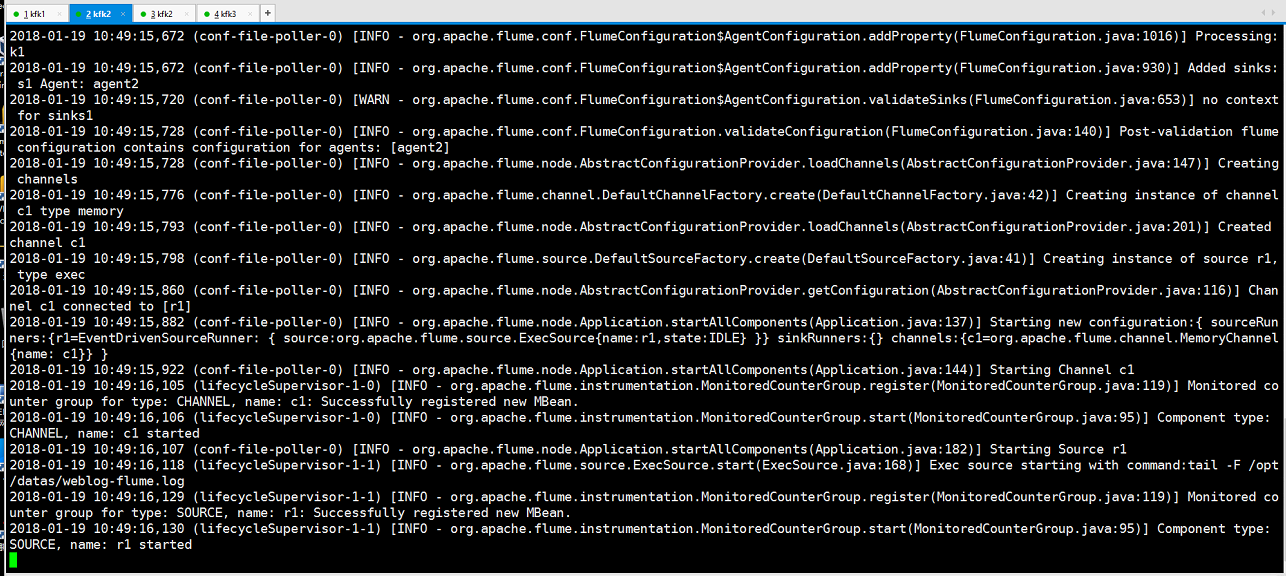
可以看到启动成功!
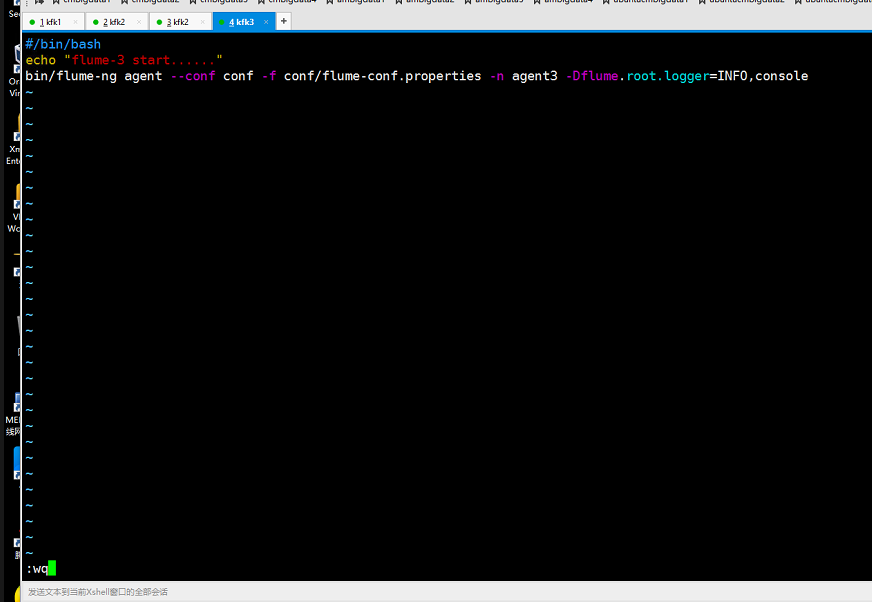
把这个启动脚本分发到节点3去


在节点3上对脚本文件稍微修改一下
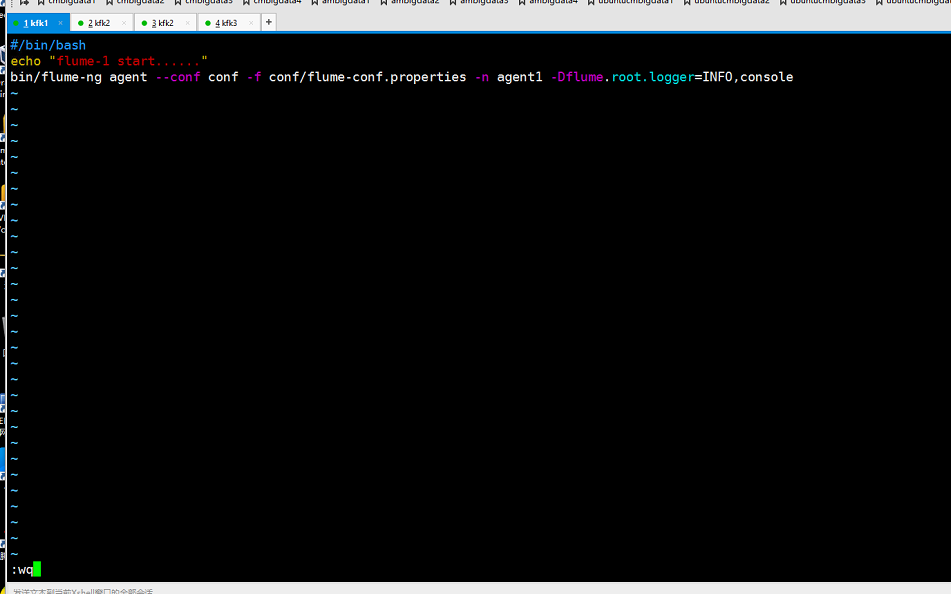
到现在为止的就是我们的节点2和节点3的启动脚本配置,我们的合并节点1的flume的脚本配置还没有配置呢,我们还是从节点2上分发到节点1上去再作修改


编写Kafka Consumer执行脚本

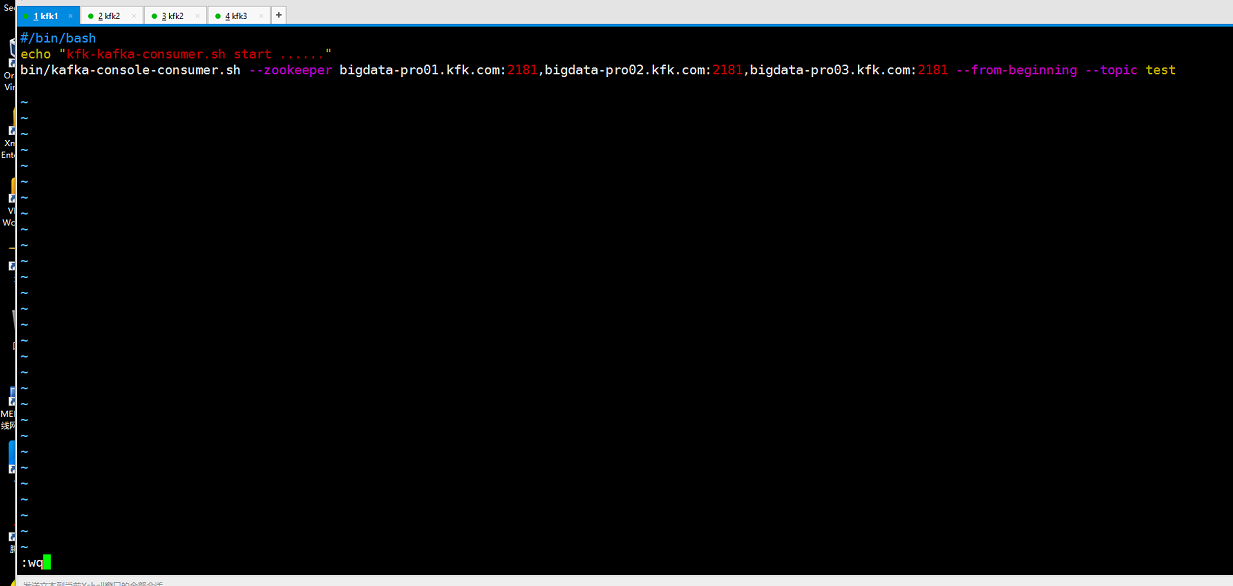
保存退出后把这个脚本文件分发到其他两个节点来


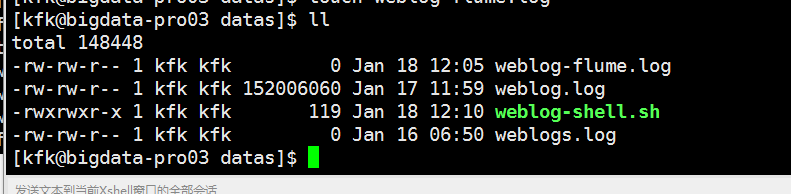
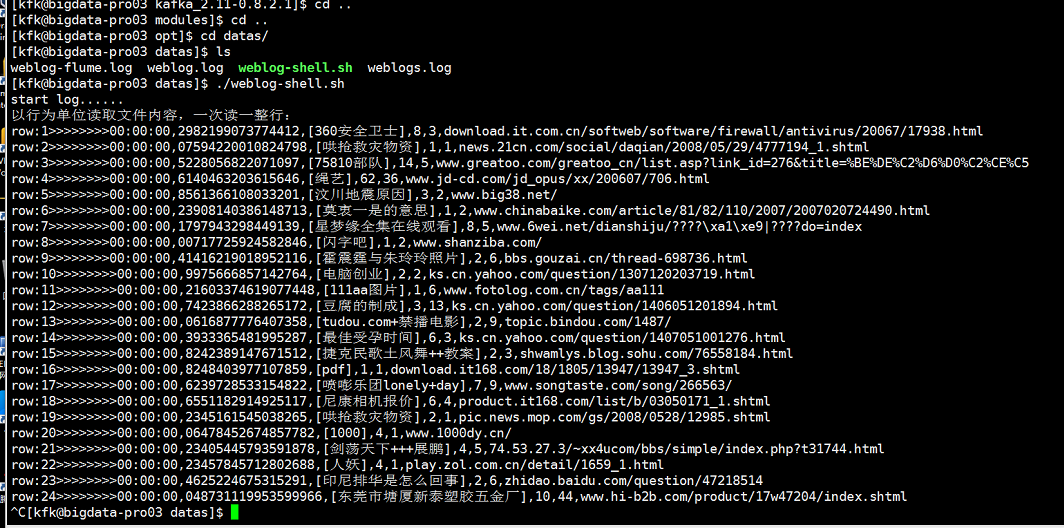
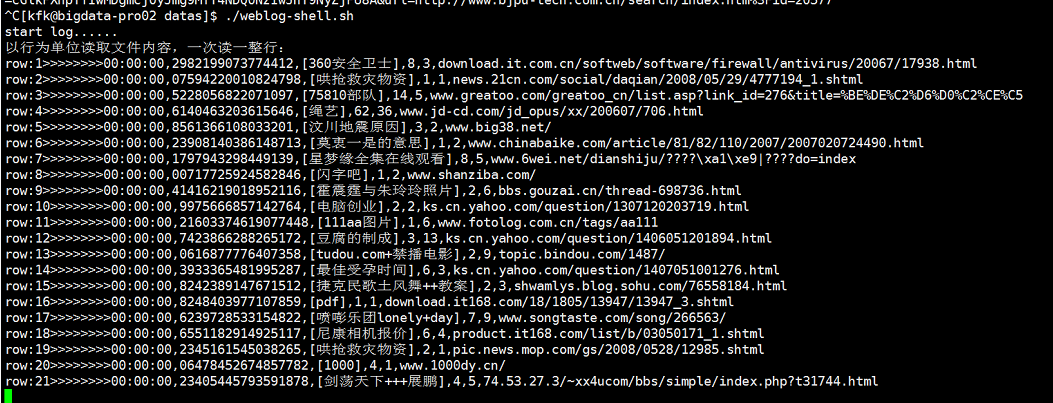
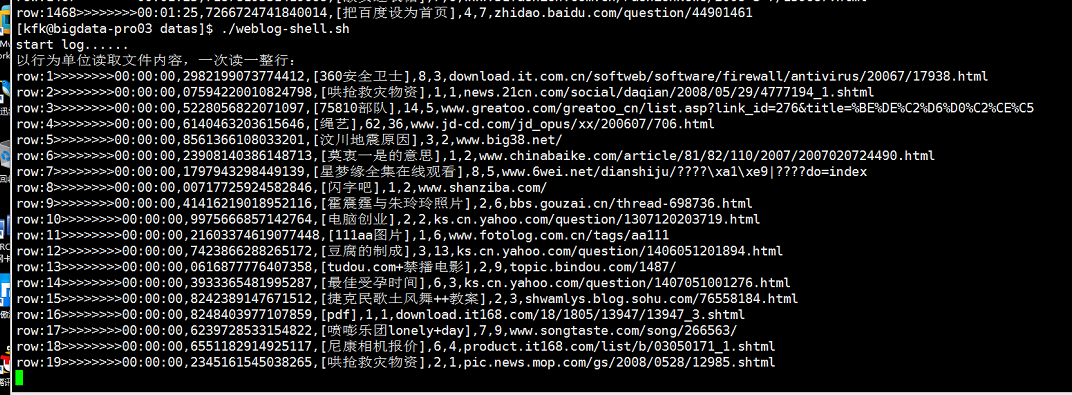
在我们所以的应用程序启动之前,首先我们先验证一下我们的模拟器是否正常的,能不能从一个文件把数据一条条的读取到另外一个文件里
直接运行weblog-shell.sh脚本
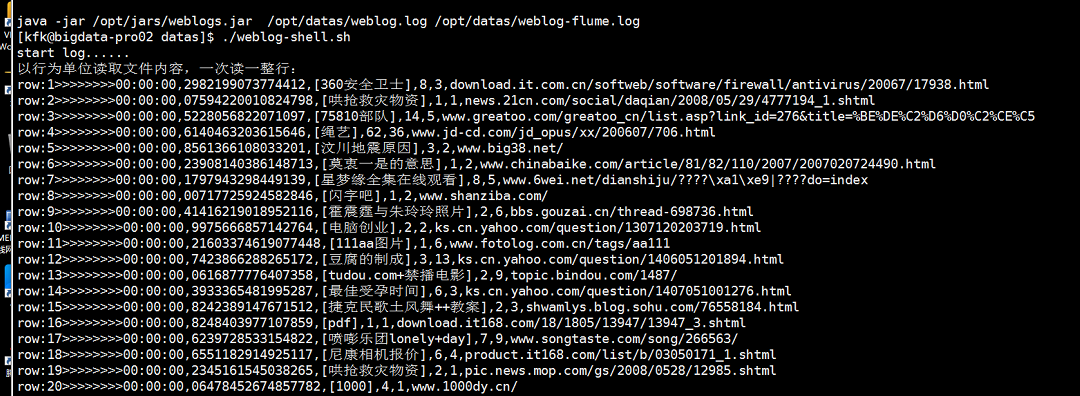
从运行结果看是没有问题的,(可能有些人在运行的时候会出现中文乱码,我今天是人品大爆发没有出现中文乱码)
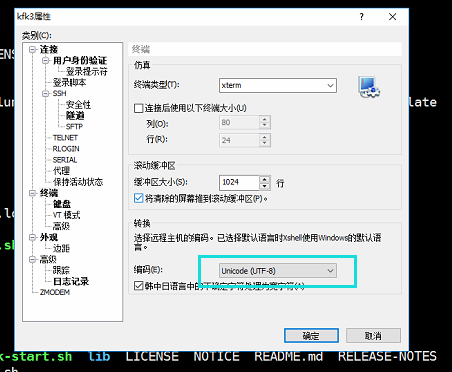
如果出现了中文乱码的话就这样设置一下
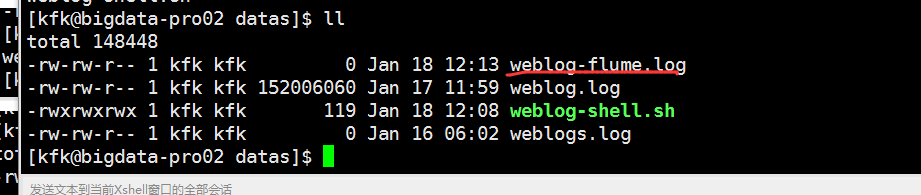
节点2正常运行了,现在我们验证一下节点3是否正常
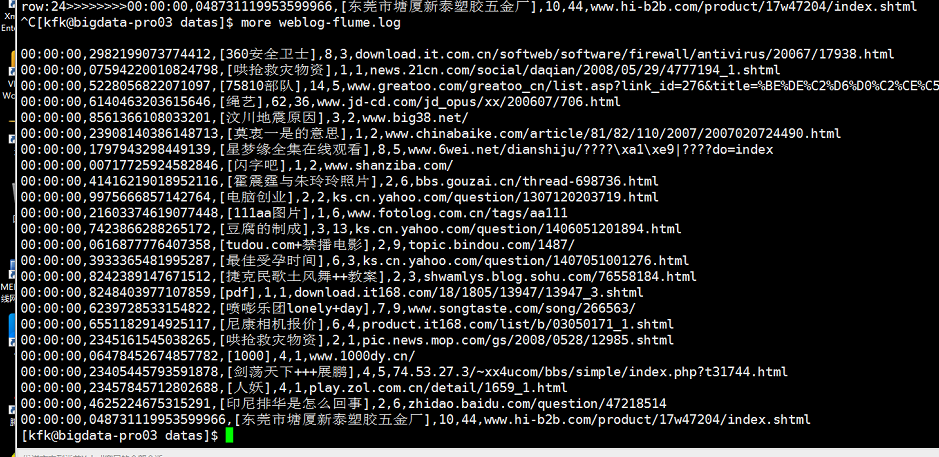
可以看到节点3也正常能读取。
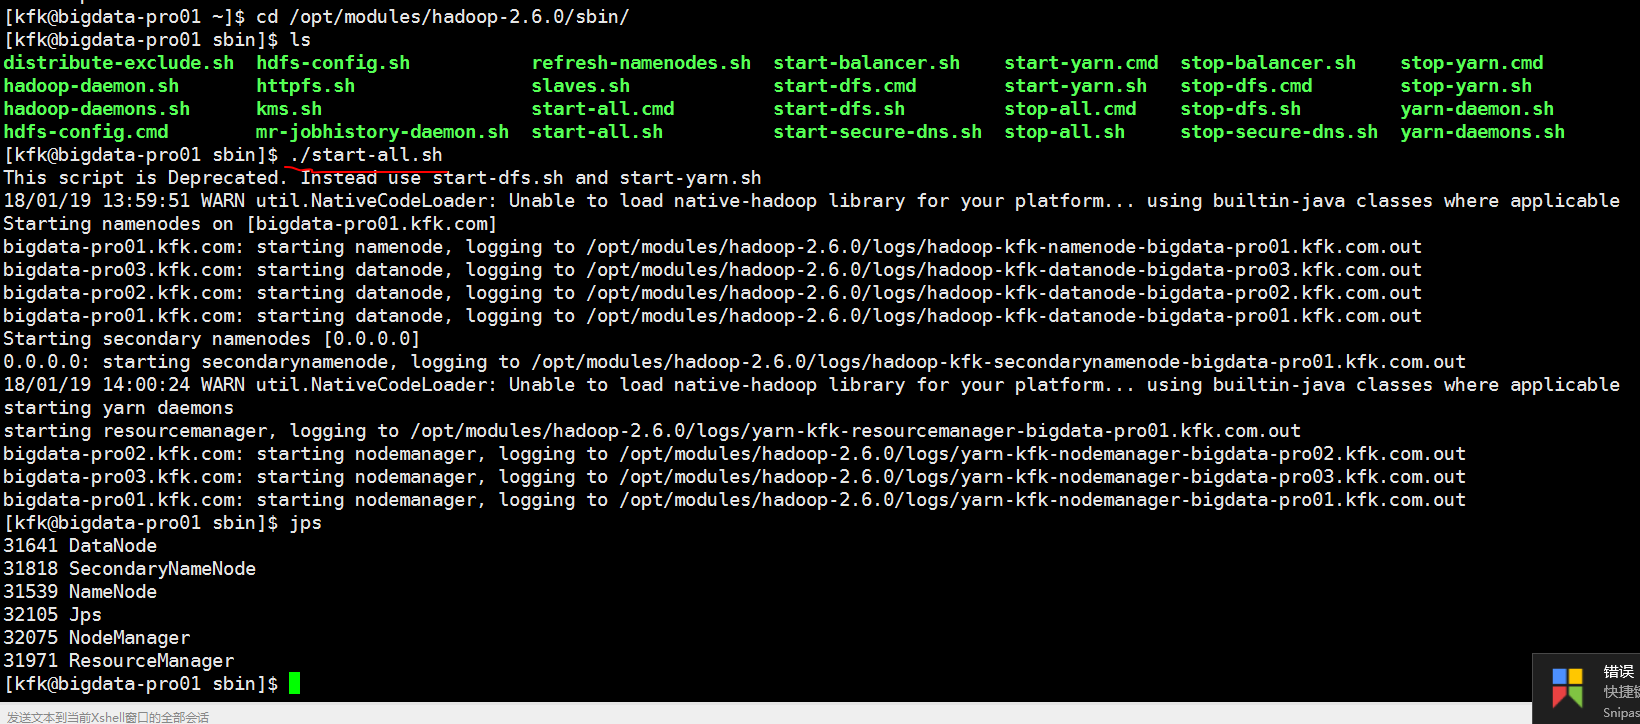
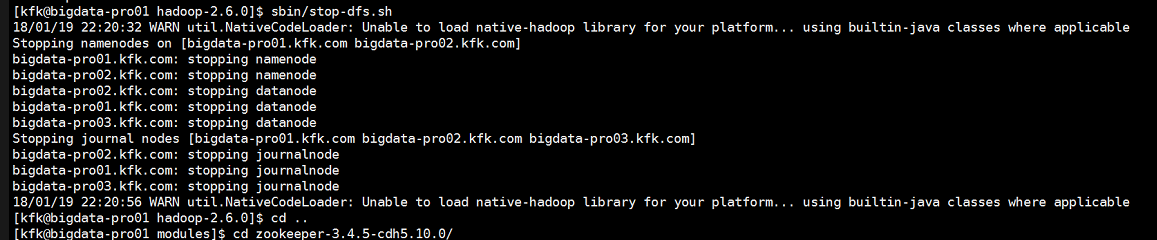
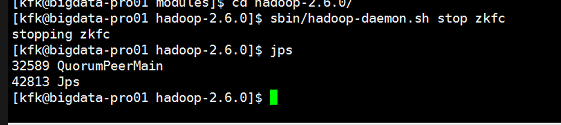
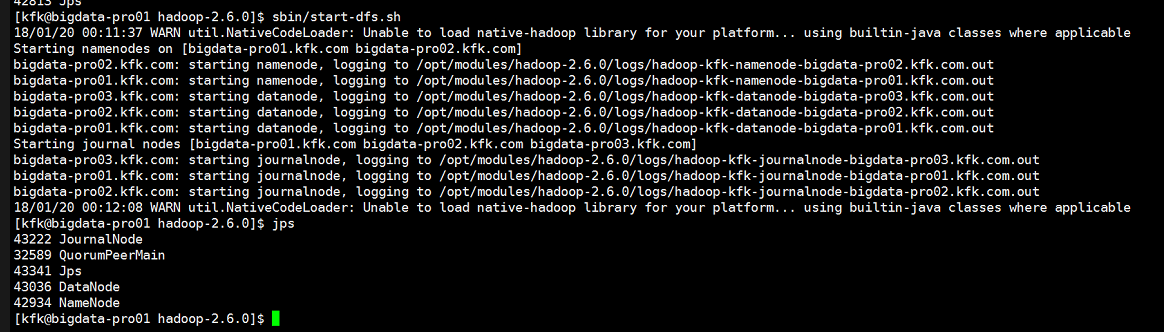
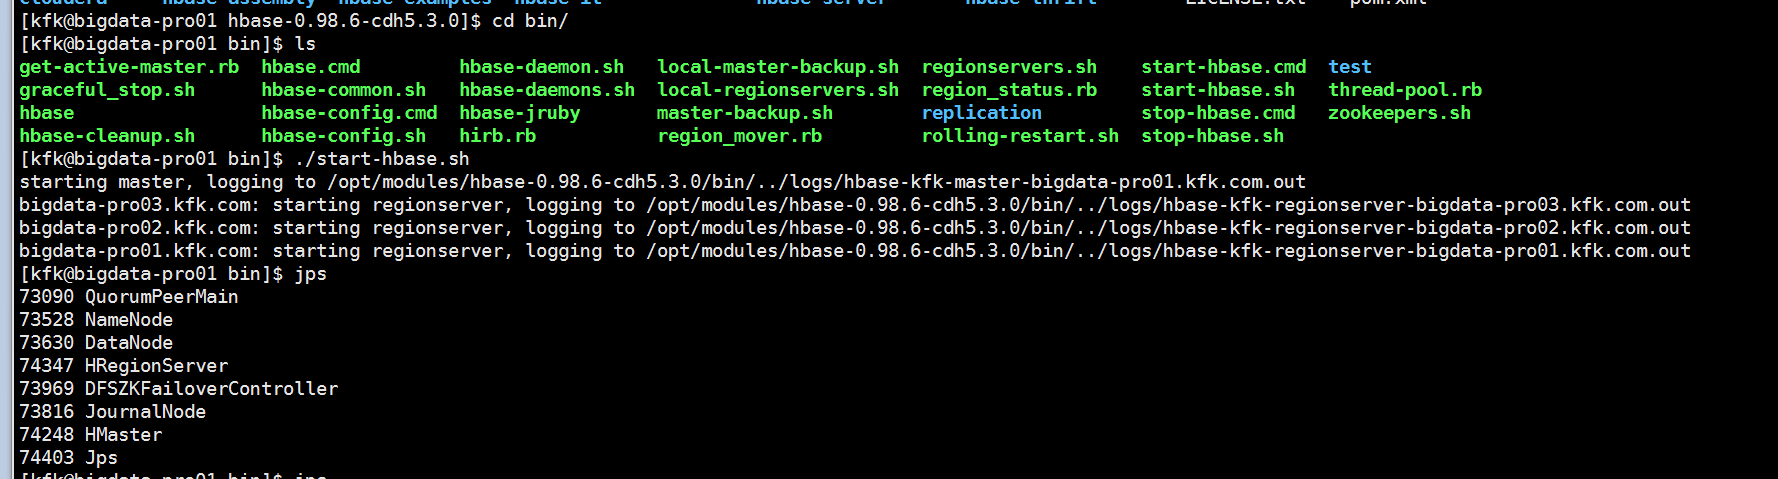
现在启动hdfs
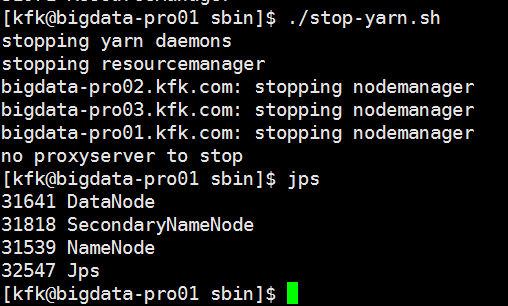
把yarn进程停止
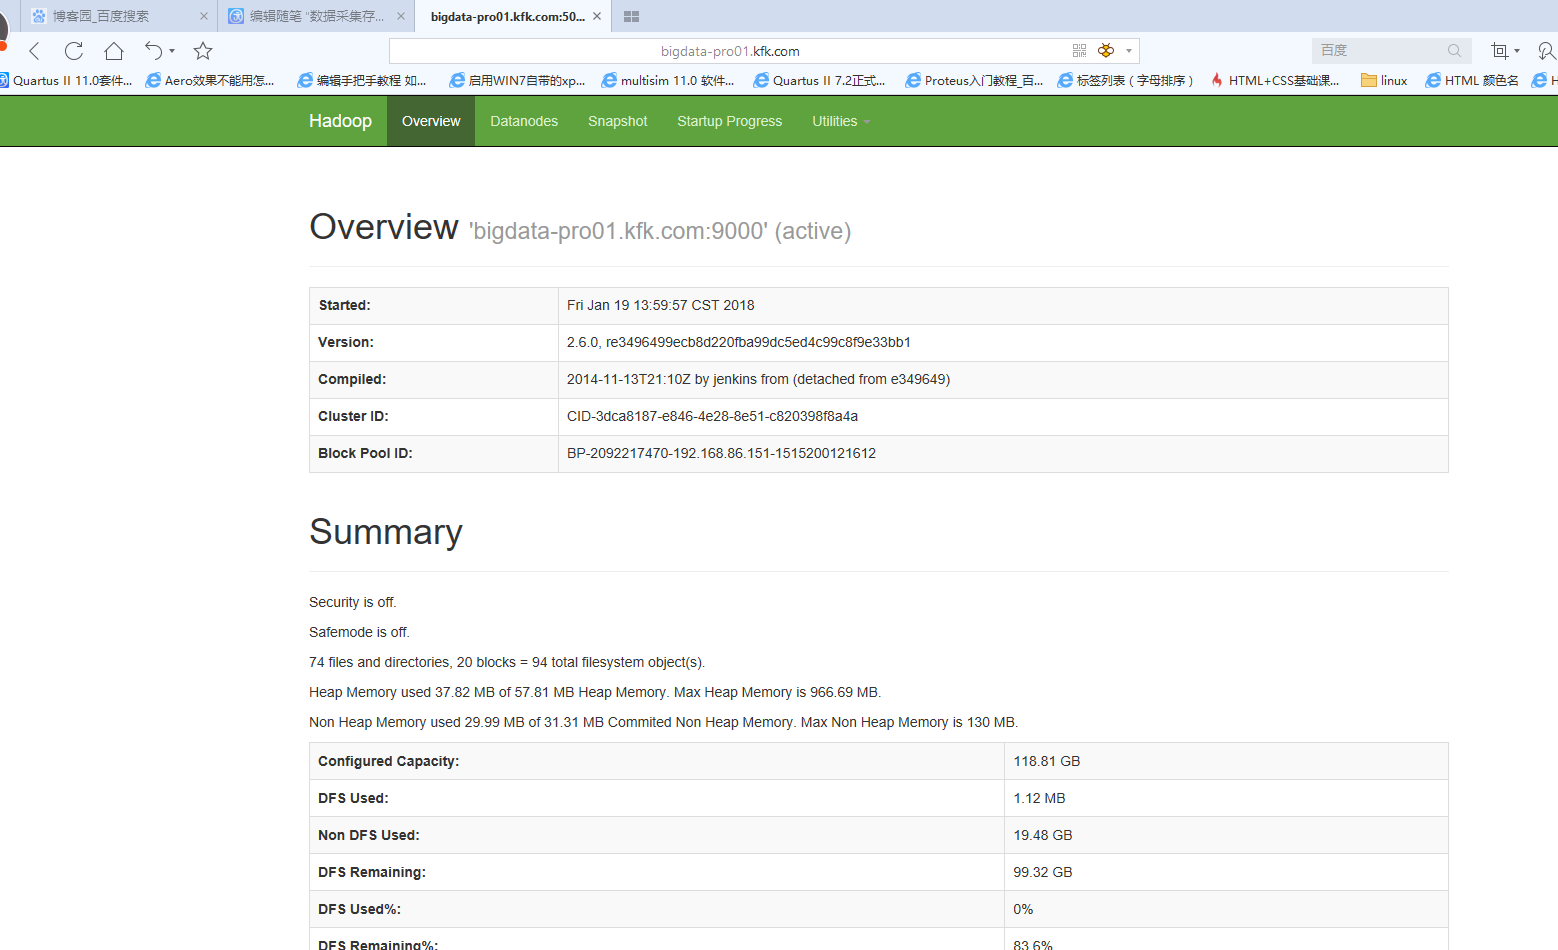
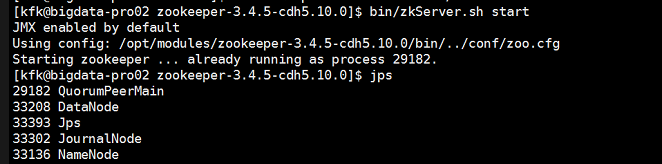
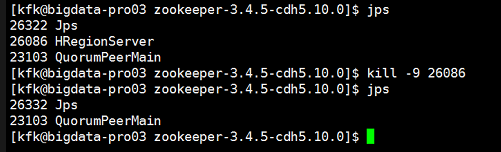
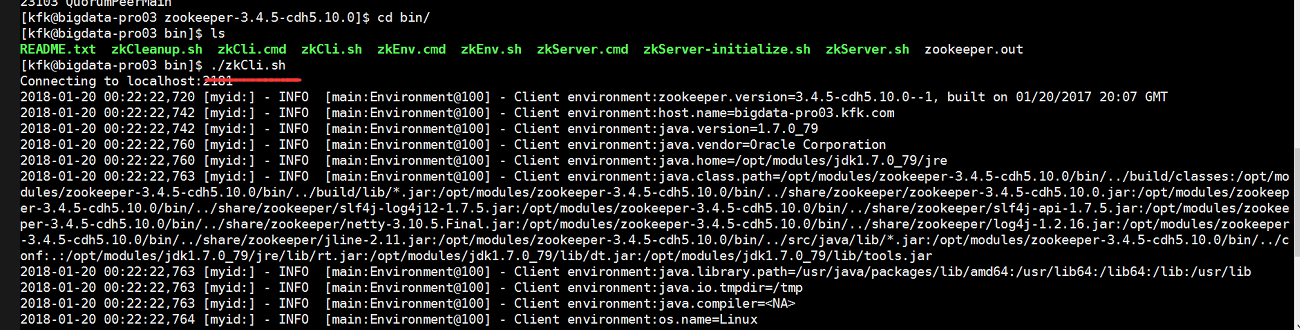
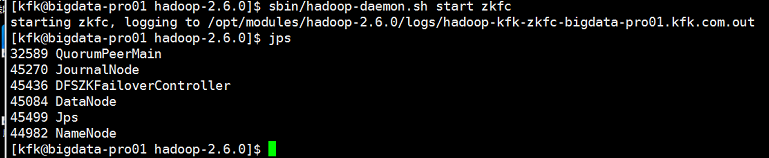
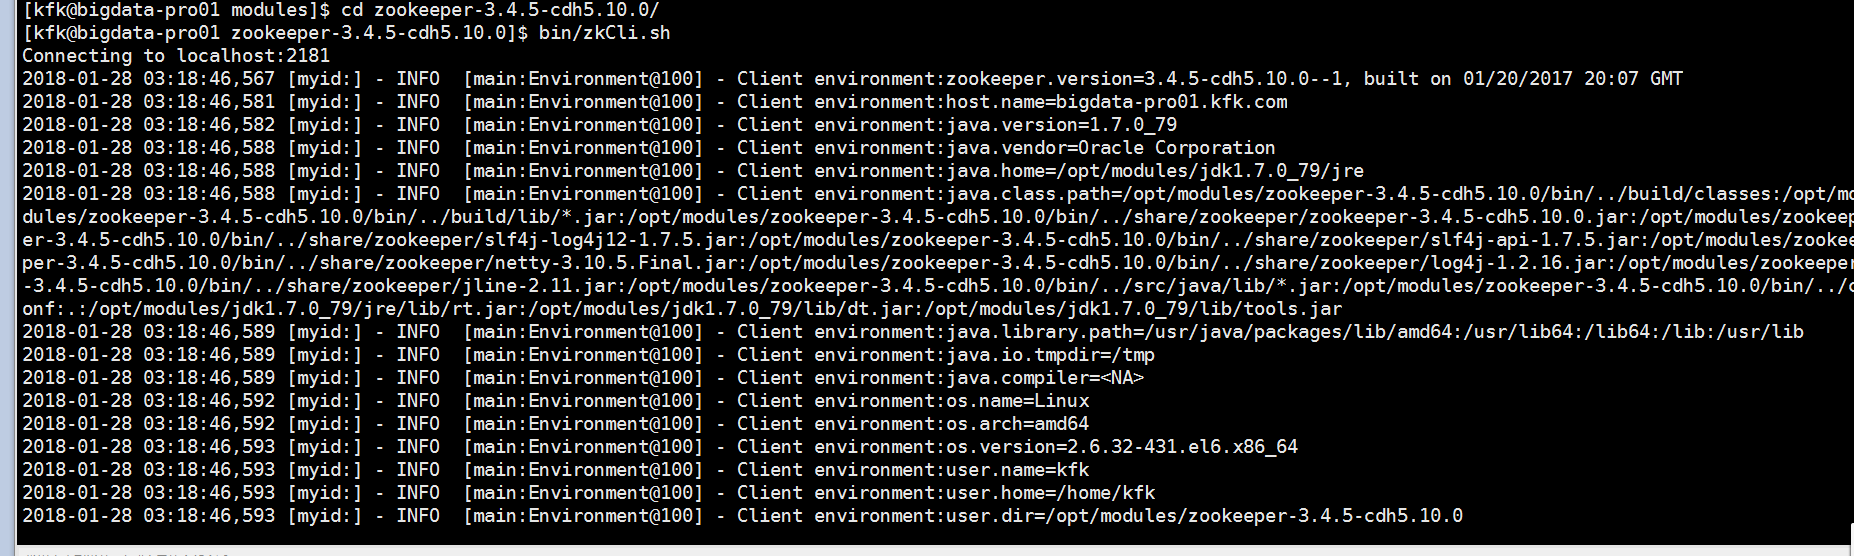
启动zookeeper
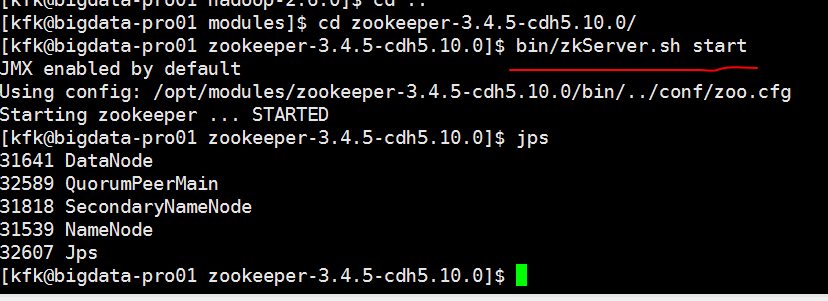
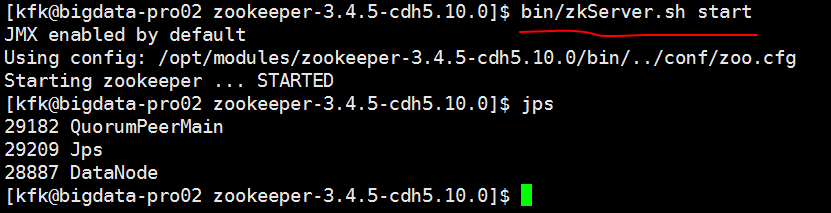
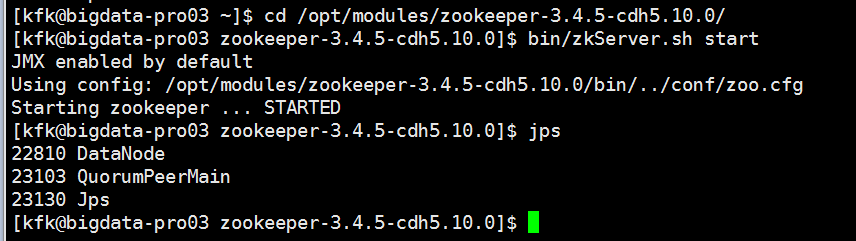
查看zookeeper的状态


启动HA

可以看到没有启动起来
是因为之前配置的HA的我们把他备份了但是没有使用上

现在我们把之前配置好的HA切换回来
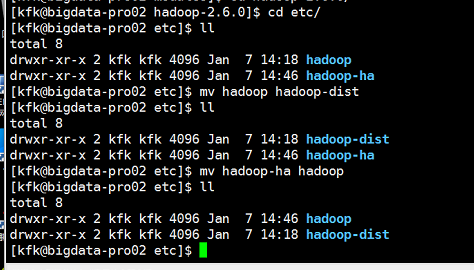
对与节点2也是一样的操作
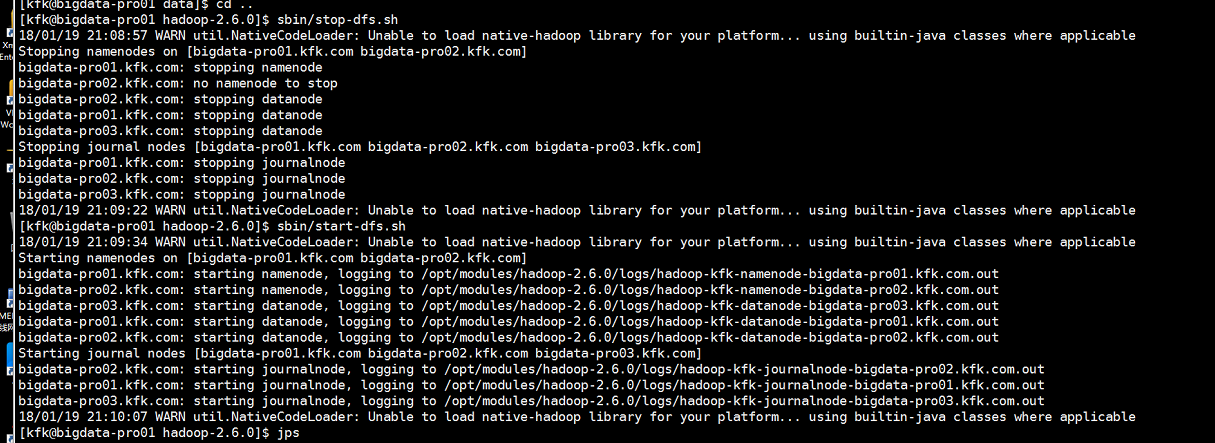
为了安全起见,先把hdfs进程停止
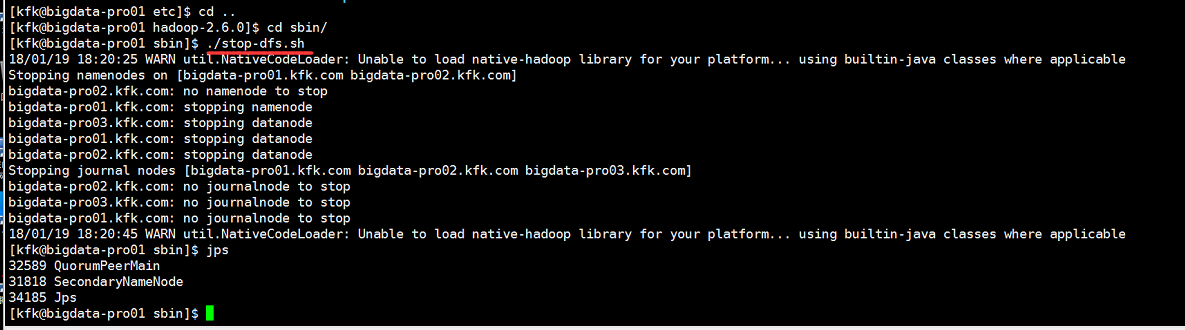
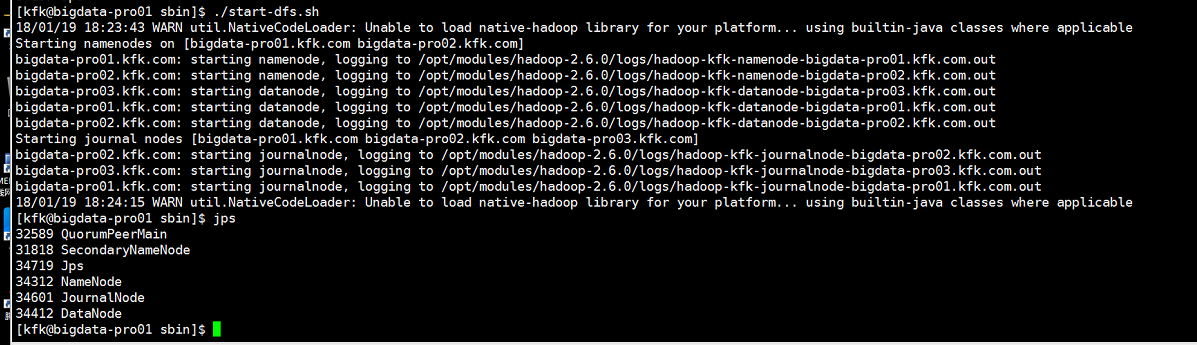
再启动一下
因为前面我们只是把节点1和节点2的hadoop配置文件替换了,节点3还没有替换过来,我们现在把节点3也替换过来
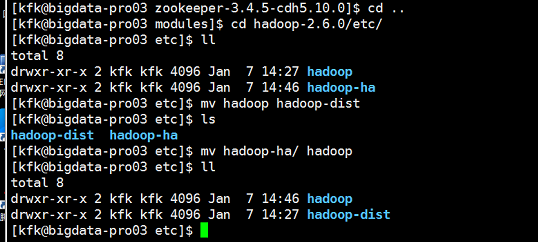
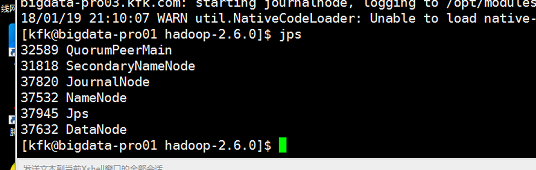
现在三个节点我们都改好了,老规矩把hdfs重启一下
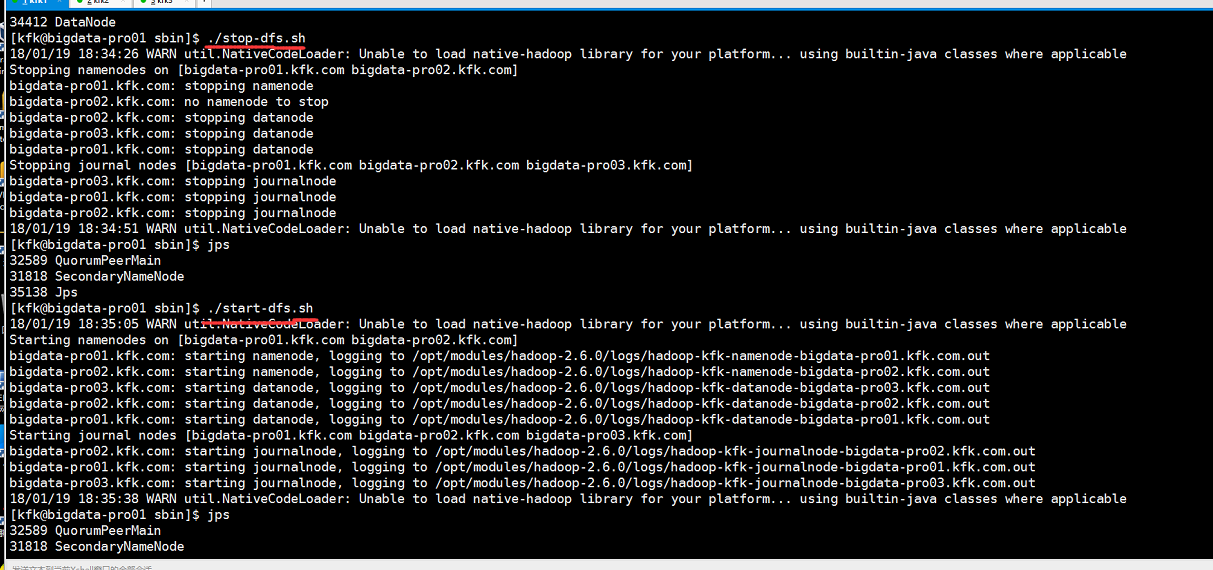
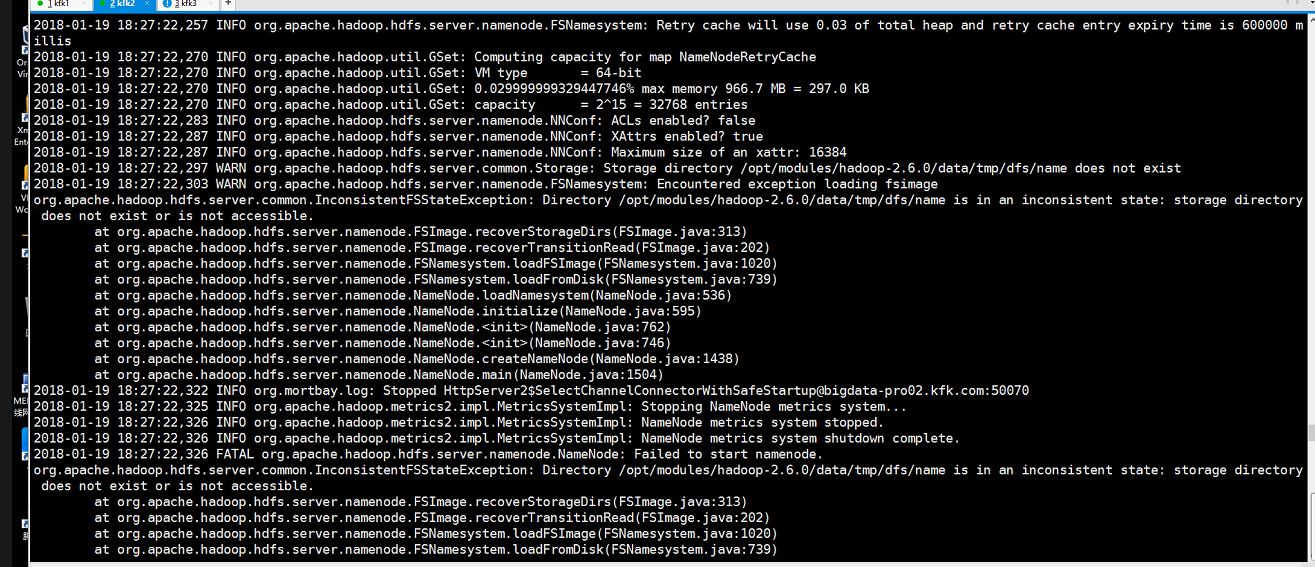
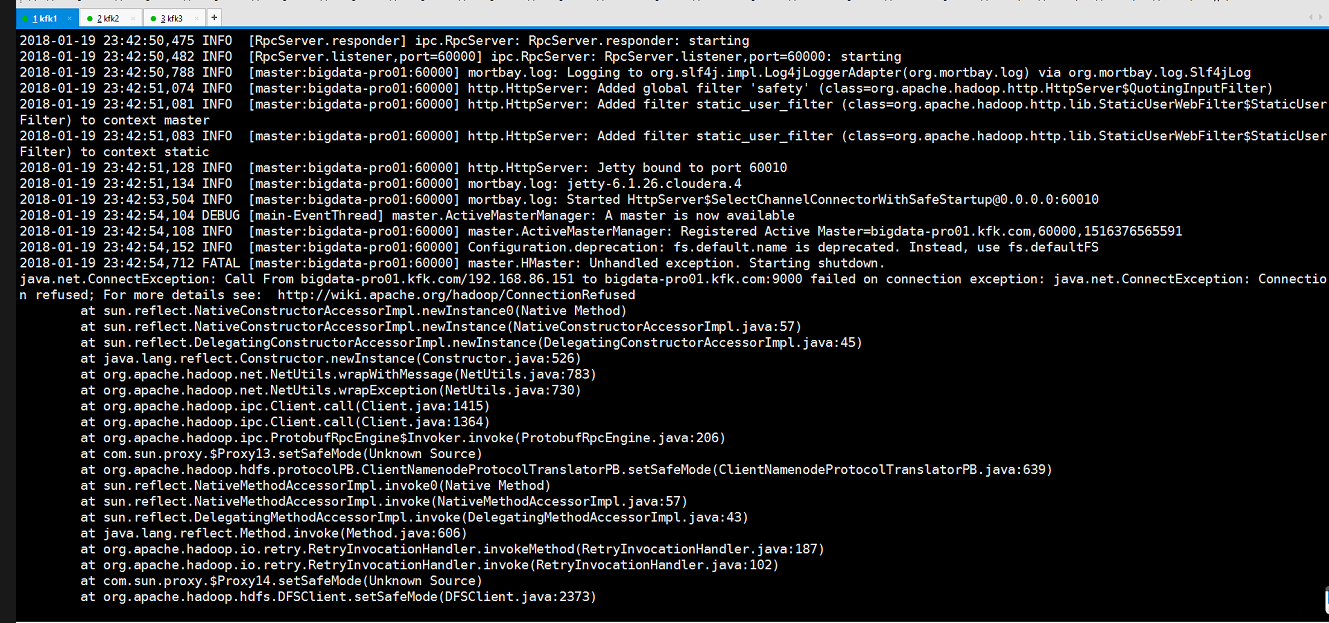
但是我们发现节点2的namenode并没有启动,查看日志,发现报了这个错误
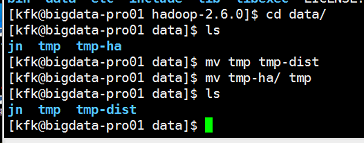
把HA的临时目录也改一下
重启一下hdfs
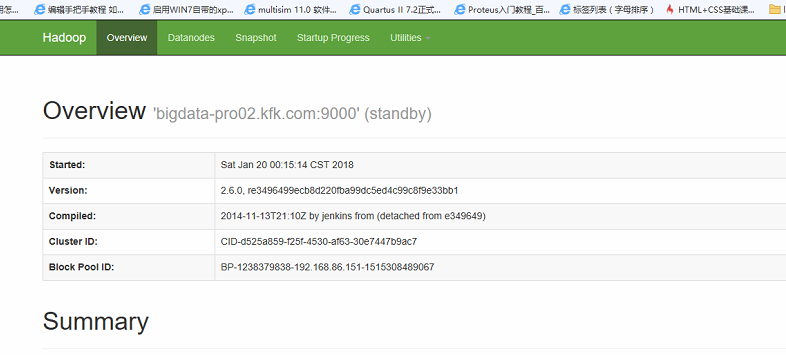
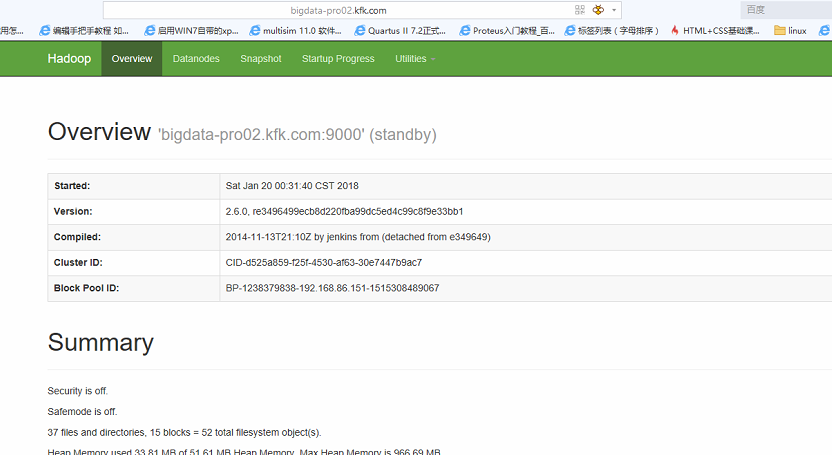
但是现在又出现问题了,节点1和节点2的namenode都是standby状态了!!!!
下面我们参考前面的过程:

说白了就是在nn2上同步nn1的元数据信息。
不多说,下面就把解决问题的方法说一下,先把所有进程关闭。这个我就不演示了
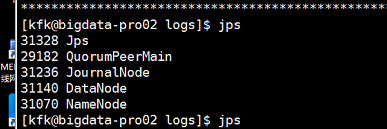
先在3个节点启动journalnode sbin/hadoop-daemon.sh start journalnode
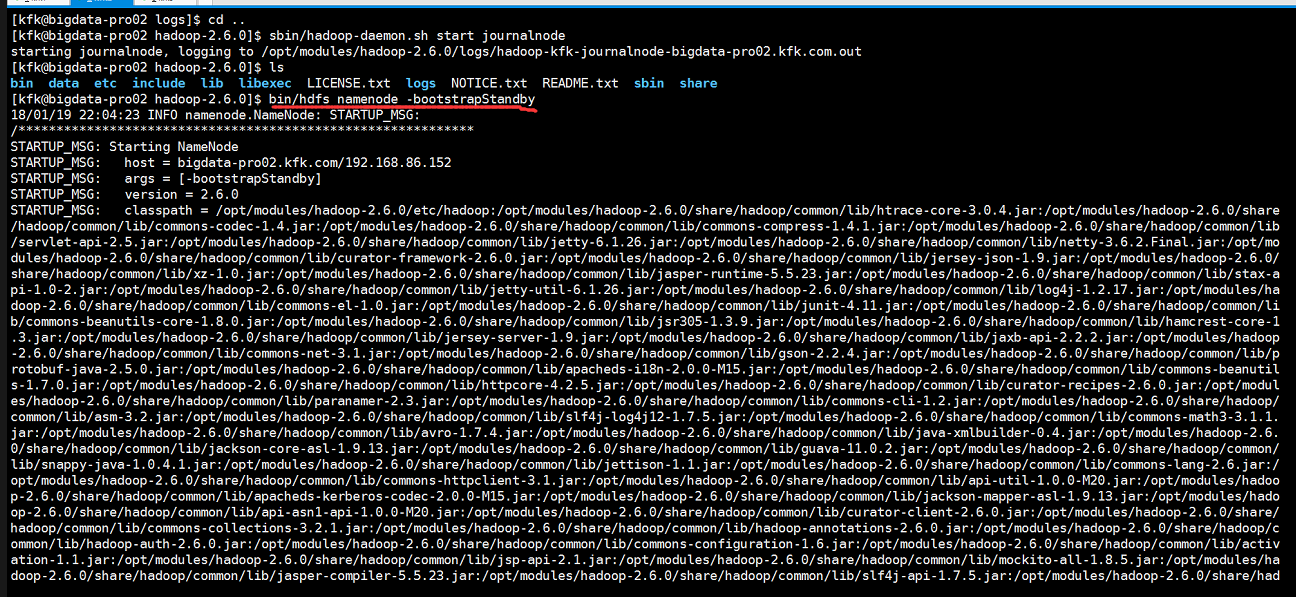
这个时候就不要再格式话namenode了,因为前面有数据,格式化的话就GG了,直接启动节点1的namenode

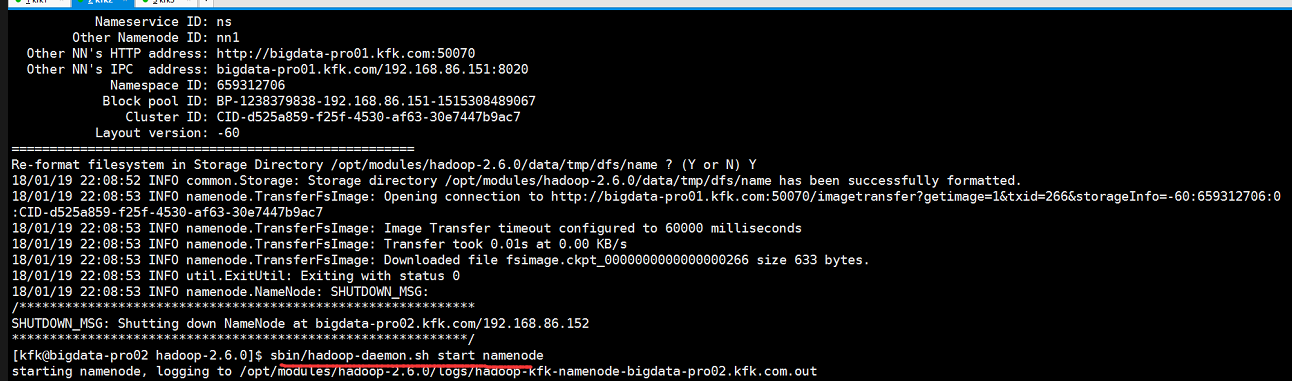
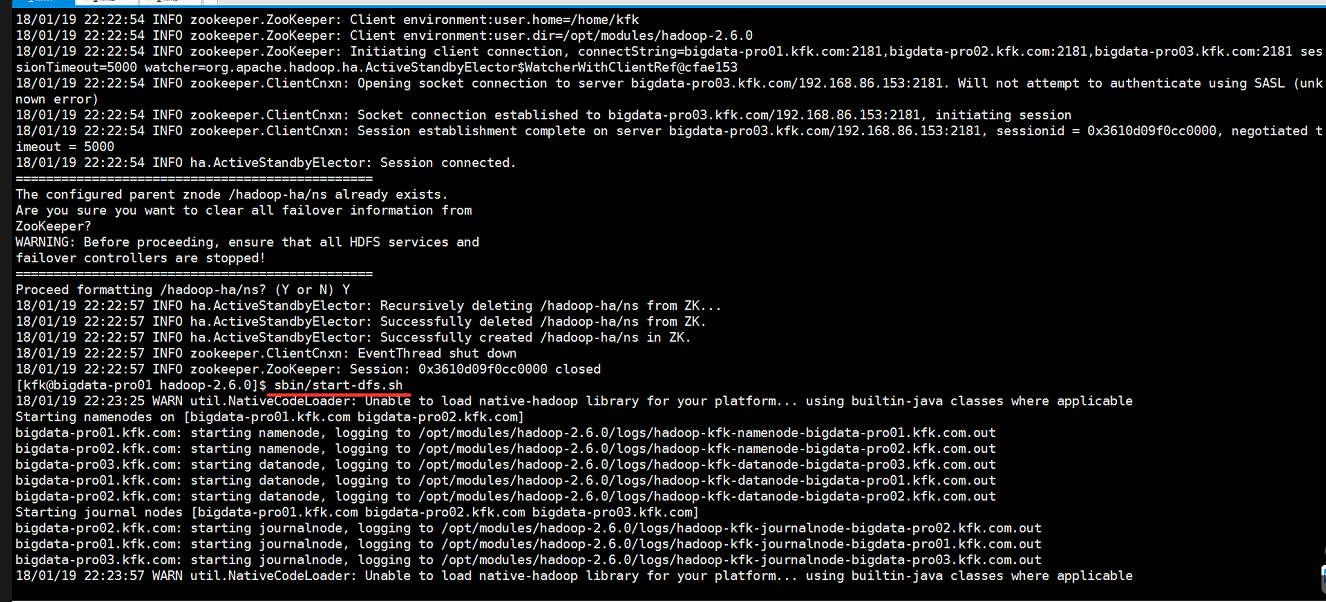
接下来就关键的一步了,在nn2上同步nn1的元数据信息
同步完成后就启动节点2的namenode
下一步是讲nn1设置为active状态
![]()
启动三个节点的datanode


关闭所有hdfs
启动所有zookeeper


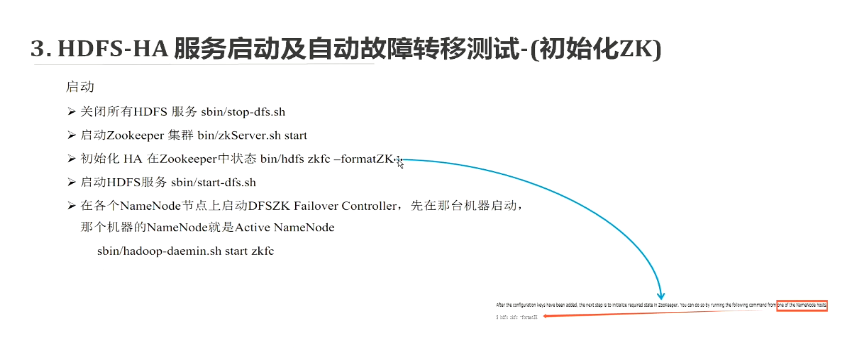
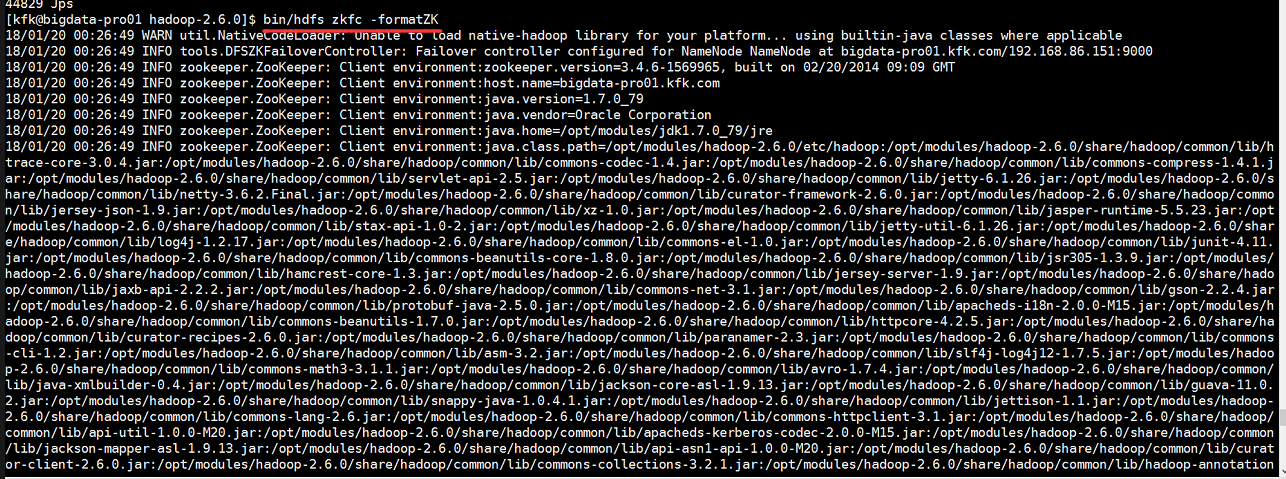
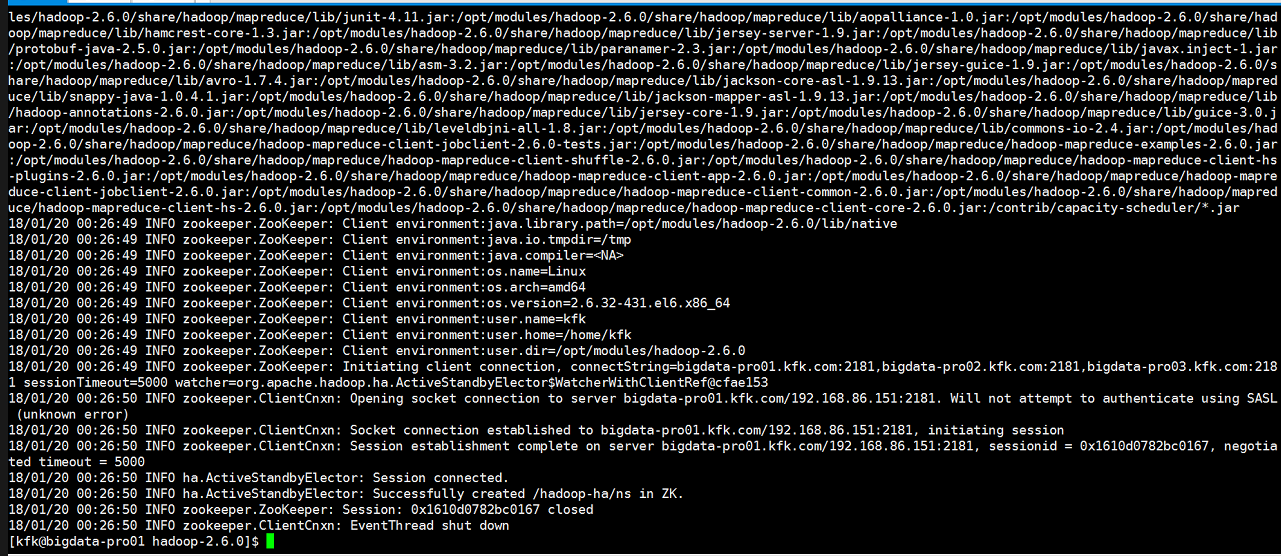
初始化HA在zookeeper状态中的

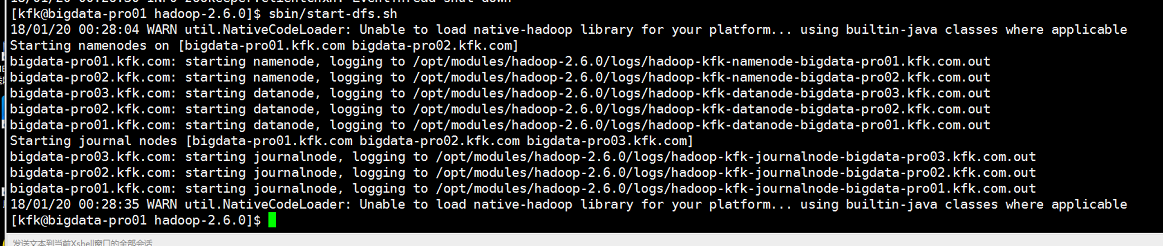
启动hdfs

在所以namenode节点上启动zkfc(我这里是节点1节点2)

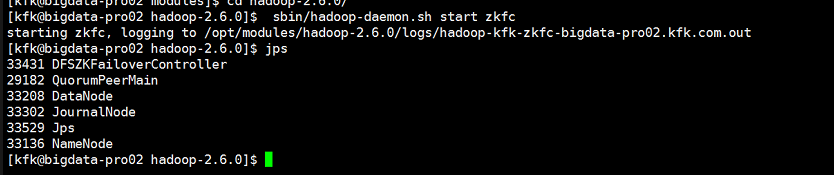
成功!
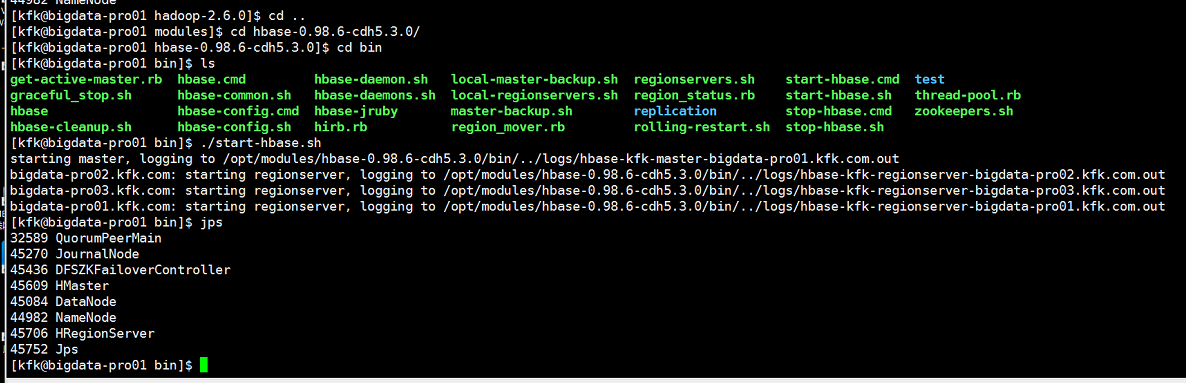
接下来我们启动的是Hbase
可以看到Hmaster没有启动
我们查看日志
修改hadoop的配置文件hdfs-site.xml,把这里改成9000
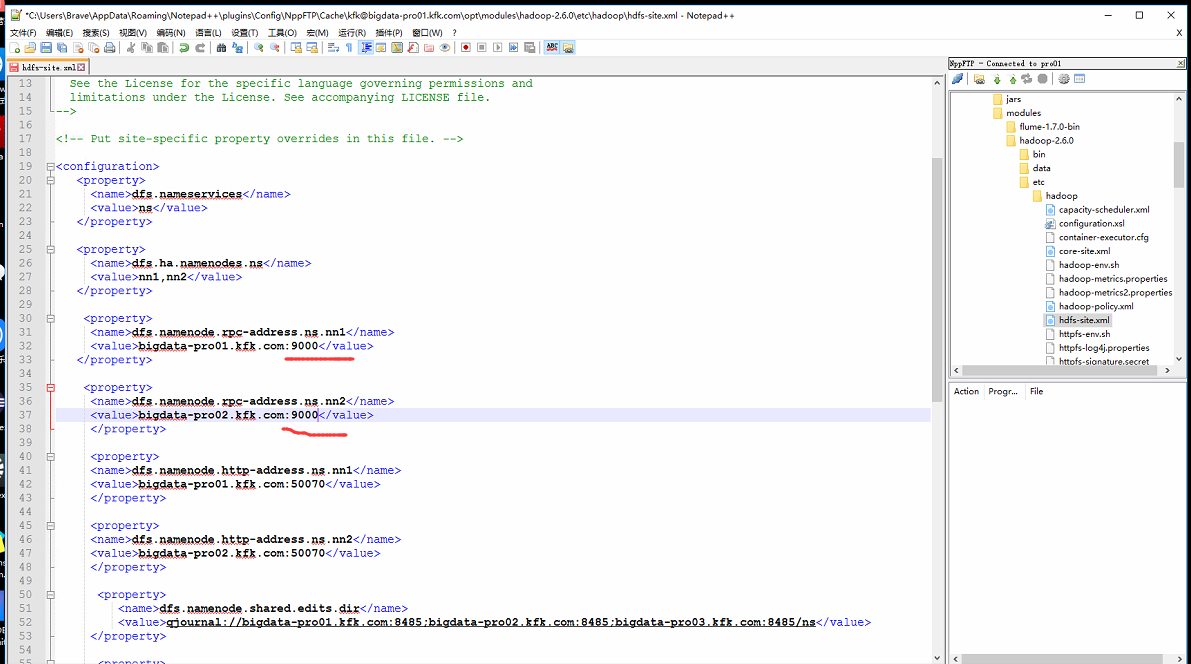
其他两节点也一样的,我这里就不多演示了。
因为修改了配置文件,我们还是要重启一下进程


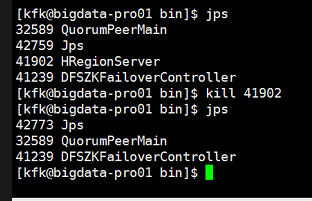
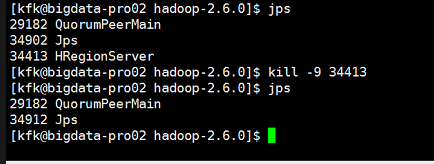
关闭完之后我们现在重启一下


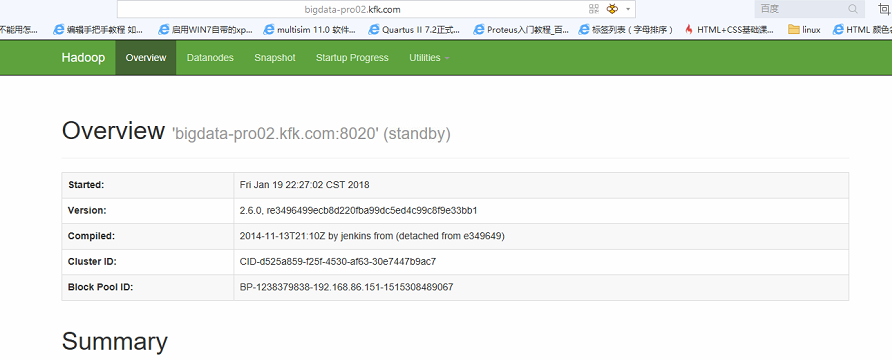
现在问题又来了,又出现了两个namenode是standby状态!!!

现在我们这样子


停掉之后我们就初始化一下

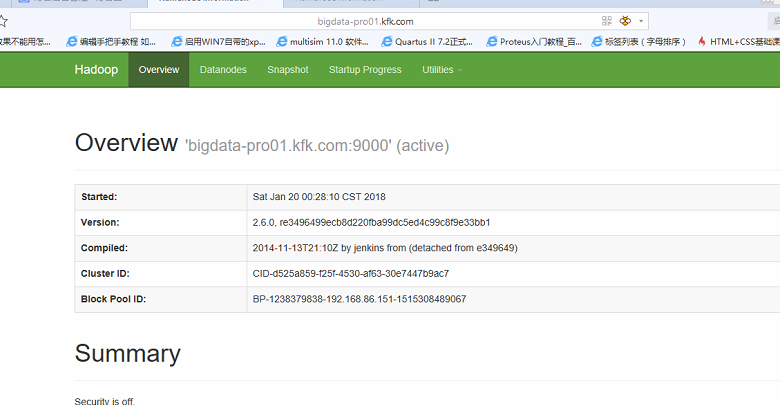
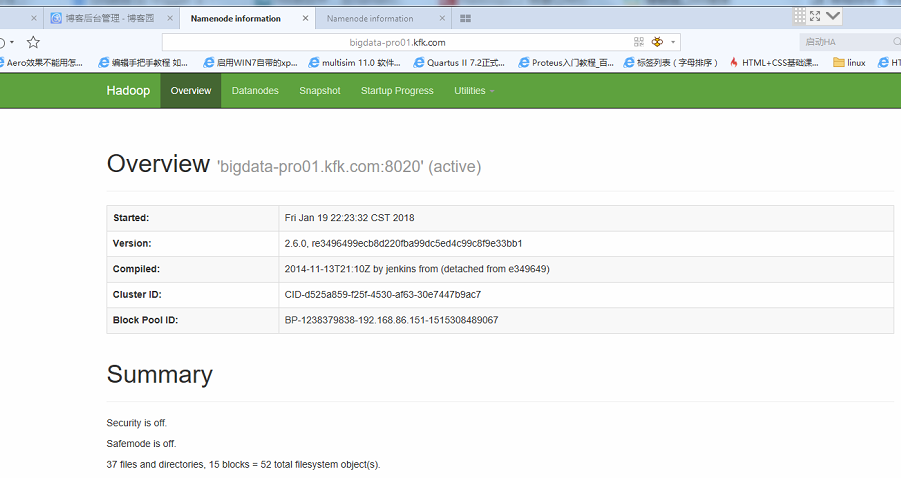
我们可以看到节点1的namenode是active状态了
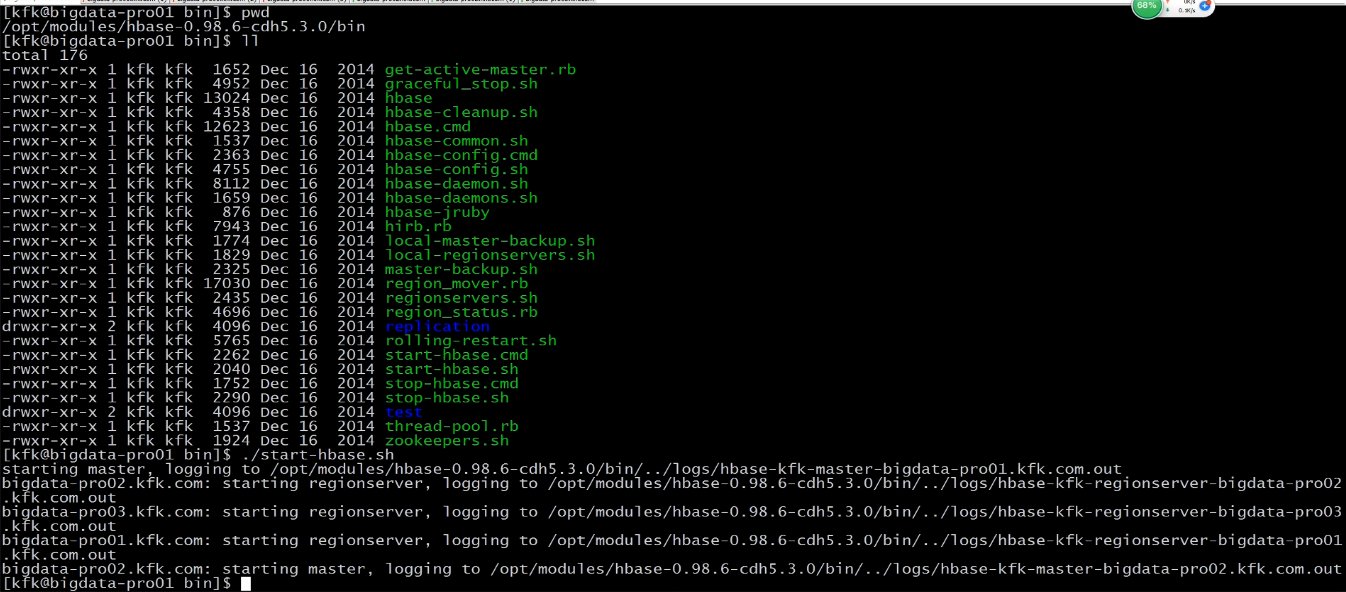
启动hbase
但是不久后HMaster会自动关闭,hbase启动失败啊!!!
查看日志
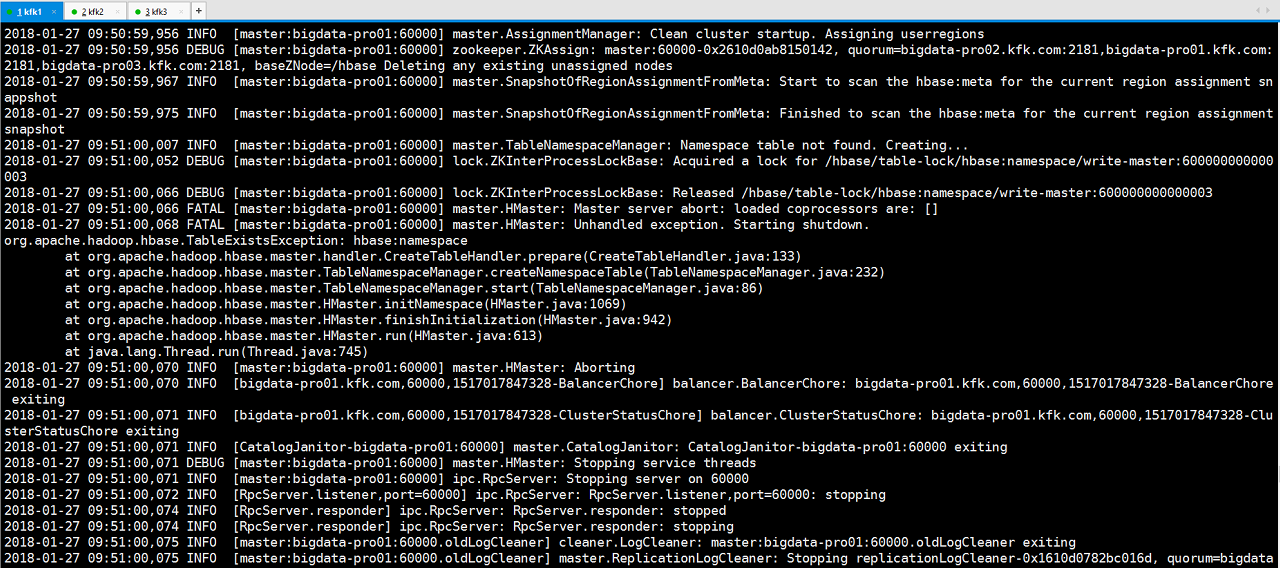
我们这样解决,我们进入zookeeper里面,删除hbase的数据
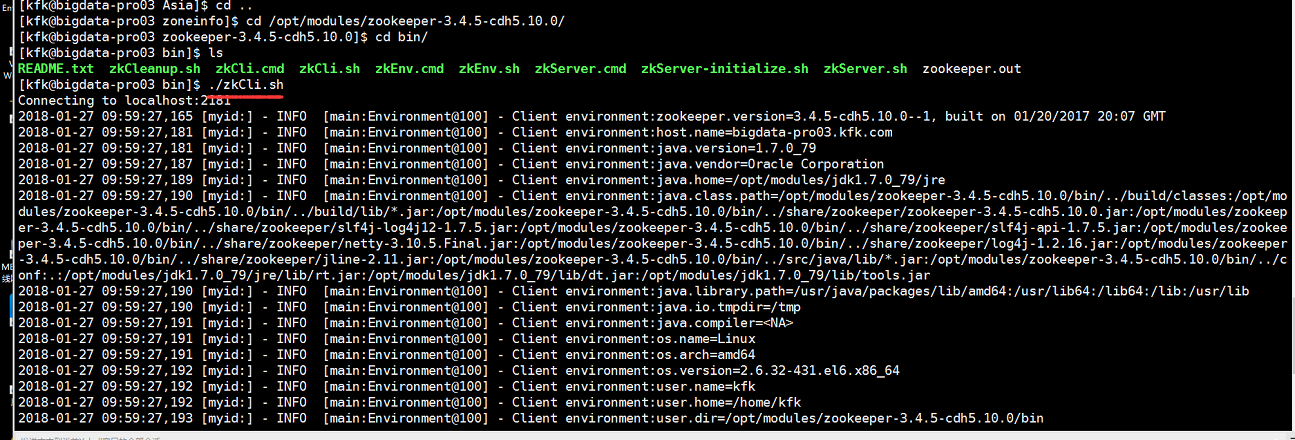
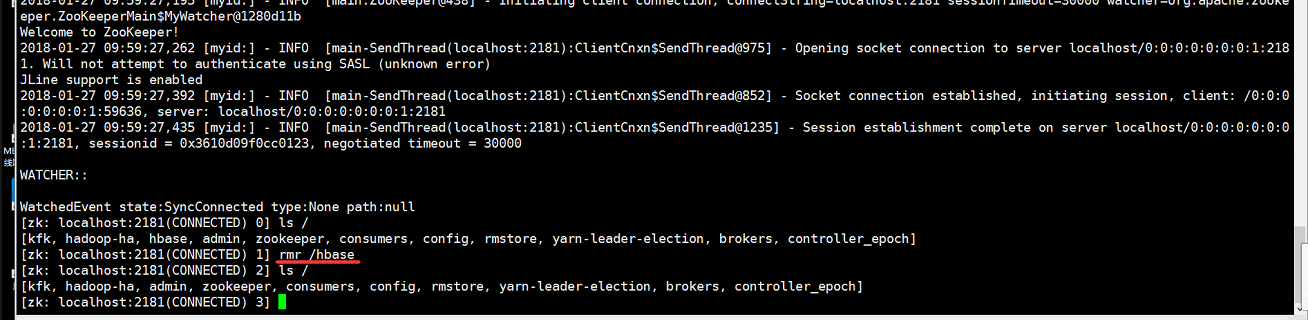
再次启动hbase
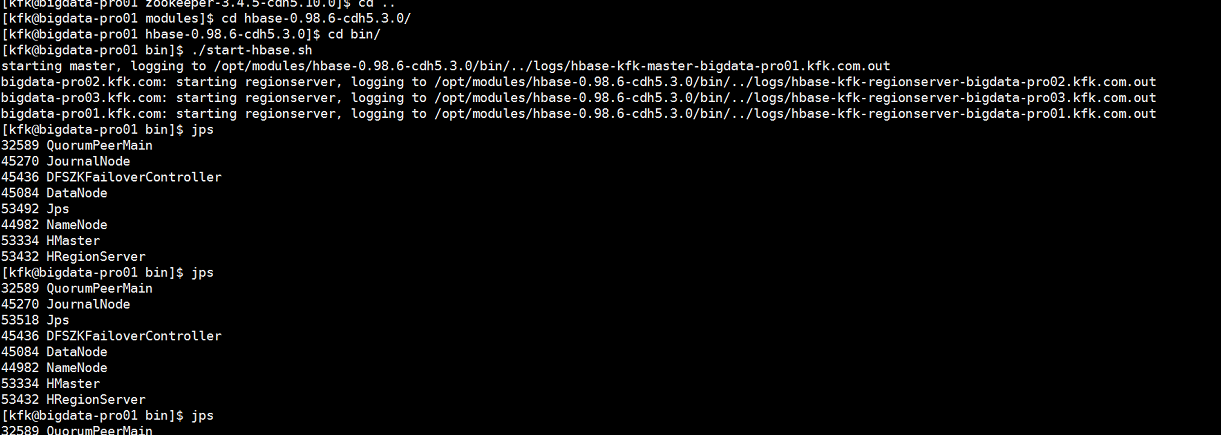
确定这次HMaster不会挂掉
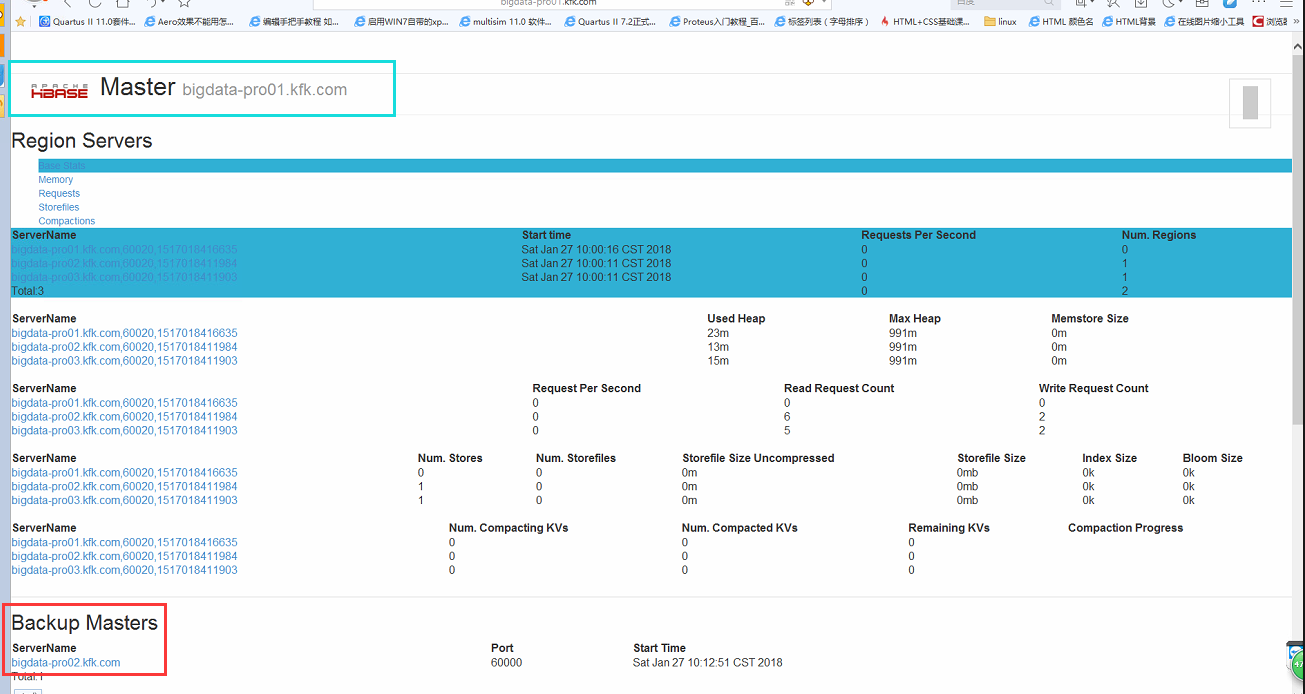
同时把节点2的master也启动一下

从浏览器查看网页,可以看到节点1是master 节点2是backup master(界面比较丑,具体什么原因我也不清楚了)
启动hbase shell

启动kafka

另外两个节点也是一样的启动


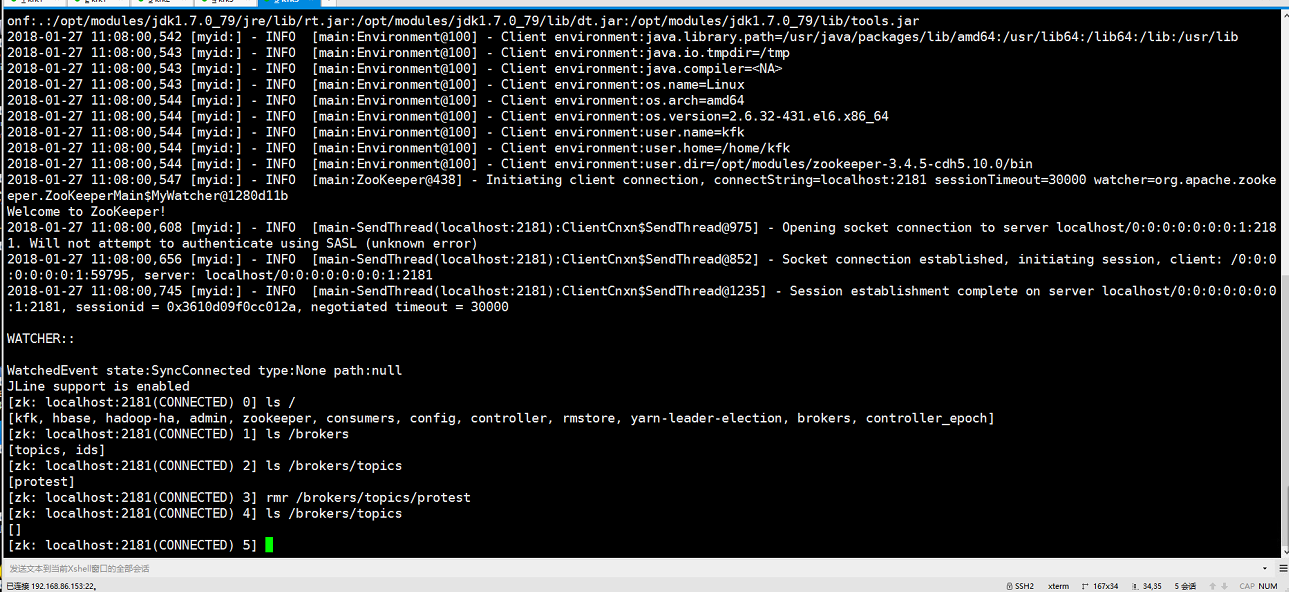
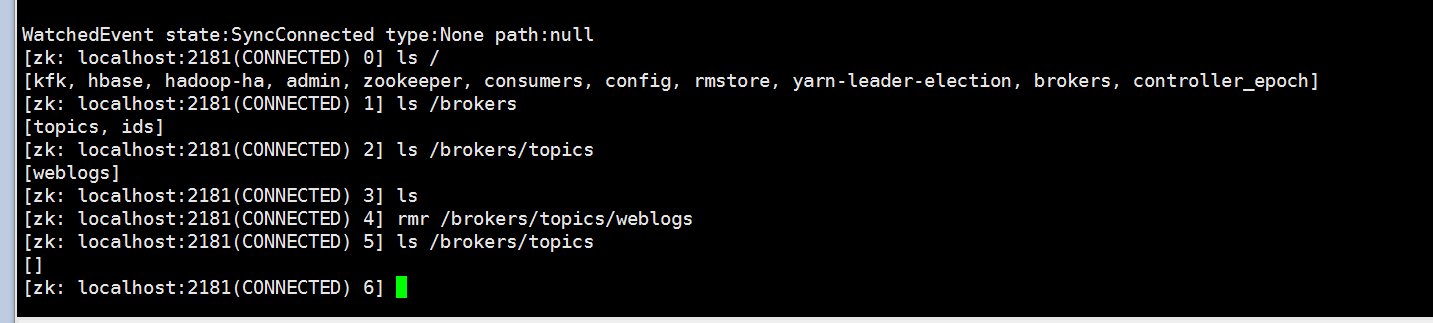
下面我们进入zookeeper把之前创建的几个topic删除掉
现在我们在kafka上创建topic(随便一个安装了kafka的节点都可以)

bin/kafka-topics.sh --zookeeper bigdata-pro01.kfk.com:2181,bigdata-pro02.kfk.com:2181,bigdata-pro03.kfk.com:2181 --create --topic weblogs --replication-factor 1 --partitions 1

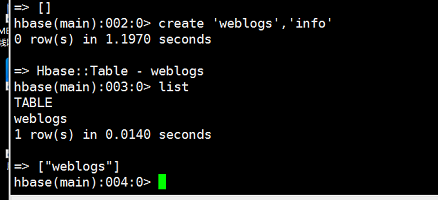
在hbase下创建一个表
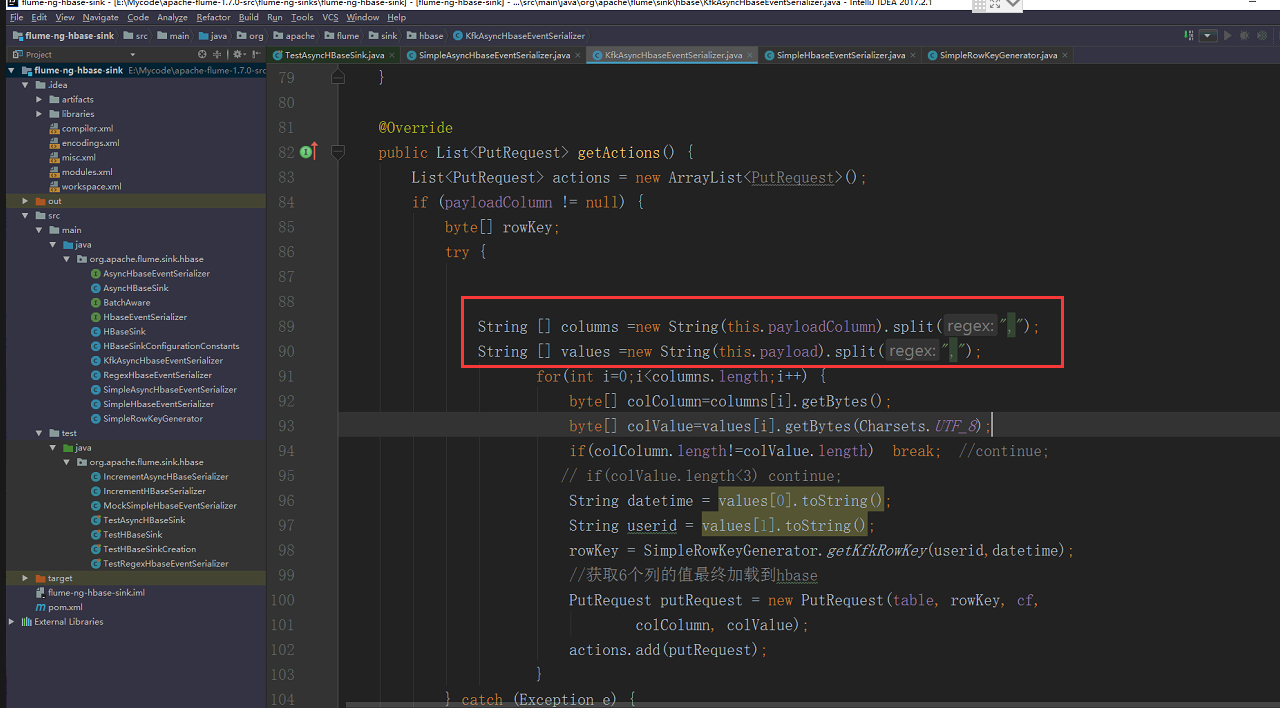
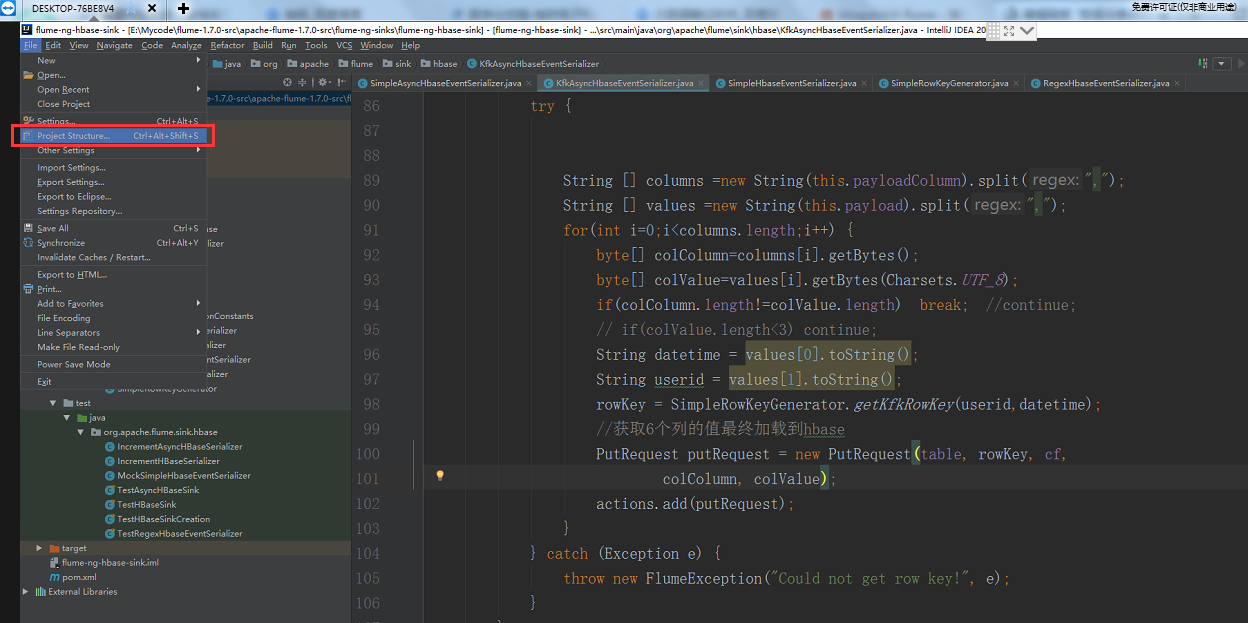
修改一下flume的源代码,之前有个地方弄错了
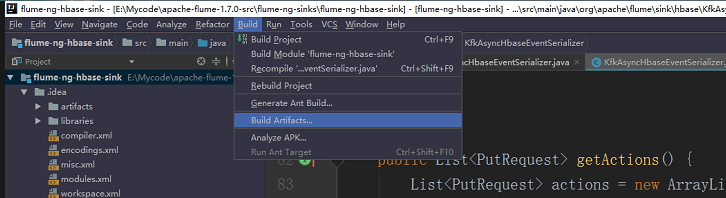
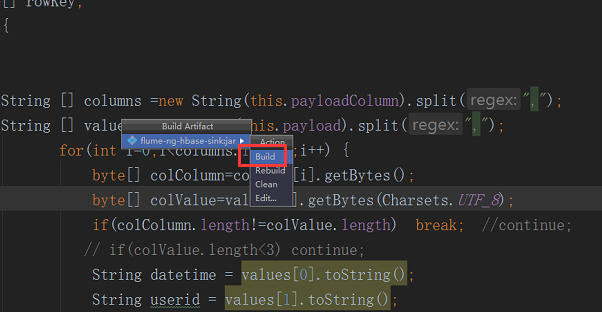
我们重新编译一下
把这个压缩包重新上传一下,我修改了名字

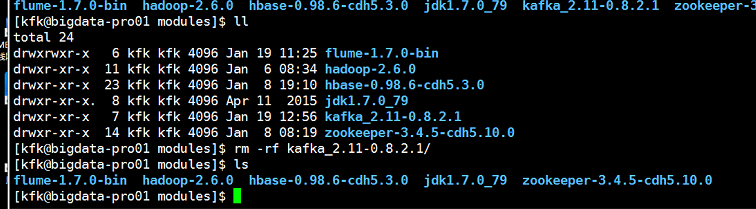
但是现在我们又发现了新的问题了,因为我们用的是flume1.7版本的,这个时候我们应该配合kafka0.9系列的,而我们用的是kafka0.8的,所以我们要换掉


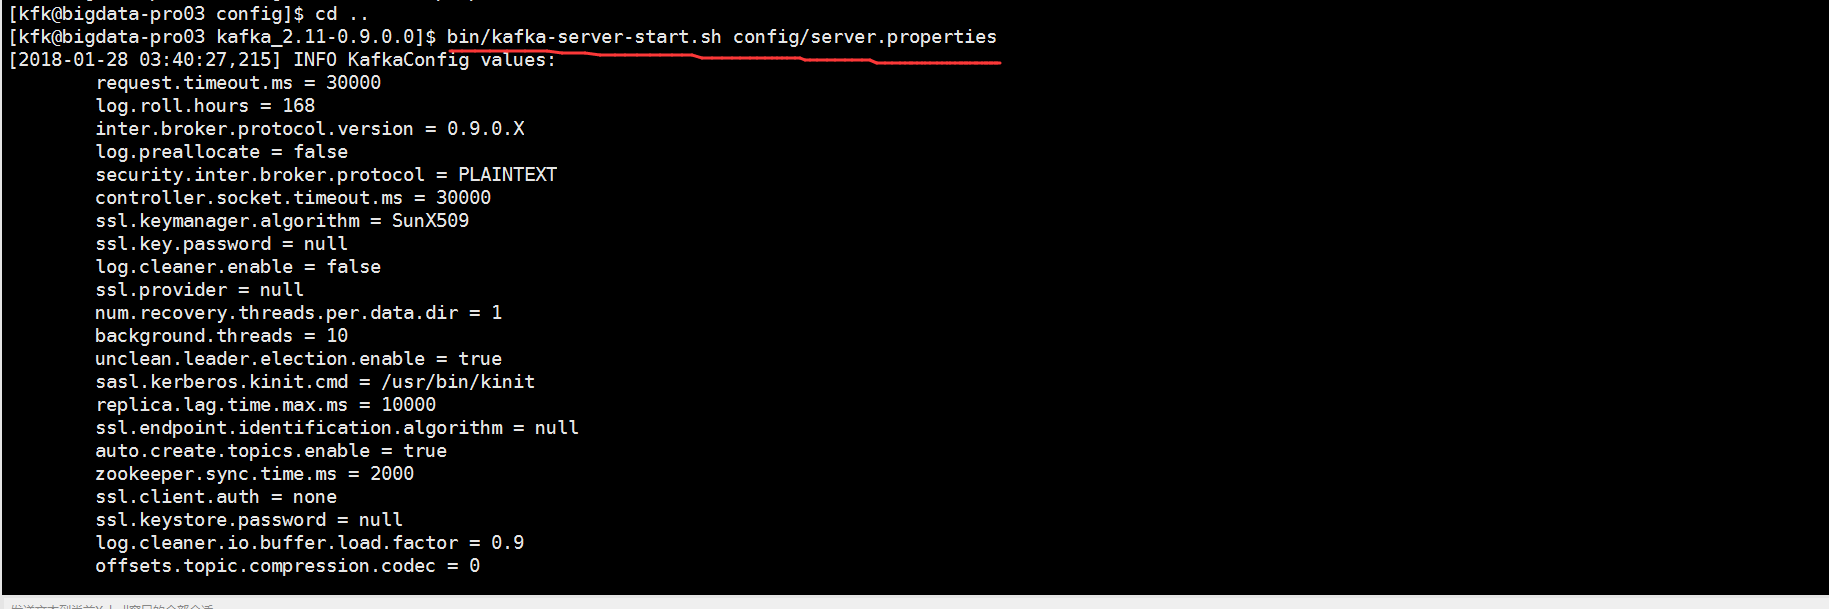
把0.9的kafka上传上来
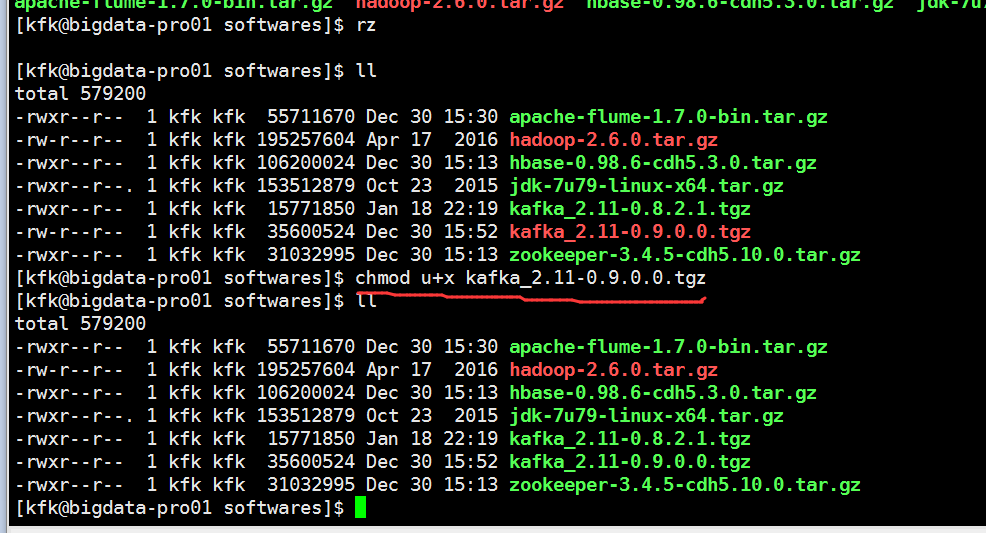
解压

修改配置文件
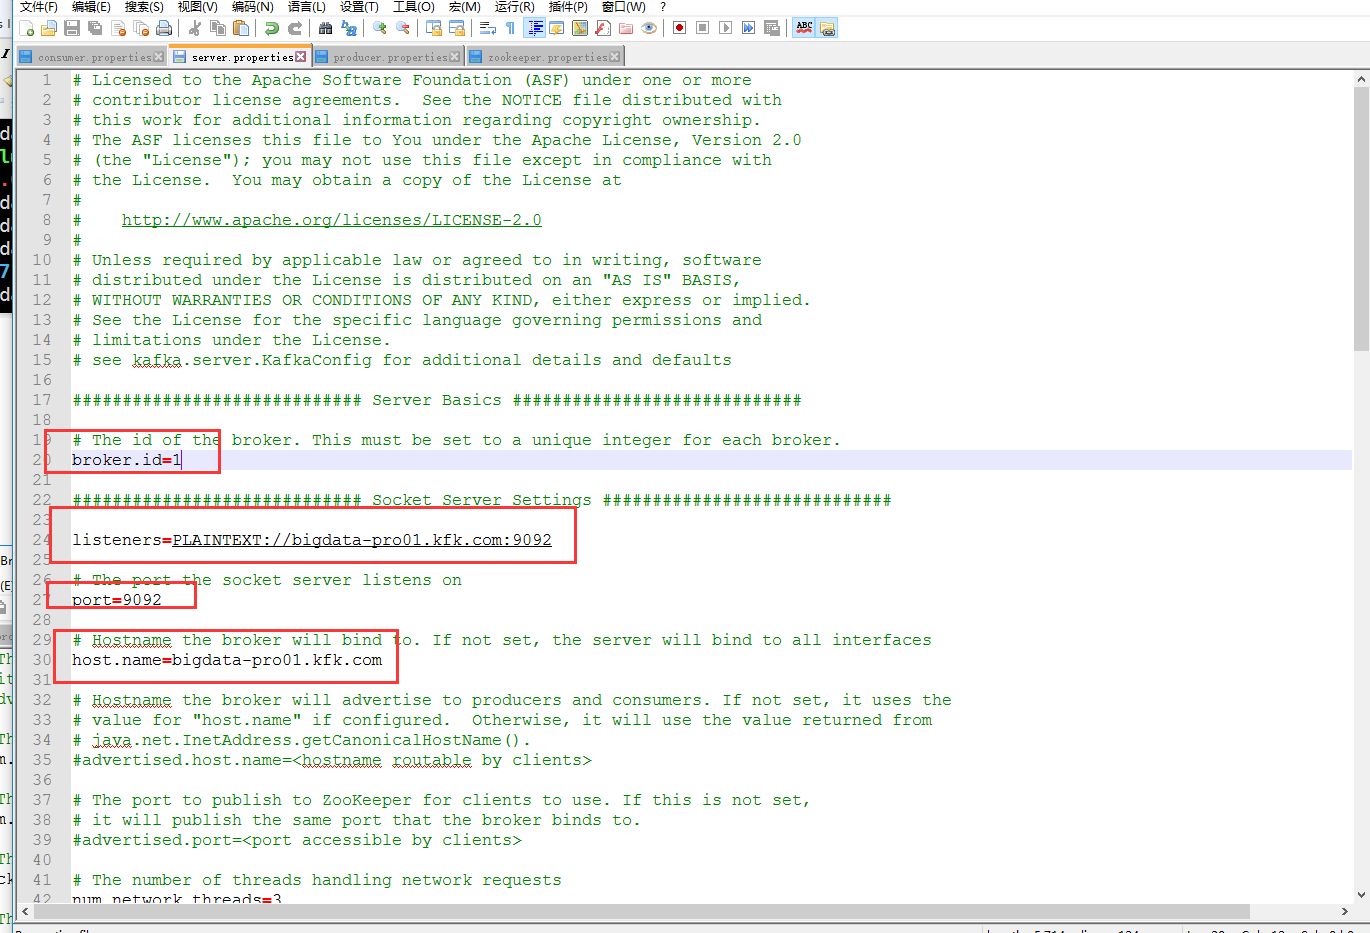
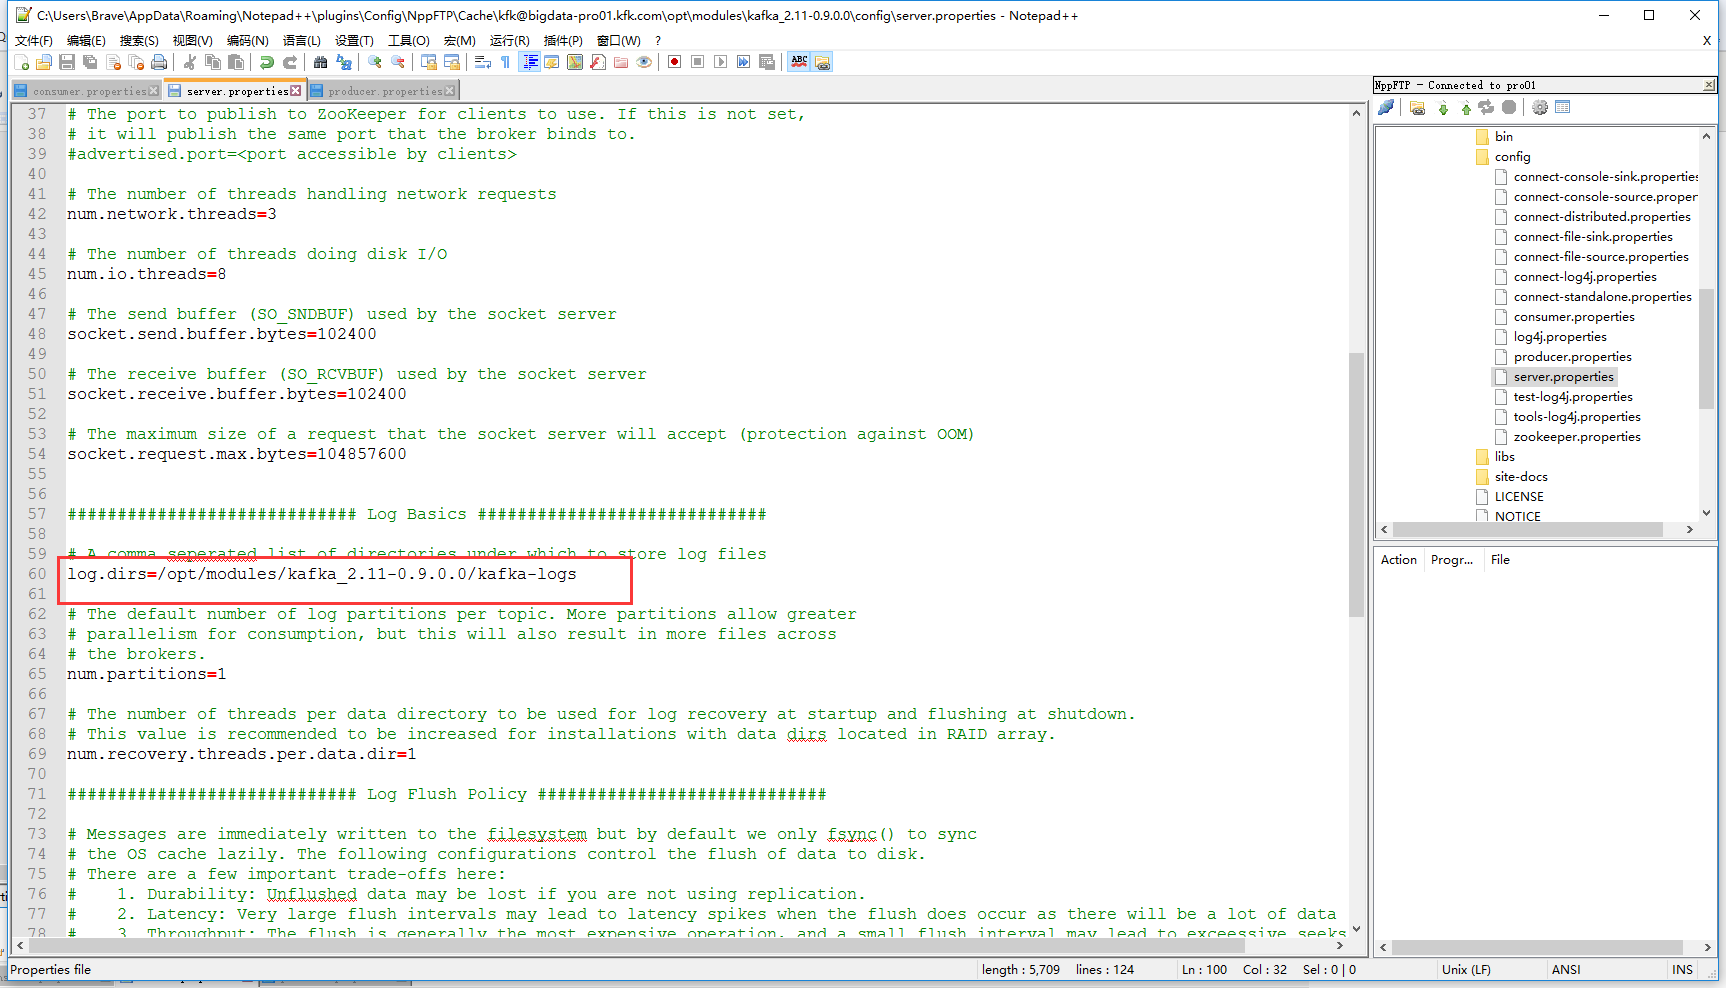
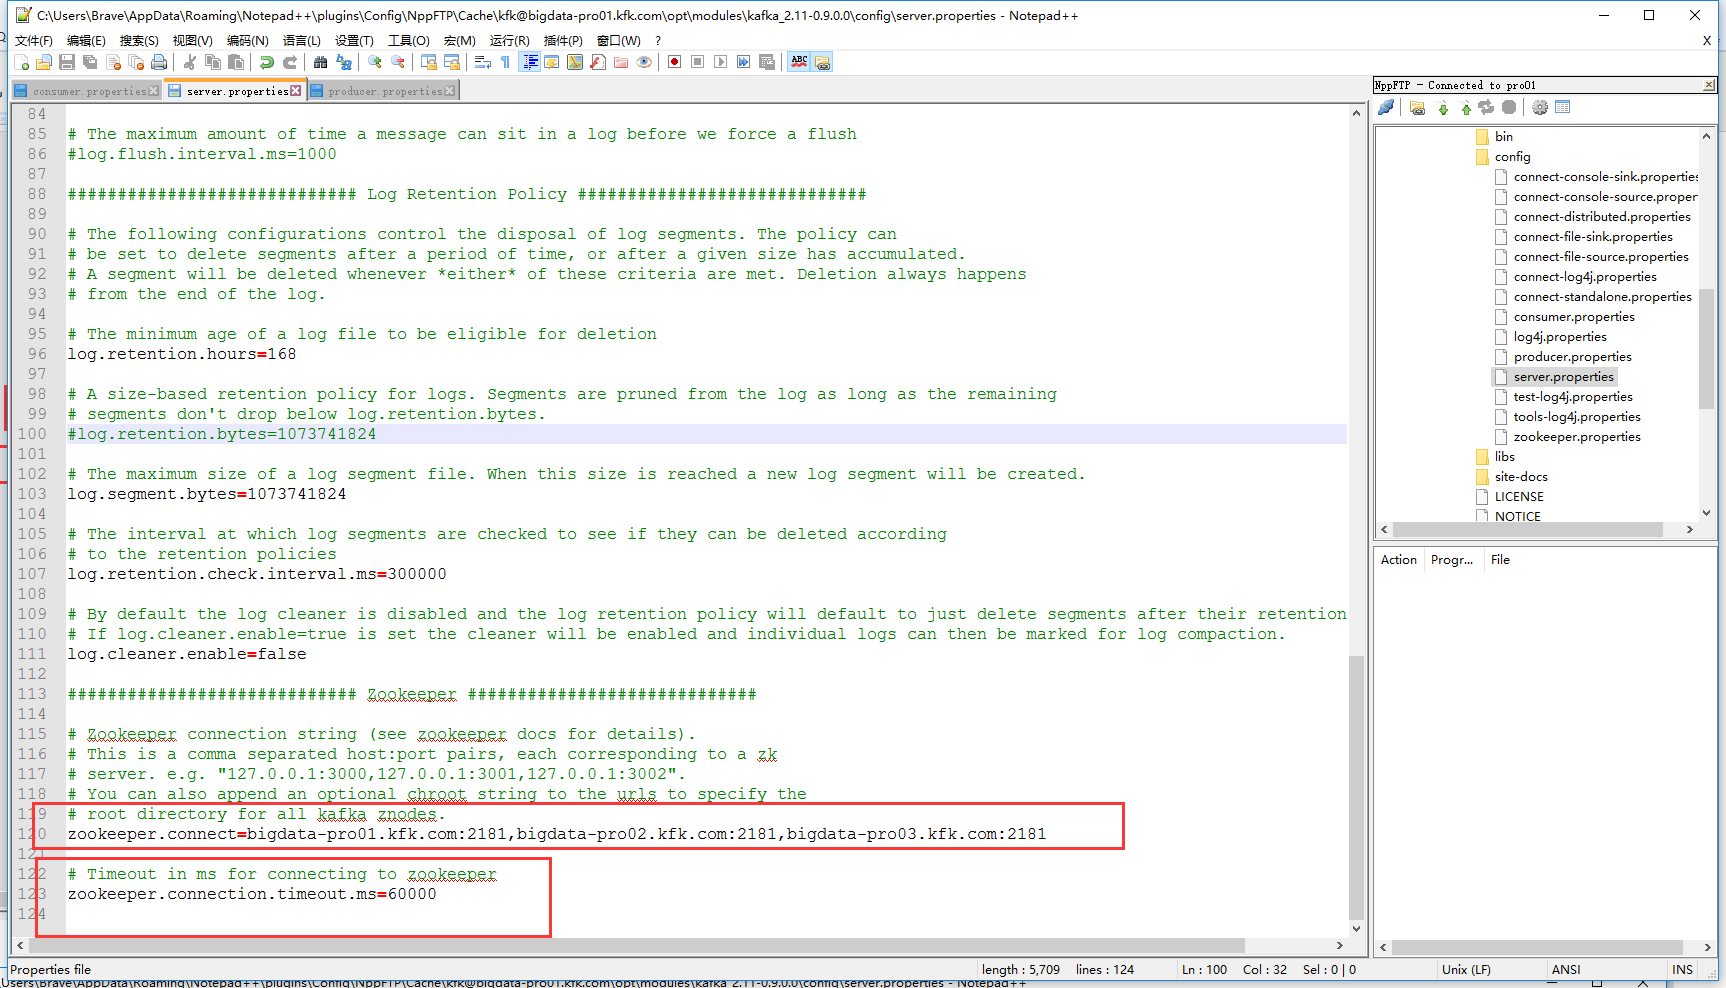
server.properties
# Licensed to the Apache Software Foundation (ASF) under one or more
# contributor license agreements.  See the NOTICE file distributed with
# this work for additional information regarding copyright ownership.
# The ASF licenses this file to You under the Apache License, Version 2.0
# (the "License"); you may not use this file except in compliance with
# the License.  You may obtain a copy of the License at
#
#    http://www.apache.org/licenses/LICENSE-2.0
#
# Unless required by applicable law or agreed to in writing, software
# distributed under the License is distributed on an "AS IS" BASIS,
# WITHOUT WARRANTIES OR CONDITIONS OF ANY KIND, either express or implied.
# See the License for the specific language governing permissions and
# limitations under the License.
# see kafka.server.KafkaConfig for additional details and defaults

############################# Server Basics #############################

# The id of the broker. This must be set to a unique integer for each broker.
broker.id=1

############################# Socket Server Settings #############################

listeners=PLAINTEXT://bigdata-pro01.kfk.com:9092

# The port the socket server listens on
port=9092

# Hostname the broker will bind to. If not set, the server will bind to all interfaces
host.name=bigdata-pro01.kfk.com

# Hostname the broker will advertise to producers and consumers. If not set, it uses the
# value for "host.name" if configured.  Otherwise, it will use the value returned from
# java.net.InetAddress.getCanonicalHostName().
#advertised.host.name=<hostname routable by clients>

# The port to publish to ZooKeeper for clients to use. If this is not set,
# it will publish the same port that the broker binds to.
#advertised.port=<port accessible by clients>

# The number of threads handling network requests
num.network.threads=3

# The number of threads doing disk I/O
num.io.threads=8

# The send buffer (SO_SNDBUF) used by the socket server
socket.send.buffer.bytes=102400

# The receive buffer (SO_RCVBUF) used by the socket server
socket.receive.buffer.bytes=102400

# The maximum size of a request that the socket server will accept (protection against OOM)
socket.request.max.bytes=104857600


############################# Log Basics #############################

# A comma seperated list of directories under which to store log files
log.dirs=/opt/modules/kafka_2.11-0.9.0.0/kafka-logs

# The default number of log partitions per topic. More partitions allow greater
# parallelism for consumption, but this will also result in more files across
# the brokers.
num.partitions=1

# The number of threads per data directory to be used for log recovery at startup and flushing at shutdown.
# This value is recommended to be increased for installations with data dirs located in RAID array.
num.recovery.threads.per.data.dir=1

############################# Log Flush Policy #############################

# Messages are immediately written to the filesystem but by default we only fsync() to sync
# the OS cache lazily. The following configurations control the flush of data to disk.
# There are a few important trade-offs here:
#    1. Durability: Unflushed data may be lost if you are not using replication.
#    2. Latency: Very large flush intervals may lead to latency spikes when the flush does occur as there will be a lot of data to flush.
#    3. Throughput: The flush is generally the most expensive operation, and a small flush interval may lead to exceessive seeks.
# The settings below allow one to configure the flush policy to flush data after a period of time or
# every N messages (or both). This can be done globally and overridden on a per-topic basis.

# The number of messages to accept before forcing a flush of data to disk
#log.flush.interval.messages=10000

# The maximum amount of time a message can sit in a log before we force a flush
#log.flush.interval.ms=1000

############################# Log Retention Policy #############################

# The following configurations control the disposal of log segments. The policy can
# be set to delete segments after a period of time, or after a given size has accumulated.
# A segment will be deleted whenever *either* of these criteria are met. Deletion always happens
# from the end of the log.

# The minimum age of a log file to be eligible for deletion
log.retention.hours=168

# A size-based retention policy for logs. Segments are pruned from the log as long as the remaining
# segments don't drop below log.retention.bytes.
#log.retention.bytes=1073741824

# The maximum size of a log segment file. When this size is reached a new log segment will be created.
log.segment.bytes=1073741824

# The interval at which log segments are checked to see if they can be deleted according
# to the retention policies
log.retention.check.interval.ms=300000

# By default the log cleaner is disabled and the log retention policy will default to just delete segments after their retention expires.
# If log.cleaner.enable=true is set the cleaner will be enabled and individual logs can then be marked for log compaction.
log.cleaner.enable=false

############################# Zookeeper #############################

# Zookeeper connection string (see zookeeper docs for details).
# This is a comma separated host:port pairs, each corresponding to a zk
# server. e.g. "127.0.0.1:3000,127.0.0.1:3001,127.0.0.1:3002".
# You can also append an optional chroot string to the urls to specify the
# root directory for all kafka znodes.
zookeeper.connect=bigdata-pro01.kfk.com:2181,bigdata-pro02.kfk.com:2181,bigdata-pro03.kfk.com:2181

# Timeout in ms for connecting to zookeeper
zookeeper.connection.timeout.ms=60000
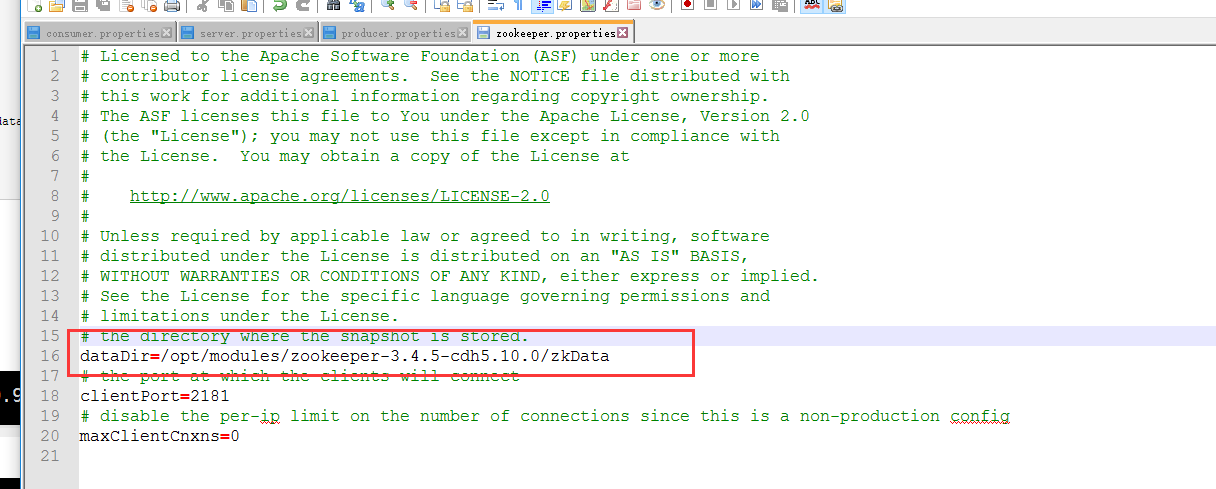
zookeeper.properties(和zookeeper的配置文件一致)
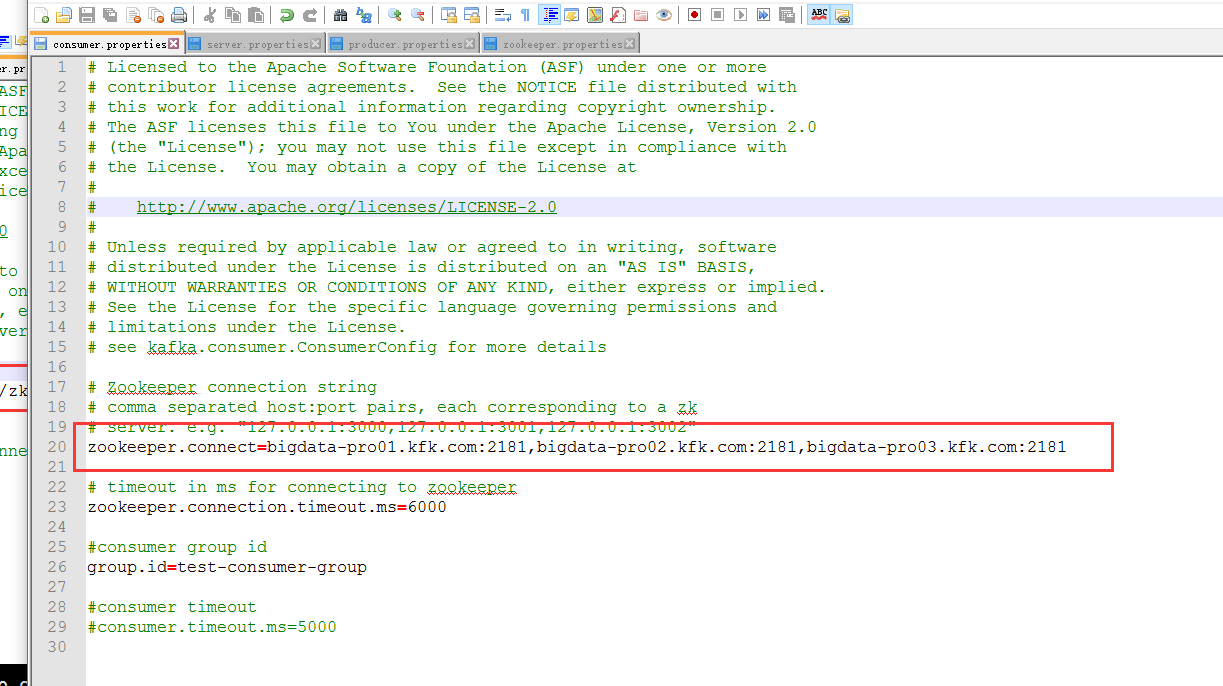
consumer.properties
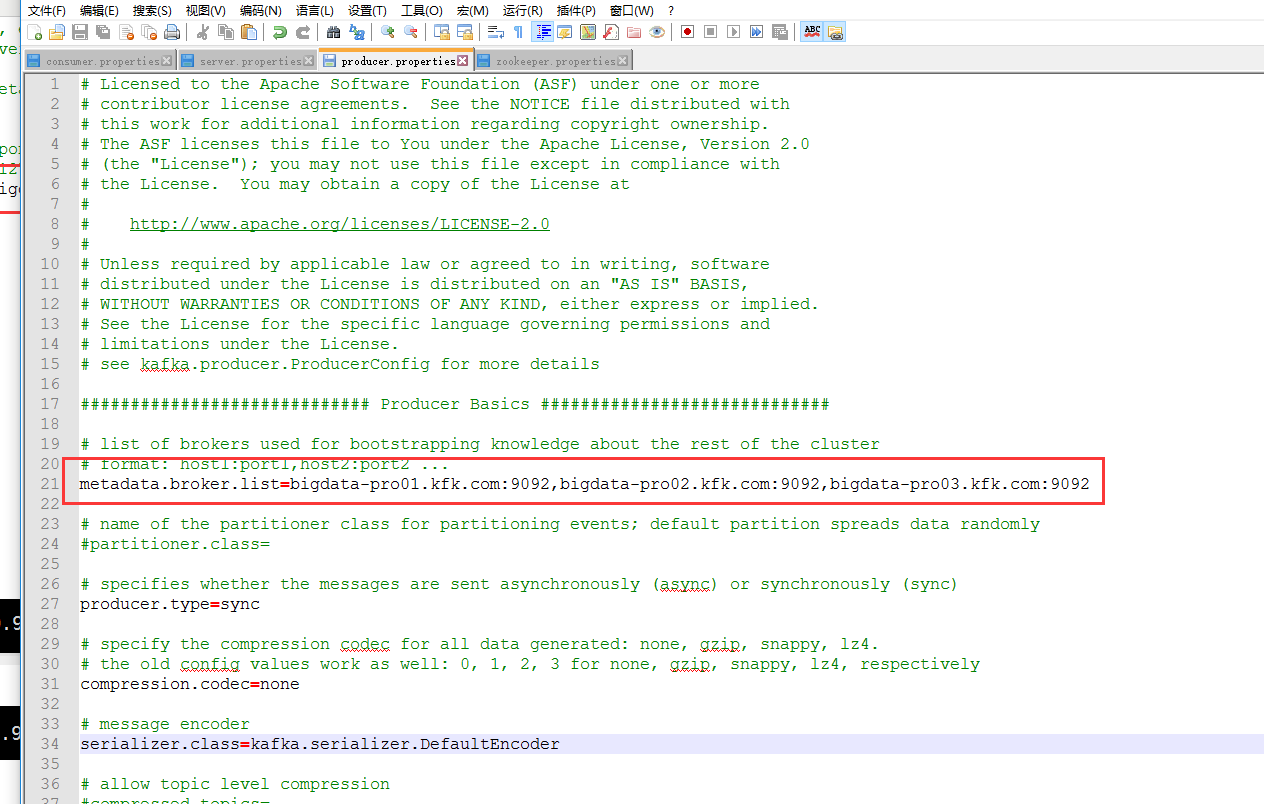
producer.properties
把kafka分发都另外的两个节点去


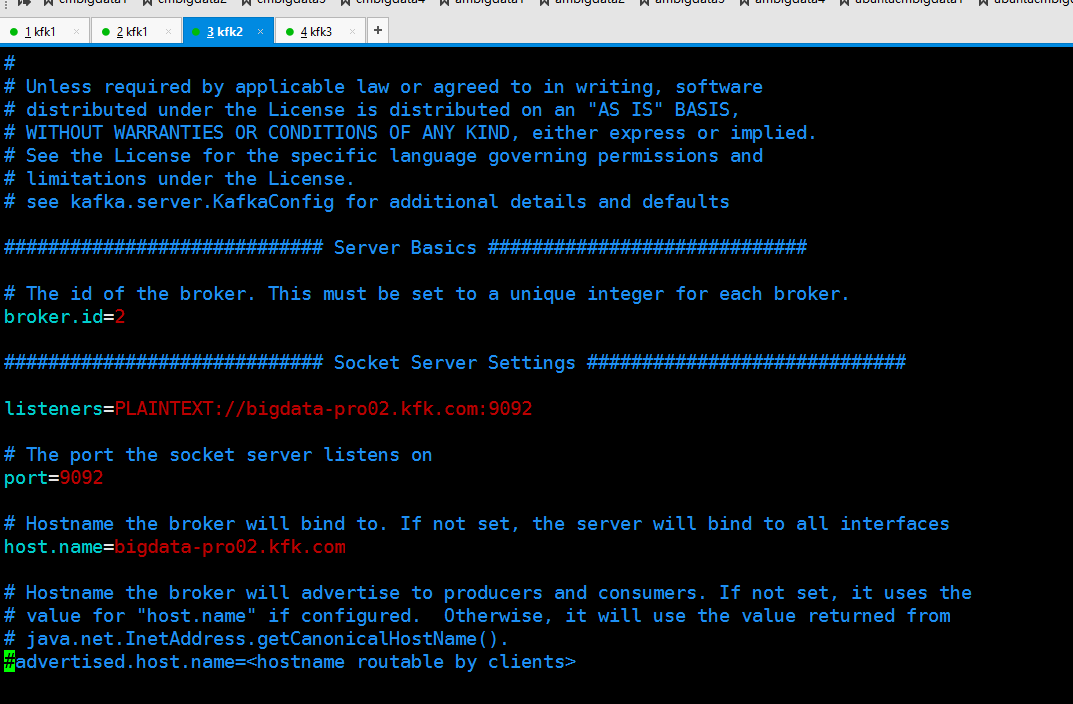
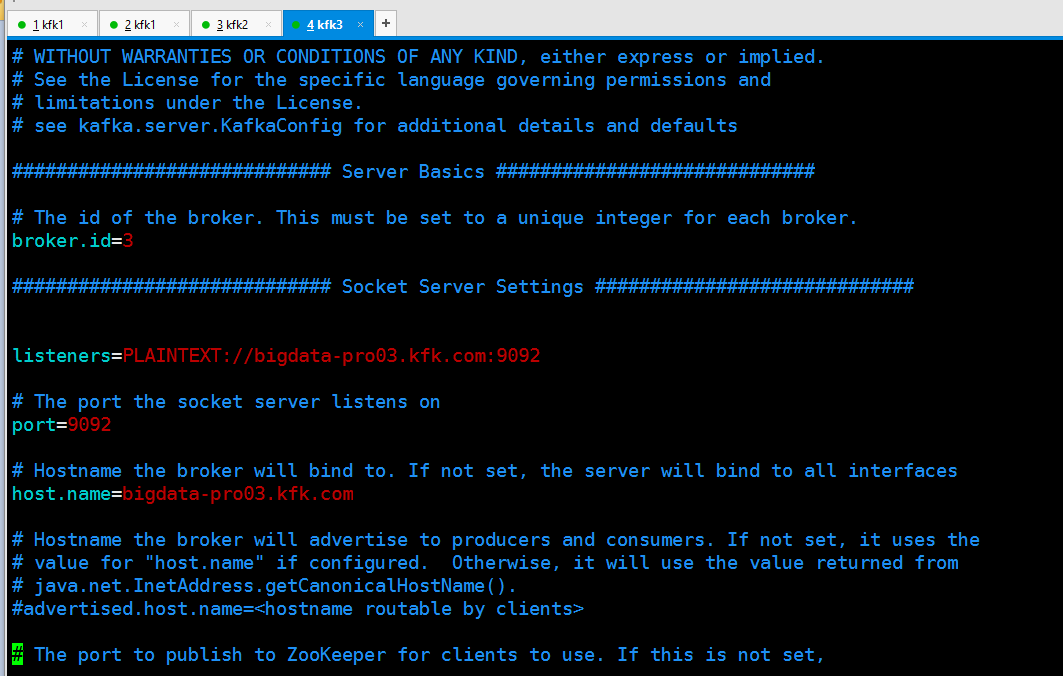
在节点2和节点3也把相应的配置文件修改一下
server.properties
server.properties
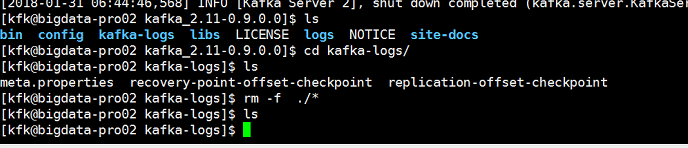
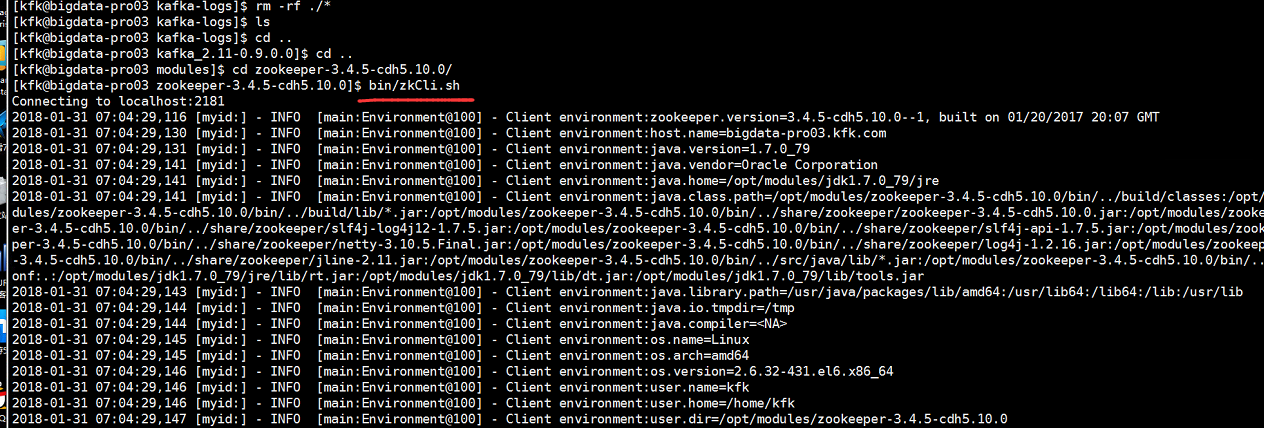
把以前的topic删除掉
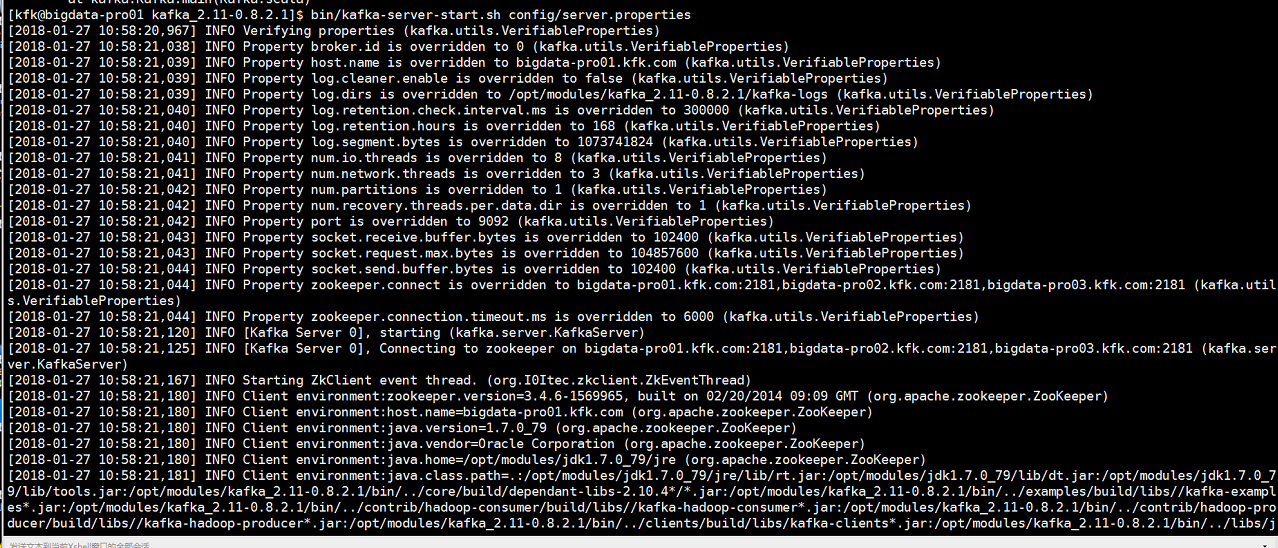
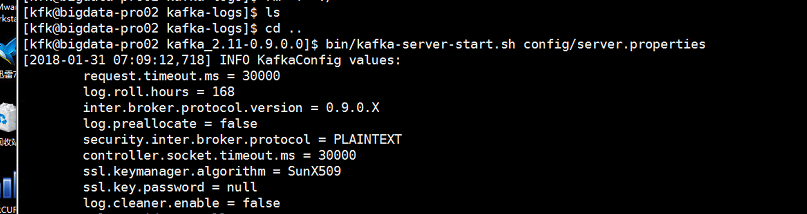
启动kafka

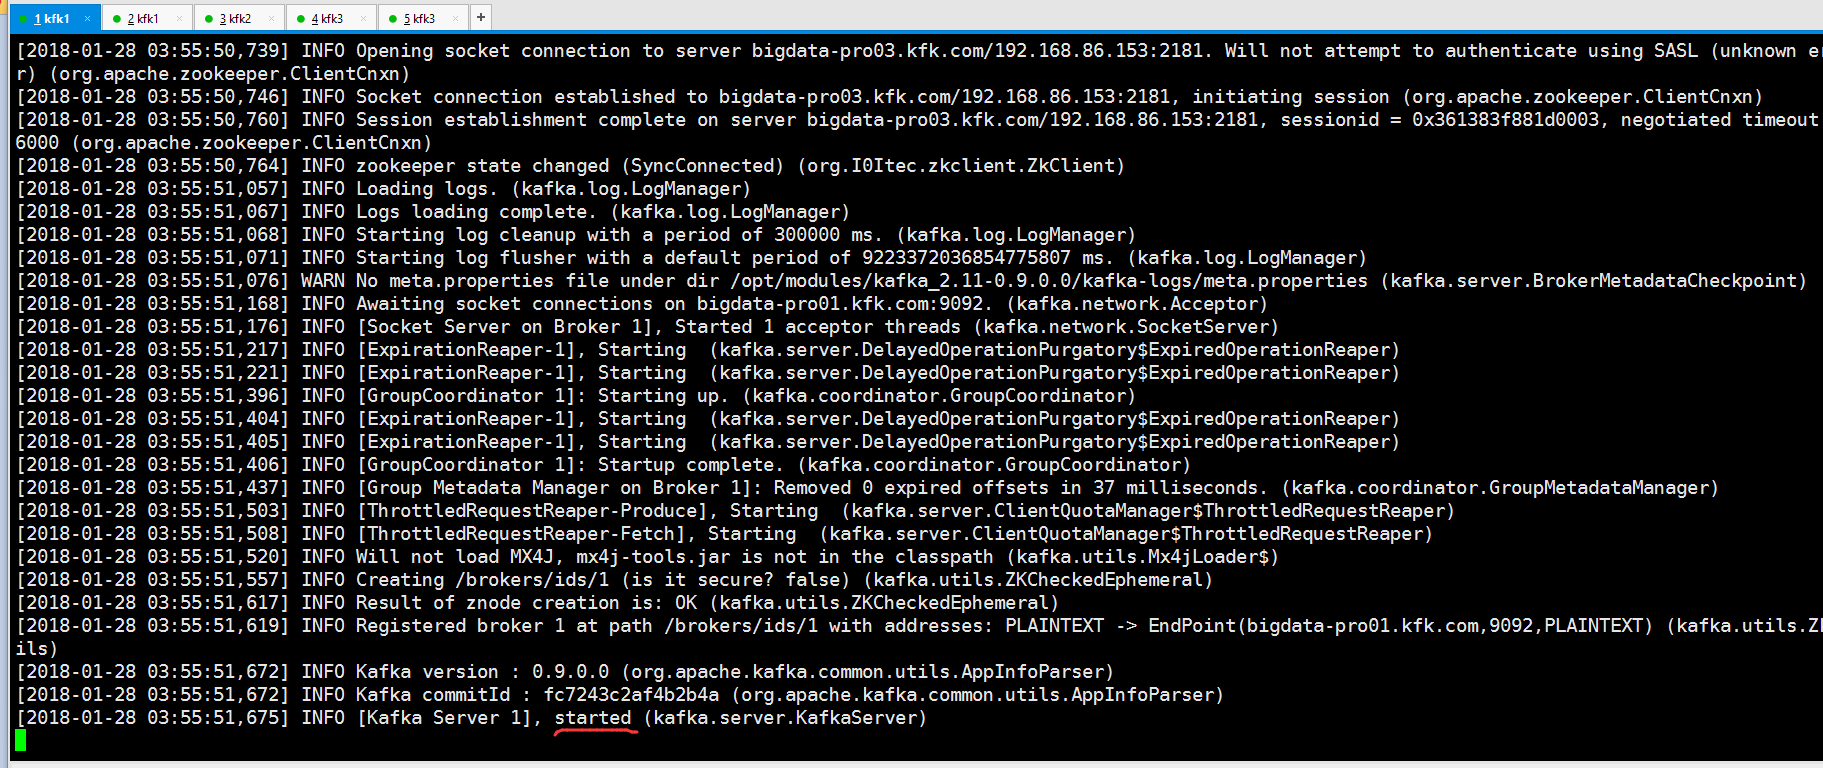
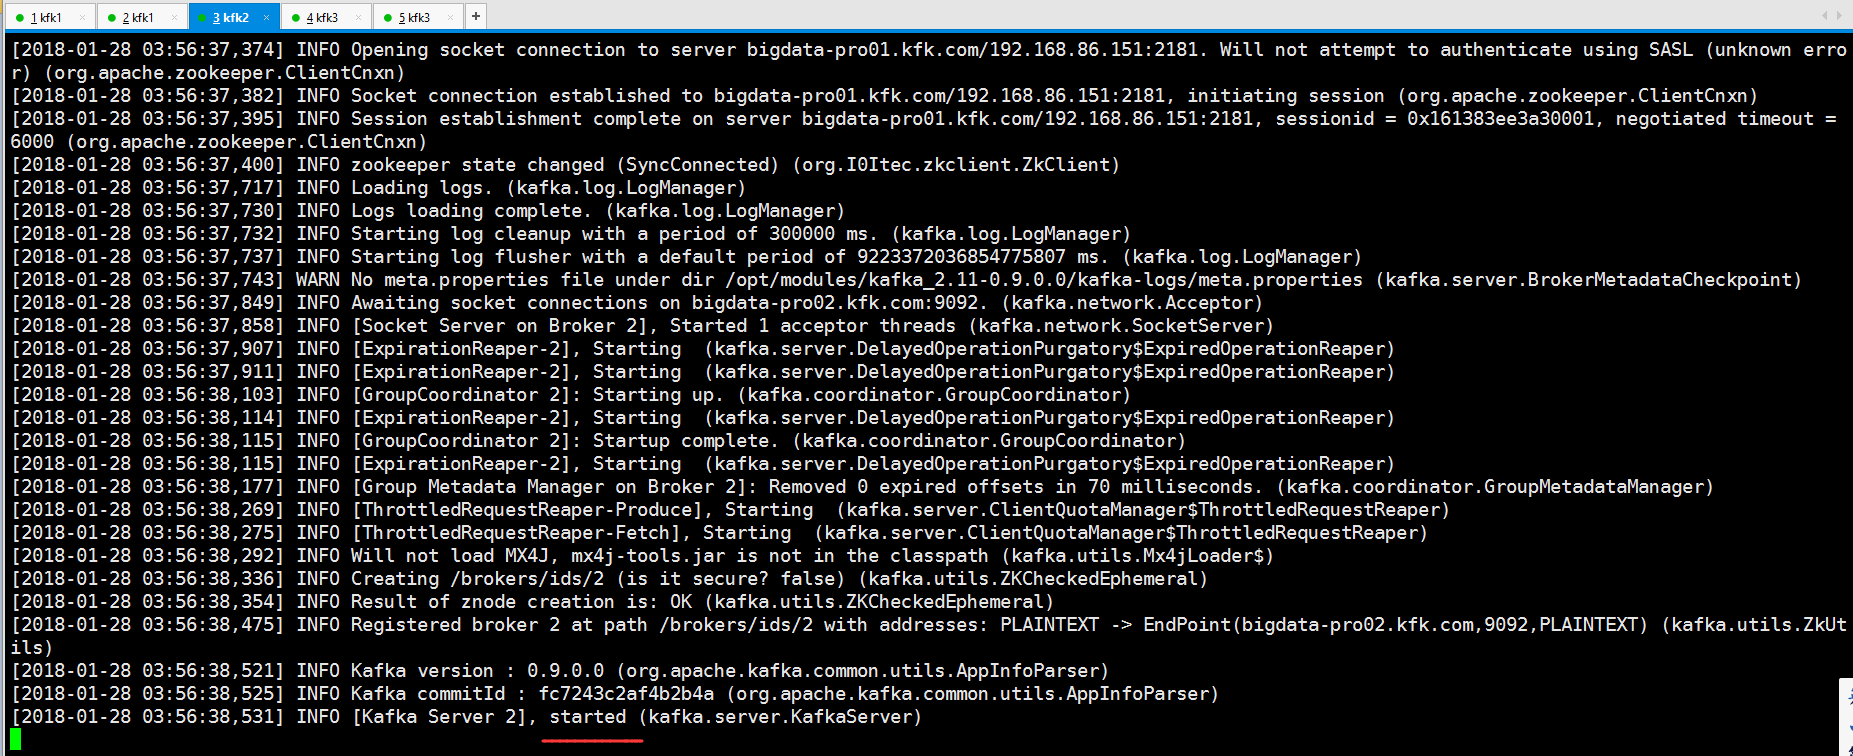
同时我们启动节点1和节点2的kafka


创建topic


可以看到节点2没有接收到!只能先不管了,先把服务启动起来
我们现在把节点2的flume启动起来
先把数据启起来

启动flume
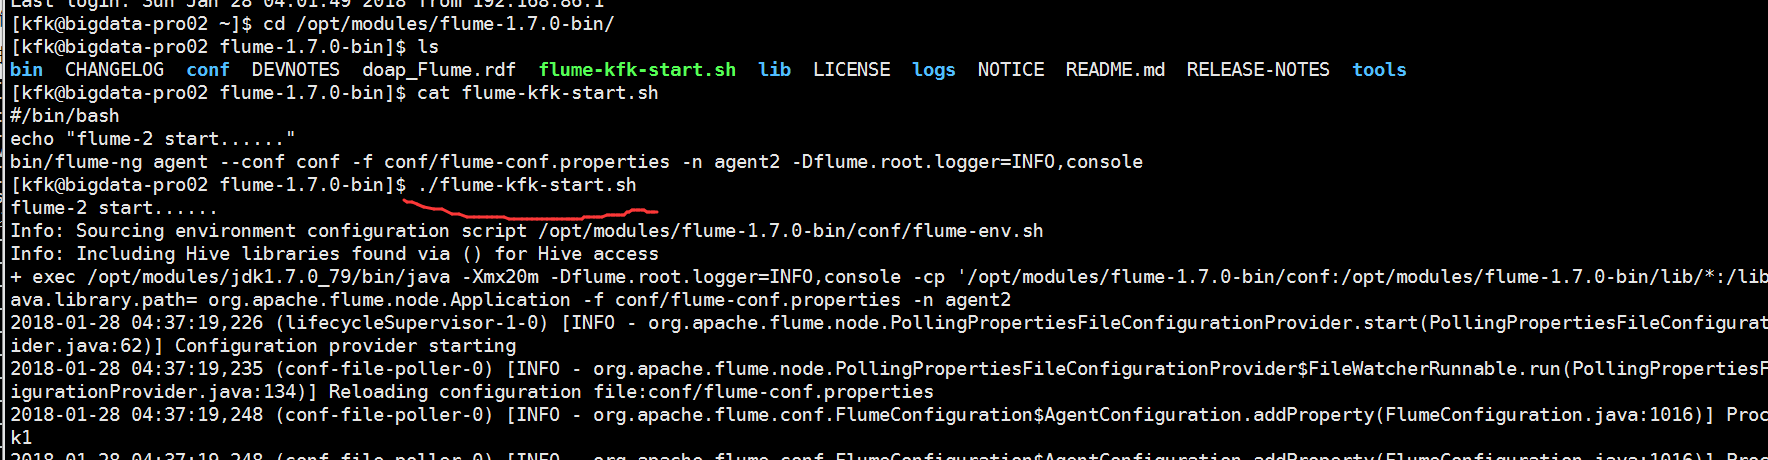
启动节点1的flume
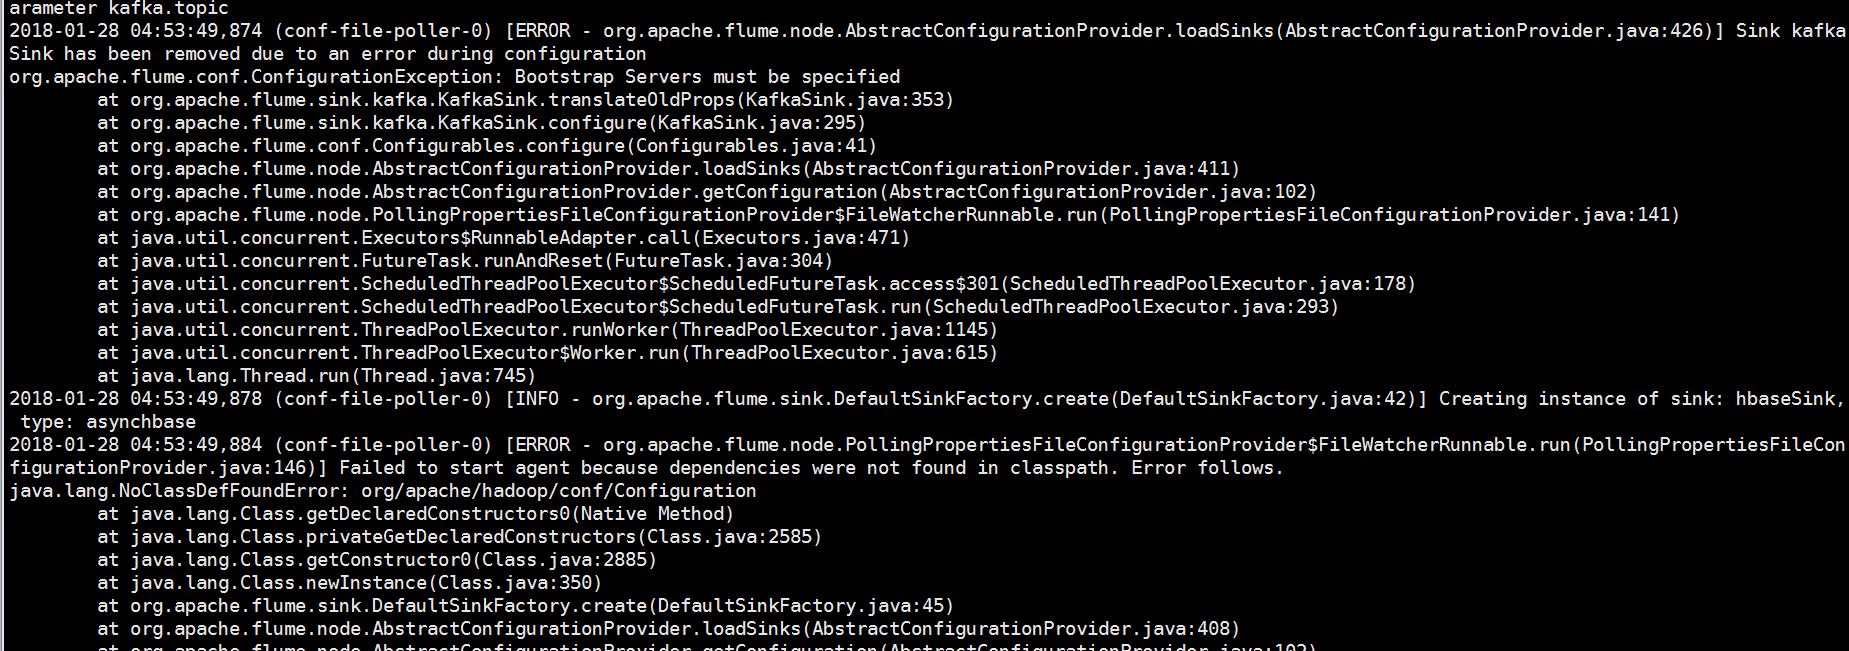
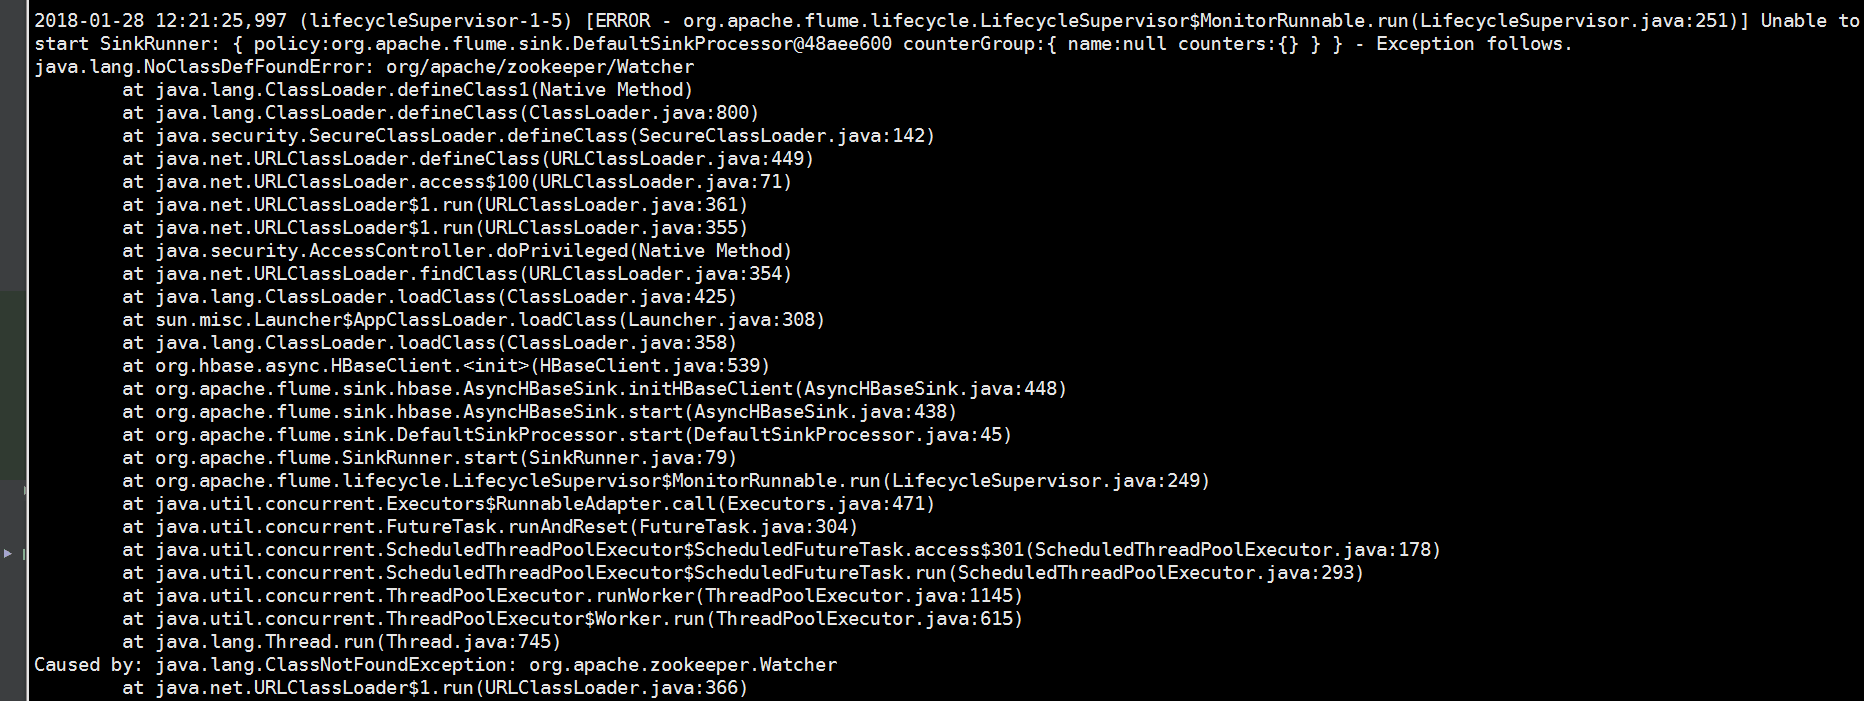
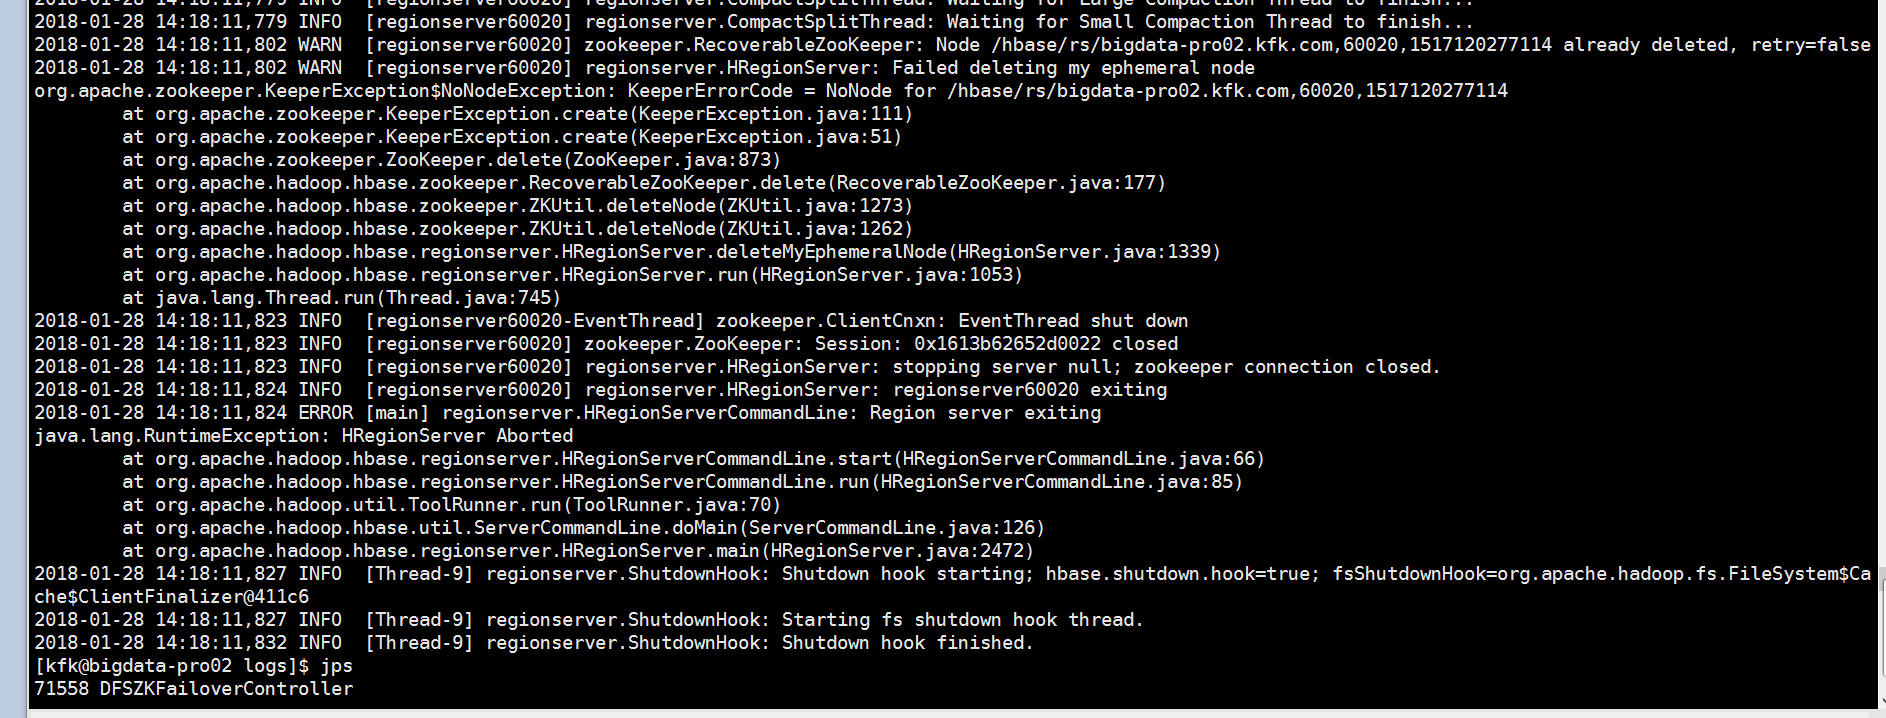
报错了!!!查看flume的配置文件
发现有个地方配置写错了,把他改过来,再次启动节点1的flume
其实刚刚修改了配置只是解决了前面的那个问题,后面的问题一样没有解决,说什么缺少依赖包的。
我们现在回忆一下我我们做二次开发打包的时候是不是把一些相关的依赖去掉了,现在我们重新打包,把相关的依赖包也一起打进来。
这些相关的依赖包,一个都不要干掉,全部保留着,然后一起打包
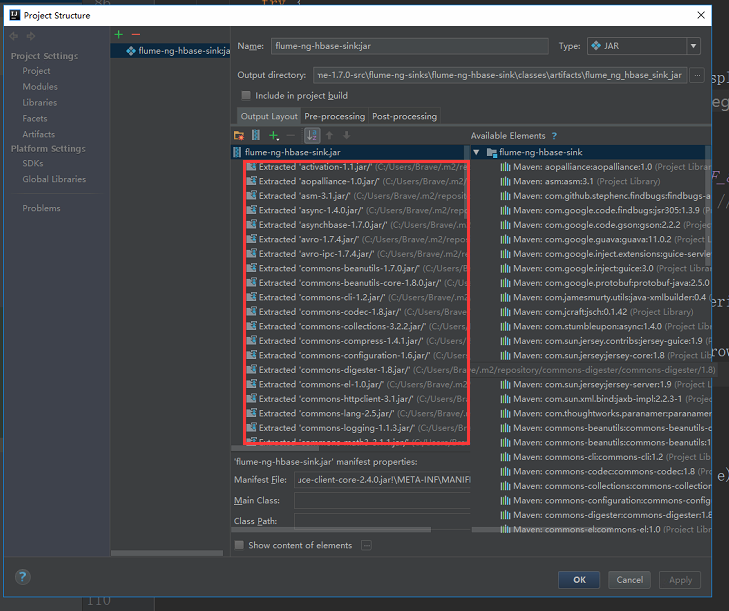
具体打包过程我这里就不多说了,前面有提到的。打完包后就把flume的lib下的包替换了就可以了。(这个是针对节点1来说的)
好了,不多说,启动节点1的flume
又报了一个错误
这次是这样,把zookeeper下的一个报拷贝到flume的lib下

把这个包复制过去。把所以进程关闭,然后重新启动dfs zkfc zookeeper(具体的启动步骤我这里不重复了)
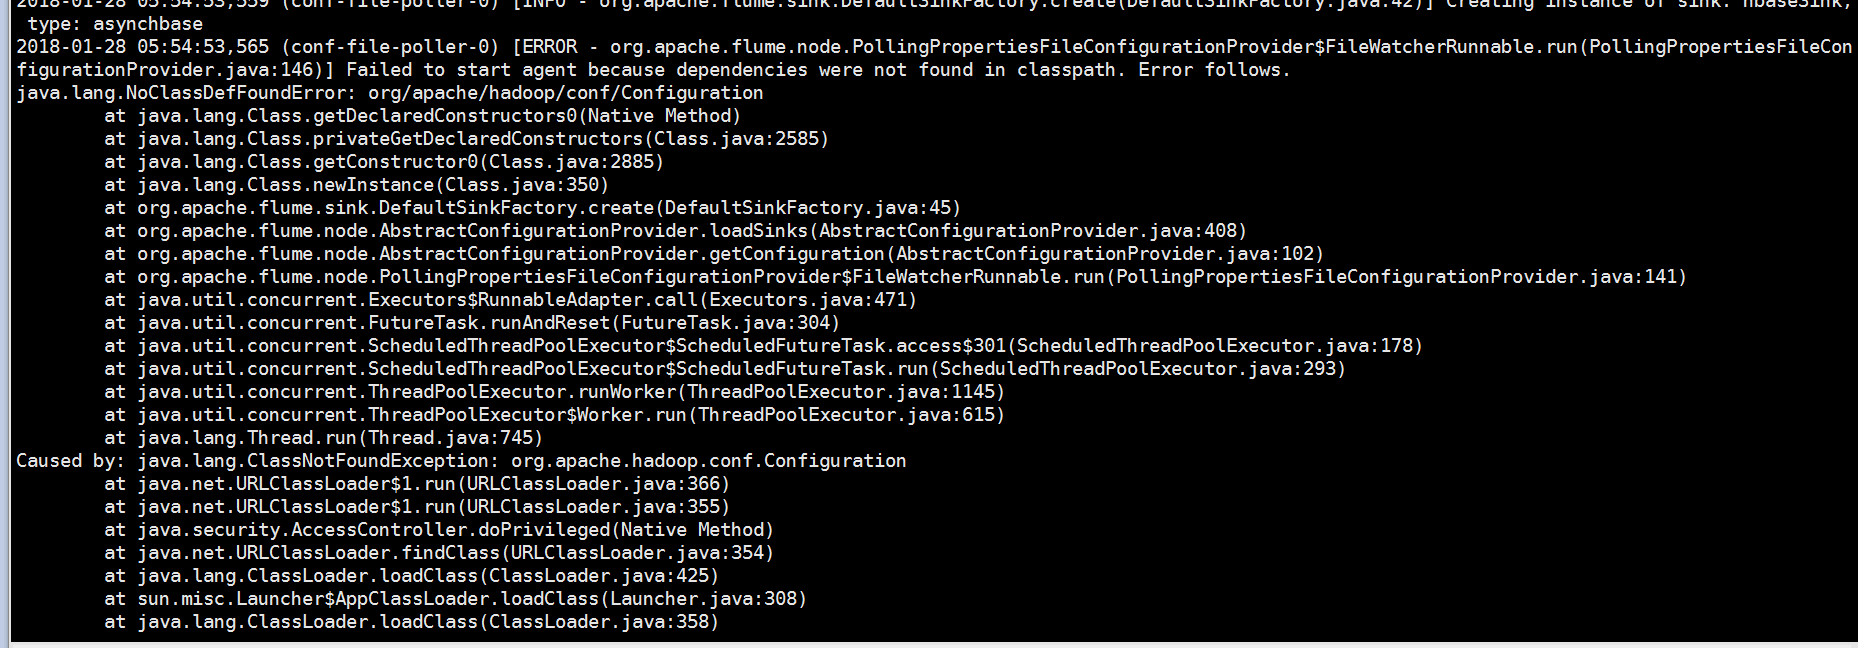
再次启动flume,结果还是报错

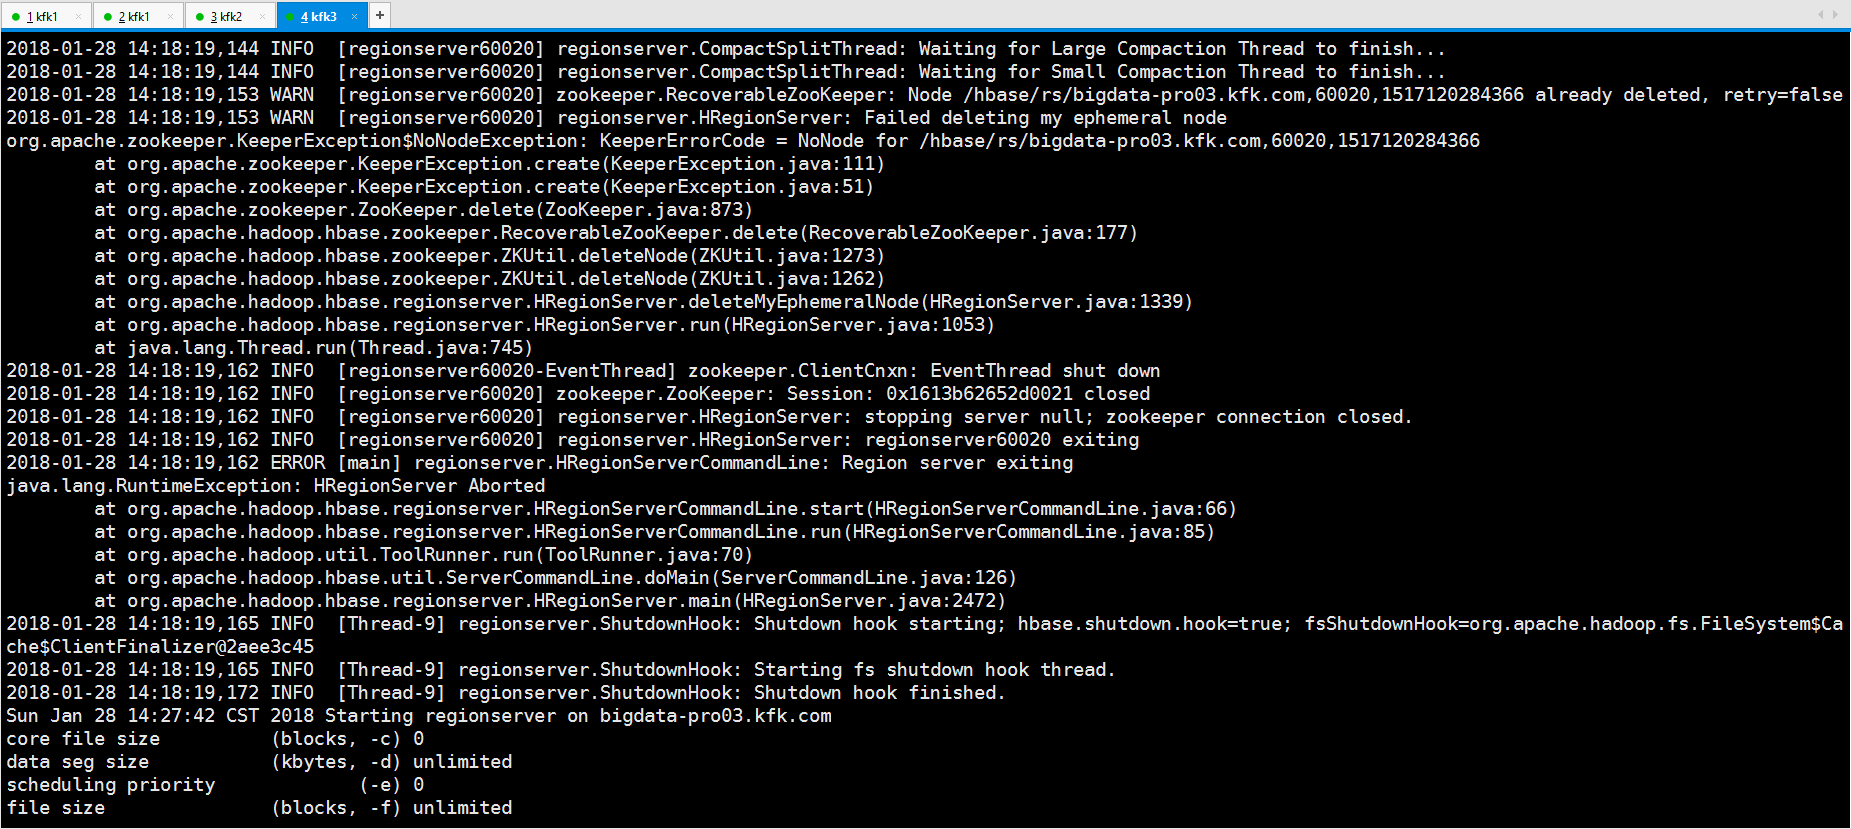
可以看到是更hbase相关的,我们现在就启动hbase.
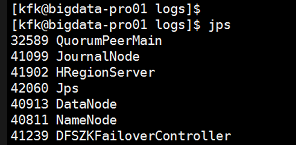
这个是节点1的进程,但是查看节点2和节点3的进程的时候,他们的hbase是没有启动的
下面是查看相关的日志
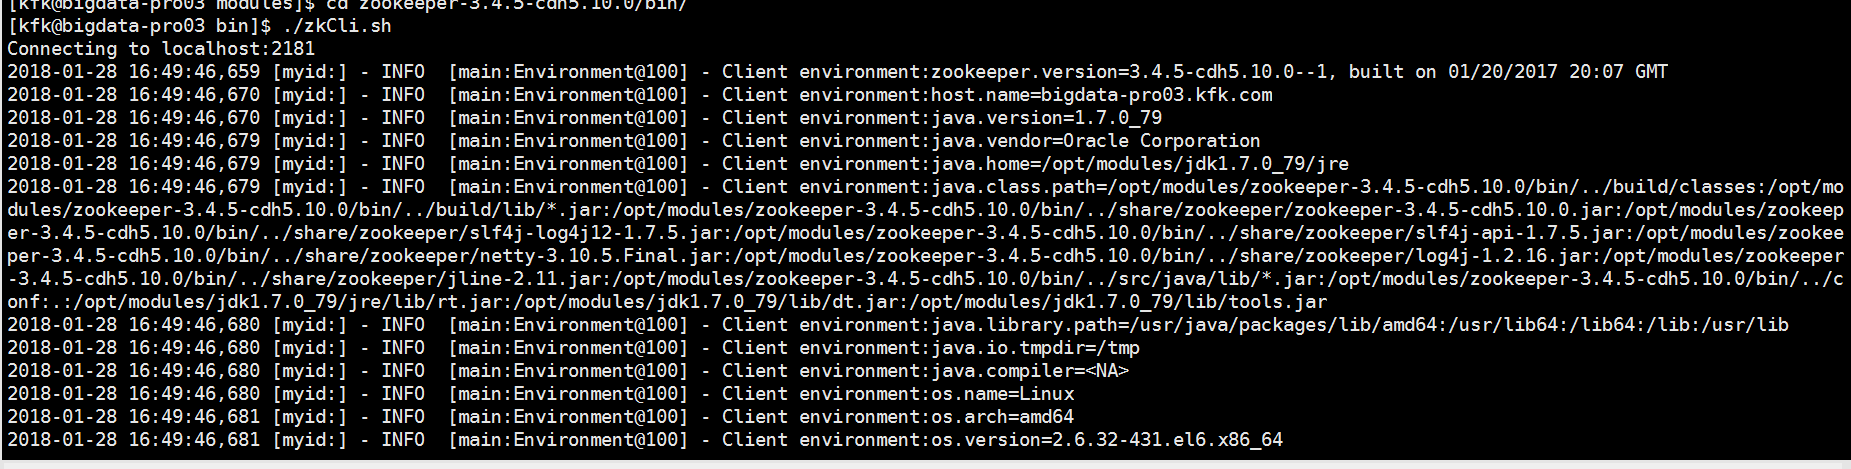
这时候我们就应该到zookeeper里

再次重新启动hbase,然后同时在节点2的hbase把back-up master也启动起来

回到节点1上启动flume
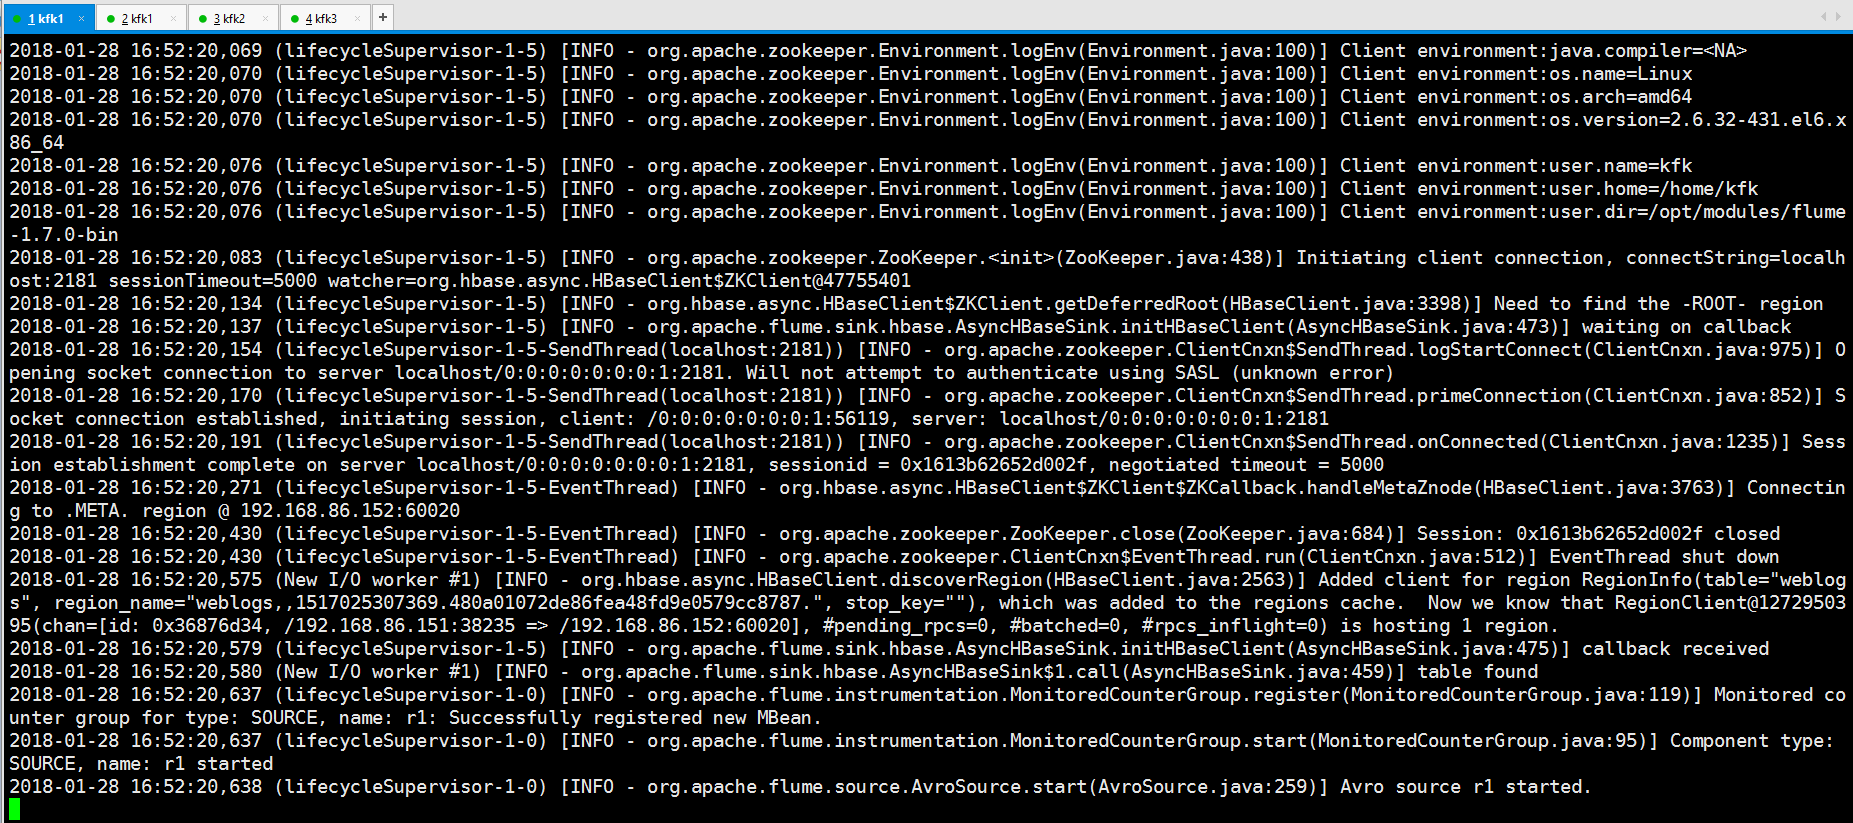
成功启动了!!!!
在节点1启动一个kafka的消费者

针对前面节点2的kafka日志不正常的问题


现在分别启动三个节点的kafka


创建topic

bin/kafka-topics.sh --zookeeper bigdata-pro01.kfk.com:2181,bigdata-pro02.kfk.com:2181,bigdata-pro03.kfk.com:2181 --create --topic weblogs --replication-factor 3 --partitions 1
我们查看三台机器的kafka日志


启动flume ,先启动节点1的然后就再启动节点2 的和节点3的
在节点2和节点3产生数据
查看我们的hbase的表有么有接收到数据

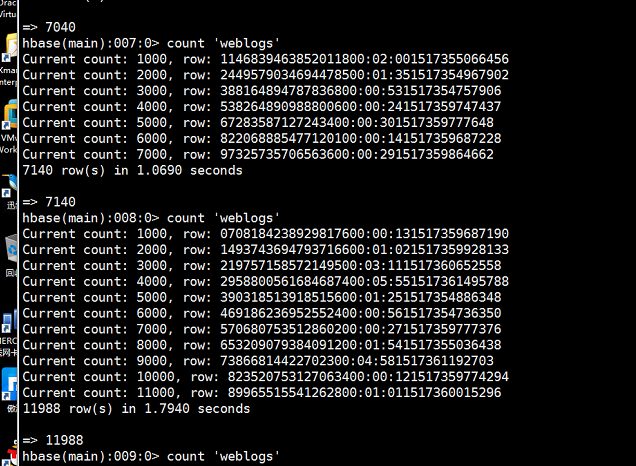
可以看到数据在不断的增加,hbase接收到数据了。
虽然在hbase上接收到数据了,但是在我的kafka消费端我是怎么都接收不到数据,经过几天下来的排查,和别人的帮助,
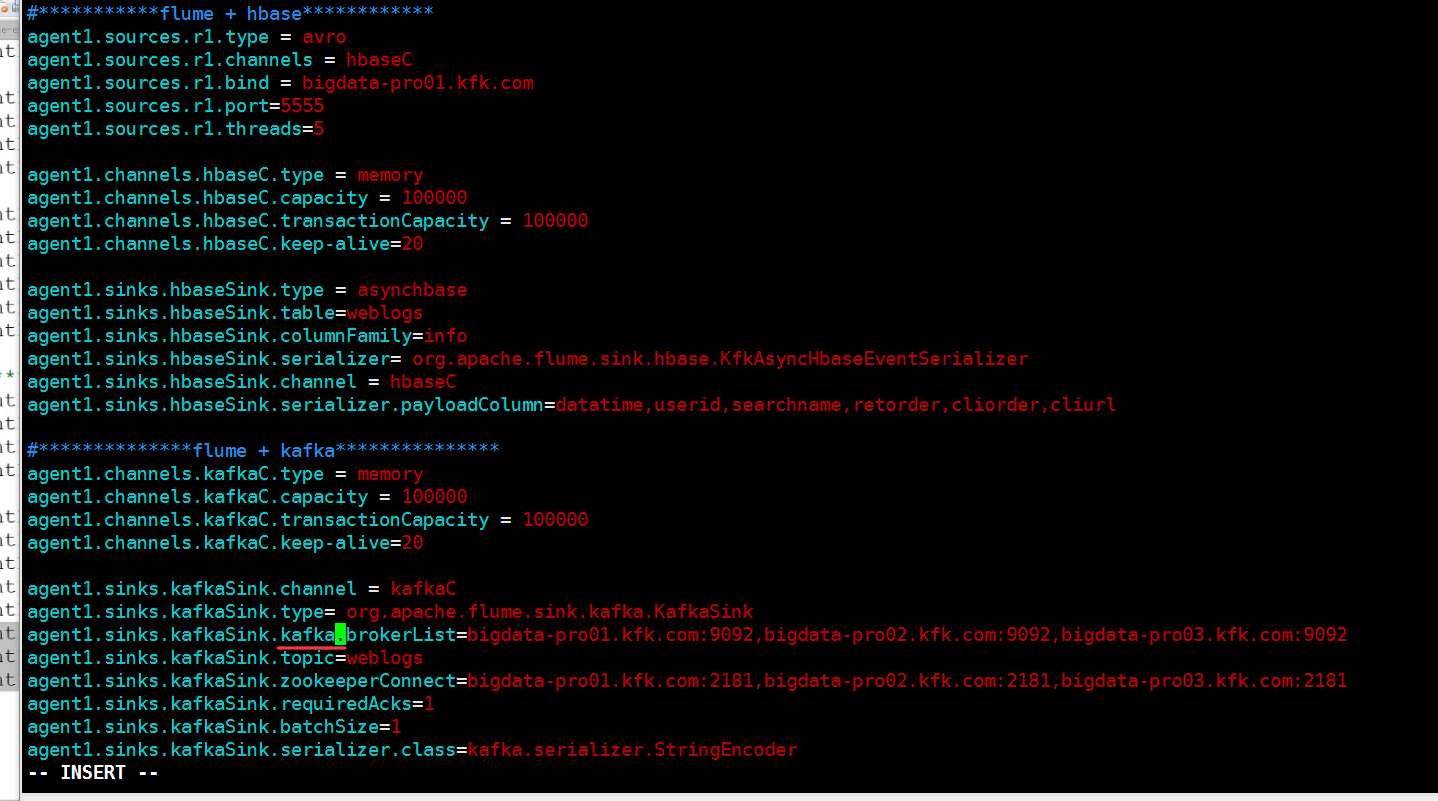
从flume的配置文件查看
问题就出在这里
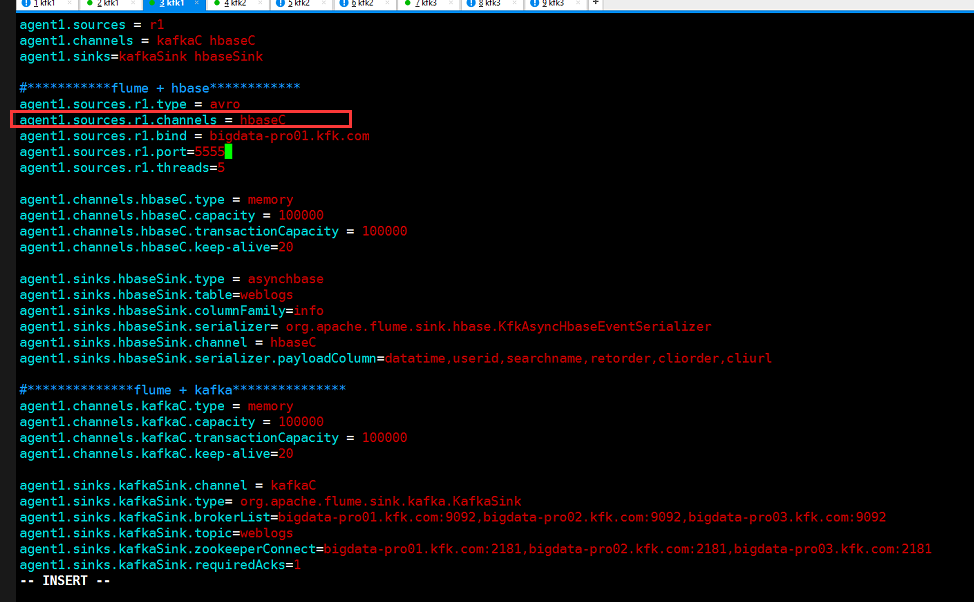
节点1的source管道只接收了hbase并没有接收kafka,现在我们改过来
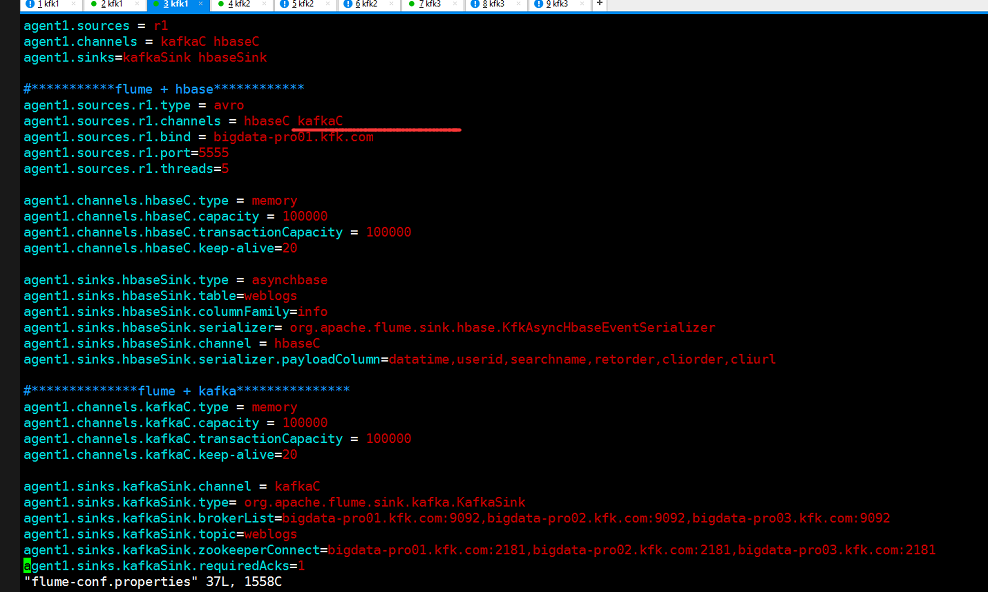
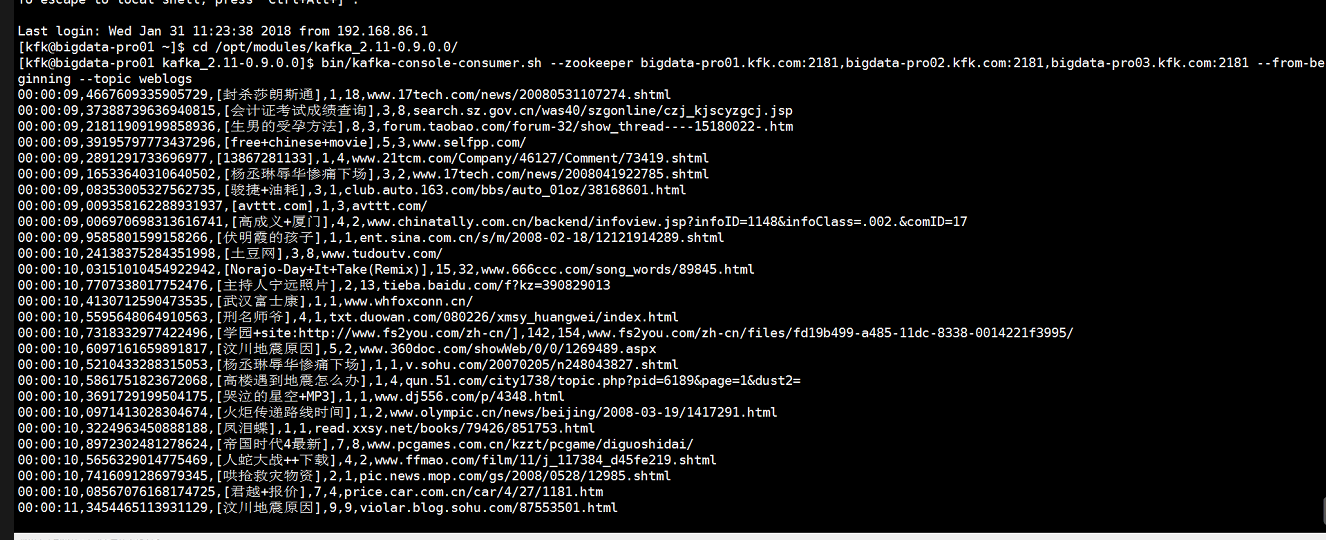
现在我们看到消费端已经是接收到数据了,
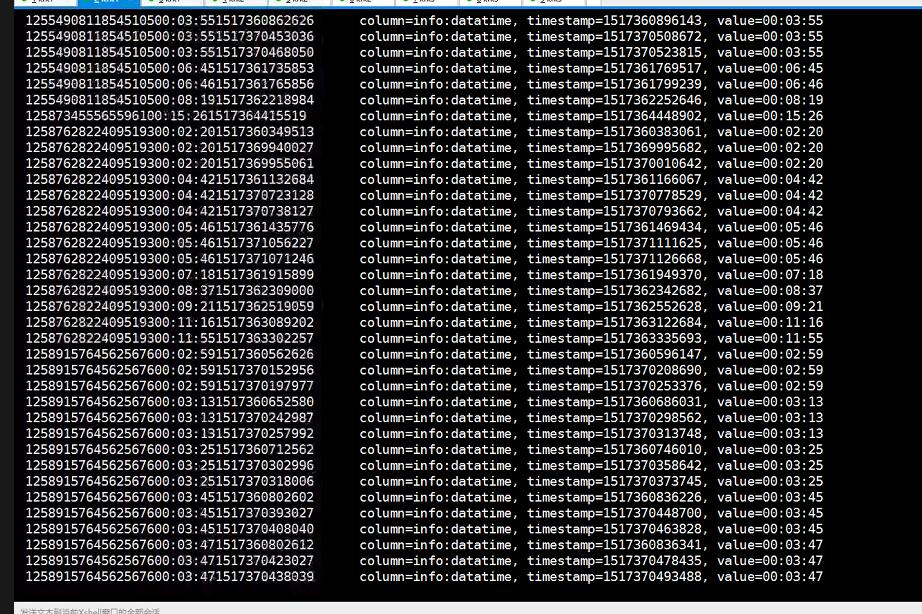
问题补充,后来经过查询hbase表里面的数据,发现只是接收到了datatime的这一列数据,其他数据没有接收到,这一点是很要命的
是什么原因呢,
是因为我们下载的搜狗 数据库里面的每一条数据不是都是6列的,也就是说我们下载的那个数据里面有些数据的列是null的
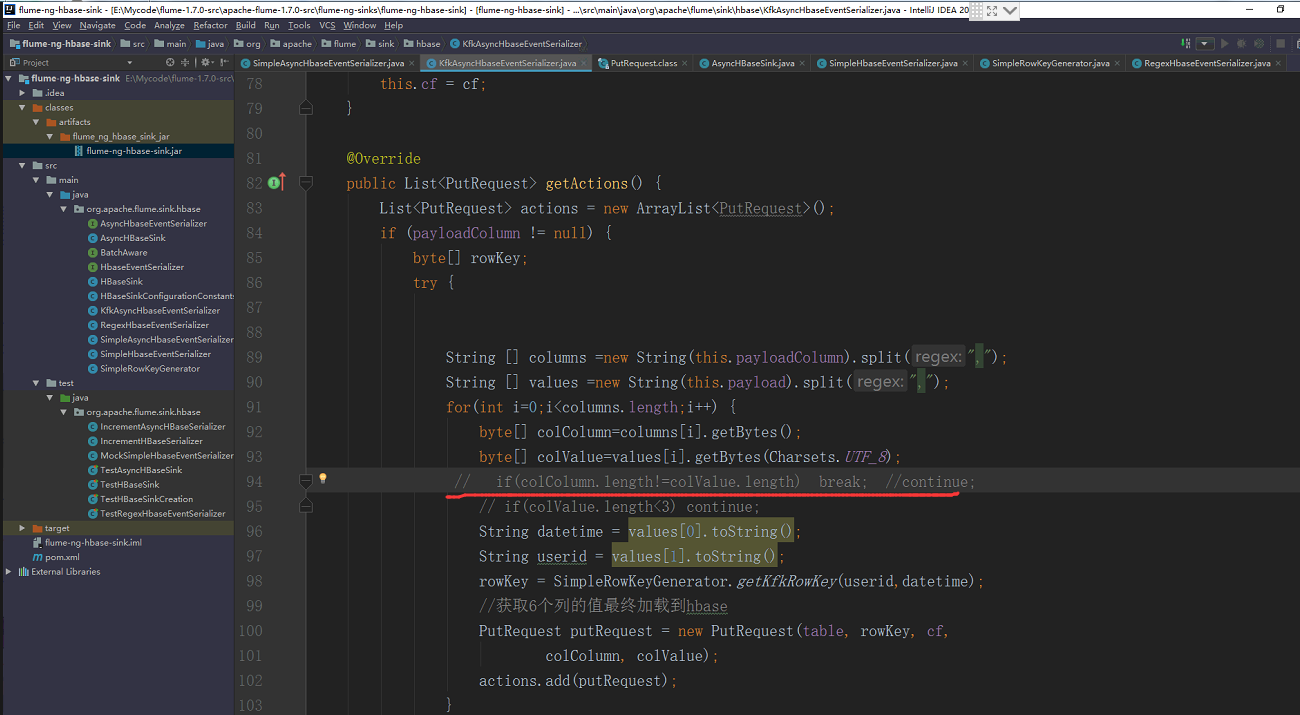
我们需要重新修改一下我们二次开发的代码了
把这一句注释掉就可以了,然后重新打包上次(过程我就不演示了)
重启kafka flume consumer hbase等等
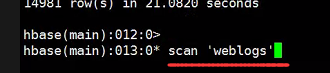
进入hbase shell 里面使用这个命令全表扫描
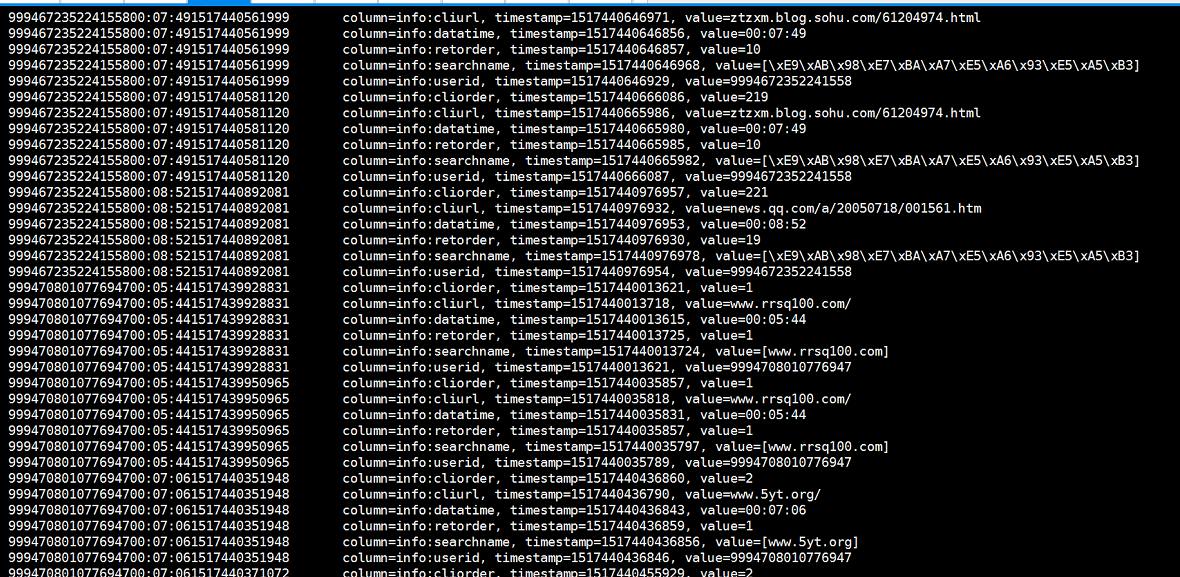
我们可以看到所有的列的信息我们都拿到了!!!!!
到这里整个数据采集存储分发完整流程我们就跑通了。真的感谢大数据的民间高手的帮助啊,感谢阿拉!!!