注:以下所有操作均在CentOS 6.5 x86_64位系统下完成。
#准备工作#
在安装Nginx之前,请确保已经使用yum安装了pcre等基础组件,具体见《CentOS安装LNMP环境的基础组件》。
然后创建www的用户组和用户,并且不允许登录权限:
# id www
id: www:无此用户
# groupadd www
# useradd -g www -s /sbin/nologin www
# id www
uid=501(www) gid=501(www) 组=501(www)
#Nginx的安装#
开始下载Nginx并进行编译安装:
# cd /usr/local/src
# wget http://nginx.org/download/nginx-1.6.2.tar.gz
# tar zxf nginx-1.6.2.tar.gz
# cd nginx-1.6.2
# ./configure --prefix=/usr/local/nginx-1.6.2 --group=www --user=www --with-http_ssl_module --with-pcre --with-http_stub_status_module --with-http_gzip_static_module

Configuration summary
  + using system PCRE library
  + using system OpenSSL library
  + md5: using OpenSSL library
  + sha1: using OpenSSL library
  + using system zlib library

  nginx path prefix: "/usr/local/nginx-1.6.2"
  nginx binary file: "/usr/local/nginx-1.6.2/sbin/nginx"
  nginx configuration prefix: "/usr/local/nginx-1.6.2/conf"
  nginx configuration file: "/usr/local/nginx-1.6.2/conf/nginx.conf"
  nginx pid file: "/usr/local/nginx-1.6.2/logs/nginx.pid"
  nginx error log file: "/usr/local/nginx-1.6.2/logs/error.log"
  nginx http access log file: "/usr/local/nginx-1.6.2/logs/access.log"
  nginx http client request body temporary files: "client_body_temp"
  nginx http proxy temporary files: "proxy_temp"
  nginx http fastcgi temporary files: "fastcgi_temp"
  nginx http uwsgi temporary files: "uwsgi_temp"
  nginx http scgi temporary files: "scgi_temp"

# make && make install
# ln -s /usr/local/nginx-1.6.2/ /usr/local/nginx
# chown -R www:www /usr/local/nginx
# chown -R www:www /usr/local/nginx-1.6.2
把Nginx的sbin目录加入PATH:
# vim /etc/profile

export PATH=$PATH:/usr/local/mysql/bin:$JAVA_HOME/bin:/usr/local/nginx/sbin

# source /etc/profile
查看Nginx的版本信息,并且检验上一步骤是否成功:
# nginx -V
nginx version: nginx/1.6.2
built by gcc 4.4.7 20120313 (Red Hat 4.4.7-4) (GCC)
TLS SNI support enabled
configure arguments: --prefix=/usr/local/nginx-1.6.2 --group=www --user=www --with-http_ssl_module --with-pcre --with-http_stub_status_module
至此,Nginx已经安装完毕。
#Nginx的启动/重启/关闭#
给Nginx的webapp配置相关路径(这里是为了后面运维管理方便,可以把不同的Web项目放到该目录下):
# mkdir -p /data/www
简单修改下配置文件:
# vim /usr/local/nginx/conf/nginx.conf

user  www;
worker_processes  1;
events {
    worker_connections  1024;
}
http {
    include       mime.types;
    default_type  application/octet-stream;
    sendfile      on;
    keepalive_timeout  65;
    gzip  on;
    server {
        listen       80;
        server_name  localhost;
        location / {
            root   html;
            index  index.html index.htm;
        }
    }
}
开始启动Nginx:
# nginx
这个时候打开浏览器访问地址http://youripaddress应该可以看到:
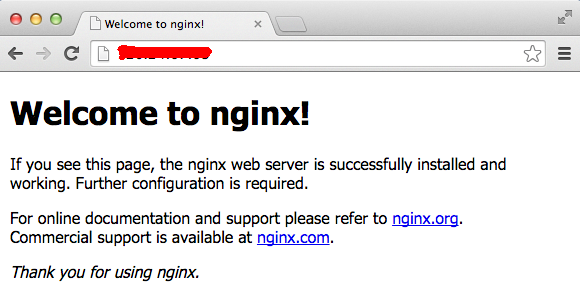
至此,Nginx已经启动成功。
一般来说,当修改了nginx.conf配置文件后,可以直接重启让配置生效,重启之前一般检测下配置文件是否正确:
# nginx -t
nginx: the configuration file /usr/local/nginx-1.6.2/conf/nginx.conf syntax is ok
nginx: configuration file /usr/local/nginx-1.6.2/conf/nginx.conf test is successful
# nginx -s reload
另外,重启也可以通过发信号的方式:
# kill -HUP ${master_pid}
关闭的命令如下:
# nginx -s quit
# nginx -s stop
注:quit表示等请求结束后再关闭,stop表示立刻关闭。
也可以通过发信号的方式来关闭:
# kill -QUIT ${nginx_master}
# kill -TERM ${nginx_master}
# kill -9 ${nginx_master}
注:-QUIT表示从容停止,等所有请求结束后再关闭进程;TERM则表示立刻关闭进程;-9表示强制关闭。
为了以后管理上的方便, 我们这里写个启动脚本,以后就可以用service命令来启动,如下:
# vim /etc/init.d/nginxd

#!/bin/sh
# chkconfig: 2345 85 15
# description:Nginx Server

NGINX_HOME=/usr/local/nginx-1.6.2
NGINX_SBIN=$NGINX_HOME/sbin/nginx
NGINX_CONF=$NGINX_HOME/conf/nginx.conf
NGINX_PID=$NGINX_HOME/logs/nginx.pid

NGINX_NAME="Nginx"

. /etc/rc.d/init.d/functions

if [ ! -f $NGINX_SBIN ]
then
    echo "$NGINX_NAME startup: $NGINX_SBIN not exists! "
    exit
fi

start() {
    $NGINX_SBIN -c $NGINX_CONF
    ret=$?
    if [ $ret -eq 0 ]; then
        action $"Starting $NGINX_NAME: " /bin/true
    else
        action $"Starting $NGINX_NAME: " /bin/false
    fi
}

stop() {
    kill `cat $NGINX_PID`
    ret=$?
    if [ $ret -eq 0 ]; then
        action $"Stopping $NGINX_NAME: " /bin/true
    else
        action $"Stopping $NGINX_NAME: " /bin/false
    fi
}

restart() {
    stop
    start
}

check() {
    $NGINX_SBIN -c $NGINX_CONF -t
}


reload() {
    kill -HUP `cat $NGINX_PID` && echo "reload success!"
}

relog() {
    kill -USR1 `cat $NGINX_PID` && echo "relog success!"
}

case "$1" in
    start)
        start
        ;;
    stop)
        stop
        ;;
    restart)
        restart
        ;;
    check|chk)
        check
        ;;
    status)
        status -p $NGINX_PID
        ;;
    reload)
        reload
        ;;
    relog)
        relog
        ;;
    *)
        echo $"Usage: $0 {start|stop|restart|reload|status|check|relog}"
        exit 1
esac

# chmod +x /etc/init.d/nginxd
# chkconfig nginxd on
这样子就可以通过service来启动:
# service nginxd start
#Nginx的安全配置#
1、 首先设置不允许目录浏览,默认配置即为不允许。
autoindex off
2、开启访问日志,nginx中默认已开启,这里我们后续为了运维管理上的方便最好把日志单独放到/data目录下。
access_log /data/www/logs/localhost.access.log
3、确保目录的安全,由于Nginx使用的是www用户启动,黑客入侵服务器成功后将获得www用户的权限,所以需要确保网站Web目录和文件的属主与启动用户不同,防止网站被黑客恶意篡改和删除。网站Web目录和文件的属主可以设置为root,其中Web目录权限统一设置为755,Web文件权限统一设置为644。只有上传目录等可读写权限的目录可以被设置为777,为了防止黑客上传木马到777权限目录中,还必须保证该777权限的目录没有执行脚本的权限。这里有两种情况处理:
1)对于使用PHP的业务,配置如下:
location ~* ^/data/www/logs/.*\.(php|php5)$ {
    deny all;
}
注:当然最安全的还是给PHP的可执行目录采用白名单的方式,这个我们在PHP的安装一节中再详细介绍。
2)对于非使用PHP的业务(如python、cgi等),则需要禁止外部访问777目录,配置如下:
location ~ ^/data/www/logs/ {
    deny all;
}
4、对于管理目录,需要限制访问的IP地址,比如这里限制访问nginx状态的:
server {
    location /nginx-admin {
        stub_status on;
        access_log logs/nginx-admin.log;
        allow 11.12.23.0/24;
        deny all;
    }

    location /admin {
        ...
    }
}
注:上面配置的11.12.23.0/24指的就是当前运维客户端的IP地址段。
在允许IP的机器上输入地址应该可以看到:

而不允许的用户访问应该是不可以的,会显示403错误,比如:

5、把Nginx默认的首页等页面删除,使用业务自己的首页来顶替。
6、不允许IP直接访问服务器,这样的好处是怕当IP地址泄漏出去之后,被人用别的域名来指向了这个IP地址,可以设置让其返回500等错误码。比如:
server {
    listen        80 default;
    return 500;
}
server {
    listen        80;
    server_name   www.tencent.com tencent.com;
    root          /data/www/tencent;

    access_log    /data/logs/nginx/tencent.access.log;
    error_log     /data/logs/nginx/tencent.error.log;
}
注:上面的配置表示当使用IP地址直接访问时将出错,而使用域名访问时(比如请求tencent.com则正常)。
#Nginx的性能配置#
1、使用epoll的I/O模型,一般为默认。
use epoll;
2、 配置Nginx的进程数,一般根据CPU的数目来设置,比如双核的可以配置为2或4。
work_processes 4;
3、配置每个进程允许的最大连接数,理论上每台Nginx服务器的最大连接数为work_processes*worker_connections,需要根据当前服务器配置进行设置。
worker_connections 10240;
4、配置Nginx进程打开的最多文件描述符数目,最好与系统的ulimit -n保持一致。
worker_rlimit_nofile 102400;
5、配置keepalive超时时间,默认以秒为单位。
keepalive_timeout 60;
6、配置客户端请求头部的缓冲区大小,这个可以根据系统分页大小来设置,分页大小可以用命令getconf PAGESIZE来获取。
client_header_buffer_size 4k;
7、配置为打开文件指定缓存(默认没有启用),建议和打开文件数一致,并且为其指定缓存过期时间。
open_file_cache max=102400 inactive=20s;
8、配置缓存的有效信息检查时间间隔。
open_file_cache_valid 30s;
9、配置在缓存过期时间内文件的最少使用次数,如果低于这个次数则将缓存移除。
open_file_cache_min_uses 1;