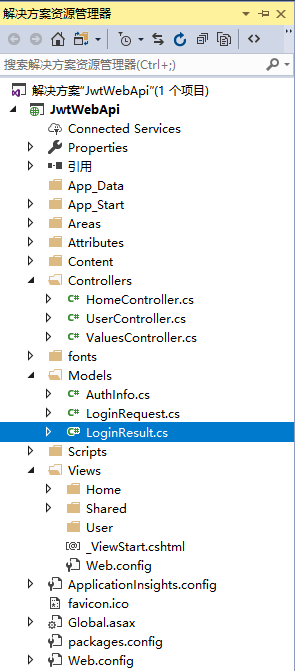
这是第一部:先实现NetFramework上的WebApi使用JWT认证
1、VS新建一个WebApi项目
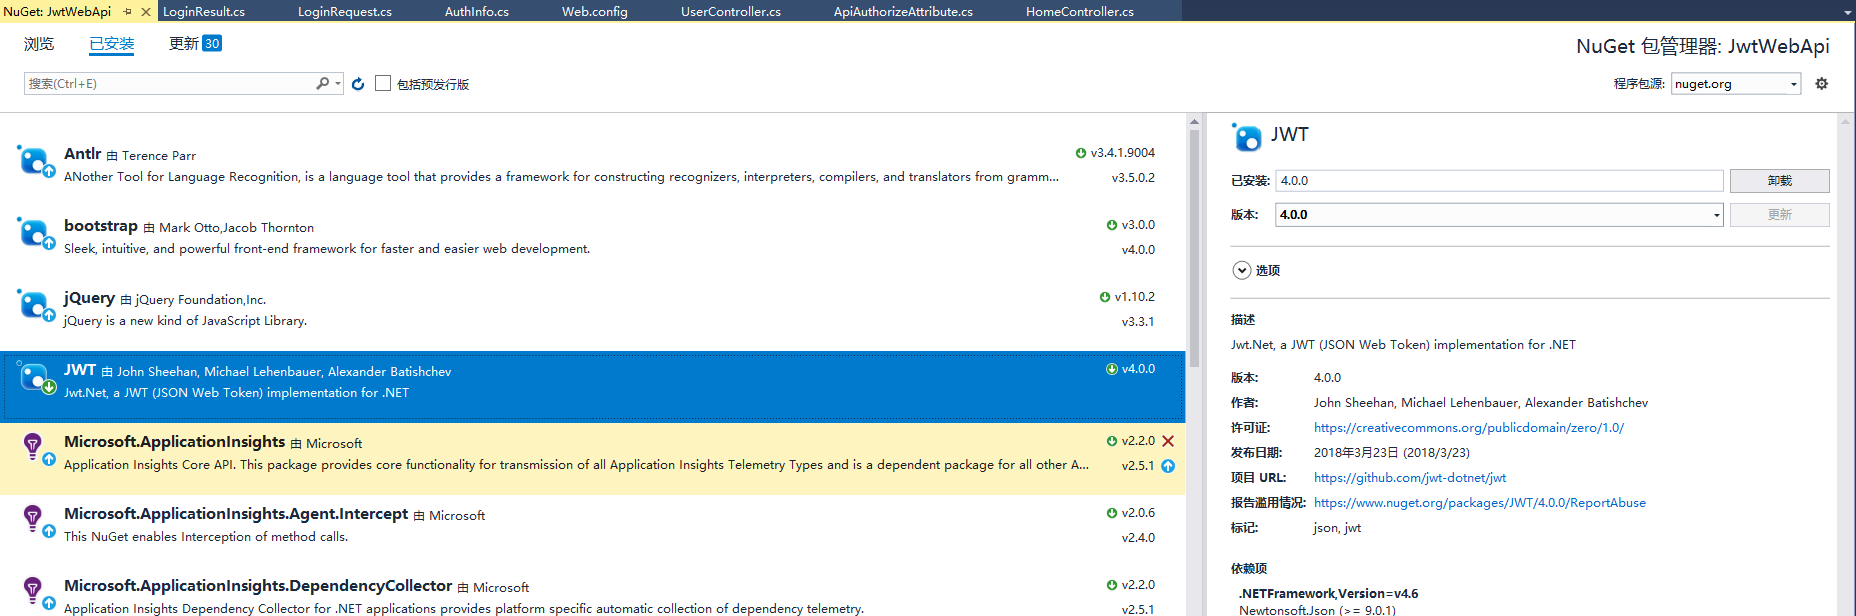
2、项目右键----管理Nuget程序包----找到JWT,然后安装
3、Model文件夹下新建三个类LoginResult,LoginRequest,AuthInfo

 1 namespace JwtWebApi.Models
 2 {
 3     public class LoginResult
 4     {
 5         public bool Success { get; set; }
 6
 7         public string Token { get; set; }
 8
 9         public string Message { get; set; }
10     }
11 }
1 namespace JwtWebApi.Models
2 {
3     public class LoginRequest
4     {
5         public string UserName { get; set; }
6
7         public string Password { get; set; }
8     }
9 }
 1 using System.Collections.Generic;
 2
 3 namespace JwtWebApi.Models
 4 {
 5     public class AuthInfo
 6     {
 7         //模拟JWT的payload
 8         public string UserName { get; set; }
 9
10         public List<string> Roles { get; set; }
11
12         public bool IsAdmin { get; set; }
13     }
14 }
4、在Controllers文件夹中的HomeController(没有就新建一个)中添加一个Post方法,这是生成JWT Token方法的地方,一般应放在登录的Action下
 1 using JWT;
 2 using JWT.Algorithms;
 3 using JWT.Serializers;
 4 using JwtWebApi.Models;
 5 using System;
 6 using System.Collections.Generic;
 7 using System.Web.Http;
 8
 9 namespace JwtWebApi.Controllers
10 {
11     public class HomeController : ApiController
12     {
13         public LoginResult Post([FromBody]LoginRequest request)
14         {
15             LoginResult rs = new LoginResult();
16             //这是是获取用户名和密码的,这里只是为了模拟
17             if (request.UserName == "wangshibang" && request.Password == "123456")
18             {
19                 AuthInfo info = new AuthInfo { UserName = "wangshibang", Roles = new List<string> { "Admin", "Manage" }, IsAdmin = true };
20                 try
21                 {
22                     const string secret = "To Live is to change the world";
23                     //secret需要加密
24                     IJwtAlgorithm algorithm = new HMACSHA256Algorithm();
25                     IJsonSerializer serializer = new JsonNetSerializer();
26                     IBase64UrlEncoder urlEncoder = new JwtBase64UrlEncoder();
27                     IJwtEncoder encoder = new JwtEncoder(algorithm, serializer, urlEncoder);
28                     var token = encoder.Encode(info, secret);
29                     rs.Message = "XXXXX";
30                     rs.Token = token;
31                     rs.Success = true;
32                 }
33                 catch (Exception ex)
34                 {
35                     rs.Message = ex.Message;
36                     rs.Success = false;
37                 }
38             }
39             else
40             {
41                 rs.Message = "fail";
42                 rs.Success = false;
43             }
44             return rs;
45         }
46     }
47 }
5、项目下添加一个Attributes文件夹,需要写个权限拦截器,新建一个ApiAuthorizeAttribute类继承自AuthorizeAttribute类
 1 using JWT;
 2 using JWT.Serializers;
 3 using JwtWebApi.Models;
 4 using System;
 5 using System.Linq;
 6 using System.Web.Http;
 7 using System.Web.Http.Controllers;
 8
 9 namespace JwtWebApi.Attributes
10 {
11     public class ApiAuthorizeAttribute : AuthorizeAttribute
12     {
13         protected override bool IsAuthorized(HttpActionContext actionContext)
14         {
15             var authHeader = from t in actionContext.Request.Headers where t.Key == "auth" select t.Value.FirstOrDefault();
16             if (authHeader != null)
17             {
18                 string token = authHeader.FirstOrDefault();
19                 if (!string.IsNullOrEmpty(token))
20                 {
21                     try
22                     {
23                         const string secret = "To Live is to change the world";
24                         //secret需要加密
                IJwtAlgorithm algorithm = new HMACSHA256Algorithm();
25                         IJsonSerializer serializer = new JsonNetSerializer();
26                         IDateTimeProvider provider = new UtcDateTimeProvider();
27                         IJwtValidator validator = new JwtValidator(serializer, provider);
28                         IBase64UrlEncoder urlEncoder = new JwtBase64UrlEncoder();
29                         IJwtDecoder decoder = new JwtDecoder(serializer, validator, urlEncoder,algorithm);
30
31                         var json = decoder.DecodeToObject<AuthInfo>(token, secret, verify: true);
32                         if (json != null)
33                         {
34                             actionContext.RequestContext.RouteData.Values.Add("auth", json);
35                             return true;
36                         }
37                         return false;
38                     }
39                     catch (Exception ex)
40                     {
41                         return false;
42                     }
43                 }
44             }
45             return false;
46         }
47     }
48 }
6、Controllers文件夹中新建一个UserController,新建一个Get的Action,需要加上ApiAuthorize特性
 1 using JwtWebApi.Attributes;
 2 using JwtWebApi.Models;
 3 using System.Web.Http;
 4
 5 namespace JwtWebApi.Controllers
 6 {
 7     public class UserController : ApiController
 8     {
 9         // GET: User
10         [ApiAuthorize]
11         public string Get()
12         {
13             AuthInfo info = RequestContext.RouteData.Values["auth"] as AuthInfo;
14             if (info == null)
15             {
16                 return "获取不到,失败";
17             }
18             else
19             {
20                 return $"获取到了,Auth的Name是 {info.UserName}";
21             }
22         }
23     }
24 }
7、然后用PostMan测试
下面是解决接口调用的跨域问题,有两种,一种是用CORS,另外一种就是修改WebConfig添加自定义options谓词处理模块
我只用了自定义Options谓词处理
 1 <system.webServer>
 2     <handlers>
 3       <!--开启options谓词处理模块-->
 4       <remove name="ExtensionlessUrlHandler-Integrated-4.0" />
 5       <!--<remove name="OPTIONSVerbHandler" />-->
 6       <remove name="TRACEVerbHandler" />
 7       <add name="ExtensionlessUrlHandler-Integrated-4.0" path="*." verb="*" type="System.Web.Handlers.TransferRequestHandler" preCondition="integratedMode,runtimeVersionv4.0" />
 8     </handlers>
 9     <httpProtocol>
10       <customHeaders>
11         <!--添加自定义options谓词处理模块-->
12         <add name="Access-Control-Allow-Origin" value="http://localhost:8057"/>
13         <add name="Access-Control-Allow-Headers" value="accept, auth"/>
14         <add name="Access-Control-Allow-Methods" value="GET, OPTIONS"/>
15       </customHeaders>
16     </httpProtocol>
17     <validation validateIntegratedModeConfiguration="false" />
18     <modules>
19       <remove name="ApplicationInsightsWebTracking" />
20       <add name="ApplicationInsightsWebTracking" type="Microsoft.ApplicationInsights.Web.ApplicationInsightsHttpModule, Microsoft.AI.Web" preCondition="managedHandler" />
21     </modules>
22   </system.webServer>
好了,现在把你的WebApi部署到服务器上,然后用另一个跨域页面调取接口访问吧
 1 <!DOCTYPE html>
 2 <html>
 3 <head>
 4     <meta http-equiv="Content-Type" content="text/html; charset=utf-8" />
 5     <title></title>
 6     <meta charset="utf-8" />
 7     <script src="jquery-3.3.1.min.js"></script>
 8 </head>
 9 <body>
10     <fieldset>
11         <legend>身份验证</legend>
12         <form>
13             <label for="UserName">用户名:</label><input type="text" name="userName" id="userName" value="admin" />
14             <br />
15             <br />
16             <label for="Password">密码:</label><input type="password" name="password" id="password" value="123" />
17             <br />
18             <br />
19         </form>
20         <button id="login">登录</button>
21     </fieldset>
22     <br />
23
24     <fieldset>
25         <legend>调用接口</legend>
26         <button id="invoke">调用接口</button>
27     </fieldset>
28     <script>
29         $(function () {
30             //调用api站点的登录接口,接口在登录成功后返回一个token。
31             $("#login").on("click", function () {
32                 $.ajax({
33                     url: "http://localhost:8056/api/home",
34                     data: $("form").serialize(),
35                     method: "post",
36                     success: function (data) {
37                         if (data.Success) {
38                             //为简单起见,将token保存在全局变量中。
39                             window.token = data.Token;
40                             alert("登录成功");
41                         } else {
42                             alert("登录失败:" + data.Message);
43                         }
44                     }
45                 });
46             });
47
48             //调用api站点的获取数据的接口,该接口要求身份验证。
49             $("#invoke").on("click", function () {
50                 console.log(window.token);
51                 $.ajax({
52                     url: "http://localhost:8056/api/user",
53                     method: "get",
54                     headers: { "auth": window.token },//通过请求头来发送token,放弃了通过cookie的发送方式
55                     complete: function (jqXHR,textStatus) {
56                         alert(jqXHR.responseText);
57                     },
58
59                 });
60             });
61         });
62     </script>
63 </body>
64 </html>