单个 <router-view/> 和多个 <router-view/> 的区别,
单个 <router-view/> 只是一个区域的变化,不需要设置name属性,在设置路由的时候单个<router-view/>使用的是component,
多个<router-view/>里面需要设置一个name属性,设置路由的时候单个<router-view/>使用的是components,
————————————————
<div>
<router-view/>
<router-view class="left" name="nav" />
<router-view class="right" name="con" />
</div>
然后在router.js中进行配置,注意:component改成要components,components是一个对象了,nav:AboutNav,左侧的nav就是<router-view name="nav" /> 标签里的 name属性值,nav:AboutNav,右侧的AboutNav就是引用组件时候import AboutNav from './views/AboutNav.vue'中的AboutNav。
import AboutCon from './views/AboutCon.vue'
import AboutNav from './views/AboutNav.vue'
{
path: '/about',
name: 'about',
components:
{
nav:AboutNav,
con:AboutCon
}
}
--------------------
other
vue同一个页面可以有多个router-view
参考:https://blog.csdn.net/u011615787/article/details/80075240
分别给router-view定义一个name,默认显示的可以不用定义
自己先在components文件夹内写4个组件,准备放入4个router-viewer标签,我的分别是
app.vue
|
1
2
3
4
5
6
7
8
9
10
11
12
13
14
15
16
17
18
19
20
21
22
23
24
25
26
27
28
29
30
31
32
33
34
35
36
37
38
39
40
41
42
43
44
45
46
47
48
49
50
51
52
53
54
|
<template> <div id="app"> <!-- <img src="./assets/logo.png"> --> <!-- <container-Left/> --> <router-link to="/HelloWorld" > 222 </router-link> <router-view/> <router-view name="left" class="area left"/> <router-view name="right" class="area right"/> <router-view name="logo" class="area "/> <router-view name="bottom" class="area bottom"/> </div></template><script>import containerLeft from './components/containerLeft.vue'export default { name: 'App', components:{ containerLeft, }}</script><style>#app { font-family: 'Avenir', Helvetica, Arial, sans-serif; -webkit-font-smoothing: antialiased; -moz-osx-font-smoothing: grayscale; text-align: center; color: #2c3e50; /* margin-top: 60px; */}.area{ 400px; height:400px; border:1px red soild; position: absolute; top:20px; z-index: 1002;}.left{ left:0px; top:100px;}.right{ right: 0px;}.bottom{ top: 90%; 100%; height: 30px;}</style> |
路由文件router/index.js
核心:
|
1
2
3
4
5
6
7
8
9
10
11
12
13
14
15
16
17
18
19
20
21
22
23
24
25
26
27
28
29
30
31
32
33
34
35
36
37
38
39
40
41
42
43
44
45
46
47
48
49
50
51
52
53
54
55
56
57
58
|
import Vue from 'vue'import Router from 'vue-router'import HelloWorld from '@/components/HelloWorld'import Veaflet from '@/components/Veaflet'import containerLeft from '@/components/containerLeft'import containerRight from '@/components/containerRight'import containerTop from '@/components/containerTop'import containerBottom from '@/components/containerBottom'import lefttree from '@/components/lefttree'Vue.use(Router)// 创建一个路由器实例// 并且配置路由规则const router = new Router({ routes: [ { path: '/', name: 'Veaflet', meta:{title:'Veaflet'}, components:{ default: Veaflet, left:containerLeft, right:containerRight, logo:containerTop, bottom:containerBottom } }, { path: '/HelloWorld', name: 'HelloWorld', meta:{title:'HelloWorld'}, component: HelloWorld }, { path: '/containerLeft', name: 'containerLeft', meta:{title:'containerLeft'}, component: containerLeft }, { path: '/lefttree', name: 'lefttree', meta:{title:'lefttree'}, component: lefttree } ]}) //修改动态网页标题 beforeEach 导航钩子,路由改变前触发 router.beforeEach((to,from,next) =>{ //window.document.title = to.meta.title; window.document.title = to.name; next(); }) router.afterEach((to,from,next) =>{ window.scrollTo(0,0); }) export default router; |
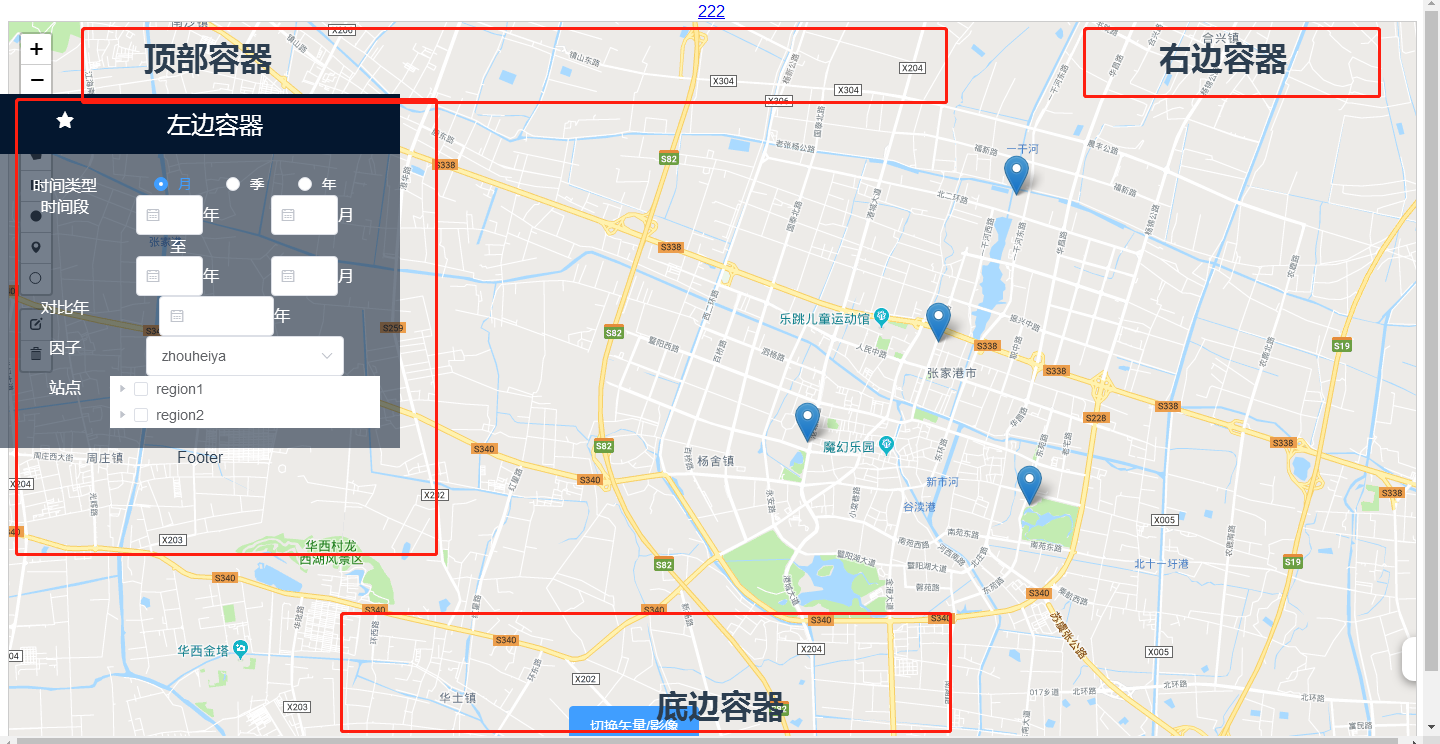
运行效果如图: