https://grpc.io/docs/languages/dart/quickstart/
1.安装brew
https://brew.sh/index_zh-cn.html
ruby -e "$(curl -fsSL https://raw.githubusercontent.com/Homebrew/install/master/install)"
前提是机器上安装了ruby
貌似还需要xcode命令行?
命令行下载
https://developer.apple.com/download/more/
安装brew可能还报Failed to connect to raw.githubusercontent.com port 443: Connection refused error。这是DNS问题
修改hosts文件
sudo vim /etc/hosts
添加
199.232.28.133 raw.githubusercontent.com
之后再
验证是否安装成功
brew --version
按brew花了不少时间
2.安装protobuf
brew install protobuf
3.安装插件
pub global activate protoc_plugin
4.添加环境变量
vim .bash_profile
添加
exprot PATH=$PATH:/Users/xx/.pub-cache/bin
5.安装插件

6.编译
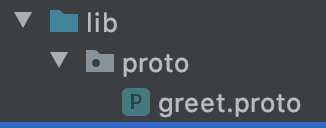
复制文件到flutter /lib/proto下,proto文件夹随便起的

内容
syntax = "proto3";

option csharp_namespace = "MesGrpcServer";

package greet;

// The greeting service definition.
service Greeter {
  // Sends a greeting
  rpc SayHello (HelloRequest) returns (HelloReply);
}

// The request message containing the user's name.
message HelloRequest {
  string name = 1;
}

// The response message containing the greetings.
message HelloReply {
  string message = 1;
}
命令行编译
protoc --dart_out=grpc:. greet.proto --plugin ~/.pub-cache/bin/protoc-gen-dart
生成

7.pubspec.yaml中添加
  protobuf: 1.0.1
  grpc: 2.2.0
8.写flutter客户端程序
import 'package:flutter/material.dart';
import 'package:fluttertest/proto/greet.pbgrpc.dart';
import 'package:grpc/grpc.dart';

class GrpcTest extends StatefulWidget {
  @override
  _GrpcTestState createState() => _GrpcTestState();
}

class _GrpcTestState extends State<GrpcTest> {
  @override
  Widget build(BuildContext context) {
    return Scaffold(
      appBar: AppBar(),
      body: Center(
        child: MaterialButton(
          child: Text("发送"),
          onPressed: (){
            //创建一个通道
            final channel = ClientChannel(
              '192.168.1.102',
              port: 5000,
              options: const ChannelOptions(credentials: ChannelCredentials.insecure()),
            );

            final stub = GreeterClient(channel);

            ()async{
              HelloRequest http=HelloRequest();
              http.name='tom';
              try{
             var response=  await stub.sayHello(http);
             print(response.message);

              } catch(e){
                print(e);
              }
              await channel.shutdown();
            }();
          },
        ),
      ),
    );
  }
}