Struts2,Spring3,Hibernate4整合--SSH框架(学习中)
一、包的导入
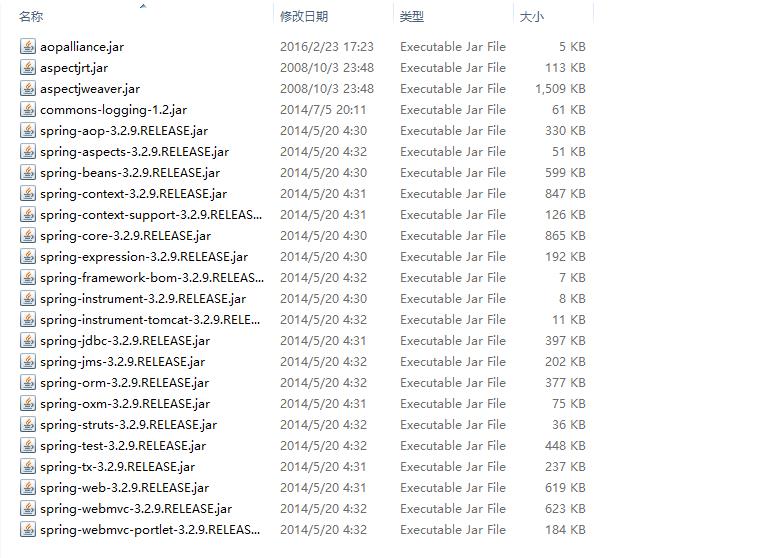
1、Spring包
2、Hibernate 包

3、struts 包 (还欠 struts2-spring-plugin-2.3.28.jar 的包)

4、数据库方面的包及junt4的包

二、配置文件
1、beans.xml (具体要注意的已经注释到 xml 中了,目前整合了Spring 与 hibernate4 )
<?xml version="1.0" encoding="UTF-8"?>
<beans xmlns="http://www.springframework.org/schema/beans"
       xmlns:xsi="http://www.w3.org/2001/XMLSchema-instance"
       xmlns:context="http://www.springframework.org/schema/context"
       xmlns:tx="http://www.springframework.org/schema/tx"
       xmlns:aop="http://www.springframework.org/schema/aop"
       xsi:schemaLocation="http://www.springframework.org/schema/beans
      http://www.springframework.org/schema/beans/spring-beans.xsd
      http://www.springframework.org/schema/context
      http://www.springframework.org/schema/context/spring-context.xsd
      http://www.springframework.org/schema/tx
      http://www.springframework.org/schema/tx/spring-tx.xsd
      http://www.springframework.org/schema/aop
      http://www.springframework.org/schema/aop/spring-aop.xsd">

    <!-- 打开Spring 的 Annotation 支持-->
    <context:annotation-config/>
    <!-- 设定Annotation 到 哪里 找-->
    <context:component-scan base-package="org.cs"/>
    <!-- 打开Spring 的 Aop 代理 -->
    <aop:aspectj-autoproxy/>

    <!-- 使用 DBCP 创建 dateSource -->
    <bean id="dataSource" class="org.apache.commons.dbcp2.BasicDataSource" destroy-method="close">
        <property name="driverClassName" value="${jdbc.driverClassName}" />
        <property name="url" value="${jdbc.url}" />
        <property name="username" value="${jdbc.username}" />
        <property name="password" value="${jdbc.password}" />
        <!-- 配置 hibernate -->
        <!-- 配置连接池的初始值 为 1-->
        <property name="initialSize" value="1"/>
        <!-- 配置最小空闲时 -->
        <property name="minIdle" value="1"/>
        <!-- 最大连接池 -->
        <property name="maxTotal" value="100"/>
        <!-- 配置最大空闲时-->
        <property name="maxIdle" value="20"/>
        <!-- 配置等待时间-->
        <property name="maxWaitMillis" value="1000" />
    </bean>
    <context:property-placeholder location="classpath:jdbc.properties"/>

    <!--  整合 hibernate4 创建 SessionFactory 工厂 -->
    <bean id="sessionFactory" class="org.springframework.orm.hibernate4.LocalSessionFactoryBean">
        <!-- 注入 数据源 -->
        <property name="dataSource" ref="dataSource"/>
        <!-- 设置 Spring 在哪里找 实体类 -->
        <property name="packagesToScan">
            <value>org.cs.Model</value>
        </property>
        <!-- 配置 hibernate -->
        <property name="hibernateProperties">
            <!--<value>hibernate.dialect=org.hibernate.dialect.HSQLDialect</value>-->
            <props>
                <prop key="hibernate.dialect">org.hibernate.dialect.MySQLDialect</prop>
                <prop key="hibernate.show_sql">true</prop>
                <prop key="hibernate.hbm2ddl.auto">update</prop>
                <prop key="hibernate.format_sql">false</prop>
            </props>
        </property>
    </bean>

    <!-- 配置 Spring 的事务管理 -->
    <!-- 创建事务管理器 -->
    <bean id="transactionManager"
          class="org.springframework.orm.hibernate4.HibernateTransactionManager">
        <property name="sessionFactory" ref="sessionFactory"/>
    </bean>
    <!-- 配置 AOP -->
    <aop:config>
        <!-- 设置 aop:pointcut 表示 哪些 包.方法 需要加入事务-->
        <aop:pointcut id="allMethods"
                      expression="execution(* org.cs.Service.*.*(..))"/>
        <!-- 设置 aop:pointcut 表示 具体 需要加入事物的 方法-->
        <aop:advisor advice-ref="txAdvice" pointcut-ref="allMethods"/>
    </aop:config>
    <!-- 配置那些方法需要加入事务处理 -->
    <tx:advice id="txAdvice" transaction-manager="transactionManager">
        <tx:attributes>
            <!-- 让所有方法加入事务 -->
            <tx:method name="*" propagation="REQUIRED" read-only="true"/>
            <tx:method name="add*" propagation="REQUIRED"/>
            <tx:method name="update*" propagation="REQUIRED"/>
            <tx:method name="save*" propagation="REQUIRED"/>
            <tx:method name="del*" propagation="REQUIRED"/>
        </tx:attributes>
    </tx:advice>

</beans>
2、struts.xml (实现 Spring 与 Struts2 的整合 )
<?xml version="1.0" encoding="UTF-8" ?>
<!DOCTYPE struts PUBLIC
	"-//Apache Software Foundation//DTD Struts Configuration 2.3//EN"
	"http://struts.apache.org/dtds/struts-2.3.dtd">

<struts>
    <!-- 设置 url 后缀-->
    <constant name="struts.action.extension" value="action,do"/>
    <!-- 当 struts的配置文件修改后,系统是否自动重新加载该文件,默认值为false(生 产环境下使用),开发阶段最好打开 -->
    <constant name="struts.configuration.xml.reload" value="true"/>
    <!-- 表示 Action 由 Spring 依赖注入来注入-->
    <constant name="struts.objectFactory" value="org.apache.struts2.spring.StrutsSpringObjectFactory"/>

    <!-- xxxAction 使用 struts 配置 -->
    <package name="default" namespace="/" extends="struts-default">
        <!--<!– 配置拦截器 , 要在 action 配置 后才生效–>-->
        <!--<interceptors>-->
            <!--<!– 这种 方式 在 action 中需要 配置 defaultStack –>-->
            <!--<!–<interceptor name="HelloInterceptor" class="Interceptor.HelloInterceptor"/>–>-->
            <!--<!– 这种方式 只需要在 action 中 配置 HelloStack –>-->
            <!--<interceptor name="HelloInterceptor" class="Interceptor.HelloInterceptor"/>-->
            <!--<interceptor-stack name="HelloStack">-->
                <!--<interceptor-ref name="defaultStack"/>-->
                <!--<interceptor-ref name="HelloInterceptor"/>-->
            <!--</interceptor-stack>-->
        <!--</interceptors>-->

        <!-- 全局结果集 -->
        <global-results>
            <result name="error">/WEB-INF/Exception/MyException.jsp</result>
            <result name="exception">/WEB-INF/Exception/MyException.jsp</result>
        </global-results>

        <!-- 异常抛出 配置-->
        <global-exception-mappings>
            <exception-mapping exception="Exception.MyException" result="exception"></exception-mapping>
        </global-exception-mappings>

        <!-- 基于 通配符 的 方式 , 由于整合了Spring ,class = "应该是Spring所注入的对象"-->
        <action name="*_*" class="{1}Action" method="{2}">
            <!-- 拦截器 生效 ,需要有继承 defaultStack -->
            <!--<interceptor-ref name="HelloInterceptor"/>-->
            <!--<interceptor-ref name="defaultStack"/>-->
            <!--<interceptor-ref name="HelloStack"/>-->
            <result name="success">/WEB-INF/jsp/{1}/{2}.jsp</result>
            <!-- 重定向 type = "redirect" -->
            <result type="redirect" name="redirect">/${url}</result>
        </action>

    </package>

</struts>
3、web.xml (创建 Spring 的 监听器,Struts2 的 过滤器)
<?xml version="1.0" encoding="UTF-8"?>
<web-app xmlns="http://xmlns.jcp.org/xml/ns/javaee"
         xmlns:xsi="http://www.w3.org/2001/XMLSchema-instance"
         xsi:schemaLocation="http://xmlns.jcp.org/xml/ns/javaee http://xmlns.jcp.org/xml/ns/javaee/web-app_3_1.xsd"
         version="3.1">

    <!-- 创建Spring 的监听器-->
    <listener>
    <listener-class>org.springframework.web.context.ContextLoaderListener</listener-class>
    </listener>
    <!-- Spring 的监听器通过这个上下文参数 获取 beans.xml 位置 -->
    <context-param>
    <param-name>contextConfigLocation</param-name>
    <param-value>classpath*:beans.xml</param-value>
    </context-param>

    <!-- OpenSessionInViewFilter 过滤器 (连接 表现层与Dao层 数据交互)-->
    <filter>
        <filter-name>openSessionInViewerFilter</filter-name>
        <filter-class>org.springframework.orm.hibernate4.support.OpenSessionInViewFilter</filter-class>
    </filter>
    <filter-mapping>
        <filter-name>openSessionInViewerFilter</filter-name>
        <url-pattern>/*</url-pattern>
    </filter-mapping>

    <!-- Struts 过滤器 -->
    <filter>
        <filter-name>struts2</filter-name>
        <filter-class>org.apache.struts2.dispatcher.ng.filter.StrutsPrepareAndExecuteFilter</filter-class>
    </filter>
    <filter-mapping>
        <filter-name>struts2</filter-name>
        <url-pattern>/*</url-pattern>
    </filter-mapping>

</web-app>
三、总结:
赶时间做出来的,还没写完整(目前整合了hibernate4 与 Spring ,快断网了。。),如果有错的地方请大家指出,方便大家一起学习。
SSH 框架整合 完成了,有点激动。。
这只是基础的SSH整合,接下来我会分享具体的项目设计,希望大家一起学习,方便指出不足之处。
传送门 :
github:https://github.com/ShunC/Invest