版权说明:浙江财经大学专业实践深度学习tensorflow——齐峰
基于多隐层神经网络的手写数字识别
目录
本章内容介绍
Tensorflow实现基于单个神经元的手写数字识别
Tensorflow实现基于单隐层神经网络的手写数字识别
Tensorflow实现基于多隐层神经网络的手写数字识别
** 上一节我们用单个神经元实现手写数字识别,本节我们将在此基础上拓展神经网络的深度,使其从包含单个神经元的网络拓展为包含256个神经元的单隐层神经网络。本节我们将掌握: **
- 神经网络的搭建:通过定义全连接操作来简化网络搭建
- 存储模型:在检查点checkpoint保存参数
- 读取模型:通过读取ckpt文件将已训练模型用于预测
载入数据
import os
import tensorflow as tf #导入Tensorflow
import tensorflow.examples.tutorials.mnist.input_data as input_data #导入Tensorflow提供的读取MNIST的模块

mnist = input_data.read_data_sets("MNIST_data/", one_hot=True) # 读取MNIST数据
WARNING:tensorflow:From <ipython-input-1-cf8d7a65a687>:5: read_data_sets (from tensorflow.contrib.learn.python.learn.datasets.mnist) is deprecated and will be removed in a future version.
Instructions for updating:
Please use alternatives such as official/mnist/dataset.py from tensorflow/models.
WARNING:tensorflow:From C:UsersJohnAppDataRoamingPythonPython36site-packages	ensorflowcontriblearnpythonlearndatasetsmnist.py:260: maybe_download (from tensorflow.contrib.learn.python.learn.datasets.base) is deprecated and will be removed in a future version.
Instructions for updating:
Please write your own downloading logic.
WARNING:tensorflow:From C:UsersJohnAppDataRoamingPythonPython36site-packages	ensorflowcontriblearnpythonlearndatasetsmnist.py:262: extract_images (from tensorflow.contrib.learn.python.learn.datasets.mnist) is deprecated and will be removed in a future version.
Instructions for updating:
Please use tf.data to implement this functionality.
Extracting MNIST_data/train-images-idx3-ubyte.gz
WARNING:tensorflow:From C:UsersJohnAppDataRoamingPythonPython36site-packages	ensorflowcontriblearnpythonlearndatasetsmnist.py:267: extract_labels (from tensorflow.contrib.learn.python.learn.datasets.mnist) is deprecated and will be removed in a future version.
Instructions for updating:
Please use tf.data to implement this functionality.
Extracting MNIST_data/train-labels-idx1-ubyte.gz
WARNING:tensorflow:From C:UsersJohnAppDataRoamingPythonPython36site-packages	ensorflowcontriblearnpythonlearndatasetsmnist.py:110: dense_to_one_hot (from tensorflow.contrib.learn.python.learn.datasets.mnist) is deprecated and will be removed in a future version.
Instructions for updating:
Please use tf.one_hot on tensors.
Extracting MNIST_data/t10k-images-idx3-ubyte.gz
Extracting MNIST_data/t10k-labels-idx1-ubyte.gz
WARNING:tensorflow:From C:UsersJohnAppDataRoamingPythonPython36site-packages	ensorflowcontriblearnpythonlearndatasetsmnist.py:290: DataSet.__init__ (from tensorflow.contrib.learn.python.learn.datasets.mnist) is deprecated and will be removed in a future version.
Instructions for updating:
Please use alternatives such as official/mnist/dataset.py from tensorflow/models.
建立模型
无论是第3部分介绍的含单隐层的神经网络还是第4部分介绍的多层神经网络,上一层与下一层神经元之间都是全连接,因此,这种网络称为全连接网络(Fully Connected Networks, FCN),有时也称为多层感知机(Multi-Layer Perceptron,MLP)。
定义全连接层是构建FCN或MLP的基础,因此,我们先定义全连接层的函数fcn_layer.
def fcn_layer(output_dim,input_dim,inputs, activation=None):
#input_dim为输入神经元数量,output_dim为输出神经元数量
#inputs是输入的二维数组placeholder, activation是激活函数
    W = tf.Variable(tf.random_normal([input_dim, output_dim])) #以正态分布的随机数初始化W
    b = tf.Variable(tf.random_normal([1, output_dim])) #以正态分布的随机数初始化b
    XWb = tf.matmul(inputs, W) + b # 建立表达式:inputs x W + b
    if activation is None: # 默认不使用激活函数
        outputs = XWb
    else: # 若传入激活函数,则用其对输出结果进行变换
        outputs = activation(XWb)
    return outputs
构建输入层
x = tf.placeholder("float", [None, 784])
构建隐藏层h1
# 隐藏层h1包含256个神经元
h1=fcn_layer(output_dim=256,input_dim=784,
         inputs=x ,activation=tf.nn.relu)
构建隐藏层h2
# 隐藏层h2包含256个神经元
h2=fcn_layer(output_dim=256,input_dim=256,
         inputs=h1 ,activation=tf.nn.relu)
构建输出层
pred=fcn_layer(output_dim=10,input_dim=256,
                    inputs=h2,activation=None)
训练模型
定义损失函数
y = tf.placeholder("float", [None, 10])
# 交叉熵
loss_function = tf.reduce_mean(
                  tf.nn.softmax_cross_entropy_with_logits
                         (logits=pred,
                          labels=y))
WARNING:tensorflow:From <ipython-input-7-4208a083f4b8>:6: softmax_cross_entropy_with_logits (from tensorflow.python.ops.nn_ops) is deprecated and will be removed in a future version.
Instructions for updating:

Future major versions of TensorFlow will allow gradients to flow
into the labels input on backprop by default.

See `tf.nn.softmax_cross_entropy_with_logits_v2`.
设置训练参数
train_epochs = 30
batch_size = 100
total_batch = int(mnist.train.num_examples/batch_size)
display_step = 1
save_step=5
learning_rate = 0.001
epoch_list=[];loss_list=[];accuracy_list=[]

ckpt_dir = "./ckpt_dir/"
if not os.path.exists(ckpt_dir):
    os.makedirs(ckpt_dir)

from time import time
startTime=time()
每个固定间隔(save_step)在检查点保存一个模型(.ckpt文件),可便于随时将模型拿来进行预测。
通常,观察前几次的预测效果就可以粗略估计出神经网络设计得是否合理。
选择优化器
optimizer = tf.train.AdamOptimizer(learning_rate).minimize(loss_function)
定义准确率
correct_prediction = tf.equal(tf.argmax(y, 1), tf.argmax(pred, 1))
accuracy = tf.reduce_mean(tf.cast(correct_prediction, "float"))
训练并存储模型
#声明完所有变量后,调用tf.train.Saver
saver = tf.train.Saver()

sess = tf.Session()
sess.run(tf.global_variables_initializer())

for epoch in range(train_epochs):
    for batch in range(total_batch):
        xs, ys = mnist.train.next_batch(batch_size)# 读取批次数据
        sess.run(optimizer,feed_dict={x: xs,y: ys}) # 执行批次训练

    #total_batch个批次训练完成后,使用验证数据计算误差与准确率
    loss,acc = sess.run([loss_function,accuracy],
                        feed_dict={x: mnist.validation.images, y: mnist.validation.labels})

    epoch_list.append(epoch)
    loss_list.append(loss)
    accuracy_list.append(acc)

    if (epoch+1) % display_step == 0:
        print("Train Epoch:", '%02d' % (epoch+1), "Loss=", "{:.9f}".format(loss)," Accuracy=","{:.4f}".format(acc))
    if (epoch+1) % save_step == 0:
            saver.save(sess, os.path.join(ckpt_dir, 'mnist_h256_h256_model_{:06d}.ckpt'.format(epoch+1)))#存储模型
            print('mnist_h256_h256_model_{:06d}.ckpt saved'.format(epoch+1))

# 显示运行总时间
duration =time()-startTime
print("Train Finished takes:","{:.2f}".format(duration))

saver.save(sess, os.path.join(ckpt_dir, 'mnist_h256_h256_model.ckpt'))#生成检查点文件
print("Model saved!")
Train Epoch: 01 Loss= 49.183917999  Accuracy= 0.8648
Train Epoch: 02 Loss= 31.142955780  Accuracy= 0.8910
Train Epoch: 03 Loss= 22.746276855  Accuracy= 0.9138
Train Epoch: 04 Loss= 19.703006744  Accuracy= 0.9202
Train Epoch: 05 Loss= 16.630659103  Accuracy= 0.9288
mnist_h256_h256_model_000005.ckpt saved
Train Epoch: 06 Loss= 14.405362129  Accuracy= 0.9344
Train Epoch: 07 Loss= 13.964346886  Accuracy= 0.9354
Train Epoch: 08 Loss= 12.710490227  Accuracy= 0.9384
Train Epoch: 09 Loss= 12.258079529  Accuracy= 0.9378
Train Epoch: 10 Loss= 11.629873276  Accuracy= 0.9416
mnist_h256_h256_model_000010.ckpt saved
Train Epoch: 11 Loss= 11.640337944  Accuracy= 0.9396
Train Epoch: 12 Loss= 10.753168106  Accuracy= 0.9422
Train Epoch: 13 Loss= 10.515151978  Accuracy= 0.9442
Train Epoch: 14 Loss= 10.427335739  Accuracy= 0.9466
Train Epoch: 15 Loss= 9.722047806  Accuracy= 0.9486
mnist_h256_h256_model_000015.ckpt saved
Train Epoch: 16 Loss= 9.628216743  Accuracy= 0.9506
Train Epoch: 17 Loss= 10.060099602  Accuracy= 0.9498
Train Epoch: 18 Loss= 9.758562088  Accuracy= 0.9510
Train Epoch: 19 Loss= 9.516422272  Accuracy= 0.9532
Train Epoch: 20 Loss= 10.057726860  Accuracy= 0.9510
mnist_h256_h256_model_000020.ckpt saved
Train Epoch: 21 Loss= 9.425415993  Accuracy= 0.9550
Train Epoch: 22 Loss= 9.334410667  Accuracy= 0.9570
Train Epoch: 23 Loss= 8.687754631  Accuracy= 0.9574
Train Epoch: 24 Loss= 8.958929062  Accuracy= 0.9566
Train Epoch: 25 Loss= 9.020849228  Accuracy= 0.9554
mnist_h256_h256_model_000025.ckpt saved
Train Epoch: 26 Loss= 9.506571770  Accuracy= 0.9544
Train Epoch: 27 Loss= 9.910702705  Accuracy= 0.9550
Train Epoch: 28 Loss= 8.664851189  Accuracy= 0.9586
Train Epoch: 29 Loss= 8.741664886  Accuracy= 0.9586
Train Epoch: 30 Loss= 8.711877823  Accuracy= 0.9600
mnist_h256_h256_model_000030.ckpt saved
Train Finished takes: 121.04
Model saved!
从上述结果可以发现,包含2个隐层的神经网络的分类性能可能并没有明显比仅包含一个隐层的神经网络更优。因为一个神经网络模型的性能取决于多个方面,例如:是否具备与训练参数数量相符的训练样本数量、超参数的设置、初始化和学习率的调整策略等等,因此,单纯地通过增加层数并不一定会获得明显的性能提高,甚至有可能下降。
sess.close()
进行预测
在建立模型并进行训练后,若认为在验证集上的准确率可以接受,则可以使用此模型进行预测。
我们之前通过** tf.train.Saver **对已训练的模型进行了保存,我们可以在./ckpt_dir/文件夹下找到相关文件,如下图所示:
共包含16个文件,包括,5个.data文件,5个.index文件,5个.meta文件,以及1个检查点文件checkpoint。
可以发现无论迭代训练多少次,检查点文件中最多只保存当前最新5个模型,这是Tensorflow中默认的设置。
读取模型
print("Starting another session for prediction")
saver = tf.train.Saver()

sess = tf.Session()
init = tf.global_variables_initializer()
sess.run(init)

ckpt = tf.train.get_checkpoint_state(ckpt_dir)

if ckpt and ckpt.model_checkpoint_path:
    saver.restore(sess, ckpt.model_checkpoint_path)# 从已保存的模型中读取参数
print ("Accuracy:", accuracy.eval(session=sess, feed_dict={x: mnist.test.images, y: mnist.test.labels}))
Starting another session for prediction
INFO:tensorflow:Restoring parameters from ./ckpt_dir/mnist_h256_h256_model.ckpt
Accuracy: 0.9565
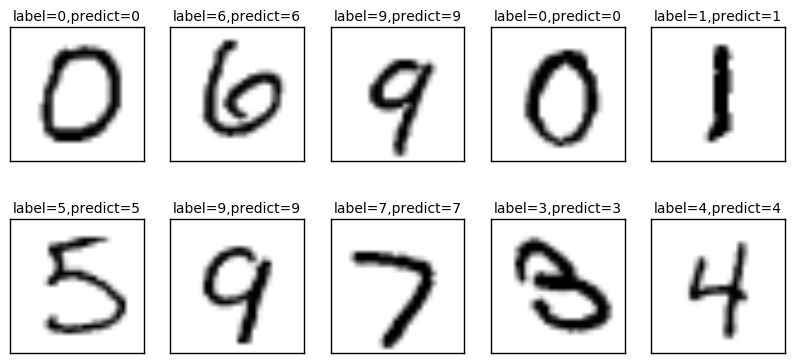
可视化
import matplotlib.pyplot as plt
import numpy as np
def plot_images_labels_prediction(images,labels,
                                  prediction,idx,num=10):
    fig = plt.gcf()
    fig.set_size_inches(10, 12)
    if num>25: num=25
    for i in range(0, num):
        ax=plt.subplot(5,5, 1+i)

        ax.imshow(np.reshape(images[idx],(28, 28)),
                  cmap='binary')

        title= "label=" +str(np.argmax(labels[idx]))
        if len(prediction)>0:
            title+=",predict="+str(prediction[idx])

        ax.set_title(title,fontsize=10)
        ax.set_xticks([]);ax.set_yticks([])
        idx+=1
    plt.show()
prediction_result=sess.run(tf.argmax(pred,1), # 由于pred预测结果是one-hot编码格式,所以需要转换为0~9数字
                           feed_dict={x: mnist.test.images })
plot_images_labels_prediction(mnist.test.images,
                              mnist.test.labels,
                              prediction_result,10)
找出预测错误
count=0
for i in range(500):
    if prediction_result[i]!=np.argmax(mnist.test.labels[i]):
        print("i="+str(i)+
              "   label=",np.argmax(mnist.test.labels[i]),
              "predict=",prediction_result[i])
        count+=1
print("count=", count)
i=7   label= 9 predict= 1
i=8   label= 5 predict= 6
i=24   label= 4 predict= 9
i=115   label= 4 predict= 9
i=124   label= 7 predict= 4
i=125   label= 9 predict= 4
i=149   label= 2 predict= 5
i=151   label= 9 predict= 8
i=175   label= 7 predict= 9
i=234   label= 7 predict= 2
i=247   label= 4 predict= 2
i=259   label= 6 predict= 0
i=290   label= 8 predict= 4
i=320   label= 9 predict= 1
i=321   label= 2 predict= 7
i=326   label= 2 predict= 1
i=340   label= 5 predict= 3
i=352   label= 5 predict= 3
i=359   label= 9 predict= 4
i=404   label= 2 predict= 3
i=412   label= 5 predict= 3
i=435   label= 8 predict= 7
i=444   label= 2 predict= 8
i=445   label= 6 predict= 0
i=495   label= 8 predict= 2
count= 25