系统下载地址:http://win.hftda.cn/win7.html
教程地址:http://www.xitongcheng.com/jiaocheng/xtazjc_article_15314.html
现在贴上来教程:
VMware虚拟机可以运行不同版本的操作系统,而且不会对本机系统造成任何影响,比安装双系统更方便,不过有部分用户还不知道怎么使用VMware安装ghost win7系统,接下来小编就以图文的方式教大家在VM中安装ghost win7的方法。
一、准备工作
1、虚拟机:VMware Workstation 12安装激活
2、操作系统:最新ghost windows7系统下载
二、VMware虚拟机安装ghost win7步骤
1、运行虚拟机VMware Workstation,创建一个新的虚拟机;
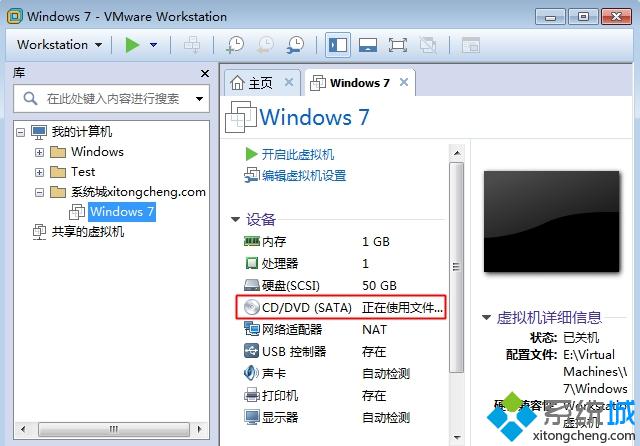
2、选中我们创建好的windows7虚拟机,点击CD/DVD;
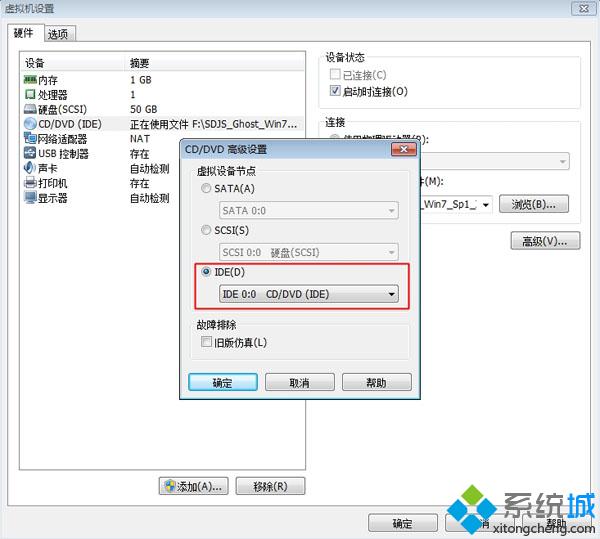
3、点击“使用ISO映像文件”,“浏览”选择win7系统镜像;

4、点击“高级”选择“IDE”模式,否则无法安装;
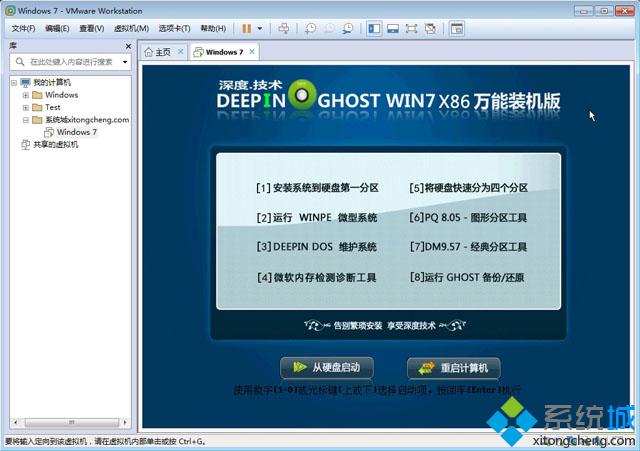
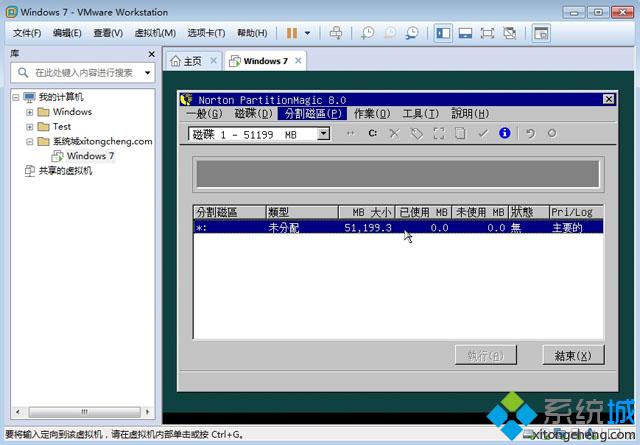
5、启动虚拟机,进入系统安装主界面,由于虚拟机未安装系统,需进行分区,点击PQ8.05图形分区工具进入;
6、右键选择当前磁盘分区,点击“建立”,PQ8.05硬盘分区详细教程;
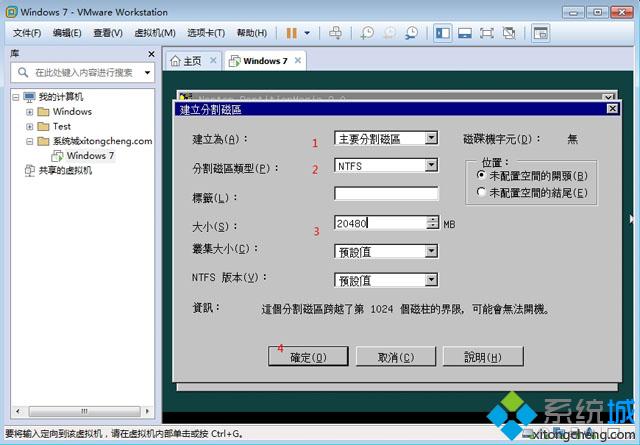
7、依次选择“主要分割磁区”、“NTFS”并输入磁盘大小,1G=1024M,确定;
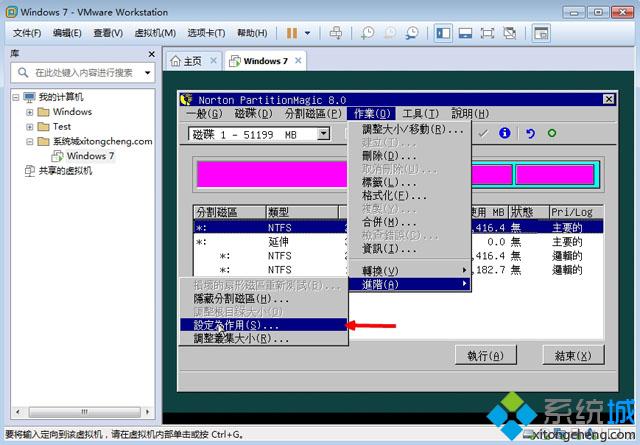
8、接着按同样的步骤建立“逻辑分割磁区”,建立完成后,选择右键第一个分区—进阶—设定为作用;
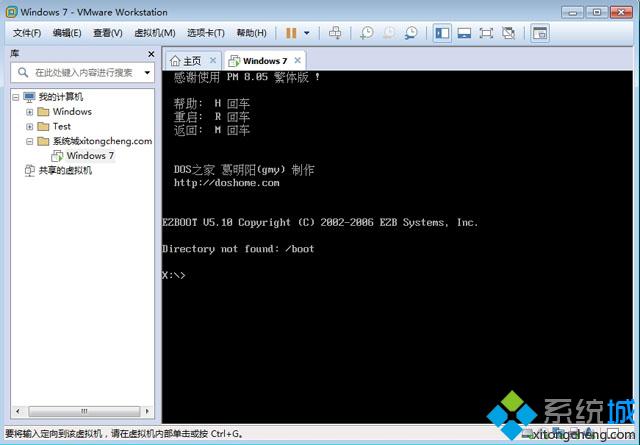
9、最后点击“执行”,结束后进入以下界面输入R回车重启;
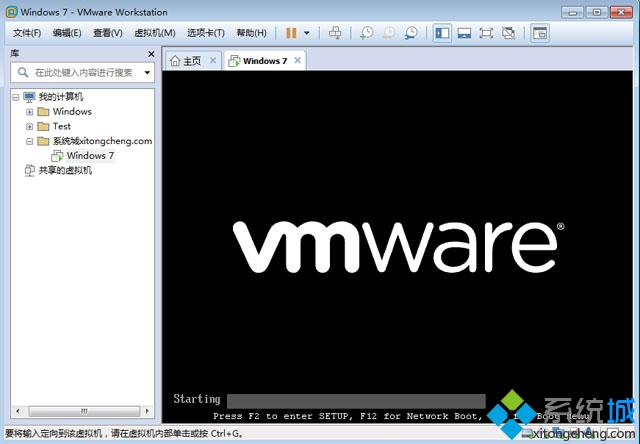
10、在以下界面马上按下F2进入BIOS设置;
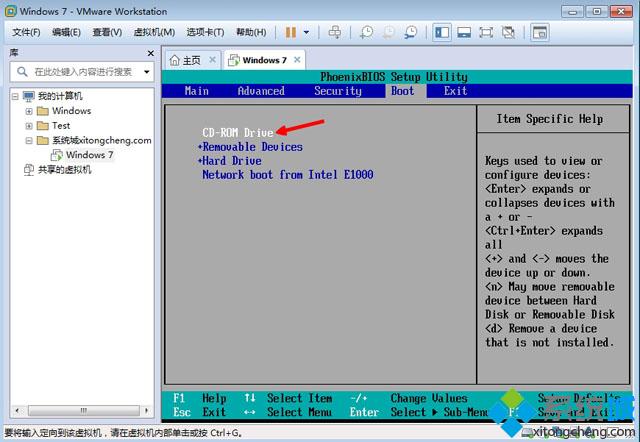
11、切换到Boot,使用shift和+将CD-ROM Drive移动到第一位,按F10保存重启;
12、重启进入安装主界面,选择“安装系统到磁盘第一分区”,开始安装ghost win7系统;

13、重启时选择使用硬盘启动(初始化-安装-导入软件-完成安装)。重启之后,继续选择使用硬盘启动。完成安装后,修改bios即可正常使用。