1、安装svg-sprite-loader插件,运行一下命令:
npm i svg-sprite-loader -D
2、修改webpack的配置文件,在webpack.base.config.js中修改如下代码:
'use strict'
const webpack = require('webpack')
const path = require('path')
const utils = require('./utils')
const config = require('../config')
const vueLoaderConfig = require('./vue-loader.conf')

function resolve (dir) {
  return path.join(__dirname, '..', dir)
}


module.exports = {
  context: path.resolve(__dirname, '../'),
  entry: {
    app: './src/main.js'
  },
  output: {
    path: config.build.assetsRoot,
    filename: '[name].js',
    publicPath: process.env.NODE_ENV === 'production'
      ? config.build.assetsPublicPath
      : config.dev.assetsPublicPath
  },
  resolve: {
    extensions: ['.js', '.vue', '.json'],
    alias: {
      'vue$': 'vue/dist/vue.esm.js',
      '@': resolve('src'),
      '@scss': resolve('src/scss')
    }
  },
  module: {
    rules: [
      {
        test: /.vue$/,
        loader: 'vue-loader',
        options: vueLoaderConfig
      },
      {
        test: /.js$/,
        loader: 'babel-loader',
        include: [resolve('src'), resolve('test'), resolve('node_modules/webpack-dev-server/client')]
      },
      {
        test: /.(png|jpe?g|gif|svg)(?.*)?$/,
        loader: 'url-loader',
        exclude: [resolve('src/icons')],
        options: {
          limit: 10000,
          name: utils.assetsPath('img/[name].[hash:7].[ext]')
        }
      },
      {
        test: /.(mp4|webm|ogg|mp3|wav|flac|aac)(?.*)?$/,
        loader: 'url-loader',
        options: {
          limit: 10000,
          name: utils.assetsPath('media/[name].[hash:7].[ext]')
        }
      },
      {
        test: /.(woff2?|eot|ttf|otf)(?.*)?$/,
        loader: 'url-loader',
        options: {
          limit: 10000,
          name: utils.assetsPath('fonts/[name].[hash:7].[ext]')
        }
      },
      {
        test: /.svg$/,
        loader: 'svg-sprite-loader',
        include: [resolve('src/icons')],
        options: {
          symbolId: 'icon-[name]'
        }
      }
    ]
  },
  node: {
    // prevent webpack from injecting useless setImmediate polyfill because Vue
    // source contains it (although only uses it if it's native).
    setImmediate: false,
    // prevent webpack from injecting mocks to Node native modules
    // that does not make sense for the client
    dgram: 'empty',
    fs: 'empty',
    net: 'empty',
    tls: 'empty',
    child_process: 'empty'
  }

3、在src目录新建一个icon文件夹,里面放三个内容:
① 存放.svg文件的svg文件夹;
② 全局注册组件的index.js文件
③ svgo.yml文件

其中index.js内容如下:
// index.js  文件
import Vue from 'vue'
import SvgIcon from '@/components/SvgIcon'// svg组件

// register globally
Vue.component('svg-icon', SvgIcon)

const req = require.context('./svg', false, /.svg$/)
const requireAll = requireContext => requireContext.keys().map(requireContext)
requireAll(req)
svgo.yml文件:
# replace default config

# multipass: true
# full: true

plugins:

  # - name
  #
  # or:
  # - name: false
  # - name: true
  #
  # or:
  # - name:
  #     param1: 1
  #     param2: 2

- removeAttrs:
    attrs:
      - 'fill'
      - 'fill-rule'
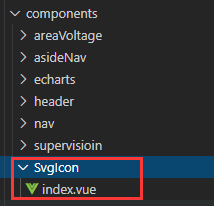
4、注册Svgicon组件。在components文件夹下新建SvgIcon文件夹,里面放置index.vue文件,代码如下:
代码如下:
<template>
  <svg :class="svgClass" aria-hidden="true">
    <use :xlink:href="iconName"/>
  </svg>
</template>

<script>
export default {
  name: 'SvgIcon',
  props: {
    iconClass: {
      type: String,
      required: true
    },
    className: {
      type: String,
      default: ''
    }
  },
  computed: {
    iconName() {
      return `#icon-${this.iconClass}`
    },
    svgClass() {
      if (this.className) {
        return 'svg-icon ' + this.className
      } else {
        return 'svg-icon'
      }
    }
  }
}
</script>

<style scoped>
.svg-icon {
   10em;
  height: 10em;
  vertical-align: -0.15em;
  fill: currentColor;
  overflow: hidden;
}
</style>
5、main.js中引入全局注册组件的index.js文件,main.js中要加的代码如下:
import '@/icons' // 全局注册组件
6、在需要使用图标的地方(.vue文件)使用以下代码:
<svg-icon icon-class="icon_set"/>
