本文摘自:https://www.msp360.com/resources/blog/backup-aws-ec2-instance/
Amazon EC2 instances can be backed up in more than one way. The approach you take on how to back up Amazon EC2 instance should reflect your needs: Whether you require an automated backup solution, how quickly you need to be able to restore an instance during an emergency and how much data you can store and transfer.
This article identifies the different methods for backing up EC2 instances and discusses the pros and cons of each approach.
Table of Contents
EC2 Backup Method 1: EBS Snapshots

One way to back up EC2 instances is by creating a snapshot of the Elastic Block Storage (EBS) volume or volumes that your EC2 instance uses.
EBS snapshots allow you to save the state of an EBS volume at a given point in time, then restore it later.
This approach to EC2 backup is relatively straightforward. You first stop the instance or, at a minimum, unmount the volume you want to back up since you can’t reliably back up a volume that is still in use.
Next, from the EC2 Console, choose the Snapshot tool and follow the instructions on the screen.
Note that the process of creating a snapshot can take several hours, depending on how much data you are capturing.
Once the snapshot has been created, you’ll be able to use it to restore your data to the point in time at which you took the snapshot, should you need to do so during disaster recovery or for other data retrieval purposes.
EBS volume snapshots are a simple and easy way to create backups for EC2 instances. There is, however, a major downside to this approach: It is manual in nature. You have to stop your volumes, then click through the EC2 Console in order to create the backup. If you have many EC2 instances to back up, or you need to create backups multiple times per day, this method is not feasible.
Plan your perfect disaster recovery strategy on AWS:
EC2 Backup Method 2: Creating a New AMI

Another approach to backing up EC2 instances is by creating a new Amazon Machine Image (AMI). An AMI contains all of the operating system code, configuration settings, and data that you need in order to create a virtual server on EC2.
You can use AMIs for backups by building a custom AMI based on your EC2 instance, then using that AMI to create a clone of the instance in the event that you need to restore it.
As when backing up an EBS volume, you also usually need to stop your EC2 instance before creating a new AMI. There are exceptions to this rule; for example, when you use a file system such as XFS, which can be “frozen” in order to create backups, you do not need to stop the instance before creating an AMI. However, in most cases, you should stop the EC2 instance in order to avoid the possibility of data corruption in your new AMI, which would make recovery impossible.
Once your instance has stopped, start the Console and select the instance you want to back up. Then navigate to Actions>Image>Create Image. This opens a dialog where you can configure how your new AMI will be created.
This method of EC2 backup is slightly more complicated than snapshotting an EBS volume because it involves more steps, but it is still relatively simple. Plus, when you create an AMI image for backup purposes, you gain the convenience of having your operating system and configuration data packaged into a single backup image, which you can then use to restore an instance quickly. This is more convenient than having only the EBS volume backed up.
Yet AMI image backups also have a downside. Like EBS snapshotting, this backup method is heavy on manual work. It is also not feasible on a large scale.
EC2 Backup Automating with S3 and the AWS CLI
Fortunately, working manually is not your only option for backing up EC2 instances. By completing a little upfront configuration, you can use S3 storage buckets and Bash scripts to create an automated backup solution that can scale whenever you need.
To automate EC2 backups, you need three things:
- An S3 storage bucket. For information on creating an S3 bucket, click here.
- An IAM role with permissions to access the S3 storage bucket. Learn how to create an IAM role here and how to configure IAM permissions for S3 here.
- A script that uses the AWS Command Line Interface (CLI) to create an EBS snapshot or AMI image.
To create your backup script, you need first to install the AWS CLI, which supports Windows, Linux, and macOS.
You can then write a script in Bash (for Linux and macOS) or PowerShell (for Windows) that automates your EC2 backup process.
A simple example backup script written in Bash looks like this:
#!/bin/bash

aws ec2 create-snapshot --volume-id vol-xxxxx --description "Backup: `date`."
This script uses the create-snapshot command on the AWS CLI. This command allows you to snapshot EBS volumes.
If you wish instead to use the AMI image approach, you can swap in the create-image command instead. Your script would then resemble the following:
#!/bin/bash

aws ec2 create-image --instance-id i-1234567890abcdef0 --name "Image Backup" --description "Backup AMI"
These are very basic examples. By expanding your script (and using it in conjunction with a tool such as cron), you could easily back up multiple EC2 instances, perform backups at a set time of day and so on.
You can also use your script to remove older backup snapshots or AMIs in order to reduce your S3 storage costs.
Alternate Approach: Backing Up Just Data

In some instances, you may wish to back up just the data inside your EC2 instance, rather than the entire instance.
This can be a good approach if, for example, you want to minimize the storage costs of your backups by backing up only application data, rather than a full file system. If you need to restore your instance, you can combine the application data with a stock root file system image to create a new instance.
As long as your file system does not contain an extensive amount of custom configuration settings, this approach would work well -- although it may make recovery during an emergency somewhat more complicated because you would need to build a new instance, rather than simply recreate one based on an existing EBS snapshot or AMI.
Flexible EC2 Backups with MSP360
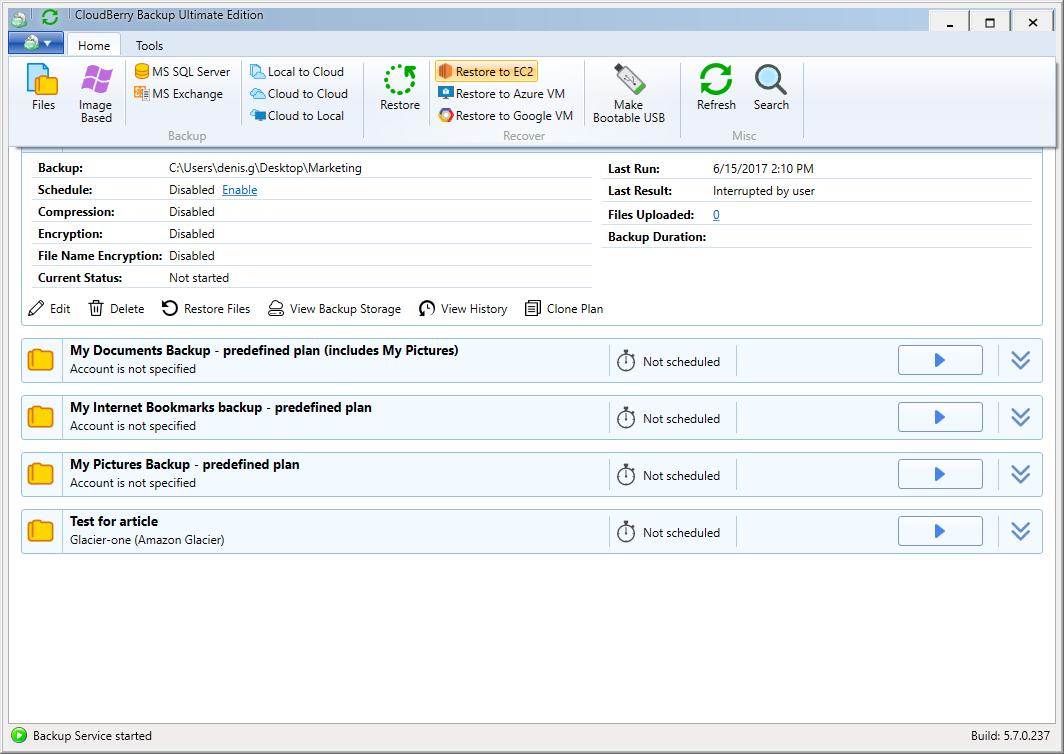
MSP360 Backup is a versatile solution that supports all of the backup methodologies described above.
With MSP360, you can back up individual files from an EC2 instance if you wish in order to minimize storage needs and optimize storage costs.
Alternatively, if you wish to back up an entire EC2 instance, you can do that as well. MSP360 supports image-based backup of a complete EC2 virtual machine.
MSP360 also provides a flexible approach to restoring data. It can restore instances directly to EC2, or restore data to an AMI or EBS volume that can then be used to rebuild an EC2 instance. This flexibility ensures that you can recover quickly during an emergency by choosing the most effective path to data restoration. To learn more about that functionality, check out our article:
Further reading How to Do a Full Server Restore to Amazon EC2
Because MSP360 offers not only a graphical user interface but also a command-line tool, called cbb.exe, it can be used to automate EC2 backups, too.
Conclusion
There are two main approaches to backing up EC2 instances: First, to use EBS snapshots, and second, to use AMI images.
There are also different methodologies for implementing both of these approaches. The default method is to work manually through the EC2 Console. While this strategy is easy, it suffers from the major drawback of being impossible to automate. Lack of automation prevents this backup strategy from being feasible to execute on a large scale.
If you use S3 storage and scripting to automate the EC2 backup process, however, you can achieve streamlined, efficient backups. Any organization seeking to create an EC2 backup solution that works at scale should adopt an automated approach.
附加:如何重置 Amazon EC2 实例的密码和SSH 密钥?
-使用AWSSupport-ResetAccess重置EC2(LINUX)密钥-
-AWSSupport-ResetAccess简介-
您可以使用 AWSSupport-ResetAccess文档在 Amazon EC2 Windows 实例上自动重新启用本地管理员密码生成,以及在 Amazon EC2 Linux 实例上生成新 SSH 密钥。
AWSSupport-ResetAccess文档旨在执行 Systems Manager 操作、AWS CloudFormation 操作和 Lambda 函数的组合,从而将重置本地管理员密码通常所需的步骤自动化。
您可以使用 Automation 配合 AWSSupport-ResetAccess文档解决以下问题:
Windows
您丢失了 EC2 密钥对:要解决此问题,您可以使用 AWSSupport-ResetAccess文档,从当前实例创建启用了密码的 AMI,从 AMI 启动新实例,然后选择您拥有的密钥对。
您丢失了本地管理员密码:要解决此问题,您可以使用 AWSSupport-ResetAccess 文档生成可以使用当前 EC2 密钥对解密的一个新密码。
Linux
您丢失了 EC2 密钥对,或者配置了对实例的 SSH 访问但丢失:要解决此问题,您可以使用 AWSSupport-ResetAccess 文档创建当前实例的新 SSH 密钥,这使您能够重新连接到该实例。

-AWSSupport-ResetAccess工作原理-
使用自动化和 AWSSupport-ResetAccess文档对实例进行故障排除的工作原理如下:
*您为实例指定 ID 并运行自动化工作流程。
*系统创建一个临时 VPC,然后运行一系列 Lambda 函数以配置该 VPC。
*系统在与您的原始实例相同的可用区内为您的临时 VPC 标识一个子网。
*系统启动一个临时的启用了 SSM 的 帮助程序实例。
*系统停止您的原始实例并创建备份。然后,它将原始根卷挂载到帮助程序实例。
*系统使用 Run Command 在帮助程序实例上运行 EC2Rescue。在 Windows 上,EC2Rescue 通过在附加的原始根卷上使用 EC2Config 或 EC2Launch 为本地管理员启用密码生成。在 Linux 上,EC2Rescue 生成并注入新的 SSH 密钥并将私有密钥加密保存到 Parameter Store 中。完成后,EC2Rescue 重新将根卷挂载回原始实例。
*系统根据您的实例创建新 Amazon 系统映像 (AMI),现在密码生成已启用。您可以使用此 AMI 创建新 EC2 实例,并根据需要关联新密钥对。
*系统重启您的原始实例,并终止临时实例。系统也将终止临时 VPC 和在自动化开始时创建的 Lambda 函数。
Windows:您的实例生成一个新密码,您可以使用分配给实例的当前密钥对从 EC2 控制台对该密码进行解码。
Linux:您可以使用存储在 Systems Manager Parameter Store 中的 SSH 密钥(格式为 *ec2rlopensshinstance_idkey*),通过 SSH 连接到实例。**
步骤:
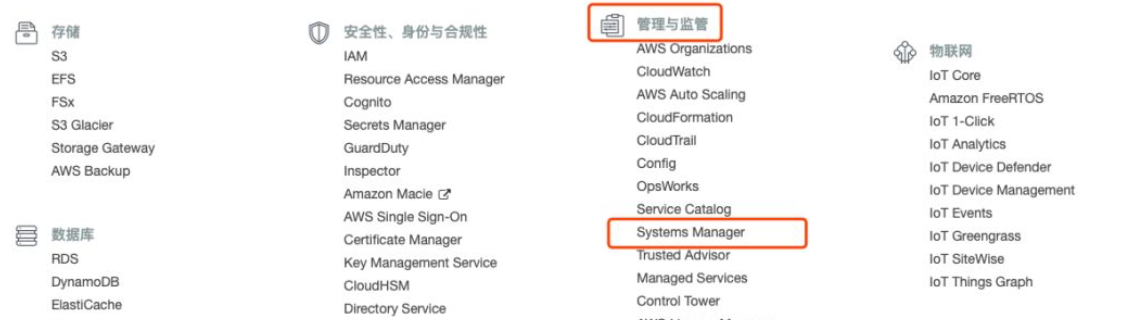
1.进入AWS Systems Manager:
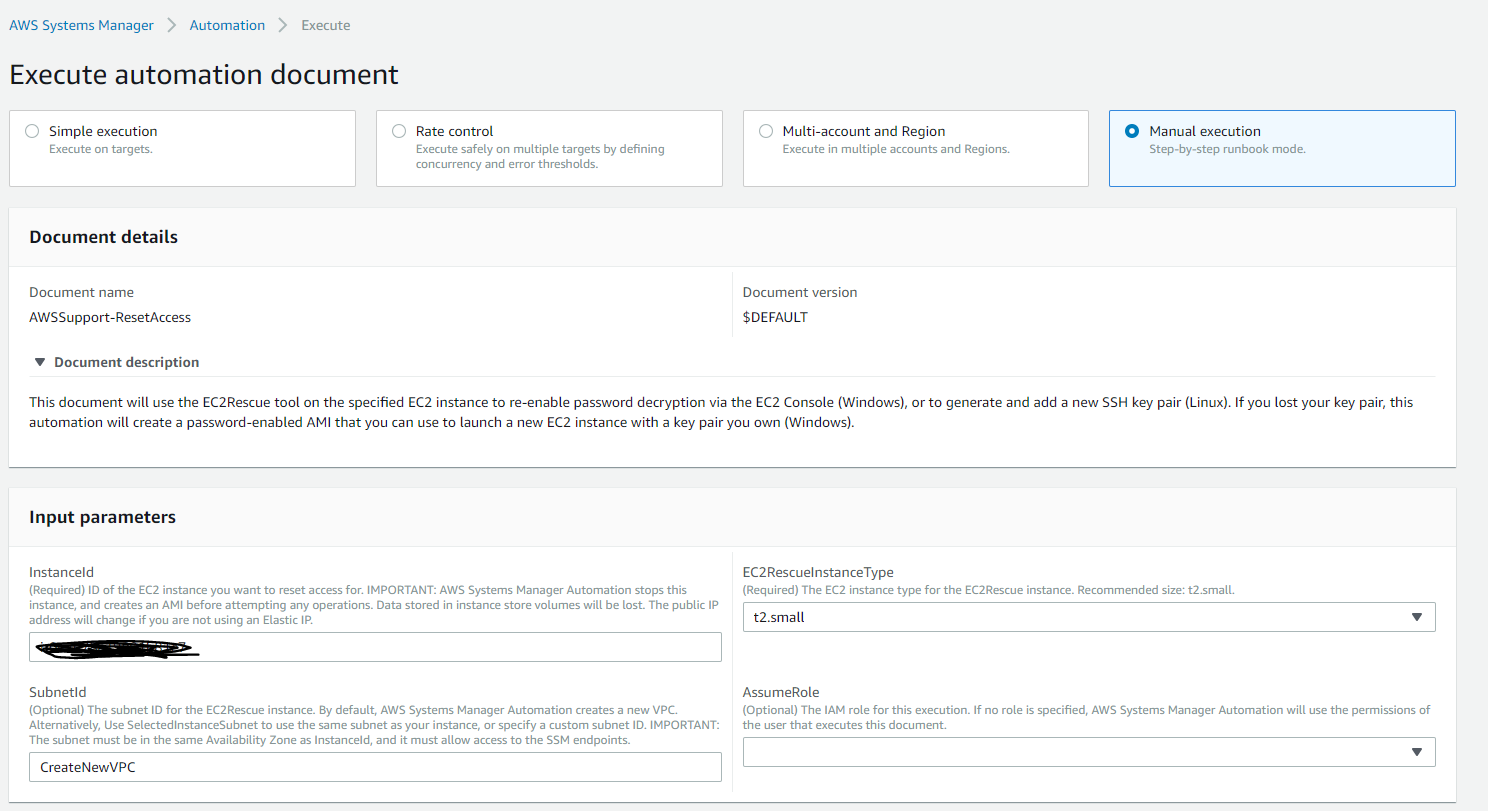
2.然后在自动化里面搜索AWSSupport-ResetAccess,然后进入,然后选择手动执行,这样可以按照需求执行相应步骤,然后instanceid输入上面实例的id,其他参数如恢复实例类型,VPC,子网,角色默认即可:
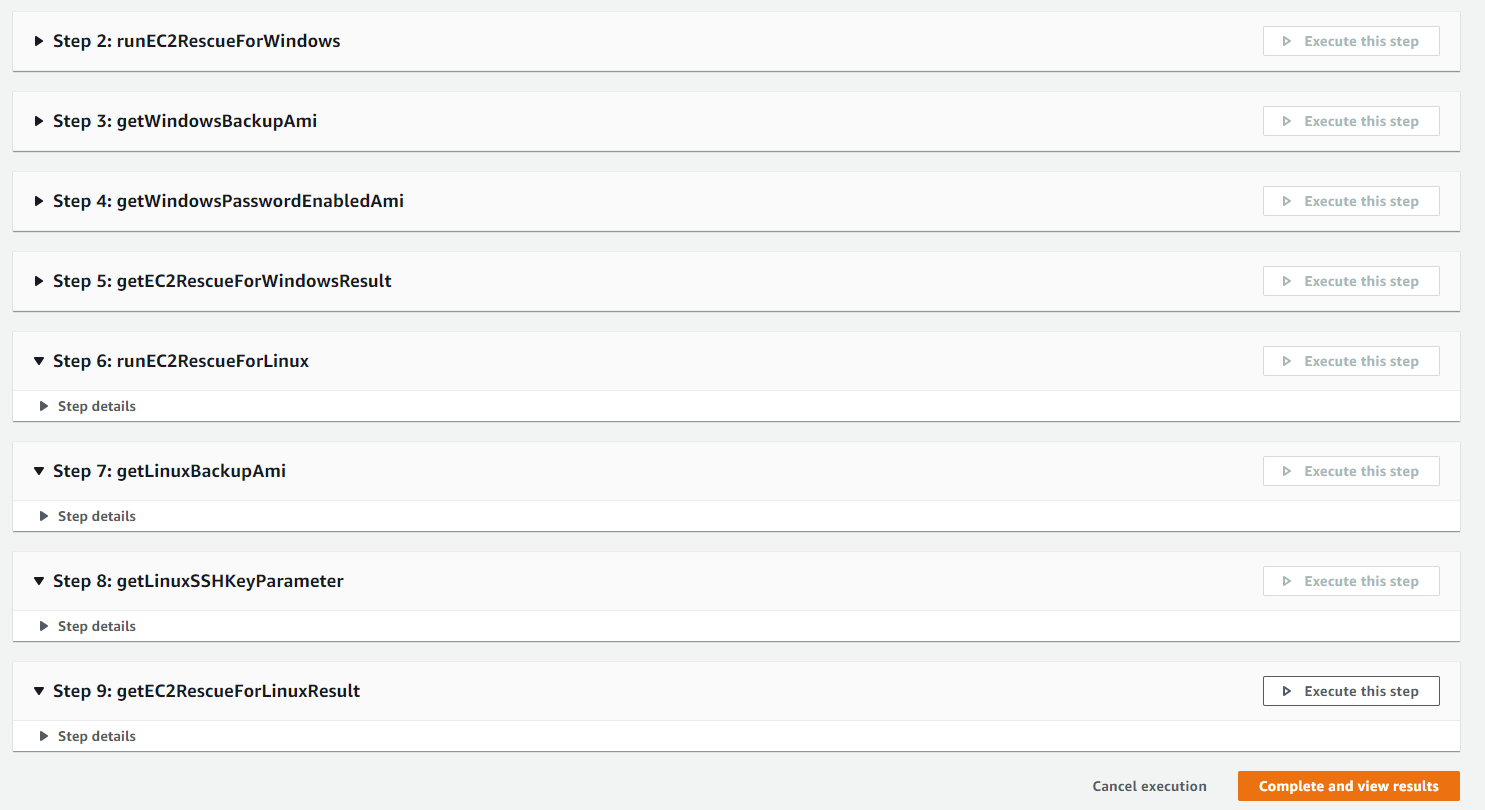
3.然后执行相应步骤后等待即可,每个步骤的名称对应着改步骤具体的功能,Linux实例就不要选Windows相关的步骤:
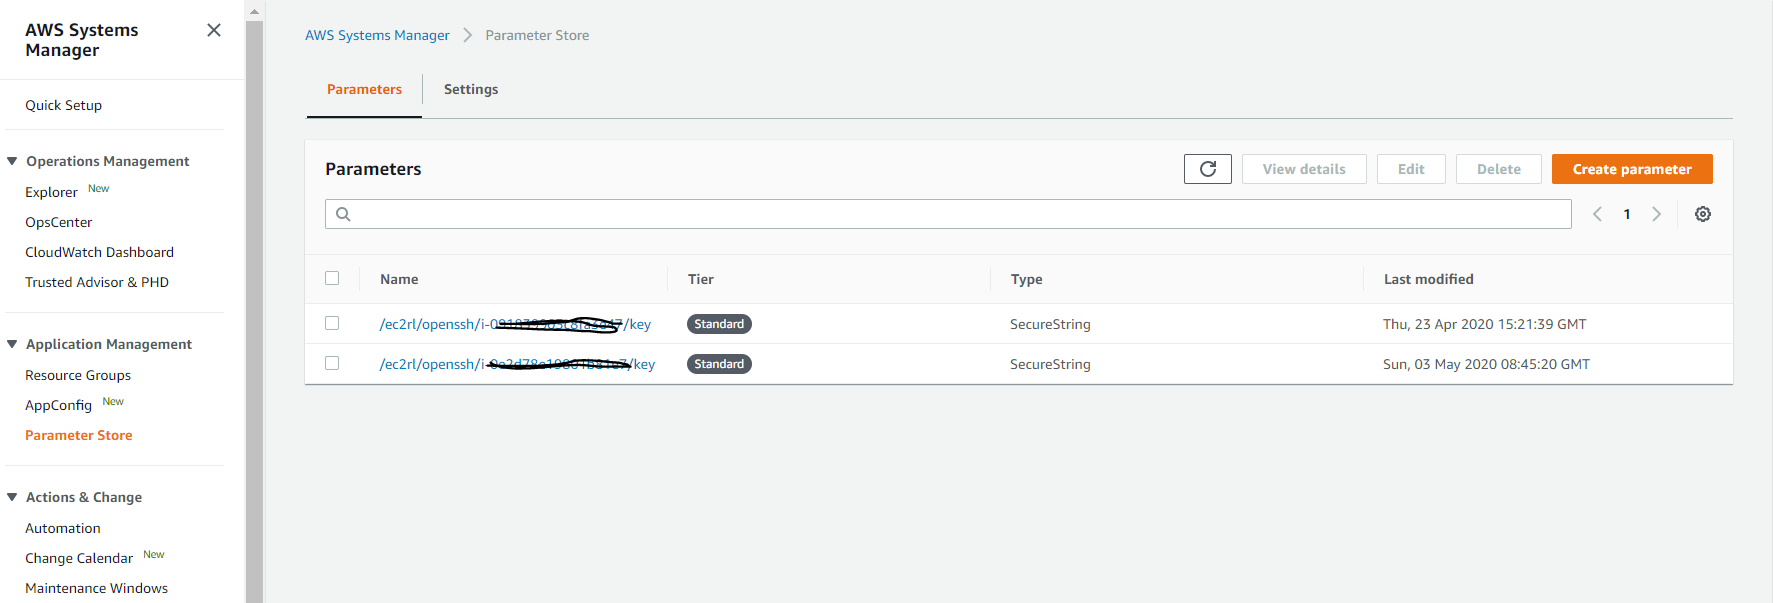
4.全部执行完毕后,新的SSH密钥存储在了参数存储中,将其复制下来,保存为.pem文件,就可以用这个新的密钥登录上述测试的实例:

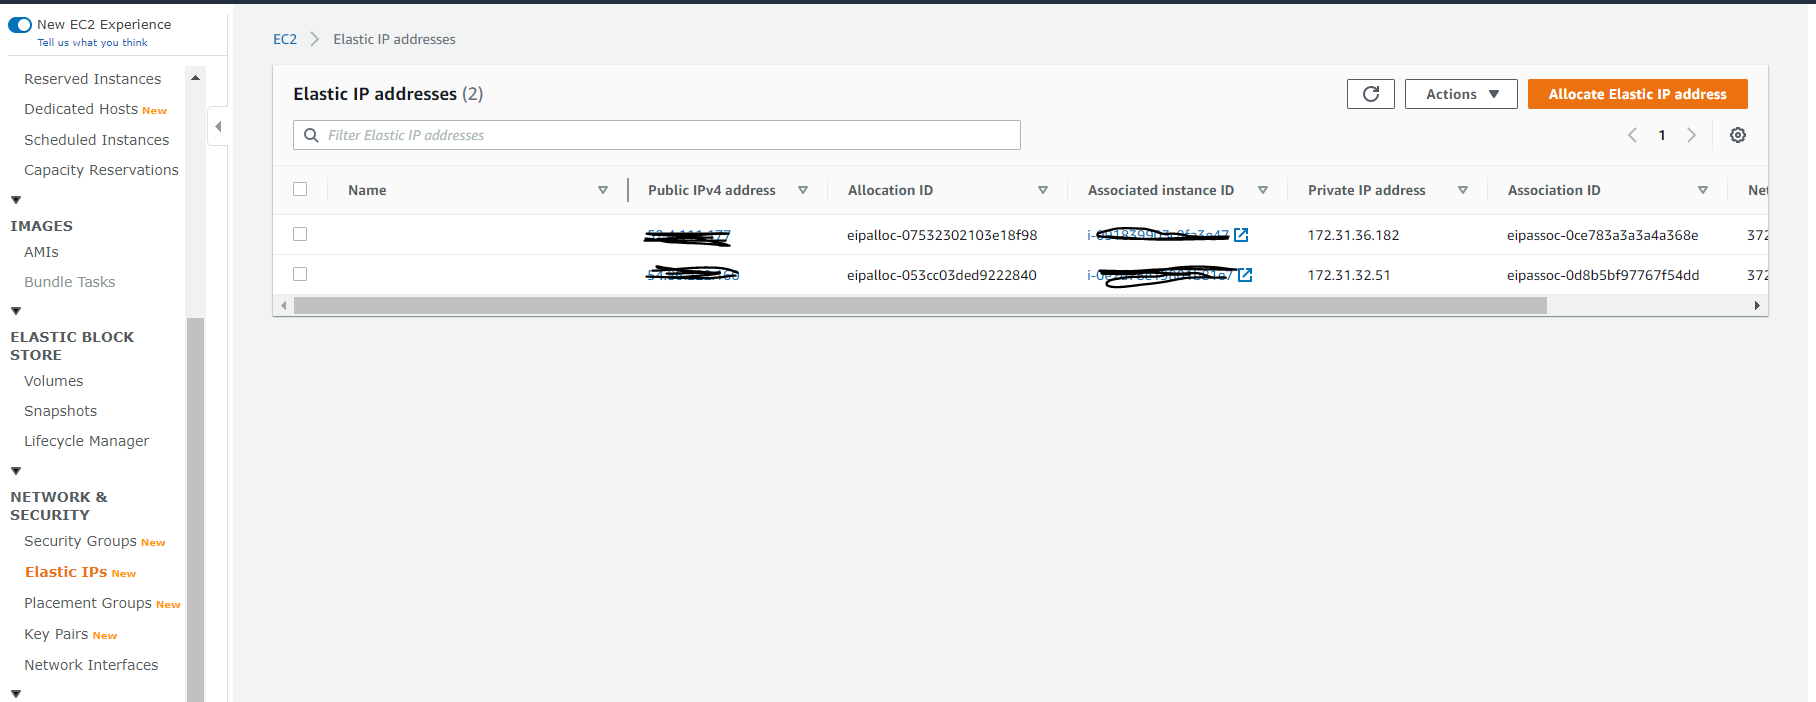
注意我有给我的EC2 instance分配静态ip地址,然后使用
ssh -i "xxx-xxx.pem" ubuntu@ec2-54-86-xxx-xxx.compute-1.amazonaws.com
连接上我的实例: