由于该项目是针对中小学生竞赛并且是第一次举行,所以识别的目标交通标志仅仅只有直行、右转、左转和停车让行。
整体流程如下:
- 数据集收集(包括训练集和测试集的分类)
- 图像预处理
- 图像标注
- 根据标注分割得到目标图像
- HOG特征提取
- 训练得到模型
- 将模型带入识别算法进行识别
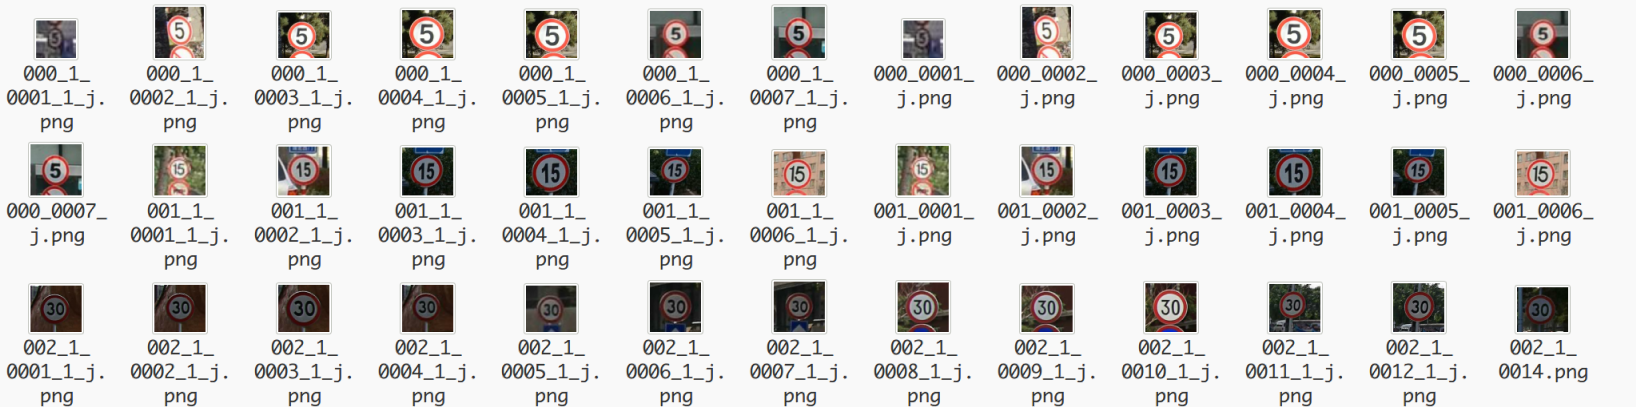
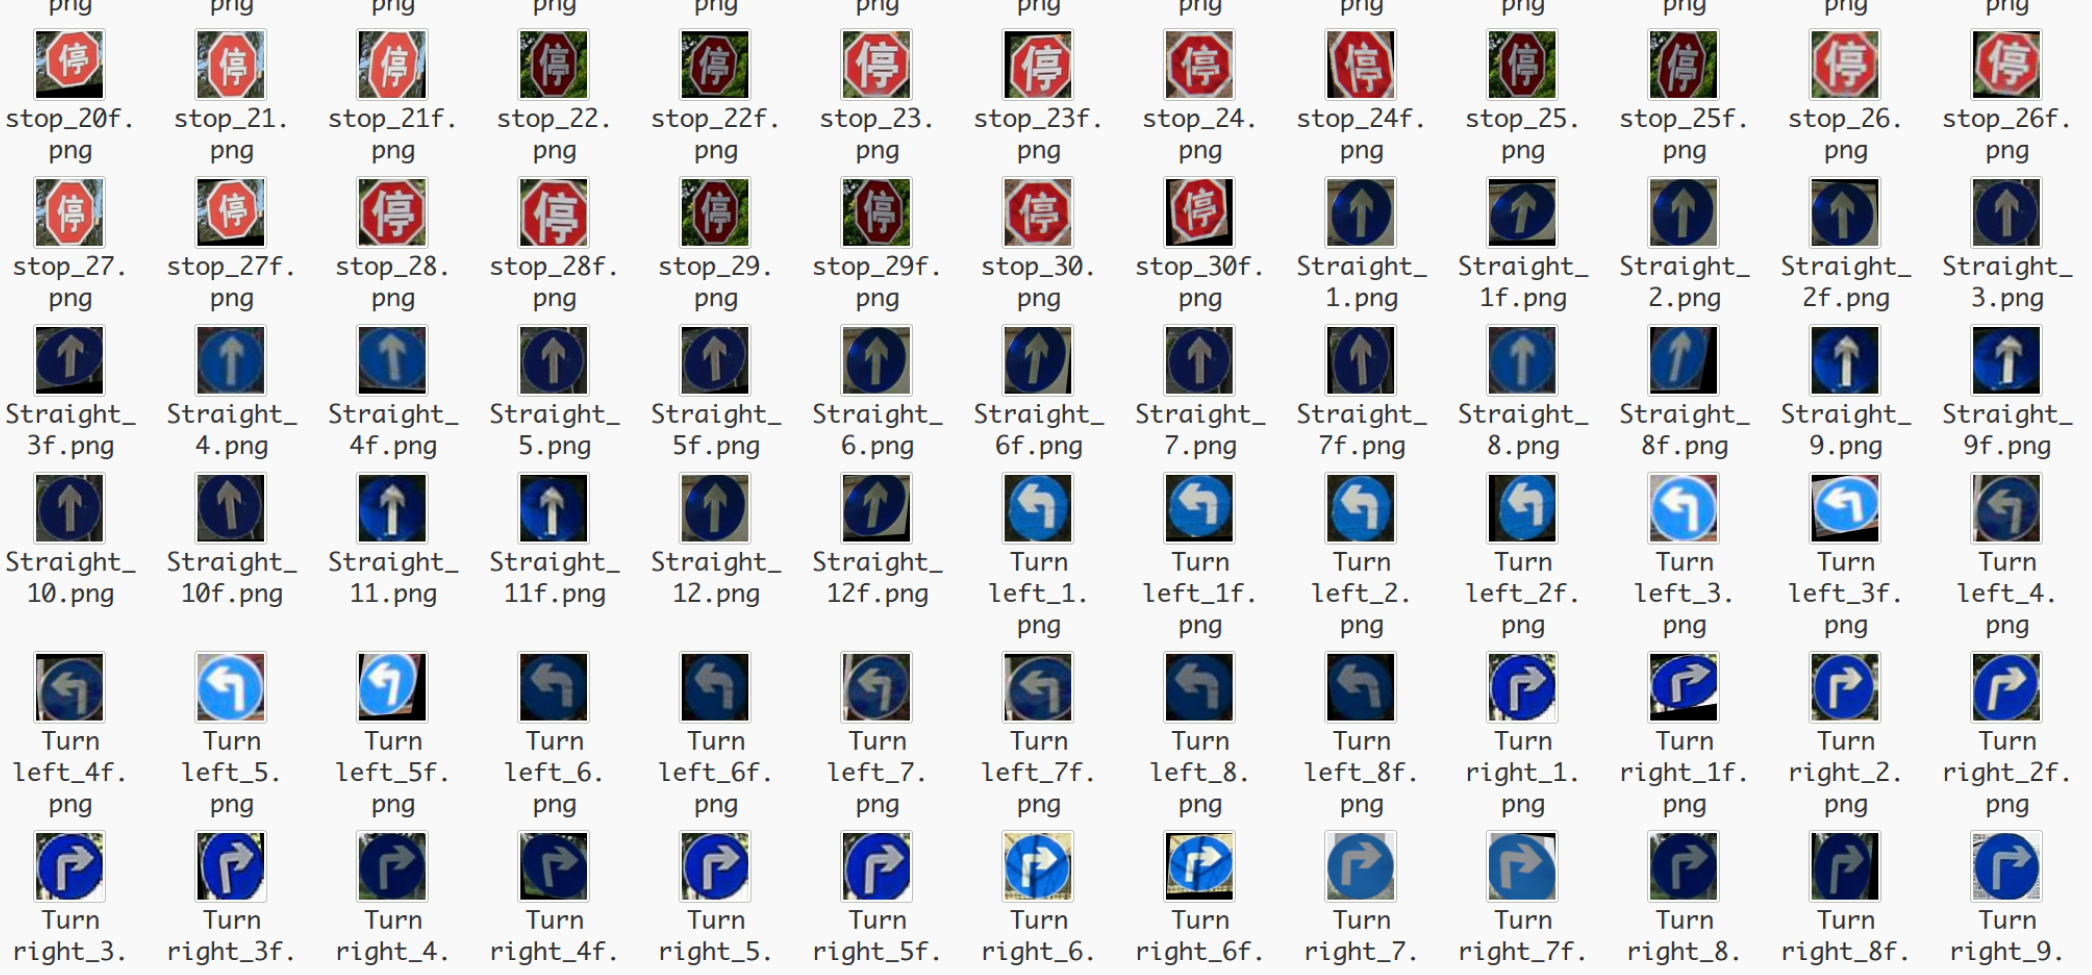
我的数据目录树。其中test_images/train_images是收集得到原始数据集。realTest/realTrain是预处理后的图像。dataTest/dataTrain是经过分类处理得到的图像,HogTest/HogTrain是通过XML标注后裁剪得到的图像。HogTest_affine/HogTrain_affine是经过仿射变换处理扩充的训练集和测试集。imgTest_hog.txt/imgTrain_hog.txt是测试集和训练集的Hog特征

一、图像处理
由于得到的数据集图像大小不一(如下),我们首先从中心区域裁剪并调整正方形图像的大小,然后将处理后的图像保存到realTrain和realTest里面。
图片名称对应关系如下:
img_label = {
"000":"Speed_limit_5",
"001":"Speed_limit_15",
"002":"Speed_limit_30",
"003":"Speed_limit_40",
"004":"Speed_limit_50",
"005":"Speed_limit_60",
"006":"Speed_limit_70",
"007":"Speed_limit_80",
"008":"No straight or right turn",
"009":"No straight or left turn",
"010":"No straight",
"011":"No left turn",
"012":"Do not turn left and right",
"013":"No right turn",
"014":"No Overhead",
"015":"No U-turn",
"016":"No Motor vehicle",
"017":"No whistle",
"018":"Unrestricted speed_40",
"019":"Unrestricted speed_50",
"020":"Straight or turn right",
"021":"Straight",
"022":"Turn left",
"023":"Turn left or turn right",
"024":"Turn right",
"025":"Drive on the left side of the road",
"026":"Drive on the right side of the road",
"027":"Driving around the island",
"028":"Motor vehicle driving",
"029":"Whistle",
"030":"Non-motorized",
"031":"U-turn",
"032":"Left-right detour",
"033":"traffic light",
"034":"Drive cautiously",
"035":"Caution Pedestrians",
"036":"Attention non-motor vehicle",
"037":"Mind the children",
"038":"Sharp turn to the right",
"039":"Sharp turn to the left",
"040":"Downhill steep slope",
"041":"Uphill steep slope",
"042":"Go slow",
"044":"Right T-shaped cross",
"043":"Left T-shaped cross",
"045":"village",
"046":"Reverse detour",
"047":"Railway crossing-1",
"048":"construction",
"049":"Continuous detour",
"050":"Railway crossing-2",
"051":"Accident-prone road section",
"052":"stop",
"053":"No passing",
"054":"No Parking",
"055":"No entry",
"056":"Deceleration and concession",
"057":"Stop For Check"
}
def center_crop(img_array, crop_size=-1, resize=-1, write_path=None):
    ##从中心区域裁剪并调整正方形图像的大小。
    rows = img_array.shape[0]
    cols = img_array.shape[1]

    if crop_size==-1 or crop_size>max(rows,cols):
        crop_size = min(rows, cols)
    row_s = max(int((rows-crop_size)/2), 0)
    row_e = min(row_s+crop_size, rows)
    col_s = max(int((cols-crop_size)/2), 0)
    col_e = min(col_s+crop_size, cols)

    img_crop = img_array[row_s:row_e,col_s:col_e,]

    if resize>0:
        img_crop = cv2.resize(img_crop, (resize, resize))

    if write_path is not None:
        cv2.imwrite(write_path, img_crop)
    return img_crop
然后根据得到的realTrain和realTest自动生成带有<size><width><height><depth><filename>的xml文件
def write_img_to_xml(imgfile, xmlfile):

    img = cv2.imread(imgfile)
    img_folder, img_name = os.path.split(imgfile)
    img_height, img_width, img_depth = img.shape
    doc = Document()

    annotation = doc.createElement("annotation")
    doc.appendChild(annotation)

    folder = doc.createElement("folder")
    folder.appendChild(doc.createTextNode(img_folder))
    annotation.appendChild(folder)

    filename = doc.createElement("filename")
    filename.appendChild(doc.createTextNode(img_name))
    annotation.appendChild(filename)

    size = doc.createElement("size")
    annotation.appendChild(size)

    width = doc.createElement("width")
    width.appendChild(doc.createTextNode(str(img_width)))
    size.appendChild(width)

    height = doc.createElement("height")
    height.appendChild(doc.createTextNode(str(img_height)))
    size.appendChild(height)

    depth = doc.createElement("depth")
    depth.appendChild(doc.createTextNode(str(img_depth)))
    size.appendChild(depth)

    with open(xmlfile, "w") as f:
        doc.writexml(f, indent="	", addindent="	", newl="
", encoding="utf-8")
<annotation>
<folder>/home/xiao5/Desktop/Test2/data/realTest/PNGImages</folder>
<filename>000_1_0001_1_j.png</filename>
<size>
<width>640</width>
<height>640</height>
<depth>3</depth>
</size>
</annotation>
然后对realTrain和realTest的图片进行标注,向默认XML添加新的信息(矩形信息)。
<annotation> <folder>PNGImages</folder> <filename>021_1_0001_1_j.png</filename> <path> C:Usersxiao5Desktop ealTestPNGImages�21_1_0001_1_j.png </path> <source> <database>Unknown</database> </source> <size> <width>640</width> <height>640</height> <depth>3</depth> </size> <segmented>0</segmented> <object> <name>Straight</name> <pose>Unspecified</pose> <truncated>0</truncated> <difficult>0</difficult> <bndbox> <xmin>13</xmin> <ymin>22</ymin> <xmax>573</xmax> <ymax>580</ymax> </bndbox> </object> </annotation>
处理完后利用我们添加的矩形将图片裁剪下来并且重命名进行分类。主要思路是:解析XML文档,根据<name>标签进行分类,如果是直行、右转、左转、停止,那么就把它从原图中裁剪下来并重命名,如果没有<object>那么就认为是负样本,其中在处理负样本的时候,我进行了颜色识别,把一张负样本图片根据颜色(红色、蓝色)裁剪成几张负样本,这样做的好处是:我们在进行交通标志的识别时,也是使用的颜色识别来选取到交通标志,我们从负样本中分割出来的相近颜色样本有利于负样本的训练,提高模型精度。
def produce_proposals(xml_dir, write_dir, square=False, min_size=30):
                ##返回proposal_num对象
    proposal_num = {}
    for cls_name in classes_name:
        proposal_num[cls_name] = 0

    index = 0
    for xml_file in os.listdir(xml_dir):
        img_path, labels = parse_xml(os.path.join(xml_dir,xml_file))
        img = cv2.imread(img_path)
        ##如果图片中没有出现定义的那几种交通标志就把它当成负样本
        if len(labels) == 0:
            neg_proposal_num = produce_neg_proposals(img_path, write_dir, min_size, square, proposal_num["background"])
            proposal_num["background"] = neg_proposal_num
        else:
            proposal_num = produce_pos_proposals(img_path, write_dir, labels, min_size, square=True, proposal_num=proposal_num)

        if index%100 == 0:
            print ("total xml file number = ", len(os.listdir(xml_dir)), "current xml file number = ", index)
            print ("proposal num = ", proposal_num)
        index += 1

    return proposal_num

为了提高模型的精确度,还对目标图片(四类图片)进行仿射变换来扩充训练集。
def affine(img, delta_pix):
    rows, cols, _ = img.shape
    pts1 = np.float32([[0,0], [rows,0], [0, cols]])
    pts2 = pts1 + delta_pix
    M = cv2.getAffineTransform(pts1, pts2)
    res = cv2.warpAffine(img, M, (rows, cols))
    return res


def affine_dir(img_dir, write_dir, max_delta_pix):
    img_names = os.listdir(img_dir)
    img_names = [img_name for img_name in img_names if img_name.split(".")[-1]=="png"]
    for index, img_name in enumerate(img_names):
        img = cv2.imread(os.path.join(img_dir,img_name))
        save_name = os.path.join(write_dir, img_name.split(".")[0]+"f.png")
        delta_pix = np.float32(np.random.randint(-max_delta_pix,max_delta_pix+1,[3,2]))
        img_a = affine(img, delta_pix)
        cv2.imwrite(save_name, img_a)
二、HOG特征提取
处理好图片后分别对训练集和测试集进行特征提取得到imgTest_HOG.txt和imgTrain_HOG.txt
def hog_feature(img_array, resize=(64,64)):
    ##提取HOG特征

    img = cv2.cvtColor(img_array, cv2.COLOR_BGR2GRAY)
    img = cv2.resize(img, resize)
    bins = 9
    cell_size = (8, 8)
    cpb = (2, 2)
    norm = "L2"
    features = ft.hog(img, orientations=bins, pixels_per_cell=cell_size,
                        cells_per_block=cpb, block_norm=norm, transform_sqrt=True)
    return features

def extra_hog_features_dir(img_dir, write_txt, resize=(64,64)):
    ##提取目录中所有图像HOG特征

    img_names = os.listdir(img_dir)
    img_names = [os.path.join(img_dir, img_name) for img_name in img_names]
    if os.path.exists(write_txt):
        os.remove(write_txt)

    with open(write_txt, "a") as f:
        index = 0
        for img_name in img_names:
            img_array = cv2.imread(img_name)
            features = hog_feature(img_array, resize)
            label_name = img_name.split("/")[-1].split("_")[0]
            label_num = img_label[label_name]
            row_data = img_name + "	" + str(label_num) + "	"

            for element in features:
                row_data = row_data + str(round(element,3)) + " "
            row_data = row_data + "
"
            f.write(row_data)

            if index%100 == 0:
                print ("total image number = ", len(img_names), "current image number = ", index)
            index += 1
三、模型训练
利用得到的HOG特征进行训练模型得到svm_model.pkl
def load_hog_data(hog_txt):

    img_names = []
    labels = []
    hog_features = []
    with open(hog_txt, "r") as f:
        data = f.readlines()
        for row_data in data:
            row_data = row_data.rstrip()
            img_path, label, hog_str = row_data.split("	")
            img_name = img_path.split("/")[-1]
            hog_feature = hog_str.split(" ")
            hog_feature = [float(hog) for hog in hog_feature]
            #print "hog feature length = ", len(hog_feature)
            img_names.append(img_name)
            labels.append(label)
            hog_features.append(hog_feature)
    return img_names, np.array(labels), np.array(hog_features)


def svm_train(hog_features, labels, save_path="./svm_model.pkl"):

    clf = SVC(C=10, tol=1e-3, probability = True)
    clf.fit(hog_features, labels)
    joblib.dump(clf, save_path)
    print ("finished.")
四、交通标志识别及实验测试
交通标志识别的流程:颜色识别得到阈值范围内的二值图、然后进行轮廓识别、剔除多余矩阵。
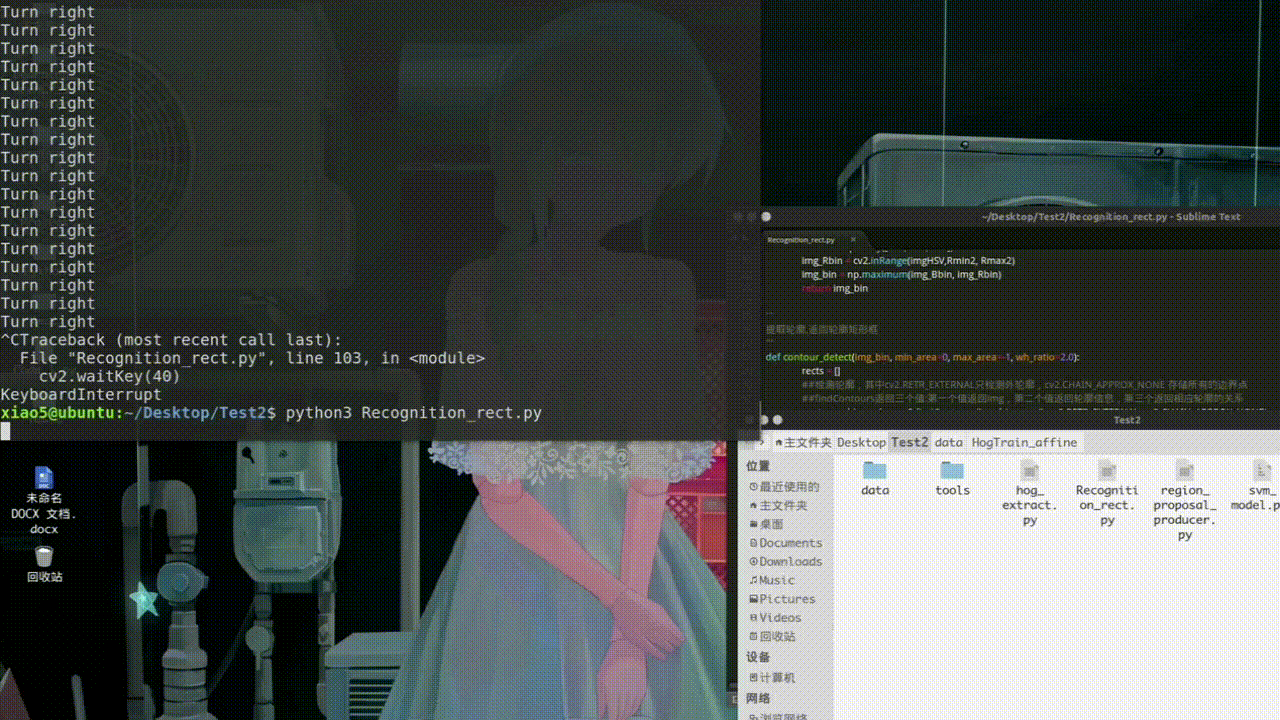
def preprocess_img(imgBGR):
        ##将图像由RGB模型转化成HSV模型
    imgHSV = cv2.cvtColor(imgBGR, cv2.COLOR_BGR2HSV)
    Bmin = np.array([110, 43, 46])
    Bmax = np.array([124, 255, 255])
        ##使用inrange(HSV,lower,upper)设置阈值去除背景颜色
    img_Bbin = cv2.inRange(imgHSV,Bmin, Bmax)
    Rmin2 = np.array([165, 43, 46])
    Rmax2 = np.array([180, 255, 255])
    img_Rbin = cv2.inRange(imgHSV,Rmin2, Rmax2)
    img_bin = np.maximum(img_Bbin, img_Rbin)
    return img_bin

'''
提取轮廓,返回轮廓矩形框
'''
def contour_detect(img_bin, min_area=0, max_area=-1, wh_ratio=2.0):
    rects = []
    ##检测轮廓,其中cv2.RETR_EXTERNAL只检测外轮廓,cv2.CHAIN_APPROX_NONE 存储所有的边界点
    ##findContours返回三个值:第一个值返回img,第二个值返回轮廓信息,第三个返回相应轮廓的关系
    contours, hierarchy= cv2.findContours(img_bin.copy(), cv2.RETR_EXTERNAL, cv2.CHAIN_APPROX_NONE)
    if len(contours) == 0:
        return rects
    max_area = img_bin.shape[0]*img_bin.shape[1] if max_area<0 else max_area
    for contour in contours:
        area = cv2.contourArea(contour)
        if area >= min_area and area <= max_area:
            x, y, w, h = cv2.boundingRect(contour)
            if 1.0*w/h < wh_ratio and 1.0*h/w < wh_ratio:
                rects.append([x,y,w,h])
    return rects
然后加载模型进行测验
if __name__ == "__main__":
    cap = cv2.VideoCapture(0)
    cv2.namedWindow('camera')
    cv2.resizeWindow("camera",640,480)
    cols = int(cap.get(cv2.CAP_PROP_FRAME_WIDTH))
    rows = int(cap.get(cv2.CAP_PROP_FRAME_HEIGHT))
    clf = joblib.load("/home/xiao5/Desktop/Test2/svm_model.pkl")
    i=0
    while (1):
        i+=1
        ret, img = cap.read()
        img_bin = preprocess_img(img)
        min_area = img_bin.shape[0]*img.shape[1]/(25*25)
        rects = contour_detect(img_bin, min_area=min_area)
        if rects:
            Max_X=0
            Max_Y=0
            Max_W=0
            Max_H=0
            for r in rects:
                if r[2]*r[3]>=Max_W*Max_H:
                    Max_X,Max_Y,Max_W,Max_H=r
            proposal = img[Max_Y:(Max_Y+Max_H),Max_X:(Max_X+Max_W)]##用Numpy数组对图像像素进行访问时,应该先写图像高度所对应的坐标(y,row),再写图像宽度对应的坐标(x,col)。
            cv2.rectangle(img,(Max_X,Max_Y), (Max_X+Max_W,Max_Y+Max_H), (0,255,0), 2)
            cv2.imshow("proposal", proposal)
            cls_prop = hog_extra_and_svm_class(proposal, clf)
            cls_prop = np.round(cls_prop, 2)
            cls_num = np.argmax(cls_prop)##找到最大相似度的索引
            if cls_names[cls_num] is not "background":
                print(cls_names[cls_num])
            else:
                print("N/A")
        cv2.imshow('camera',img)
        cv2.waitKey(40)
    cv2.destroyAllWindows()
    cap.release()