git:https://github.com/bmdcheng/product_server
git:https://github.com/bmdcheng/order_server
1.需要创建两个项目注册到eureka,然后来进行调用展示效果
2.首先创建product_server
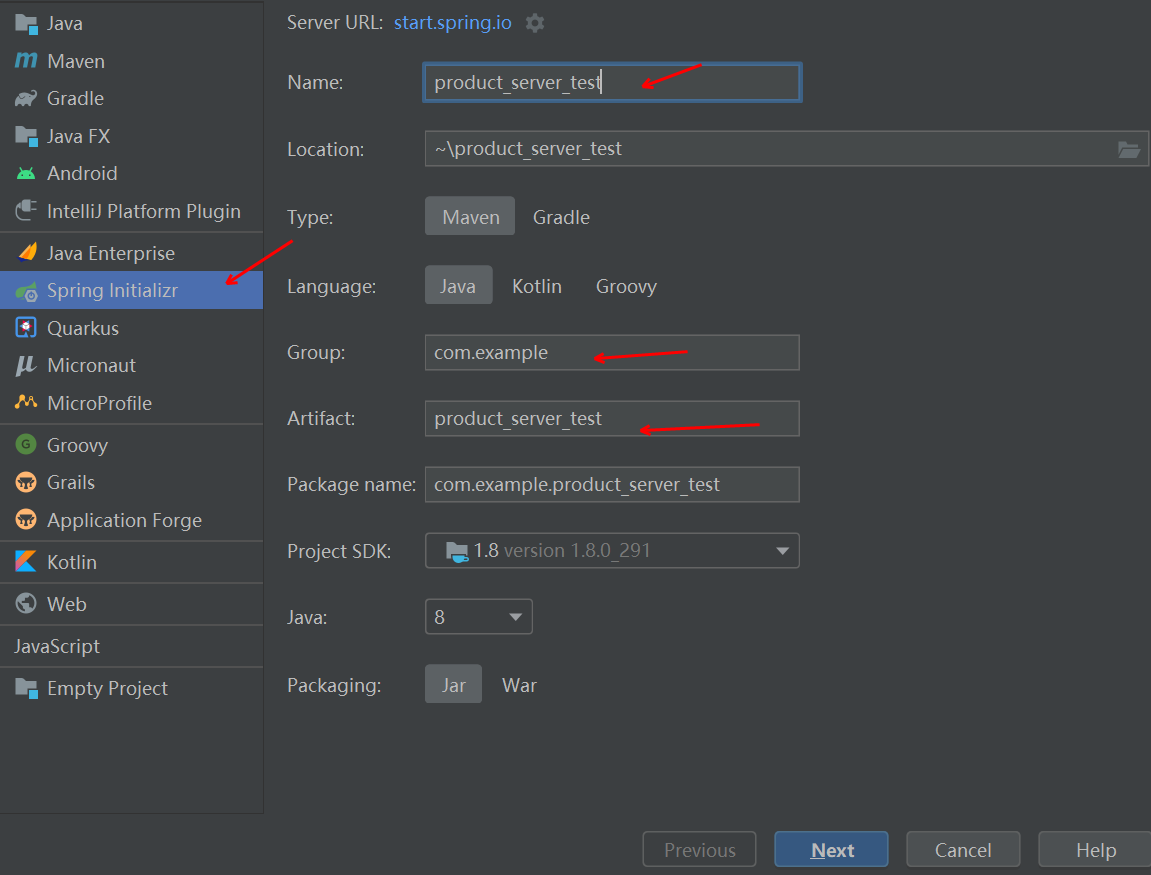
3.选择相应的依赖

4.编写一个controller,用于提供服务
package com.example.product_server_test.controller;

import org.springframework.web.bind.annotation.RequestMapping;
import org.springframework.web.bind.annotation.RestController;

import java.util.ArrayList;
import java.util.HashMap;
import java.util.List;
import java.util.Map;

@RestController
@RequestMapping("/api/product")
public class ProductController {

    @RequestMapping("findAll")
    public Object findAll(){
        return getData();
    }

    /**
     * 模拟数据
     * @return
     */
    public List<Map<String,Object>> getData(){
       List<Map<String,Object>> list = new ArrayList<>();

        for (int i =0;10<i;i++){
            Map<String,Object> map = new HashMap<String,Object>();
            map.put("id", String.valueOf(i));
            map.put("Name", "商品"+i);
            map.put("price", i*100);
            map.put("weight", i*200);
            list.add(map);
        }
        return list;
    }

}
4.修改product_server的的配置文件application.yml
server:
  port: 8771
#指定注册中心
eureka:
  client:
    service-url:
      defaultZone: http://localhost:8761/eureka/
#服务的名称
spring:
  application:
    name: product-service-test
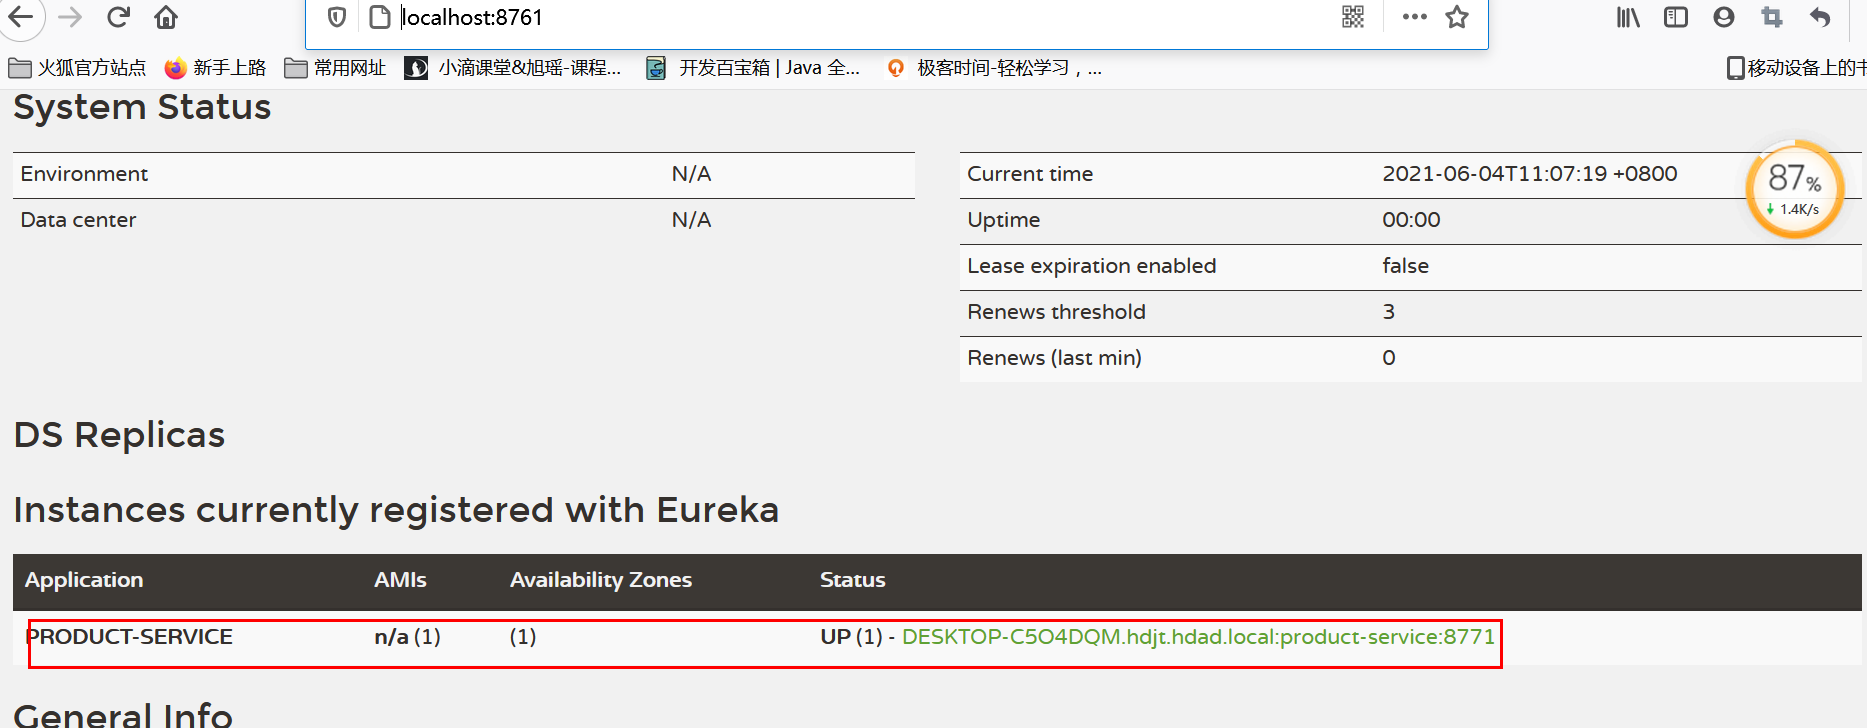
5.启动应用,然后到eureka中查看注册的produc_server,http://localhost:8761/
6.再创建一个order_server,用ribbon调用product_server
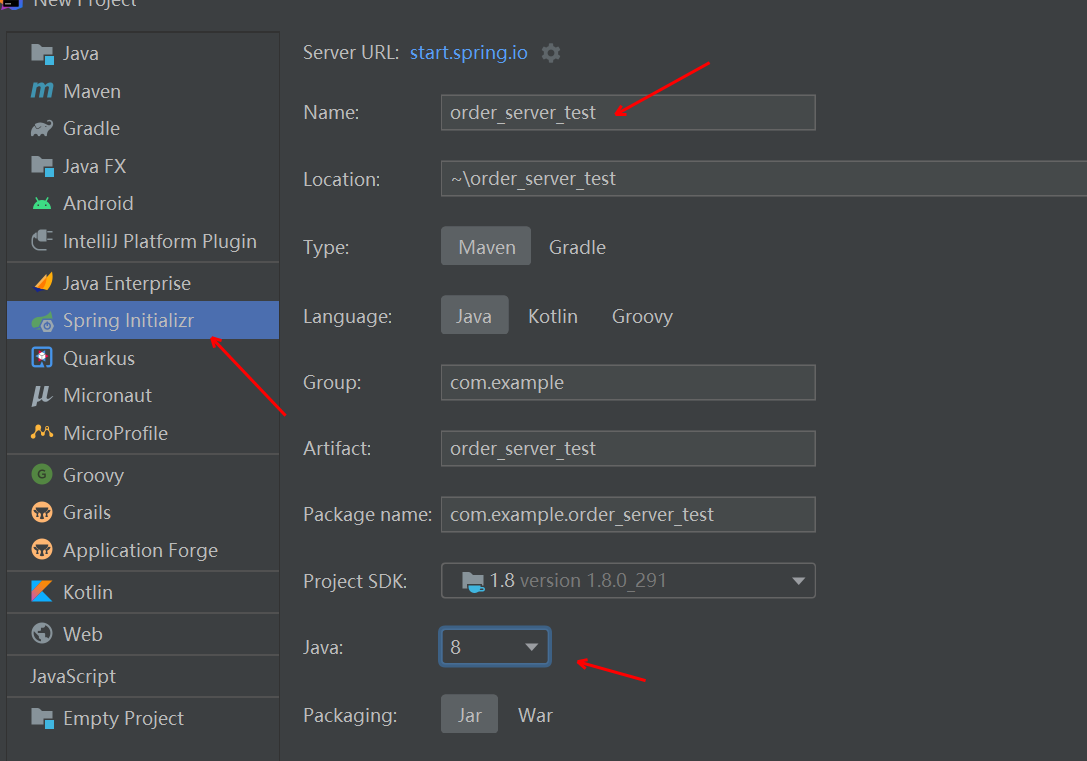
7.勾选对应的依赖,小知识点,当spring boot版本过高时,就用不了ribbon了,所以调低一点springboot版本就可以选择ribbon依赖了

8.修改order_server中的启动类增加如下代码
@Bean
//@Bean 将该对象交由spring ioc管理
@LoadBalanced
//@增加负载均衡策略
public RestTemplate restTemplate(){
    return new RestTemplate();
}
9.修改application.yml配置文件
server:
  port: 8781
#指定注册中心
eureka:
  client:
    service-url:
      defaultZone: http://localhost:8761/eureka/
#服务的名称
spring:
  application:
    name: order-service
10.写一个controller
package com.example.order_server_test;

import org.springframework.beans.factory.annotation.Autowired;
import org.springframework.web.bind.annotation.RequestMapping;
import org.springframework.web.bind.annotation.RestController;
import org.springframework.web.client.RestTemplate;

import java.util.List;

@RestController
@RequestMapping("/api/order")
public class controller {

    @Autowired
    private RestTemplate restTemplate;

    @RequestMapping("/findAllProduct")
    public Object findAllProduct(){
        List list = restTemplate.getForObject("http://product-service/api/product/findAll", List.class);

        return list;
    }
}
11.然后在页面使用连接访问
http://localhost:8781/api/order/findAllProduct
12.看到结果了,完事。

13.总结一下流程
创建服务提供方,引入web,eureka-client,修改配置文件,设置服务的端口,服务的名称,注册中心的地址。
创建服务消费方,引入web,eureka-client,ribbon依赖,修改配置文件,设置服务的端口,服务的名称,注册中心的地址,使用@LoadBalanced注解,然后使用restTemplate调连接,拿返回值