笔者在做一个个人博客项目的时候需要一个富文本框输入组件与后台进行交互,但是官方配置里面没有关于nodejs的,于是自己查阅资料研究了一下,最后终于应用到了系统中。
一、后台配置
首先是找到了这个项目:https://github.com/netpi/ueditor,可以通过他开源的代码将ueditor应用的node上面,大概方法如下:
1.先安装依赖:
npm install ueditor --save2. 配置Node设置
//引入接口文件
const api = require('./api');
//引入文件模块
const fs = require('fs');
//引入处理路径模块
const path = require('path');
//引入处理post数据模块
var bodyParser = require('body-parser');

//引入express
const express = require('express');
const app = express();
//引入ueditor
const ueditor = require("ueditor")

// parse application/x-www-form-urlencoded
app.use(bodyParser.urlencoded({ extended: false }))

//更改限定大小
app.use(bodyParser.json({ limit: '50mb' }));
app.use(bodyParser.urlencoded({ limit: '50mb', extended: true }));
// parse application/json
app.use(bodyParser.json())
app.use(api)

app.use("/ueditor/ue", ueditor(path.join(__dirname, 'public'), function(req, res, next) {
    //客户端上传文件设置
    var imgDir = '/img/ueditor/'
    var ActionType = req.query.action;
    if (ActionType === 'uploadimage' || ActionType === 'uploadfile' || ActionType === 'uploadvideo') {
        var file_url = imgDir; //默认图片上传地址
        /*其他上传格式的地址*/
        if (ActionType === 'uploadfile') {
            file_url = '/file/ueditor/'; //附件
        }
        if (ActionType === 'uploadvideo') {
            file_url = '/video/ueditor/'; //视频
        }
        res.ue_up(file_url); //你只要输入要保存的地址 。保存操作交给ueditor来做
        res.setHeader('Content-Type', 'text/html');
    }
    //  客户端发起图片列表请求
    else if (req.query.action === 'listimage') {
        var dir_url = imgDir;
        res.ue_list(dir_url); // 客户端会列出 dir_url 目录下的所有图片
    }
    // 客户端发起其它请求
    else {
        // console.log('config.json')
        res.setHeader('Content-Type', 'application/json');
        res.redirect('../nodejs/config.json');
    }
}));

//处理静态文件 todo
// 访问静态资源文件 这里是访问所有dist目录下的静态资源文件
app.use(express.static(path.resolve(__dirname, 'public/')))
app.use('/ueditor', function(req, res) {
    res.render('views/');
});

//监听8888端口
app.listen(8888);
console.log('sucess listen......')
这里需要注意的是因为已经require了ueditor,所以该插件已经安装到了node_module内,所以不需要再拷贝额外的文件了,只需要需要在这个目录下面新建public文件夹存放返回给后台的数据,另外,还需要引入配置文件config.json
二、前台配置
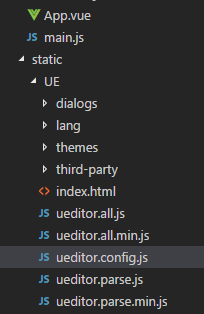
vue的前台配置需要下载ueditor的文件放在目录中,我将其放在了static文件夹中,在vue入口文件中引入ueditor的文件:
import '../static/UE/ueditor.config.js'
import '../static/UE/ueditor.all.min.js'
import '../static/UE/lang/zh-cn/zh-cn.js'
import '../static/UE/ueditor.parse.min.js'
值得一提的是需要将ueditor.config.js文件中的目录配置为放置该插件的目录:
window.UEDITOR_HOME_URL = "/static/UE/"
然后在组件中配置好就可以了
我的UE.vue组件:
<template>
  <script :id=id type="text/plain"></script>
</template>

<script>
  export default {
    name: 'UE',
    data () {
      return {
        editor: null
      }
    },
    props: {
      defaultMsg: {
        type: String
      },
      config: {
        type: Object
      },
      id: {
        type: String
      },
    },
    mounted() {
      const _this = this;
      this.editor = UE.getEditor(this.id, this.config); // 初始化UE
      this.editor.addListener("ready", function () {
        _this.editor.setContent(_this.defaultMsg); // 确保UE加载完成后,放入内容。
      });
    },
    methods: {
      getUEContent() { // 获取内容方法
        return this.editor.getContent()
      }
    },
    destroyed() {
      this.editor.destroy();
    }
  }
</script>
引入方式:
<UE :defaultMsg=defaultMsg :config=config :id=ue1 ref="ue"></UE>

data() {
    return {
      defaultMsg: "",
      image: "",
      config: {
        initialFrameWidth: null,
        initialFrameHeight: 350
      },
      ue1: "ue1"
    };
  },
就可以成功配置好ueditor的基本功能了
三、前后台请求代理
在vue dev环境下可以设置webpack的proxyTable将后端请求代理转发,就可以轻松调试文件上传功能了,同理,vue build之后的文件则需要用Node将静态文件代理到和后端同一个端口上才可以请求后台端口
篇幅有限,文章可能讲述的不太清晰,具体的可以看我这个项目的代码:https://github.com/cheer4chai/myBlog