先说一下思路:
(1)先做出基本样式
(2)用图像处理技术生成验证码,并存session
(3)注意img的路径,后面要跟一个随机数,便于每次刷新时,传的地址都是不一样的
(4)用form表单把用户输入的验证码提交给form.php页面,进行判断,如果正确返回“输入正确”,否则,返回“输入错误”,空未做处理。
重点是:
(1)生成验证码时,要存一下session;
(2)判断时,要用session存的验证码和用户输入的验证码进行判断是否输入正确;
(3)判断后,注意返回123.html用的是方法
(4)验证码图片路径
首先,先写html页面:123.html
<!DOCTYPE html>
<html>
	<head>
		<meta charset="UTF-8">
		<title></title>
	</head>
	<body>
		<form method="post" action="form.php">
		<div class="con3">
			<div style="margin:0 8px;font-size: 24px;">
				图片验证码
			</div>
			<div> <input class="con3_1" style=" 150px;"  type="text" name="authcode" value=""/> </div>
			<div> <img id="captcha_img" border='1' src="./captcha.php?r='+Math.random();?>" style=" 80px;height: 46px;margin-left: 10px;"/> </div>
			<a href="javascript:void(0)" onclick="document.getElementById('captcha_img').src='./captcha.php?r='+Math.random()">换一个?</a>
		    <input type="submit" value="验证"  />
		</div>
		</form>
	</body>
</html>
<script src="jquery-1.11.2.min.js"></script>
<!--实现点击图片刷新验证码-->
<script>
	$("img").click(function(){
		var sjs = Math.floor(Math.random()*100);
		$(this).attr("src","./captcha.php?r="+sjs);
		})
</script>
其次:输出验证码页面:captcha.php
<?php
   //设置session,必须处于脚本最顶部
  session_start();
  $image = imagecreatetruecolor(100, 30);    //1>设置验证码图片大小的函数
  //设置验证码颜色 imagecolorallocate(int im, int red, int green, int blue);
  $bgcolor = imagecolorallocate($image,255,255,255); //#ffffff
  //区域填充 int imagefill(int im, int x, int y, int col) (x,y) 所在的区域着色,col 表示欲涂上的颜色
  imagefill($image, 0, 0, $bgcolor);
  //设置变量
  $captcha_code = "";
  //生成随机数字
  for($i=0;$i<4;$i++){
    //设置字体大小
    $fontsize = 6;
    //设置字体颜色,随机颜色
    $fontcolor = imagecolorallocate($image, rand(0,120),rand(0,120), rand(0,120));      //0-120深颜色
    //设置数字
    $fontcontent = rand(0,9);
    //连续定义变量
    $captcha_code .= $fontcontent;
    //设置坐标
    $x = ($i*100/4)+rand(5,10);
    $y = rand(5,10);

    imagestring($image,$fontsize,$x,$y,$fontcontent,$fontcolor);
  }
  //存到session
  $_SESSION['authcode'] = $captcha_code;
  //增加干扰元素,设置雪花点
  for($i=0;$i<200;$i++){
    //设置点的颜色,50-200颜色比数字浅,不干扰阅读
    $pointcolor = imagecolorallocate($image,rand(50,200), rand(50,200), rand(50,200));
    //imagesetpixel — 画一个单一像素
    imagesetpixel($image, rand(1,99), rand(1,29), $pointcolor);
  }
  //增加干扰元素,设置横线
  for($i=0;$i<4;$i++){
    //设置线的颜色
    $linecolor = imagecolorallocate($image,rand(80,220), rand(80,220),rand(80,220));
    //设置线,两点一线
    imageline($image,rand(1,99), rand(1,29),rand(1,99), rand(1,29),$linecolor);
  }

  //设置头部,image/png
  header('Content-Type: image/png');
  //imagepng() 建立png图形函数
  imagepng($image);
  //imagedestroy() 结束图形函数 销毁$image
  imagedestroy($image);
最后,实现判断 form.php页面
<?php
  header("Content-Type:text/html;charset=utf-8");      //设置头部信息
  //isset()检测变量是否设置
  if(isset($_REQUEST['authcode'])){
    session_start();
    //strtolower()小写函数
    if(strtolower($_REQUEST['authcode'])== $_SESSION['authcode']){
      //跳转页面
      echo "<script language="javascript">";
      echo "alert('输入正确!');";
      echo "document.location="./123.html"";
      echo "</script>";
    }else{
      //提示以及跳转页面
      echo "<script language="javascript">";
      echo "alert('输入错误!');";
      echo "document.location="./123.html"";
      echo "</script>";
    }
    exit();
  }
实现效果:
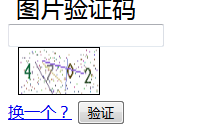
详看地址:http://www.cnblogs.com/kangshuai/p/5558208.html