普通滑动验证
以http://admin.emaotai.cn/login.aspx为例这类验证码只需要我们将滑块拖动指定位置,处理起来比较简单。拖动之前需要先将滚动条滚动到指定元素位置。

import time
from selenium import webdriver
from selenium.webdriver import ActionChains

# 新建selenium浏览器对象,后面是geckodriver.exe下载后本地路径
browser = webdriver.Firefox()

# 网站登陆页面
url = 'http://admin.emaotai.cn/login.aspx'

# 浏览器访问登录页面
browser.get(url)

browser.maximize_window()

browser.implicitly_wait(5)


draggable = browser.find_element_by_id('nc_1_n1z')

# 滚动指定元素位置
browser.execute_script("arguments[0].scrollIntoView();", draggable)

time.sleep(2)

ActionChains(browser).click_and_hold(draggable).perform()

# 拖动
ActionChains(browser).move_by_offset(xoffset=247, yoffset=0).perform()

ActionChains(browser).release().perform()
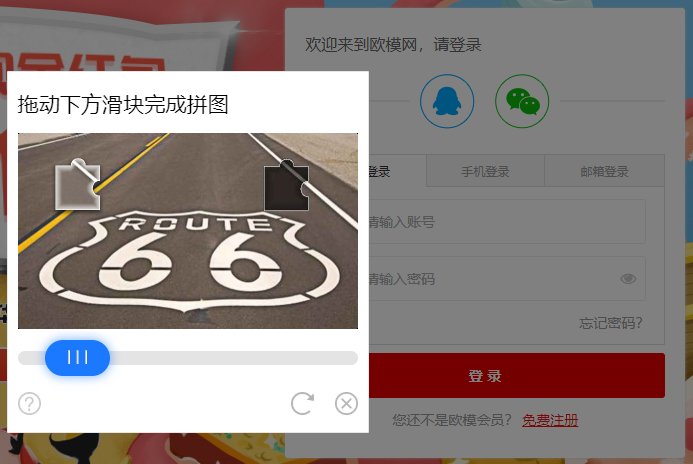
拼图滑动验证
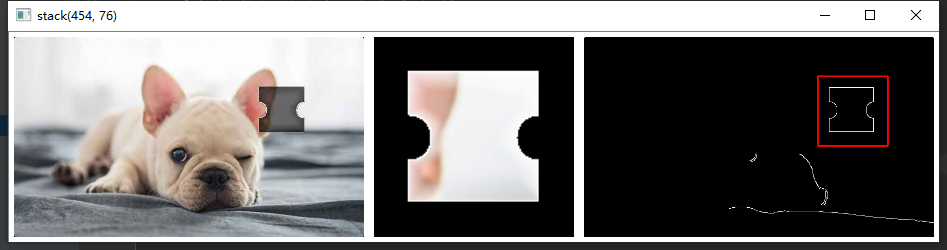
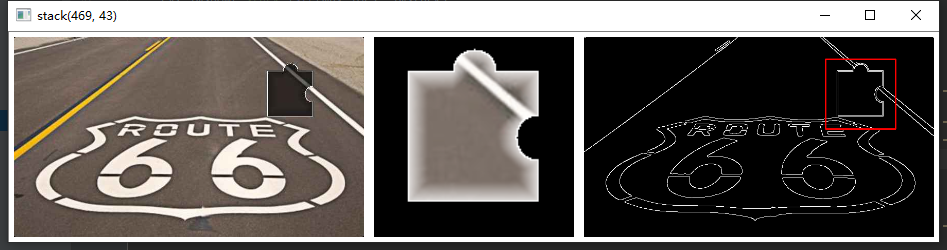
我们以欧模网很多网站使用的都是类似的方式。因为验证码及拼图都有明显明亮的边界,图片辨识度比较高。所以我们尝试先用cv2的边缘检测识别出边界,然后进行模糊匹配,匹配出拼图在验证码图片的位置。
边缘检测
cv2模块提供了多种边缘检测算子,包括Sobel、Scharr、Laplacian、prewitt、Canny或Marr—Hildreth等,每种算子得出的结果不同。这里我们用Canny算子,测试了很多算子,这种效果最好。
Canny
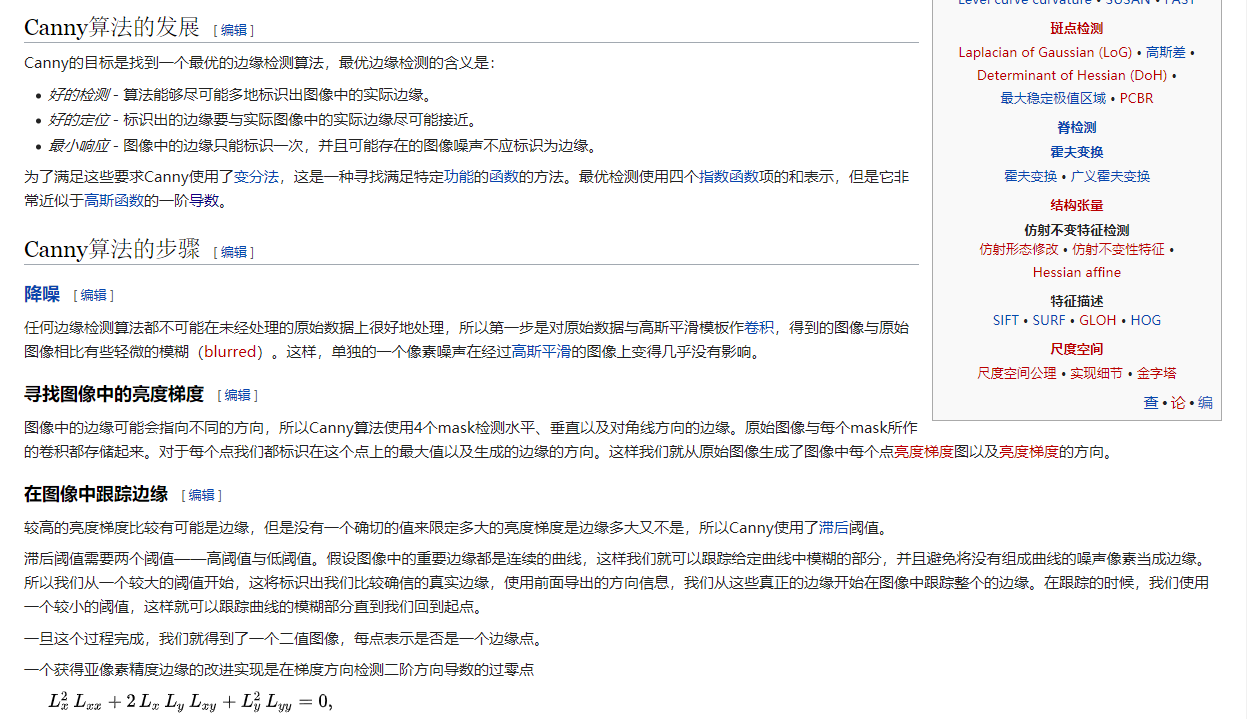
我们通过一个程序调整一下canny算子的阈值,使得输出图片只包含拼图轮廓。
import cv2

lowThreshold = 0
maxThreshold = 100

# 最小阈值范围 0 ~ 500
# 最大阈值范围 100 ~ 1000

def canny_low_threshold(intial):
    blur = cv2.GaussianBlur(img, (3, 3), 0)
    canny = cv2.Canny(blur, intial, maxThreshold)
    cv2.imshow('canny', canny)


def canny_max_threshold(intial):
    blur = cv2.GaussianBlur(img, (3, 3), 0)
    canny = cv2.Canny(blur, lowThreshold, intial)
    cv2.imshow('canny', canny)


# 参数0以灰度方式读取
img = cv2.imread('vcode.png', 0)

cv2.namedWindow('canny', cv2.WINDOW_NORMAL | cv2.WINDOW_KEEPRATIO)
cv2.createTrackbar('Min threshold', 'canny', lowThreshold, max_lowThreshold, canny_low_threshold)
cv2.createTrackbar('Max threshold', 'canny', maxThreshold, max_maxThreshold, canny_max_threshold)
canny_low_threshold(0)

# esc键退出
if cv2.waitKey(0) == 27:
    cv2.destroyAllWindows()
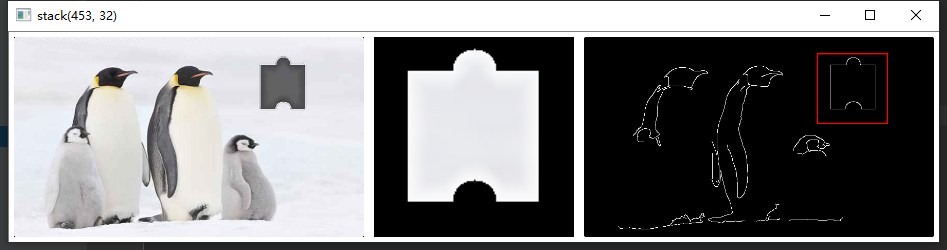
测试了若干个图片发现最小阈值100、最大阈值500输出结果比较理想。

拼图匹配
我们用cv2的matchTemplate方法进行模糊匹配,匹配方法用CV_TM_CCOEFF_NORMED归一化相关系数匹配。
几种方法算法详见。
【1】 平方差匹配 method=CV_TM_SQDIFF square dirrerence(error)
这类方法利用平方差来进行匹配,最好匹配为0.匹配越差,匹配值越大.
【2】标准平方差匹配 method=CV_TM_SQDIFF_NORMED standard square dirrerence(error)
【3】 相关匹配 method=CV_TM_CCORR
这类方法采用模板和图像间的乘法操作,所以较大的数表示匹配程度较高,0标识最坏的匹配效果.
【4】 标准相关匹配 method=CV_TM_CCORR_NORMED
【5】 相关匹配 method=CV_TM_CCOEFF
这类方法将模版对其均值的相对值与图像对其均值的相关值进行匹配,1表示完美匹配,
-1表示糟糕的匹配,0表示没有任何相关性(随机序列).
【6】标准相关匹配 method=CV_TM_CCOEFF_NORMED
canndy_test.py:
import cv2
import numpy as np

def matchImg(imgPath1,imgPath2):

    imgs = []

    # 原始图像,用于展示
    sou_img1 = cv2.imread(imgPath1)
    sou_img2 = cv2.imread(imgPath2)

    # 原始图像,灰度
    # 最小阈值100,最大阈值500
    img1 = cv2.imread(imgPath1, 0)
    blur1 = cv2.GaussianBlur(img1, (3, 3), 0)
    canny1 = cv2.Canny(blur1, 100, 500)
    cv2.imwrite('temp1.png', canny1)

    img2 = cv2.imread(imgPath2, 0)
    blur2 = cv2.GaussianBlur(img2, (3, 3), 0)
    canny2 = cv2.Canny(blur2, 100, 500)
    cv2.imwrite('temp2.png', canny2)

    target = cv2.imread('temp1.png')
    template = cv2.imread('temp2.png')

    # 调整显示大小
    target_temp = cv2.resize(sou_img1, (350, 200))
    target_temp = cv2.copyMakeBorder(target_temp, 5, 5, 5, 5, cv2.BORDER_CONSTANT, value=[255, 255, 255])

    template_temp = cv2.resize(sou_img2, (200, 200))
    template_temp = cv2.copyMakeBorder(template_temp, 5, 5, 5, 5, cv2.BORDER_CONSTANT, value=[255, 255, 255])

    imgs.append(target_temp)
    imgs.append(template_temp)

    theight, twidth = template.shape[:2]

    # 匹配拼图
    result = cv2.matchTemplate(target, template, cv2.TM_CCOEFF_NORMED)

    # 归一化
    cv2.normalize( result, result, 0, 1, cv2.NORM_MINMAX, -1 )

    min_val, max_val, min_loc, max_loc = cv2.minMaxLoc(result)

    # 匹配后结果画圈
    cv2.rectangle(target,max_loc,(max_loc[0]+twidth,max_loc[1]+theight),(0,0,255),2)


    target_temp_n = cv2.resize(target, (350, 200))
    target_temp_n = cv2.copyMakeBorder(target_temp_n, 5, 5, 5, 5, cv2.BORDER_CONSTANT, value=[255, 255, 255])

    imgs.append(target_temp_n)

    imstack = np.hstack(imgs)

    cv2.imshow('stack'+str(max_loc), imstack)

    cv2.waitKey(0)
    cv2.destroyAllWindows()


matchImg('vcode_data/out_'+str(1)+'.png','vcode_data/in_'+str(1)+'.png')
我们测试几组数据,发现准确率拿来玩玩尚可。max_loc就是匹配出来的位置信息,我们只需要按照位置进行拖动即可。

完整程序
完整流程1.实例化浏览器 2.点击登陆,弹出滑动验证框 3.分别新建标签页打开背景图及拼图 4.全屏截图后按照尺寸裁剪 5.模糊匹配两张图片,获取匹配结果位置信息 6.将位置信息转为页面上的位移距离 7.拖动滑块到指定位置
import time
import cv2
import canndy_test
from selenium import webdriver
from selenium.webdriver import ActionChains

# 新建selenium浏览器对象,后面是geckodriver.exe下载后本地路径
browser = webdriver.Firefox()

# 网站登陆页面
url = 'https://www.om.cn/login'

# 浏览器访问登录页面
browser.get(url)

handle = browser.current_window_handle

# 等待3s用于加载脚本文件
browser.implicitly_wait(3)

# 点击登陆按钮,弹出滑动验证码
btn = browser.find_element_by_class_name('login_btn1')
btn.click()

# 获取iframe元素,切到iframe
frame = browser.find_element_by_id('tcaptcha_iframe')
browser.switch_to.frame(frame)

time.sleep(1)

# 获取背景图src
targetUrl = browser.find_element_by_id('slideBg').get_attribute('src')

# 获取拼图src
tempUrl = browser.find_element_by_id('slideBlock').get_attribute('src')


# 新建标签页
browser.execute_script("window.open('');")
# 切换到新标签页
browser.switch_to.window(browser.window_handles[1])

# 访问背景图src
browser.get(targetUrl)
time.sleep(3)
# 截图
browser.save_screenshot('temp_target.png')

w = 680
h = 390

img = cv2.imread('temp_target.png')

size = img.shape

top = int((size[0] - h) / 2)
height = int(h + ((size[0] - h) / 2))
left = int((size[1] - w) / 2)
width = int(w + ((size[1] - w) / 2))

cropped = img[top:height, left:width]

# 裁剪尺寸
cv2.imwrite('temp_target_crop.png', cropped)

# 新建标签页
browser.execute_script("window.open('');")

browser.switch_to.window(browser.window_handles[2])

browser.get(tempUrl)
time.sleep(3)

browser.save_screenshot('temp_temp.png')

w = 136
h = 136

img = cv2.imread('temp_temp.png')

size = img.shape

top = int((size[0] - h) / 2)
height = int(h + ((size[0] - h) / 2))
left = int((size[1] - w) / 2)
width = int(w + ((size[1] - w) / 2))

cropped = img[top:height, left:width]

cv2.imwrite('temp_temp_crop.png', cropped)

browser.switch_to.window(handle)

# 模糊匹配两张图片
move = canndy_test.matchImg('temp_target_crop.png', 'temp_temp_crop.png')

# 计算出拖动距离
distance = int(move / 2 - 27.5) + 2

draggable = browser.find_element_by_id('tcaptcha_drag_thumb')

ActionChains(browser).click_and_hold(draggable).perform()

# 拖动
ActionChains(browser).move_by_offset(xoffset=distance, yoffset=0).perform()

ActionChains(browser).release().perform()

time.sleep(10)
tips:可能会存在第一次不成功的情况,虽然拖动到了指定位置但是提示网络有问题、拼图丢失。可以进行循环迭代直到拼成功为止。通过判断iframe中id为slideBg的元素是否存在,如果成功了则不存在,失败了会刷新拼图让你重新拖动。
 if(isEleExist(browser,'slideBg')):
        # retry
    else:
        return

def isEleExist(browser,id):
    try:
        browser.find_element_by_id(id)
        return True
    except:
        return False