目的
使用Redis存储管理HttpSession;
添加pom.xml
该工程基于Spring Boot,同时我们将使用Spring IO Platform来维护依赖版本号;
引入的依赖有spring-session、spring-boot-starter-web、spring-boot-starter-redis,pom文件如下:
<?xml version="1.0" encoding="UTF-8"?>
<project xmlns="http://maven.apache.org/POM/4.0.0" xmlns:xsi="http://www.w3.org/2001/XMLSchema-instance"
    xsi:schemaLocation="http://maven.apache.org/POM/4.0.0 http://maven.apache.org/xsd/maven-4.0.0.xsd">
    <modelVersion>4.0.0</modelVersion>

    <groupId>com.example</groupId>
    <artifactId>helloworld</artifactId>
    <version>0.0.1-SNAPSHOT</version>

    <dependencyManagement>
        <dependencies>
            <dependency>
                <groupId>io.spring.platform</groupId>
                <artifactId>platform-bom</artifactId>
                <version>Athens-SR2</version>
                <type>pom</type>
                <scope>import</scope>
            </dependency>

            <dependency>
                <!-- Import dependency management from Spring Boot -->
                <groupId>org.springframework.boot</groupId>
                <artifactId>spring-boot-dependencies</artifactId>
                <version>1.4.3.RELEASE</version>
                <type>pom</type>
                <scope>import</scope>
            </dependency>
        </dependencies>
    </dependencyManagement>

    <!-- Additional lines to be added here... -->
    <dependencies>
        <dependency>
            <groupId>org.springframework.session</groupId>
            <artifactId>spring-session</artifactId>
        </dependency>
        <dependency>
            <groupId>org.springframework.boot</groupId>
            <artifactId>spring-boot-starter-web</artifactId>
        </dependency>
        <dependency>
            <groupId>org.springframework.boot</groupId>
            <artifactId>spring-boot-starter-redis</artifactId>
        </dependency>
    </dependencies>

    <build>
        <plugins>
            <plugin>
                <groupId>org.springframework.boot</groupId>
                <artifactId>spring-boot-maven-plugin</artifactId>
                <version>1.4.3.RELEASE</version>
                <executions>
                    <execution>
                        <goals>
                            <goal>repackage</goal>
                        </goals>
                    </execution>
                </executions>
            </plugin>
        </plugins>
    </build>

</project>
配置Spring Session
配置比较简单,主要是添加@EnableRedisHttpSession注解即可,该注解会创建一个名字叫springSessionRepositoryFilter的Spring Bean,其实就是一个Filter,这个Filter负责用Spring Session来替换原先的默认HttpSession实现,在这个例子中,Spring Session是用Redis来实现的。
import org.springframework.session.data.redis.config.annotation.web.http.EnableRedisHttpSession;

@EnableRedisHttpSession
public class HttpSessionConfig {

}
操作HttpSession
这里我们将实现两个操作,一个是往Session中写入数据,另一个是查询数据,如下所示:
@RestController
public class Example {

    @RequestMapping("/set")
    String set(HttpServletRequest req) {
        req.getSession().setAttribute("testKey", "testValue");
        return "设置session:testKey=testValue";
    }

    @RequestMapping("/query")
    String query(HttpServletRequest req) {
        Object value = req.getSession().getAttribute("testKey");
        return "查询Session:"testKey"=" + value;
    }

}
编写main方法
编写main方法,使用@SpringBootApplication注解标注,如果查看该注解源码的话,会发现相当于添加了@SpringBootConfiguration @EnableAutoConfiguration @ComponentScan等注解
import org.springframework.boot.SpringApplication;
import org.springframework.boot.autoconfigure.SpringBootApplication;

@SpringBootApplication
public class APP {
       public static void main(String[] args) throws Exception {
            SpringApplication.run(APP.class, args);
        }
}
运行程序,测试验证
1、本地启动redis服务;

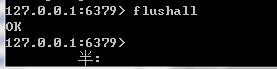
2、打开redis客户端,输入flushall清空缓存;
3、浏览器输入http://localhost:8080/set,设置Session

redis客户端输入keys *命令, 可以发现redis中确实有数据插入:

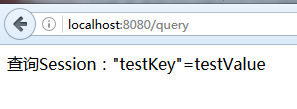
4、浏览器输入http://localhost:8080/query,查询Session
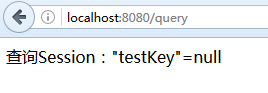
5、清空redis缓存,浏览器输入http://localhost:8080/query,再次查询Session
发现HttpSession中已经无数据。
最后,如果查看浏览器的cookie的话,会发现有一个name为“SESSION”的cookie,其值为redis中spring session key的一部分。

另外,还可以在redis客户端输入HGETALL来查看spring session具体的值,如下:

结论:以上测试结果全部符合预期,HttpSession的实现成功被Spring Session替换,操作HttpSession等同于操作redis中的数据。
工程源码参考
https://github.com/peterchenhdu/spring-session-example
参考资料
http://docs.spring.io/spring-session/docs/1.3.1.BUILD-SNAPSHOT/reference/html5/