nsible常用模块使用详解
ansible常用模块有:
- ping
- yum
- template
- copy
- user
- group
- service
- raw
- command
- shell
- script
ansible常用模块raw、command、shell的区别:
- shell模块调用的/bin/sh指令执行
- command模块不是调用的shell的指令,所以没有bash的环境变量
- raw很多地方和shell类似,更多的地方建议使用shell和command模块。但是如果是使用老版本python,需要用到raw,又或者是客户端是路由器,因为没有安装python模块,那就需要使用raw模块了
ansible常用模块之ping
ping模块用于检查指定节点机器是否连通,用法很简单,不涉及参数,主机如果在线,则回复pong
[root@node1 ~]# vi /etc/ansible/inventory

[webservers]
node2
[root@node1 ~]# ansible all -m ping
node2 | SUCCESS => {
    "ansible_facts": {
        "discovered_interpreter_python": "/usr/libexec/platform-python"
    },
    "changed": false,
    "ping": "pong"
}
[ro
ansible常用模块之command
command模块用于在远程主机上执行命令,ansible默认就是使用command模块。
command模块有一个缺陷就是不能使用管道符和重定向功能。
//查看受控主机的/tmp目录内容
[root@node1 ~]# ansible node2 -a 'ls /tmp'
node2 | CHANGED | rc=0 >>
ansible_command_payload_dd3zynn_
hsperfdata_root
ks-script-jl5dglcm
systemd-private-c50b4a36efd7458f885f61a51c649380-mariadb.service-bkUl9X
vmware-root_960-2999133023
vmware-root_962-2990678749
vmware-root_978-2957649101

//在受控主机的/tmp目录下新建一个文件test
[root@node1 ~]# ansible node2 -a 'touch /tmp/test'
[WARNING]: Consider using the file module with state=touch rather than running
'touch'.  If you need to use command because file is insufficient you can add 'warn:
false' to this command task or set 'command_warnings=False' in ansible.cfg to get
rid of this message.
node2 | CHANGED | rc=0 >>

[root@node1 ~]# ansible node2 -a 'ls /tmp'
node2 | CHANGED | rc=0 >>
ansible_command_payload_yg2ldpb0
hsperfdata_root
ks-script-jl5dglcm
systemd-private-c50b4a36efd7458f885f61a51c649380-mariadb.service-bkUl9X
test
vmware-root_960-2999133023
vmware-root_962-2990678749
vmware-root_978-2957649101

//command模块不支持管道符,不支持重定向
[root@node1 ~]# ansible node2 -a "echo 'hello world' > /tmp/test"
node2 | CHANGED | rc=0 >>
hello world > /tmp/test
[root@node1 ~]# ansible node2 -a 'cat /tmp/test'
node2 | CHANGED | rc=0 >>

[root@node1 ~]# ansible node2 -a 'ps -ef|grep vsftpd'
node2 | FAILED | rc=1 >>
error: unsupported SysV option

Usage:
 ps [options]

 Try 'ps --help <simple|list|output|threads|misc|all>'
  or 'ps --help <s|l|o|t|m|a>'
 for additional help text.

For more details see ps(1).non-zero return code
ansible常用模块之raw
raw模块用于在远程主机上执行命令,其支持管道符与重定向
//支持重定向
[root@node1 ~]# ansible node2 -m raw -a 'echo "hello world" > /tmp/test'
node2 | CHANGED | rc=0 >>
Shared connection to node2 closed.

[root@node1 ~]# ansible node2 -a 'cat /tmp/test'
node2 | CHANGED | rc=0 >>
hello world

//支持管道符
[root@node1 ~]# ansible node2 -m raw -a 'cat /tmp/test|grep -Eo hello'
node2 | CHANGED | rc=0 >>
hello
Shared connection to node2 closed.
ansible常用模块之shell
shell模块用于在受控机上执行受控机上的脚本,亦可直接在受控机上执行命令。
shell模块亦支持管道与重定向。
[root@node1 ~]# mkdir scripts
[root@node1 ~]# cd scripts/
[root@node1 scripts]# vi ip.sh

#!/bin/bash
ip a > /tmp/ip.txt
[root@node1 scripts]# ansible node2 -m script -a '~/scripts/ip.sh'
node2 | CHANGED => {
    "changed": true,
    "rc": 0,
    "stderr": "Shared connection to node2 closed.
",
    "stderr_lines": [
        "Shared connection to node2 closed."
    ],
    "stdout": "",
    "stdout_lines": []
}
[root@node1 scripts]# ansible node2 -m shell -a 'cat /tmp/ip.txt'
node2 | CHANGED | rc=0 >>
1: lo: <LOOPBACK,UP,LOWER_UP> mtu 65536 qdisc noqueue state UNKNOWN group default qlen 1000
    link/loopback 00:00:00:00:00:00 brd 00:00:00:00:00:00
    inet 127.0.0.1/8 scope host lo
       valid_lft forever preferred_lft forever
    inet6 ::1/128 scope host
       valid_lft forever preferred_lft forever
2: ens160: <BROADCAST,MULTICAST,UP,LOWER_UP> mtu 1500 qdisc mq state UP group default qlen 1000
    link/ether 00:0c:29:78:64:0b brd ff:ff:ff:ff:ff:ff
    inet 192.168.44.131/24 brd 192.168.44.255 scope global dynamic noprefixroute ens160
       valid_lft 1481sec preferred_lft 1481sec
    inet6 fe80::32d3:fe97:a11d:ea41/64 scope link noprefixroute
       valid_lft forever preferred_lft forever
ansible常用模块之script
script模块用于在受控机上执行主控机上的脚本
[root@ansible ~]# ll /etc/ansible/scripts/
总用量 4
-rw-r--r--. 1 root root 61 9月   8 18:59 a.sh
[root@ansible ~]# ansible 172.16.103.129 -m script -a '/etc/ansible/scripts/a.sh &>/tmp/a'
172.16.103.129 | SUCCESS => {
    "changed": true,
    "rc": 0,
    "stderr": "Shared connection to 172.16.103.129 closed.
",
    "stderr_lines": [
        "Shared connection to 172.16.103.129 closed."
    ],
    "stdout": "",
    "stdout_lines": []
}


//查看受控机上的/tmp/a文件内容
[root@ansible ~]# ansible 172.16.103.129 -m shell -a 'cat /tmp/a'
172.16.103.129 | SUCCESS | rc=0 >>
root:x:0:0:root:/root:/bin/bash
....此处省略N行
jerry:x:1000:1000::/home/jerry:/bin/bash

//由此可见确是在受控机上执行了主控机上的脚本,且输出记录到了受控机上。因为此处
//的jerry用户是在受控机上才有的用户
ansible常用模块之template
template模块用于生成一个模板,并可将其传输至远程主机上。
//下载一个163的yum源文件并开启此源
[root@ansible ~]# cd /etc/yum.repos.d/
[root@ansible yum.repos.d]# curl -o CentOS7-Base-163.repo http://mirrors.163.com/.help/CentOS7-Base-163.repo
[root@localhost ~]# sed -i 's/$releasever/7/g' /etc/yum.repos.d/CentOS7-Base-163.repo
[root@localhost ~]# sed -i 's/^enabled=.*/enabled=1/g' /etc/yum.repos.d/CentOS7-Base-163.repo

//将设置好的163源传到受控主机
[root@ansible ~]# ansible 172.16.103.129 -m template -a 'src=/etc/yum.repos.d/CentOS7-Base-163.repo dest=/etc/yum.repos.d/163.repo'
172.16.103.129 | SUCCESS => {
    "changed": true,
    "checksum": "60b8868e0599489038710c45025fc11cbccf35f2",
    "dest": "/etc/yum.repos.d/163.repo",
    "gid": 0,
    "group": "root",
    "md5sum": "5a3e688854d9ceccf327b953dab55b21",
    "mode": "0644",
    "owner": "root",
    "size": 1462,
    "src": "/root/.ansible/tmp/ansible-tmp-1536311319.27-78101453778196/source",
    "state": "file",
    "uid": 0
}

//查看受控机上是否有163源
[root@localhost ~]# ls /etc/yum.repos.d/
163.repo
ansible常用模块之yum
yum模块用于在指定节点机器上通过yum管理软件,其支持的参数主要有两个
- name:要管理的包名
- state:要进行的操作
state常用的值:
- latest:安装软件
- installed:安装软件
- present:安装软件
- removed:卸载软件
- absent:卸载软件
若想使用yum来管理软件,请确保受控机上的yum源无异常。
//在受控机上查询看vsftpd软件是否安装
[root@localhost ~]# rpm -qa|grep vsftpd
[root@localhost ~]#


//在ansible主机上使用yum模块在受控机上安装vsftpd
[root@ansible ~]# ansible 172.16.103.129 -m yum -a 'name=vsftpd state=present'
172.16.103.129 | SUCCESS => {
    "changed": true,
    "msg": "warning: /var/cache/yum/x86_64/7Server/base/packages/vsftpd-3.0.2-22.el7.x86_64.rpm: Header V3 RSA/SHA256 Signature, key ID f4a80eb5: NOKEY
Importing GPG key 0xF4A80EB5:
 Userid     : "CentOS-7 Key (CentOS 7 Official Signing Key) <security@centos.org>"
 Fingerprint: 6341 ab27 53d7 8a78 a7c2 7bb1 24c6 a8a7 f4a8 0eb5
 From       : http://mirrors.163.com/centos/RPM-GPG-KEY-CentOS-7
",
    "rc": 0,
    "results": [
        "Loaded plugins: product-id, search-disabled-repos, subscription-manager
This system is not registered with an entitlement server. You can use subscription-manager to register.
Resolving Dependencies
--> Running transaction check
---> Package vsftpd.x86_64 0:3.0.2-22.el7 will be installed
--> Finished Dependency Resolution

Dependencies Resolved

================================================================================
 Package          Arch             Version                 Repository      Size
================================================================================
Installing:
 vsftpd           x86_64           3.0.2-22.el7            base           169 k

Transaction Summary
================================================================================
Install  1 Package

Total download size: 169 k
Installed size: 348 k
Downloading packages:
Public key for vsftpd-3.0.2-22.el7.x86_64.rpm is not installed
Retrieving key from http://mirrors.163.com/centos/RPM-GPG-KEY-CentOS-7
Running transaction check
Running transaction test
Transaction test succeeded
Running transaction
  Installing : vsftpd-3.0.2-22.el7.x86_64                                   1/1
  Verifying  : vsftpd-3.0.2-22.el7.x86_64                                   1/1

Installed:
  vsftpd.x86_64 0:3.0.2-22.el7

Complete!
"
    ]
}


//查看受控机上是否安装了vsftpd
[root@localhost ~]# rpm -qa|grep vsftpd
vsftpd-3.0.2-22.el7.x86_64
ansible常用模块之copy
copy模块用于复制文件至远程受控机。
[root@ansible ~]# ls /etc/ansible/scripts/
a.sh
[root@ansible ~]# ansible 172.16.103.129 -m copy -a 'src=/etc/ansible/scripts/a.sh dest=/scripts/'
172.16.103.129 | SUCCESS => {
    "changed": true,
    "checksum": "83f66f804c195247885b013912cf9dc649f36391",
    "dest": "/scripts/a.sh",
    "gid": 0,
    "group": "root",
    "md5sum": "a63e880a932bba1160f329836cbfd730",
    "mode": "0644",
    "owner": "root",
    "size": 61,
    "src": "/root/.ansible/tmp/ansible-tmp-1536406467.26-35192956264311/source",
    "state": "file",
    "uid": 0
}


[root@ansible ~]# ansible 172.16.103.129 -m shell -a 'ls /scripts/'
172.16.103.129 | SUCCESS | rc=0 >>
a.sh
test.sh
ansible常用模块之group
group模块用于在受控机上添加或删除组。
//在受控机上添加一个系统组,其gid为306,组名为mysql
[root@ansible ~]# ansible 172.16.103.129 -m group -a 'name=mysql gid=306 state=present'
172.16.103.129 | SUCCESS => {
    "changed": true,
    "gid": 306,
    "name": "mysql",
    "state": "present",
    "system": false
}
[root@ansible ~]# ansible 172.16.103.129 -m shell -a 'grep mysql /etc/group'
172.16.103.129 | SUCCESS | rc=0 >>
mysql:x:306:


//删除受控机上的mysql组
[root@ansible ~]# ansible 172.16.103.129 -m group -a 'name=mysql state=absent'
172.16.103.129 | SUCCESS => {
    "changed": true,
    "name": "mysql",
    "state": "absent"
}
[root@ansible ~]# ansible 172.16.103.129 -m shell -a 'grep mysql /etc/group'
172.16.103.129 | FAILED | rc=1 >>
non-zero return code
ansible常用模块之user
user模块用于管理受控机的用户帐号。
//在受控机上添加一个系统用户,用户名为mysql,uid为306,设置其shell为/sbin/nologin,无家目录
[root@ansible ~]# ansible 172.16.103.129 -m user -a 'name=mysql uid=306 system=yes create_home=no shell=/sbin/nologin state=present'
172.16.103.129 | SUCCESS => {
    "changed": true,
    "comment": "",
    "create_home": false,
    "group": 306,
    "home": "/home/mysql",
    "name": "mysql",
    "shell": "/sbin/nologin",
    "state": "present",
    "system": true,
    "uid": 306
}
[root@ansible ~]# ansible 172.16.103.129 -m shell -a 'grep mysql /etc/passwd'
172.16.103.129 | SUCCESS | rc=0 >>
mysql:x:306:306::/home/mysql:/sbin/nologin

[root@ansible ~]# ansible 172.16.103.129 -m shell -a 'ls /home'
172.16.103.129 | SUCCESS | rc=0 >>
jerry


//修改mysql用户的uid为366
[root@ansible ~]# ansible 172.16.103.129 -m user -a 'name=mysql uid=366'
172.16.103.129 | SUCCESS => {
    "append": false,
    "changed": true,
    "comment": "",
    "group": 306,
    "home": "/home/mysql",
    "move_home": false,
    "name": "mysql",
    "shell": "/sbin/nologin",
    "state": "present",
    "uid": 366
}
[root@ansible ~]# ansible 172.16.103.129 -m shell -a 'grep mysql /etc/passwd'
172.16.103.129 | SUCCESS | rc=0 >>
mysql:x:366:306::/home/mysql:/sbin/nologin


//删除受控机上的mysql用户
[root@ansible ~]# ansible 172.16.103.129 -m user -a 'name=mysql state=absent'
172.16.103.129 | SUCCESS => {
    "changed": true,
    "force": false,
    "name": "mysql",
    "remove": false,
    "state": "absent"
}
[root@ansible ~]# ansible 172.16.103.129 -m shell -a 'grep mysql /etc/passwd'
172.16.103.129 | FAILED | rc=1 >>
non-zero return code
ansible常用模块之service
service模块用于管理受控机上的服务。
//查看受控机上的vsftpd服务是否启动
[root@ansible ~]# ansible 172.16.103.129 -m shell -a 'systemctl is-active vsftpd'
172.16.103.129 | FAILED | rc=3 >>
unknownnon-zero return code

//启动受控机上的vsftpd服务
[root@ansible ~]# ansible 172.16.103.129 -m service -a 'name=vsftpd state=started'
172.16.103.129 | SUCCESS => {
    "changed": true,
    "name": "vsftpd",
    "state": "started",
    "status": {
        "ActiveEnterTimestampMonotonic": "0",
        ....此处省略N行
}

//查看受控机上的vsftpd服务是否启动
[root@ansible ~]# ansible 172.16.103.129 -m shell -a 'systemctl is-active vsftpd'
172.16.103.129 | SUCCESS | rc=0 >>
active


//查看受控机上的vsftpd服务是否开机自动启动
[root@ansible ~]# ansible 172.16.103.129 -m shell -a 'systemctl is-enabled vsftpd'
172.16.103.129 | FAILED | rc=1 >>
disablednon-zero return code

//设置受控机上的vsftpd服务开机自动启动
[root@ansible ~]# ansible 172.16.103.129 -m service -a 'name=vsftpd enabled=yes'
172.16.103.129 | SUCCESS => {
    "changed": true,
    "enabled": true,
    "name": "vsftpd",
    "status": {
        "ActiveEnterTimestamp": "六 2018-09-08 00:02:39 EDT",
        ....此处省略N行
}

//查看受控机上的vsftpd服务是否开机自动启动
[root@ansible ~]# ansible 172.16.103.129 -m shell -a 'systemctl is-enabled vsftpd'
172.16.103.129 | SUCCESS | rc=0 >>
enabled


//停止受控机上的vsftpd服务
[root@ansible ~]# ansible 172.16.103.129 -m service -a 'name=vsftpd state=stopped'
172.16.103.129 | SUCCESS => {
    "changed": true,
    "name": "vsftpd",
    "state": "stopped",
    "status": {
        "ActiveEnterTimestamp": "六 2018-09-08 00:02:39 EDT",
        ....此处省略N行
}
[root@ansible ~]# ansible 172.16.103.129 -m shell -a 'systemctl is-active vsftpd'
172.16.103.129 | FAILED | rc=3 >>
inactivenon-zero return code

[root@ansible ~]# ansible 172.16.103.129 -m shell -a 'ss -antl'
172.16.103.129 | SUCCESS | rc=0 >>
State      Recv-Q Send-Q Local Address:Port               Peer Address:Port
LISTEN     0      128          *:22                       *:*
LISTEN     0      100    127.0.0.1:25                       *:*
LISTEN     0      128         :::22                      :::*
LISTEN     0      100        ::1:25                      :::*
弄4台主机,其中一台装ansible,其余三台分别部署nginx、mysql、php,实现lamp架构。请合理分配主机资源,所有主机均给500M内存即可,若资源富裕多给些亦可。
主控机ip:192.168.44.128 node1 ansible
受控机ip:192.168.44.131 node2 httpd
192.168.44.132 node3 mysql
192.168.44.133 node4 php
HTTPD
//设置三台受控机免密登录
[root@node1 ~]# vi /etc/hosts

127.0.0.1   localhost localhost.localdomain localhost4 localhost4.localdomain4
::1         localhost localhost.localdomain localhost6 localhost6.localdomain6
192.168.44.131 node2
192.168.44.128 node1
192.168.44.132 node3
192.168.44.133 node4
[root@node1 ~]# ssh-keygen -t rsa
[root@node1 ~]# ssh-copy-id root@192.168.44.132
[root@node1 ~]# ssh-copy-id root@192.168.44.133
[root@node1 ~]# vi /etc/ansible/inventory
[webservers]
node2
node3
node4

//给受控机配置yum源和下载安装包
//在https://mirrors.aliyun.com/下载yum源
[root@localhost ~]# mount /dev/cdrom /mnt
[root@localhost ~]# wget -O /etc/yum.repos.d/CentOS-Base.repo https://mirrors.aliyun.com/repo/Centos-8.repo
[root@localhost ~]# cd /etc/yum.repos.d/
[root@localhost yum.repos.d]# vi CentOS-Base.repo
:%s/$releasever/8/g
[root@localhost yum.repos.d]# yum install -y https://mirrors.aliyun.com/epel/epel-release-latest-8.noarch.rpm
[root@localhost yum.repos.d]# sed -i 's|^#baseurl=https://download.fedoraproject.org/pub|baseurl=https://mirrors.aliyun.com|' /etc/yum.repos.d/epel*
[root@localhost yum.repos.d]# sed -i 's|^metalink|#metalink|' /etc/yum.repos.d/epel*
[root@localhost yum.repos.d]# sed -i 's|$releasever|8|' /etc/yum.repos.d/epel*
[root@localhost yum.repos.d]# yum clean all
[root@localhost yum.repos.d]# yum makeache
[root@node1 ~]# ansible all -m copy -a 'src=/etc/yum.repos.d/ dest=/etc/yum.repos.d/'
[root@node1 rpm-gpg]# ansible all -m copy -a 'src=/etc/pki/rpm-gpg/RPM-GPG-KEY-EPEL-8 dest=/etc/pki/rpm-gpg/RPM-GPG-KEY-EPEL-8'
[root@node1 ~]# ansible all -m yum -a 'name=wget,bzip2,gcc,gcc-c++,make,pcre-devel,expat-devel,libxml2-devel,openssl-devel state=present'
[root@node1 ~]# ansible node2 -m shell -a 'cd ~ && wget https://mirrors.tuna.tsinghua.edu.cn/apache/httpd/httpd-2.4.46.tar.bz2'
[root@node1 ~]# ansible node2 -m shell -a 'cd ~ && wget https://mirrors.tuna.tsinghua.edu.cn/apache//apr/apr-1.7.0.tar.gz'
[root@node1 ~]# ansible node2 -m shell -a 'cd ~ && wget https://mirrors.tuna.tsinghua.edu.cn/apache//apr/apr-util-1.6.1.tar.gz'
[root@node1 ~]# ansible node2 -m shell -a 'cd ~ && tar xf httpd-2.4.46.tar.bz2'
[root@node1 ~]# ansible node2 -m shell -a 'cd ~ && tar xf apr-1.7.0.tar.gz'
[root@node1 ~]# ansible node2 -m shell -a 'cd ~ && tar xf apr-util-1.6.1.tar.gz'

//安装apr
[root@node1 ~]# ansible node2 -m shell -a 'cd apr-1.7.0 && ./configure --prefix=/usr/local/apr'
[root@node1 ~]# ansible node2 -m shell -a 'cd apr-1.7.0 && make && make install'

//安装apr-util
[root@node1 ~]# ansible node2 -m shell -a 'cd apr-util-1.6.1 && ./configure --prefix=/usr/local/apr-util --with-apr=/usr/local/apr'
[root@node1 ~]# ansible node2 -m shell -a 'cd apr-util-1.6.1 && make && make install'

//安装http
[root@node1 ~]# ansible node2 -m shell -a 'yum -y groups mark install "Development Tools" '
[root@node1 ~]# ansible node2 -m user -a 'name=apache system=yes create_home=no shell=/sbin/nologin state=present'
[root@node1 ~]# ansible node2 -m shell -a 'cd httpd-2.4.46 && ./configure --prefix=/usr/local/apache --sysconfdir=/etc/httpd24 --enable-so --enable-ssl --enable-cgi --enable-rewrite --with-zlib --with-pcre --with-apr=/usr/local/apr --with-apr-util=/usr/local/apr-util/ --enable-modules=most --enable-mpms-shared=all --with-mpm=prefork'
[root@node1 ~]# ansible node2 -m shell -a 'cd httpd-2.4.46 && make && make install'

//设置环境变量
[root@node1 ~]# ansible node2 -m shell -a 'echo "export PATH=/usr/local/apache/bin:$PATH" > /etc/profile.d/httpd.sh'
[root@node1 ~]# ansible node2 -m shell -a 'source /etc/profile.d/httpd.sh'

//设置软链接
[root@node1 ~]# ansible node2 -m shell -a 'cd /usr/local && ln -s /usr/local/apache/include /usr/include/apache'

//设置帮助文档
[root@node1 ~]# ansible all -m copy -a 'src=/etc/man_db.conf  dest=/etc/man_db.conf'

//启动服务
[root@node1 ~]# ansible node2 -m shell -a '/usr/local/apache/bin/apachectl start'
MySQL
//下载并解压安装包
[root@node1 ~]# ansible node3 -m shell -a 'cd ~ && wget https://downloads.mysql.com/archives/get/p/23/file/mysql-5.7.31-linux-glibc2.12-x86_64.tar.gz'
[root@node1 ~]# ansible node3 -m user -a 'name=mysql system=yes create_home=no shell=/sbin/nologin state=present'
[root@node1 ~]# ansible node3 -m shell -a 'cd ~ && tar xf mysql-5.7.31-linux-glibc2.12-x86_64.tar.gz -C /usr/local/'

//设置软链接
[root@node1 ~]# ansible node3 -m shell -a 'cd /usr/local && ln -s /usr/local/mysql-5.7.31-linux-glibc2.12-x86_64 /usr/local/mysql'

//修改目录/usr/local/mysql的属主属组
[root@node1 ~]# ansible node3 -m shell -a 'chown -R mysql:mysql /usr/local/mysql'

//设置环境变量
[root@node1 ~]# ansible node3 -m shell -a 'echo "export PATH=/usr/local/mysql/bin:$PATH" > /etc/profile.d/mysql.sh
[root@node1 ~]# ansible node3 -m shell -a 'source /etc/profile.d/mysql.sh'

//映射include
[root@node1 ~]# ansible node3 -m shell -a 'cd /usr/local && ln -s /usr/local/mysql/include /usr/include/mysql'

//设置lib库
[root@node1 ~]# ansible node3 -m shell -a 'echo "/usr/local/mysql/lib" > /etc/ld.so.conf.d/mysql.conf'
[root@node1 ~]# ansible node3 -m shell -a 'ldconfig'

//创建数据存放目录
[root@node1 ~]# ansible node3 -a 'mkdir /opt/data'
[root@node1 ~]# ansible node3 -a 'chown -R mysql:mysql /opt/data'

//写配置文件
[root@node1 ~]# vi /etc/my.cnf

[mysqld]
basedir = /usr/local/mysql
datadir = /opt/data
socket = /tmp/mysql.sock
port = 3306
pid-file = /opt/data/mysql.pid
user = mysql
skip-name-resolve
[root@node1 ~]# ansible node3 -m copy -a 'src=/etc/my.cnf  dest=/etc/my.cnf'

//配置服务启动脚本
[root@node1 ~]# ansible node3 -m shell -a 'cp -a /usr/local/mysql/support-files/mysql.server /etc/init.d/mysqld'
[root@node1 ~]# ansible node3 -m shell -a 'sed -ri "s#^(basedir=).*#1/usr/local/mysql#g" /etc/init.d/mysqld'
[root@node1 ~]# ansible node3 -m shell -a 'sed -ri "s#^(datadir=).*#1/opt/data#g" /etc/init.d/mysqld'

//启动mysql并修改密码
[root@node1 ~]# ansible node3 -m yum -a 'name=ncurses-compat-libs state=present'
[root@node1 ~]# ansible node3 -m shell -a 'service mysqld start'
[root@node1 ~]# ansible node3 -m shell -a '/usr/local/mysql/bin/mysql -uroot -p"k%kXJK>s:55?" --connect-expired-password -e "set password = password("csl123");" '

//设置开机自动启动
[root@node1 ~]# ansible node3 -m shell -a 'chkconfig --add mysqld'
[root@node1 ~]# ansible node3 -m shell -a 'chkconfig mysqld on'
PHP
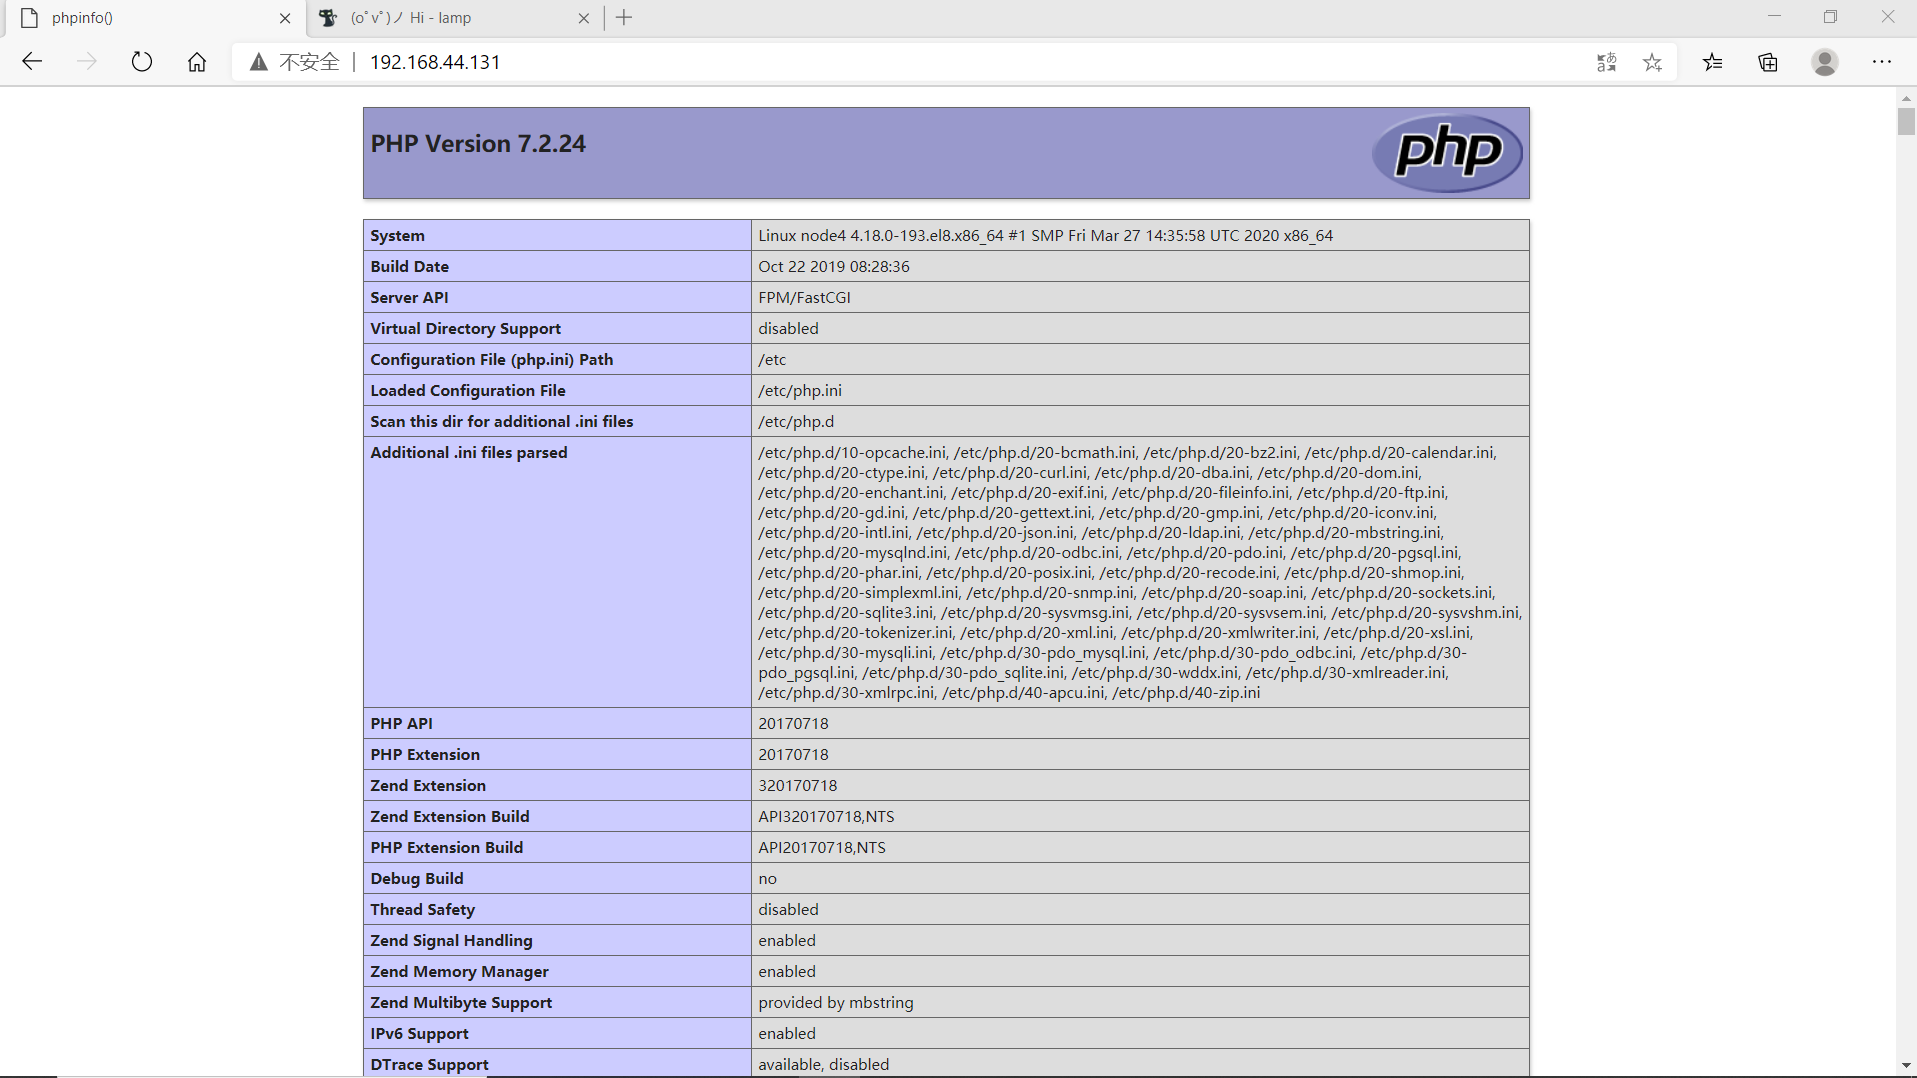
//在主控机上安装php
[root@localhost ~]# yum -y install libxml2 libxml2-devel openssl openssl-devel bzip2 bzip2-devel libcurl libcurl-devel libicu-devel libjpeg libjpeg-devel libpng libpng-devel openldap-devel  pcre-devel freetype freetype-devel gmp gmp-devel libmcrypt libmcrypt-devel readline readline-devel libxslt libxslt-devel mhash mhash-devel
[root@localhost ~]# yum -y install php*

//在node4安装php
[root@node1 ~]# ansible node4 -m yum -a 'name=libxml2,libxml2-devel,openssl,openssl-devel,bzip2,bzip2-devel,libcurl,libcurl-devel,libicu-devel,libjpeg,libjpeg-devel,libpng,libpng-devel,openldap-devel,pcre-devel,freetype,freetype-devel,gmp,gmp-devel,libmcrypt,libmcrypt-devel,readline,readline-devel,libxslt,libxslt-devel,mhash,mhash-devel state=present'
[root@node1 ~]# ansible node4 -m shell -a 'yum -y install php*'
[root@node1 ~]# ansible node4 -m shell -a 'yum -y groups mark install "Development Tools" '

//设置环境变量
[root@node1 ~]# ansible node4 -m shell -a 'echo "export PATH=/usr/local/php7/bin:$PATH" > /etc/profile.d/php7.sh'

//在配置php的主机上创建存放index.php文件
[root@node1 ~]# cat > /tmp/index.php <<EOF
<?php
    phpinfo();
?>
EOF
[root@node1 ~]# ansible node4 -a 'mkdir /var/www/html -pv'
[root@arongya ~]# ansible node4 -m copy -a 'src=/tmp/index.php dest=/var/www/html/index.php'

//修改目录/var/www/html的属主属组
[root@node1 ~]# ansible node4 -m shell -a 'chown -R apache:apache /var/www/html'

//修改/etc/php-fpm.d/www.conf配置文件
[root@node1 ~]# vi /etc/php-fpm.d/www.conf
listen.allowed_clients = /run/php-fpm/www.sock //注释掉这行
listen.allowed_clients = 0.0.0.0:9000 //加入这行

List of addresses (IPv4/IPv6) of FastCGI clients which are allowed to connect.
; Equivalent to the FCGI_WEB_SERVER_ADDRS environment variable in the original
; PHP FCGI (5.2.2+). Makes sense only with a tcp listening socket. Each address
; must be separated by a comma. If this value is left blank, connections will be
; accepted from any ip address.
; Default Value: any
listen.allowed_clients = 192.168.44.131  //加入安装httpd的受控机的IP


[root@node1 ~]# ansible node4 -m copy -a 'src=/etc/php-fpm.d/www.conf dest=/etc/php-fpm.d/www.conf'

//设置开机自动启动
[root@node1 ~]# ansible node4 -m shell -a 'systemctl enable --now php-fpm'
配置apache
//启用httpd的相关模块
[root@node1 ~]# ansible node2 -m shell -a "sed -i '/proxy_module/s/#//g' /etc/httpd24/httpd.conf"
[root@node1 ~]# ansible node2 -m shell -a "sed -i '/proxy_fcgi_module/s/#//g' /etc/httpd24/httpd.conf"


//在主机上安装httpd
//准备环境并下载源码包
[root@localhost ~]# yum -y install wget bzip2 gcc gcc-c++ make pcre-devel expat-devel libxml2-devel openssl-devel
[root@localhost ~]# wget https://mirrors.tuna.tsinghua.edu.cn/apache/httpd/httpd-2.4.46.tar.bz2
[root@localhost ~]# wget https://mirrors.tuna.tsinghua.edu.cn/apache//apr/apr-1.7.0.tar.gz
[root@localhost ~]# wget https://mirrors.tuna.tsinghua.edu.cn/apache//apr/apr-util-1.6.1.tar.gz

//安装apr
[root@localhost ~]# tar xf apr-1.7.0.tar.gz
[root@localhost ~]# cd apr-1.7.0
[root@localhost apr-1.7.0]# vi configure
    $RM "$cfgfile"  //注释或删除这一行
[root@localhost apr-1.7.0]# ./configure --prefix=/usr/local/apr
[root@localhost apr-1.7.0]# make
[root@localhost apr-1.7.0]# make install

//安装apr-util
[root@localhost apr-1.7.0]# cd ~
[root@localhost ~]# tar xf apr-util-1.6.1.tar.gz
[root@localhost ~]# cd apr-util-1.6.1
[root@localhost apr-util-1.6.1]# ./configure --prefix=/usr/local/apr-util --with-apr=/usr/local/apr
[root@localhost apr-util-1.6.1]# make
[root@localhost apr-util-1.6.1]# make install

//安装httpd
[root@localhost apr-util-1.6.1]# cd
[root@localhost ~]# yum groups mark install "Development Tools"
[root@localhost ~]# useradd -r -M -s/sbin/nologin apache
[root@localhost ~]# tar xf httpd-2.4.46.tar.bz2
[root@localhost ~]# cd httpd-2.4.46
[root@localhost httpd-2.4.46]# ./configure --prefix=/usr/local/apache
--sysconfdir=/etc/httpd24
--enable-so
--enable-ssl
--enable-cgi
--enable-rewrite
--with-zlib
--with-pcre
--with-apr=/usr/local/apr
--with-apr-util=/usr/local/apr-util/
--enable-modules=most
--enable-mpms-shared=all
--with-mpm=prefork
[root@localhost httpd-2.4.46]# make
[root@localhost httpd-2.4.46]# make install

//设置环境变量
[root@localhost httpd-2.4.46]# vi /etc/profile.d/httpd.sh
export PATH=/usr/local/apache/bin:$PATH
[root@localhost httpd-2.4.46]# source /etc/profile.d/httpd.sh

//设置软链接
[root@localhost httpd-2.4.46]# cd ~
[root@localhost ~]# ln -s /usr/local/apache/include /usr/include/apache

//启用httpd的相关模块
[root@localhost ~]# sed -i '/proxy_module/s/#//g' /etc/httpd24/httpd.conf
[root@localhost ~]# sed -i '/proxy_fcgi_module/s/#//g' /etc/httpd24/httpd.conf

//在配置文件的最后加入以下内容
<VirtualHost *:80>
DocumentRoot "/usr/local/apache/htdocs/"
ServerName www.csl.com
ProxyRequests Off
ProxyPassMatch ^/(.*.php)$ fcgi://192.168.44.133:9000/var/www/html/$1
<Directory "/usr/local/apache/htdocs/">
Options none
AllowOverride none
Require all granted
</Directory>
</VirtualHost>

[root@localhost ~]# vi /etc/httpd24/httpd.conf
//取消这两个模块的注释
#LoadModule remoteip_module modules/mod_remoteip.so
LoadModule proxy_module modules/mod_proxy.so  //这个
#LoadModule proxy_connect_module modules/mod_proxy_connect.so
#LoadModule proxy_ftp_module modules/mod_proxy_ftp.so
#LoadModule proxy_http_module modules/mod_proxy_http.so
LoadModule proxy_fcgi_module modules/mod_proxy_fcgi.so  //这个

//搜索AddType,添加以下内容
# If the AddEncoding directives above are commented-out, then you
# probably should define those extensions to indicate media types:
#
AddType application/x-compress .Z
AddType application/x-gzip .gz .tgz
AddType application/x-httpd-php .php //添加此行
AddType application/x-httpd-php-source .phps //添加此行
[root@localhost ~]# sed -i '/    DirectoryIndex/s/index.html/index.php index.html/g' /etc/httpd24/httpd.conf
[root@node1 ~]# ansible node2 -m copy -a 'src=/etc/httpd24/httpd.conf dest=/etc/httpd24/httpd.conf'

//重启apache服务
[root@node1 ~]# ansible node2 -m shell -a '/usr/local/apache/bin/apachectl stop'
[root@node1 ~]# ansible node2 -m shell -a '/usr/local/apache/bin/apachectl start'
验证
输入安装HTTPD的虚拟机IP