一、vue-router的安装
官网文档
【官网】:https://cn.vuejs.org/v2/guide/routing.html
【router文档】:https://router.vuejs.org/zh/
导入文件时找到根目录写法:[@目录]
import router from '@/src/components/index.vue'
1.1直接下载 / CDN
https://unpkg.com/vue-router/dist/vue-router.js
Unpkg.com 提供了基于 NPM 的 CDN 链接。上面的链接会一直指向在 NPM 发布的最新版本。你也可以像 https://unpkg.com/vue-router@2.0.0/dist/vue-router.js 这样指定 版本号 或者 Tag。
在 Vue 后面加载 vue-router,它会自动安装的:
<script src="/path/to/vue.js"></script>
<script src="/path/to/vue-router.js"></script>
1.2NPM安装(重点)
npm / cnpm install vue-router
如果在一个模块化工程中使用它,必须要通过 Vue.use() 明确地安装路由功能:
import Vue from 'vue'
import VueRouter from 'vue-router'

Vue.use(VueRouter)
如果使用全局的 script 标签,则无须如此 (手动安装)。
1.3构建开发版
如果你想使用最新的开发版,就得从 GitHub 上直接 clone,然后自己 build 一个 vue-router。
git clone https://github.com/vuejs/vue-router.git node_modules/vue-router
cd node_modules/vue-router
npm install
npm run build
二、路由代码实例(重点)
2.1简单实例
src/main.js(重点1)
[1]引入路由
[2]引入组件
[3]使用路由
[4]创建一个路由实例
[5]默认路径
[6]待控制的组件
[7]把路由投到vue实例
import Vue from 'vue'
import App from './App'
import VueRouter from 'vue-router' //[1]引入路由
import Parent from './components/parent.vue' //[2]引入组件

Vue.config.productionTip = false

Vue.use(VueRouter)//[3]使用路由

var router = new VueRouter({//[4]创建一个路由实例
  routes: [{
    path: "/",//[5]默认路径
    component:Parent //[6]待控制的组件
  }]
})

new Vue({
  el: '#app',
  template: '<App/>',
  router,//[7]把路由投到vue实例
  components: {
    App
  }
})
App.vue(重点2)
[1]路由显示位置
<template>
  <div id="app">
     <img src="./assets/logo.png" width="80px">
    <router-view></router-view><!-- [1]路由显示位置 -->
  </div>
</template>

<script>
export default {
  name: 'App',
  components: {},
  data () {
    return {}
  },
}
</script>

<style>
#app {
  font-family: 'Avenir', Helvetica, Arial, sans-serif;
  -webkit-font-smoothing: antialiased;
  -moz-osx-font-smoothing: grayscale;
  text-align: center;
  color: #2c3e50;
  margin-top: 60px;
}
</style>
parent.vue
一个简单的组件即可
<template>
  <div class="parent">
    <h1>路由实例</h1>
  </div>
</template>

<script>
 export default{
    name:'parent',
    components:{},
    data(){
      return{}
    }

 }
</script>

<style scoped>
</style>
效果:注意地址栏多了个#号,即路由成功
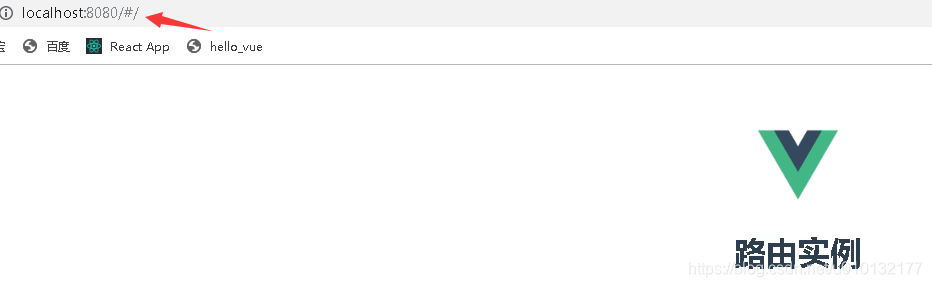
地址栏改成:http://localhost:8080/#/app ,即访问app.vue

2.2路由控制2个及多个组件
src/main.js(主要)
[2.2]引入组件2
[2.5]非默认路径
[2.6]待控制的组件
import Vue from 'vue'
import App from './App'
import VueRouter from 'vue-router' //[1]引入路由
import Parent from './components/parent.vue'//[2]引入组件
import Hello from './components/hello.vue'//【2.2】引入组件2

Vue.config.productionTip = false

Vue.use(VueRouter)//[3]使用路由

var router = new VueRouter({//[4]创建一个路由实例
  routes: [{
    path: "/",//[5]默认路径组件 / 后不要加parent即可
    component:Parent ,//[6]待控制的组件
  },{
    path: "/hello",//【2.5】非默认路径
    component:Hello ,//【2.6】待控制的组件
  }]
})

new Vue({
  el: '#app',
  template: '<App/>',
  router,//[7]把路由投到vue实例
  components: {
    App
  }
})
src/app.vue
只写重点:其它略过
<router-view></router-view><!-- [1]路由显示位置 -->
src/components/parent.vue
简单组件,略过
src/components/hello.vue
简单组件,略过
效果:mian.js【5-6】步谁是 /默认就显示谁
http://localhost:8080/#/
路由实例parent
http://localhost:8080/#/hello
路由实例hello
2.3把路由单独提取出来成一个独立文件
src/router.js【主要】
【重点】此处必须用export default 导出其它地方才能使用
import Vue from 'vue' //[0]引入vue
import VueRouter from 'vue-router' //[1]引入路由
import Parent from './components/parent.vue'//[2]引入组件
import Hello from './components/hello.vue'//[2.2]引入组件2

Vue.use(VueRouter)//[3]使用路由

//【重点】此处必须导出其它地方才能使用
export default new VueRouter({//[4]创建一个路由实例
  routes: [{
    path: "/",//[5]默认路径组件 / 后不要加parent即可
    component:Parent ,//[6]待控制的组件
  },{
    path: "/hello",//[2.5]非默认路径
    component:Hello ,//[2.6]待控制的组件
  }]
})
src/main.js(次要)
[7]先引入上面写好的router.js
[8]把路由投到vue实例
import Vue from 'vue'
import App from './App'
import router from './router.js'//[7]先引入

Vue.config.productionTip = false

new Vue({
  el: '#app',
  template: '<App/>',
  router,//[8]把路由投到vue实例
  components: {
    App
  }
})
src/app.vue
只写重点:其它略过
<router-view></router-view><!-- [1]路由显示位置 -->
src/components/parent.vue
简单组件,略过
src/components/hello.vue
简单组件,略过
效果同上例。
2.4 导航(跳转)路由各组件
navList.vue(主要)
【重点】路由链接
<template>
  <div>
  <!-- 【重点】路由链接 -->
    <router-link to='/'>parent页</router-link>
    <router-link to="/hello">hello页</router-link>
  </div>
</template>

<script>
  export default{
    name:'navList',
    data(){
      return{
        msg:'导航组件'
      }
    }
  }
</script>

<style>
</style>
在app.vue引入导航组件
<template>
  <div id="app">
     <img src="./assets/logo.png" width="80px">
     <navList/>
    <router-view></router-view><!-- [1]路由显示位置 -->
  </div>
</template>

<script>
  import navList from './components/navList'

export default {
  name: 'App',
  components: {
    navList,
  },
  data () {
    return {}
  },
}
</script>

<style>
#app {
  font-family: 'Avenir', Helvetica, Arial, sans-serif;
  -webkit-font-smoothing: antialiased;
  -moz-osx-font-smoothing: grayscale;
  text-align: center;
  color: #2c3e50;
  margin-top: 60px;
}
</style>
src/components/parent.vue
简单组件,略过
src/components/hello.vue
简单组件,略过
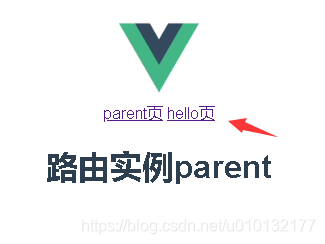
效果:点哪个导航,切换到哪个上
2.5路由嵌套
第1步,在如下目录创建三个hello.vue的子组件
/src/components/heChild/
hello1.vue、hello2.vue、hello3.vue
内容为简单组件即可例如:
<template>
  <div>
    hello1子组件
  </div>
</template>

<script>
  export default{
    name:'hello1',
    data(){
      return{}
    }
  }
</script>

<style></style>
第2步,对src/componets/hello.vue页面布局:
布局要求:有一个左栏,内放子导航
<template>
  <div>
    <div id='left'>
      <h1>hello子组件</h1>
      <!-- 【1】以下是路由链接 注意路径to要加上子组件的文件夹-->
      <router-link to="/heChild/hello1">hellow1</router-link><br/>
      <router-link to="/heChild/hello2">hellow2</router-link><br/>
      <router-link to="/heChild/hello3">hellow3</router-link><br/>
    </div>

    <div id='right'>
      <!-- 【2】点路由后,其视频插入的位置 -->
      <router-view></router-view>
    </div>
  </div>
</template>

<script>
  export default{
    name:'hello',
    data(){
      return{}
    }
  }
</script>

<style scoped>
  /* 【3】对页面进行布局 */
  #left {
    float:left;
    280px;
    min-height: 700px;
    background: lightskyblue;
  }
  #left a{
   color:black;
  }
  #right {
    100%;
    min-height:700px;
  }
</style>
第3步,配置路由src/router.js【重点】
【3.0】以下3个为引入第1步创建的子组件
【3.1】重定向,用于显示默认子组件
【3.2】 嵌套路由重点:在hello内部加一个children数组,在内部加上路由配置
import Vue from 'vue'
import VueRouter from 'vue-router' //[1]引入路由
import Parent from './components/parent.vue'//[2]引入组件
import Hello from './components/hello.vue'//[2.2]引入组件2

import Hello1 from './components/heChild/hello1.vue'//【3.0】以下3个为引入对应的子组件
import Hello2 from './components/heChild/hello2.vue'
import Hello3 from './components/heChild/hello3.vue'

Vue.use(VueRouter)//[3]使用路由

export default new VueRouter({//[4]创建一个路由实例
  routes: [{
    path: "/",//[5]默认路径组件 / 后不要加parent即可
    component:Parent ,//[6]待控制的组件
  },
  {
    path: "/hello",//[2.5]非默认路径
    component:Hello ,//[2.6]待控制的组件
    redirect:'/heChild/hello1',//【3.1】重定向,用于显示默认子组件
    //【3.2】 嵌套路由重点:在hello内部加一个children数组,在内部加上路由配置
    children:[
      {
        path:'/heChild/hello1',
        component:Hello1,
      },
      {
        path:'/heChild/hello2',
        component:Hello2,
      },
      {
        path:'/heChild/hello3',
        component:Hello3,
      },
    ]

  }]
})
第4步,main.js引入3的路由文件
不重要,所有代码同上例
import Vue from 'vue'
import App from './App'
import router from '@/router.js'//[7]先引入

Vue.config.productionTip = false

new Vue({
  el: '#app',
  template: '<App/>',
  router,//[8]把路由投到vue实例
  components: {
    App
  }
})
第5步,头部导航组件,src/navList.vue
不重要,除加了样式外,大代码同上例
<template>
  <div id="nav">
    <!-- 【重点】路由链接 -->
    <router-link to='/'>parent页</router-link>
    <router-link to="/hello">hello页</router-link>
  </div>
</template>

<script>
  export default{
    name:'navList',
    data(){
      return{
        msg:'导航组件'
      }
    }
  }
</script>

<style scoped>
#nav {
  background-color: lightskyblue;
   100%;
  height: 30px;
  line-height: 30px;
}
#nav a{
  color: #000000;
  text-decoration:none;
}
</style>
第6步,src/App.vue
不重要,所有代码同上例
<template>
  <div id="app">
     <img src="./assets/logo.png" width="80px">
     <navList/>
    <router-view></router-view><!-- [1]路由显示位置 -->
  </div>
</template>

<script>
  import navList from './components/navList'

export default {
  name: 'App',
  components: {
    navList,
  },
  data () {
    return {}
  },
}
</script>

<style>
#app {
  font-family: 'Avenir', Helvetica, Arial, sans-serif;
  -webkit-font-smoothing: antialiased;
  -moz-osx-font-smoothing: grayscale;
  text-align: center;
  color: #2c3e50;
  margin-top: 60px;
}

</style>
第7步,parent.vue同上例
不重要
<template>
  <div class="parent">
    <h1>路由实例parent</h1>
  </div>
</template>

<script>

  export default{
    name:'parent',
    components:{},
    data(){
      return{
        list:[] //定义一个空数组用于存放接收到的数据
      }
    },
    filters:{},
    directives:{},
  }
</script>

<style scoped>
</style>
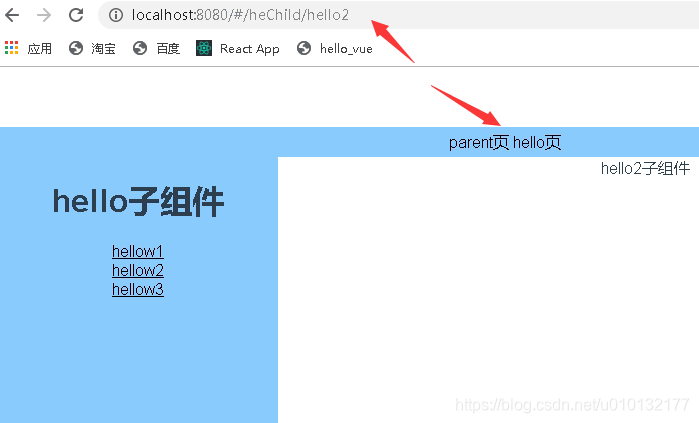
效果:
2.6用路由router-link传递参数
官方文档:
https://router.vuejs.org/zh/guide/essentials/passing-props.html
第1步,先建立一个src/wa.vue组件,常规组件
代码略过..
第2步,配置src/router.js
【4.0】引入第3个组件wa.vue
【4.1】路由传递参数 (/组件名/:参数名) 下一步到navList.vue里
【4.2】路由的
import Vue from 'vue'
import VueRouter from 'vue-router' //[1]引入路由
import Parent from './components/parent.vue'//[2]引入组件
import Hello from './components/hello.vue'//[2.2]引入组件2

import Hello1 from './components/heChild/hello1.vue'//[3.0]以下3个为引入对应的子组件
import Hello2 from './components/heChild/hello2.vue'
import Hello3 from './components/heChild/hello3.vue'

import Wa from './components/wa.vue' //【4.0】引入第3个组件

Vue.use(VueRouter)//[3]使用路由

export default new VueRouter({//[4]创建一个路由实例
  routes: [
    {
    path: "/",//[5]默认路径组件 / 后不要加parent即可
    name:'parent',
    component:Parent ,//[6]待控制的组件
    },
    {
    path: "/hello",//[2.5]非默认路径
    name:'hello',
    component:Hello ,//[2.6]待控制的组件
    redirect:'/heChild/hello1',//[3.1]显示默认子组件
    //[3.2 嵌套路由重点]在hello内部加一个children数组,在内部加上路由配置
      children:[{
          path:'/heChild/hello1',
          name:'hello1',
          component:Hello1,
        },
        {
          path:'/heChild/hello2',
          name:'hello2',
          component:Hello2,
        },
        {
          path:'/heChild/hello3',
          name:'hello3',
          component:Hello3,
        }]
    },
    {
      path: "/wa/:count",//【4.1】路由传递参数 (/组件名/:参数名) 下一步到navList.vue里
      name:'wa',//【4.2】路由的<router-link :to="{name:'wa',params:{count:18888}}">里传参数要用到
      component:Wa,//[6]待控制的组件
    },

]
})
第3步,navLink.vue里配置router-link链接的to(重点1)
【1】待传递的参数写法:
<router-link :to="{name:'wa',params:{count:18888}}">Wa页</router-link>
<template>
  <div id="nav">
    <!-- 路由链接 -->
    <router-link to='/'>parent页</router-link>
    <router-link to="/hello">hello页</router-link>
    <router-link :to="{name:'wa',params:{count:18888}}">Wa页</router-link> <!-- 【1】待传递的参数 -->
  </div>
</template>

<script>
  export default{
    name:'navList',
    data(){
      return{
        msg:'导航组件'
      }
    }
  }
</script>

<style scoped>
#nav {
  background-color: lightskyblue;
   100%;
  height: 30px;
  line-height: 30px;
}
#nav a{
  color: #000000;
  text-decoration:none;
}
</style>
第4步,wa.vue接收参数写法(重点2)
【1】接收参数写法(注意route不是router): {{$route.params.count}}
<template>
  <div>
    {{$route.params.count}}<!-- 【1】获取参数 -->
  </div>
</template>

<script>
  export default{
    name:'wa',
    data(){
      return{}
    }
  }
</script>

<style>
</style>
第5步,其它部分代码
main.js
App.js
同上例略过
效果:
点到wa页,将显示从第3步传过来的参数18888

2.6.2 获取多个路由router-link传的参数
1.路由配置src/router.js
其它总分略过只写重点
path: "/wa/:count/:name"
{
      path: "/wa/:count/:name",//【重点】路由传递参数 (/组件名/:参数名) 下一步到navList.vue里
      name:'wa',//路由的<router-link :to="{name:'wa',params:{count:18888}}">里传参数要用到
      component:Wa,//待控制的组件
    },
2.传递配置src/navList.vue
【1】待传递的参数,传递多个参数
<template>
  <div id="nav">
    <!-- 路由链接 -->
    <router-link to='/'>parent页</router-link>
    <router-link to="/hello">hello页</router-link>
    <router-link :to="{name:'wa',params:{count:18888,name:'小明'}}">Wa页</router-link> <!-- 【1】待传递的参数,传递多个参数 -->
  </div>
</template>
3.接收配置src/components/wa.vue
<template>
  <div>
    {{$route.params.count}}----{{$route.params.name}}<!-- 【1】获取参数,获取多个参数 -->
  </div>
</template>
效果
注意地址栏参数写法

2.7 传递参数地址栏是:?参数1=1
详见官方文档:
https://router.vuejs.org/zh/guide/essentials/passing-props.html#函数模式
https://router.vuejs.org/zh/api/#router-link
2.8简单路由高亮效果
只要在navList.vue里加个样式即可:
也可以全局设置在:App.vue里设置
<style>
.router-link-active {
  color:red;
}
</style>
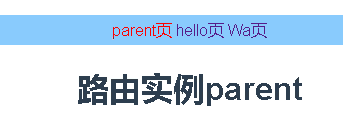
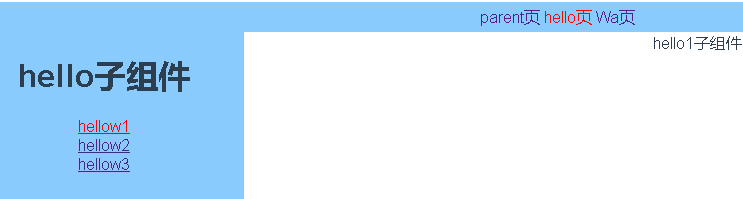
效果:
2.9 高级设置路由高亮效果
1. hello.vue
【1】以下是路由链接 注意路径to要加上主组件,这样点到子路由里,主路由设置颜色才不会消失
<template>
  <div>
    <div id='left'>
      <h1>hello子组件</h1>
      <!-- 【1】以下是路由链接 注意路径to要加上主组件,这样点到子路由里,主路由设置颜色才不会消失-->
      <router-link to="/hello/heChild/hello1">hellow1</router-link><br/>
      <router-link to="/hello/heChild/hello2">hellow2</router-link><br/>
      <router-link to="/hello/heChild/hello3">hellow3</router-link><br/>
    </div>

    <div id='right'>
      <!-- 点路由后,其视频插入的位置 -->
      <router-view></router-view>
    </div>
  </div>
</template>

<script>
  export default{
    name:'hello',
    data(){
      return{}
    }
  }
</script>

<style scoped>
  /* 对页面进行布局 */
  #left {
    float:left;
    280px;
    min-height: 700px;
    background: lightskyblue;
  }

  #right {
    100%;
    min-height:700px;
  }
</style>
2. router.js
重点:【1】-【3】
import Vue from 'vue'
import VueRouter from 'vue-router' //引入路由
import Parent from './components/parent.vue'//引入组件
import Hello from './components/hello.vue'//引入组件2

import Hello1 from './components/heChild/hello1.vue'//以下3个为引入对应的子组件
import Hello2 from './components/heChild/hello2.vue'
import Hello3 from './components/heChild/hello3.vue'

import Wa from './components/wa.vue' //引入第3个组件

Vue.use(VueRouter)//使用路由

export default new VueRouter({
linkActiveClass:'active',//【0】设置路由链接处理激活状态的style样式class名(默认值: "router-link-active"

)
  routes: [
    {
    path: "/",
    name:'parent',
    component:Parent ,
    },
    //【1】带子路由的hello组件配置开始
    {
    path: "/hello",
    name:'hello',
    component:Hello ,
    redirect:'/hello/heChild/hello1',//【2】路径要写完整前面带上主路由 /hello/子路由路径/子路由
    //【3】子路由配置开始
      children:[{
          path:'/hello/heChild/hello1',//【4】子路由,注意路径
          name:'hello1',
          component:Hello1,
        },
        {
          path:'/hello/heChild/hello2',//【5】子路由,注意路径
          name:'hello2',
          component:Hello2,
        },
        {
          path:'/hello/heChild/hello3',// 【6】子路由,注意路径
          name:'hello3',
          component:Hello3,
        }]
    },
    {
      path: "/wa/:count/:name",
      name:'wa',
      component:Wa,
    },

]
})
3. App.vue里设置全局路由处于active状态的样式
<style>
.active {
  color:red;
}
</style>
效果:
2.10 HTML5的history控制路由后退步数
官网:
https://router.vuejs.org/zh/guide/essentials/history-mode.html#后端配置例子