Nexus简介
Nexus是Sonatype推出的强大Maven仓库管理器产品,要比以前TSS上介绍的Artifactory要好使用的多,也是一个拆箱即用的Java App,内嵌Jetty容器和Java Wrapper做Windows服务,安装简单到解压然后双击install即可。更详细的帮助手册请上官方网站查看,这里推荐一个翻译中的书籍——《Maven权威指南》(在线阅读英文版,中文版),一本全面介绍Maven的书,其中也有介绍Nexus的章节,猛击这。Nexus的优点这里得啰嗦一下(摘抄自Maven中文Blog):
- 代理远程仓库。配置Nexus代理中央仓库,其它任何公开的Maven仓库,将你组织内部的Maven配置指向Nexus,这样所有构件都将从Nexus下载,如果Nexus没有你要的构件,它会自动先去外部仓库下载到本地,仅一次。
- 本地宿主仓库。Nexus可以在服务器上建立本地的宿主仓库,你可以往这个仓库里提交任意的Maven规范构件,包括不能从公开仓库下载到的构件,或者你组织内部产生的构件。
- 仓库组。有了仓库组,你就能将很多仓库聚合起来,对外公开一个统一的接口提供构件服务。
- 构件搜索。Nexus能下载远程的仓库索引,并在本地构件自己的仓库索引,有了该索引,你就能很快速方便的搜索任何你感兴趣的构件。
- 事情RSS源。Nexus服务器上发生的几乎任何事情,你都能用RSS监视,方便管理。
- Release和Snapshots区分。配置Nexus提供Release构件服务或者Snapshots服务,能更清晰的管理构件。
- 路由。Nexus的路由能够管理为特定的请求提供特定的仓库。加入你在一个组中配置了很多仓库,一条路由能够极大提高某些特定请求的响应速度。
- 上传构件。使用Nexus你能很方便的在web界面上上传一些特殊的构件至仓库。
- 高用户体验的UI。使用AJAX和REST技术开发的Nexus,在界面上为提供了很舒适的用户体验。
初始化
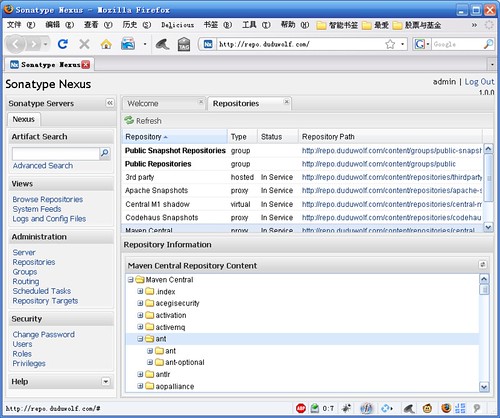
默认安装后的访问路径为http://localhost:8081/nexus/, 管理员登录为admin/admin123,UI是用Ext搭建的,熟悉Ext的人根本没有操作障碍,登录后最重要的事情就是打开远程索引下载,操作为选 择菜单Administrator->Repositories,然后在右边打开的列表中依次选择type字段为proxy的记录,在下方的编辑区 中修改"Download Remote Indexes"值为true,再从这三个仓库上点右键选择"Re-Index",这一步别忘,我当时搭建的时候就忘了Re-Index,结果等了一天还 没任何索引文件。Re-Index后,Nexus会从后台去官方地址下载仓库索引文件,大概20M大小,根据网速快慢下载相应时间后选择仓库时会以树形目 录的方式显示仓库内容。
角色权限
Nexus的操作权限完全仿照RBAC角色权限模型,默认三个用户:admin、anonymous、deployment,对应的是管理用户、匿 名访问用户和部署用户,管理用户用于仓库管理和系统配置,匿名用户用于仓库查询和仓库下载,部署用户用于私人jar包的上传。在这里,我对 deployment的默认角色Nexus Deployment Role做了自定义修改,加入了"All M2 Repositories"的create和update权限,并且加入了"UI:Base UI Privaties"权限,用意稍后解释。
Nexus的使用
- 从浏览器里打开访问地址后,通过"Artifact Search"菜单可以进行构件搜索。
- 对于一些特殊的构件,比如sqlserver2005的jdbc驱动,你可以通过管理员登录然后从第三方上传构件
- 提供仓库组的概念,对于远程代理仓库和本地宿主仓库,还有第三方仓库,全部创建为一个public-group,然后通过访问组就可以访问所有的仓库构件了,这就是所谓的分散存储,统一访问
- 和Maven结合也很简单,首先是要配置Maven,打开$user$/.m2/下的settings.xml(没有的话创建一个),然后拷贝以下内容到文件中:settings.xml
<settings> <proxies> <proxy> <id>normal</id> <active>true</active> <protocol>http</protocol> <username>deployment</username> <password>deploy</password> <host>localhost:8081/nexus</host> <port>80</port> <nonProxyHosts>localhost:8081/nexus</nonProxyHosts> </proxy> </proxies> <mirrors> <mirror> <!--This is used to direct the public snapshots repo in the profile below over to a different nexus group --> <id>nexus-public-snapshots</id> <mirrorOf>public-snapshots</mirrorOf> <url>http://localhost:8081/nexus/content/groups/public-snapshots</url> </mirror> <mirror> <!--This sends everything else to /public --> <id>nexus</id> <mirrorOf>*</mirrorOf> <url>http://localhost:8081/nexus/content/groups/public</url> </mirror> </mirrors> <profiles> <profile> <id>development</id> <repositories> <repository> <id>central</id> <url>http://central</url> <releases><enabled>true</enabled></releases> <snapshots><enabled>true</enabled></snapshots> </repository> </repositories> <pluginRepositories> <pluginRepository> <id>central</id> <url>http://central</url> <releases><enabled>true</enabled></releases> <snapshots><enabled>true</enabled></snapshots> </pluginRepository> </pluginRepositories> </profile> <profile> <!--this profile will allow snapshots to be searched when activated--> <id>public-snapshots</id> <repositories> <repository> <id>public-snapshots</id> <url>http://public-snapshots</url> <releases><enabled>false</enabled></releases> <snapshots><enabled>true</enabled></snapshots> </repository> </repositories> <pluginRepositories> <pluginRepository> <id>public-snapshots</id> <url>http://public-snapshots</url> <releases><enabled>false</enabled></releases> <snapshots><enabled>true</enabled></snapshots> </pluginRepository> </pluginRepositories> </profile> </profiles> <activeProfiles> <activeProfile>development</activeProfile> </activeProfiles> </settings>
然后,在从你的工程里的pom.xml中加入以下内容:
<distributionManagement> <repository> <id>repo</id> <name>public</name> <url>http://localhost:8081/nexus/content/repositories/releases</url> </repository> <snapshotRepository> <id>Snapshots</id> <name>Snapshots</name> <url>http://localhost:8081/nexus/content/repositories/snapshots</url> </snapshotRepository> </distributionManagement>
解释一下:
settings.xml中的proxies/proxy节点配置的是部署服务器访问属性,deployment/deploy对应的是部署用户名和密 码;mirrors/mirror配置的是maven访问仓库的地址,这里使用的是Nexus提供的群组概念,将多个仓库组成一个public- group的方式进行访问;profiles/profile则主要用来描述仓库部署的访问配置。
和apache结合
和apache结合挂域名访问也很简单,官方网站上有介绍,我这里给出一种最简单的方式:
- 启用mod_proxy.so、mod_proxy_ajp.so、mod_proxy_connect.so三个module
- 配置一下数据:
ProxyRequests Off ProxyPreserveHost On
3. 虚拟主机的配置类似下面
ServerName repo.duduwolf.com ServerAdmin duduwolf@duduwolf.com ProxyPass / http://localhost:8081/nexus ProxyPassReverse / http://localhost:8081/nexus ErrorLog logs/nexus-error.log CustomLog logs/nexus-access.log common
其他类似产品
- 著名的Artifactory,这是TSS推荐过的,也是最早的仓库管理软件
- Apache的Apache Archiva,apache出品的应该不错,不过没用过,我觉得自此有了Nexus,你完全没必要在寻找其他仓库管理软件了。