✄更新中...
更新日期:2018.11.22
★版本说明+快捷下载(官网)
| nginx | nginx-1.14.1 | http://nginx.org/download/nginx-1.14.1.zip |
| php | php-7.2.12-Win32-VC15-x64 | https://windows.php.net/downloads/releases/php-7.2.12-Win32-VC15-x64.zip |
| mysql | mysql-8.0.13-winx64 | https://dev.mysql.com/get/Downloads/MySQL-8.0/mysql-8.0.13-winx64.zip |
| phpMyAdmin | phpMyAdmin-4.8.3-all-languages | https://files.phpmyadmin.net/phpMyAdmin/4.8.3/phpMyAdmin-4.8.3-all-languages.zip |
★集成包(自制)
1.下载
https://pan.baidu.com/s/1xgYkNFp4Yw6wYDxE6PpI_A 提取码:ic8i
2.说明
绿色版,可放到任意路径使用。
2.1.文件结构说明
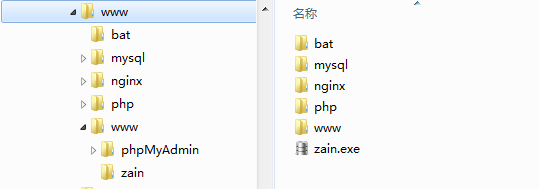
1>www:配置文件根目录,可放在硬盘任意位置(PS:尽量不要有中文路径)。
2>www/bat:批处理文件,zain.exe调用,服务安装、卸载、运行、停止相关命令。
3>www/mysql:MySQL配置文件(MySQL用户名:root 密码:czy19951219(密码自行修改))。
4>www/nginx:Nginx配置文件。
5>www/php:PHP配置文件。
6>www/www:站点访问根目录。
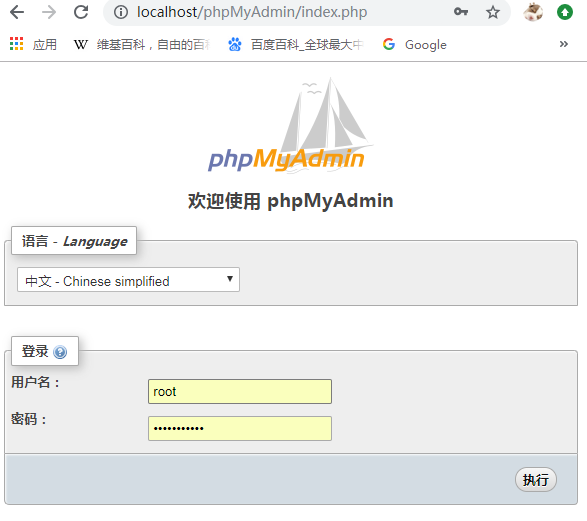
7>www/www/phpMyAdmin:MySQL图形界面管理平台。
8>www/www/zain:Demo网页。
9>www/zain.exe:nginx、php、mysql自动配置软件(mysql服务win10需要开启管理员权限)。
2.2.使用说明
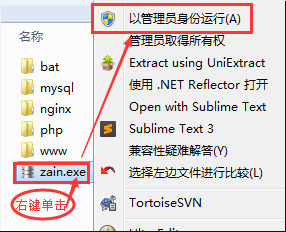
2.2.1.解压+运行zain.exe
安装前请先卸载计算机中其它服务,如:Apache、IIS等
将下载好的www.zip解压到任意全英文目录下,运行zain.exe,运行效果见下图。
(PS:zain.exe跳黑窗口为正常现象,代码实现主要用system函数调用批处理程序,暂未找到解决system函数cmd窗口隐藏方法,希望有知道的小伙伴在下方评论告知)
(注:mysql服务win10需要开启管理员权限)
管理员权限运行(win7不用):
运行效果:
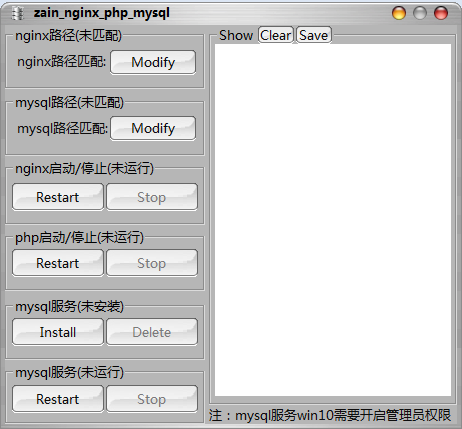
软件会显示(服务/进程)的(配置/运行)状态,单击相应功能按钮可实现(服务/进程)的快捷安装、卸载、启动、停止。
将所有配置及服务安装开启即可使用。
安装配置好后,如需更换工程路径,可用软件快速卸载、关闭所有服务和进程。
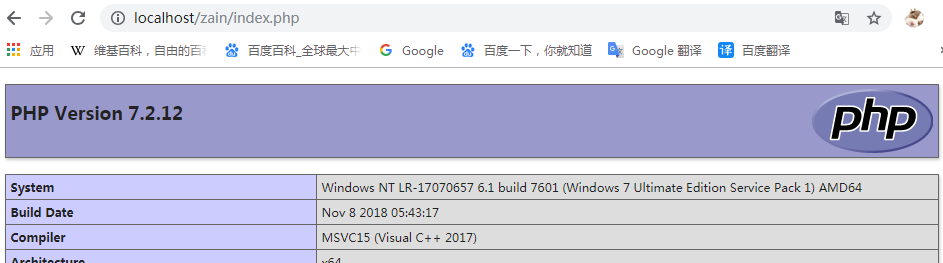
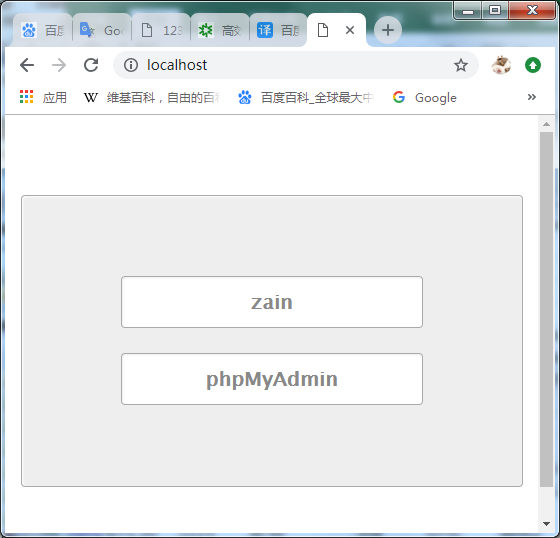
2.2.2.页面浏览效果
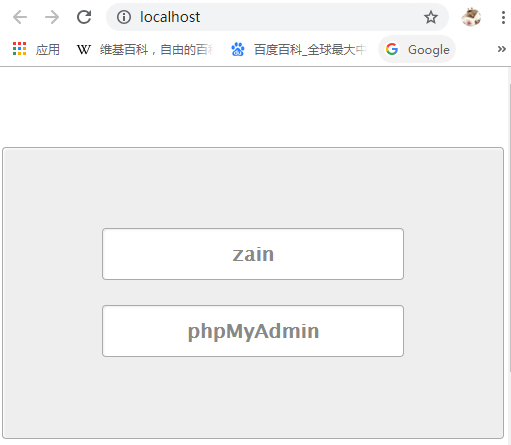
用zain.exe将所有配置及服务安装开启后,在任意浏览器路径栏输入:localhost 或 http://127.0.0.1
显示下列界面:


★下载及安装过程(详细)
1.nginx
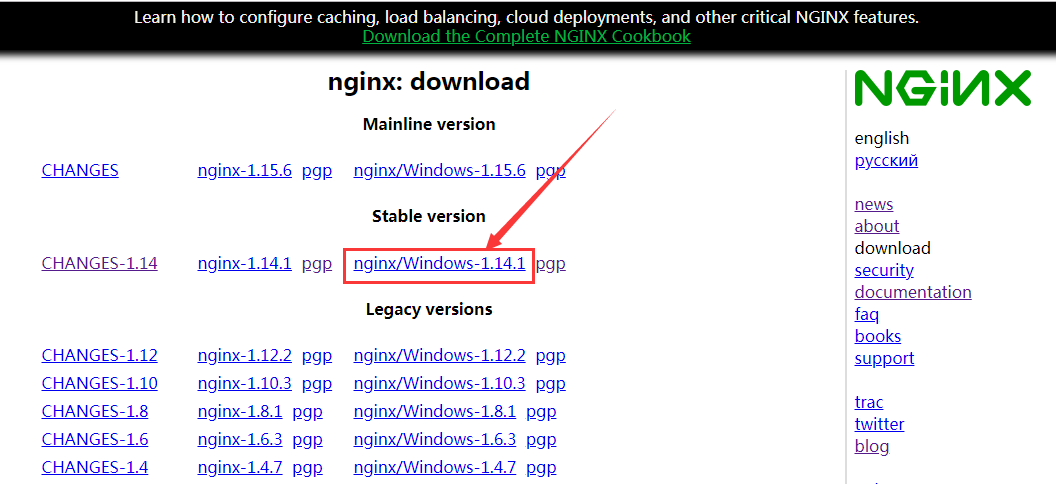
1.1.nginx下载
下载网址:http://nginx.org/en/download.html
1.2.nginx配置
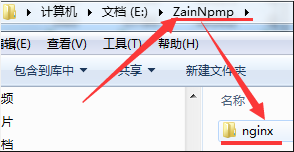
1.2.1.解压nginx
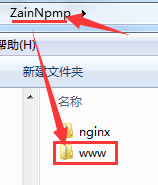
创建根目录文件夹"ZainNpmp",将nginx解压到此目录并改名为"nginx"
1.2.2.创建站点目录
ZainNpmp目录下创建"www"文件夹
在www中创建网站首页(文件名:index.html、index.htm、index.php),内容自定义

在index.html文件中添加下列代码
<!DOCTYPE html>
<html>
<head>
    <meta charset="UTF-8">
    <title>zain</title>
    <style type="text/css">
        * {
            font-family: "Lucida Grande", "Lucida Sans Unicode", Helvetica, Arial, Verdana, sans-serif;
            margin: 0;
            padding: 0;
        }
        body {
             100%;
            height: 100%;
        }
        .zain {
             500px;
            height: 210px;
            background: #eee;
            border: #aaa solid 1px;
            padding-top: 80px;
            box-shadow: 1px 1px 2px #fff inset;
            border-radius: 4px 4px 4px 4px;
            -moz-border-radius: 4px 4px 4px 4px;
            -webkit-border-radius: 4px 4px 4px 4px;
            margin: 80px auto;
            transition: 0.3s;
        }
        .zain:hover {
            background: #ddd;
        }
        .zain a {
            display: block;
             300px;
            height: 50px;
            background: #FFF;
            border: #aaa solid 1px;
            box-shadow: 1px 1px 2px #eee inset;
            border-radius: 4px 4px 4px 4px;
            -moz-border-radius: 4px 4px 4px 4px;
            -webkit-border-radius: 4px 4px 4px 4px;
            margin: 0 auto;
            display:flex;
            justify-content:center;
            align-items:center;
            text-decoration:none;
            font-size: 20px;
            font-weight: bolder;
            color: #888;
            transition: 0.3s;
        }
        .zain a:hover {
            font-size: 22px;
            color: #777;
        }
    </style>
</head>
<body>
    <div class="zain">
        <a href="./zain/index.php">zain</a><br/>
        <a href="./phpMyAdmin/index.php">phpMyAdmin</a>
    </div>
</body>
</html>
1.2.3.修改nginx配置文件
修改文件:.nginxconf ginx.conf
修改文件中第一个"location / {"内容
location / {
    root html;
    index index.html index.htm;
}
改为:
location / {
    root E:ainNpmpwww;  //改为自己的站点目录,必须用绝对路径(PS:注释不添加)
    index index.html index.htm index.php;  //添加php首页支持(PS:注释不添加)
}
修改文件中第二个"location ~ .php$ {"内容
#location ~ .php$ {
#    root           html;
#    fastcgi_pass   127.0.0.1:9000;
#    fastcgi_index  index.php;
#    fastcgi_param  SCRIPT_FILENAME  /scripts$fastcgi_script_name;
#    include        fastcgi_params;
#}
改为:
location ~ .php$ {
    root           E:ainNpmpwww;  //改为自己的站点目录,必须用绝对路径(PS:注释不添加)
    fastcgi_pass   127.0.0.1:9000;
    fastcgi_index  index.php;
    fastcgi_param  SCRIPT_FILENAME  $document_root$fastcgi_script_name;  //"/scripts"改为"$document_root","$document_root"表示前面的"root"(PS:注释不添加)
    include        fastcgi_params;
}
1.2.4.启动nginx及nginx所有命令
键盘win+R,输入cmd,打开cmd窗口
在未配置环境变量情况下需cd到nginx.exe文件对应路径
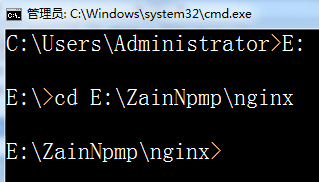
nginx  //启动nginx
nginx -s reload  //重新加载nginx配置
nginx -s reload  //重启nginx
nginx -s stop  //停止nginx
nginx -s quit  //退出nginx
nginx -t  //检测配置文件是否有语法错误,然后退出

nginx [-?hvVtq] [-s signal] [-c filename] [-p prefix] [-g directives]

-?,-h           //打开帮助信息
-v              //显示版本信息并退出
-V              //显示版本和配置选项信息,然后退出
-t              //检测配置文件是否有语法错误,然后退出
-q              //在检测配置文件期间屏蔽非错误信息
-s signal       //给一个 nginx 主进程发送信号:stop(停止), quit(退出), reopen(重启), reload(重新加载配置文件)
-p prefix       //设置前缀路径(默认是:/usr/local/Cellar/nginx/1.2.6/)
-c filename     //设置配置文件(默认是:/usr/local/etc/nginx/nginx.conf)
-g directives   //设置配置文件外的全局指令
1.2.5.查看效果
启动nginx后再浏览器地址栏输入"localhost"或"http://127.0.0.1",显示界面为站点目录(www)中网页内容
2.php
2.1.php下载
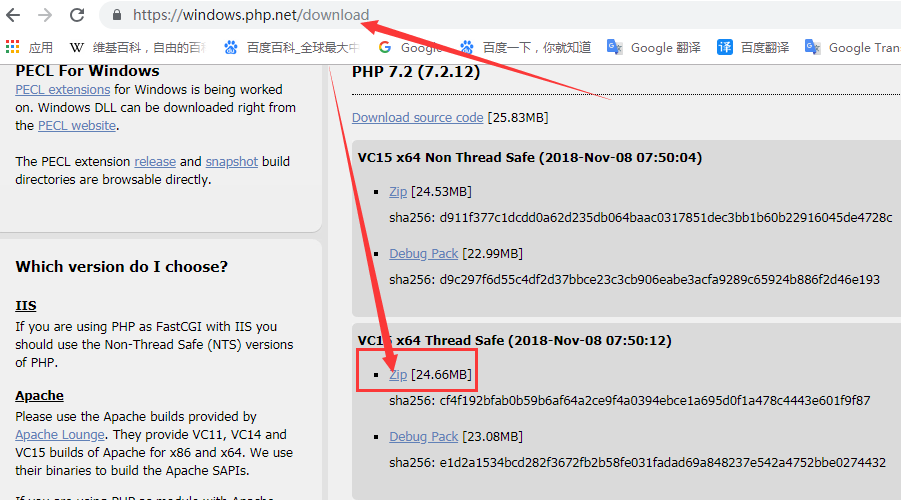
下载网址:https://windows.php.net/download
下载系统对应版本,这里选择64位线程安全版
2.2.php配置
2.2.1.解压php
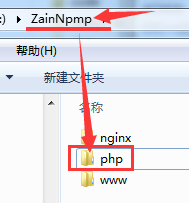
将下载好的php文件解压到"ZainNpmp"目录并改名为"php"
2.2.2.修改php配置文件
复制./php/php.ini-development文件到当前目录下,重命名为php.ini
修改文件:./php/php.ini
; extension_dir = "ext"   改为  extension_dir = "ext"
enable_dl = Off           改为  enable_dl = on
;cgi.force_redirect = 1   改为  cgi.force_redirect = 0
;fastcgi.impersonate = 1  改为  fastcgi.impersonate = 1
;cgi.rfc2616_headers = 0  改为  cgi.rfc2616_headers = 1
;date.timezone =          改为  date.timezone = Asia/Shanghai
;extension=mbstring       改为  extension=mbstring
//开启mysql支持
;extension=mysqli         改为  extension=mysqli
;extension=pdo_mysql      改为  extension=pdo_mysql
2.2.3.启动php
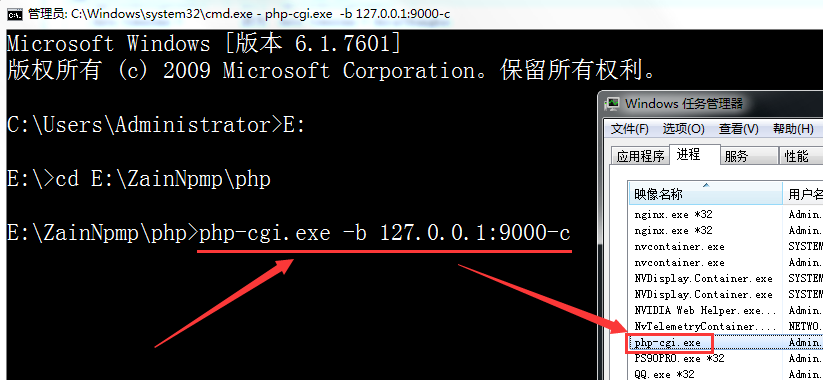
键盘win+R,输入cmd,打开cmd窗口
在未配置环境变量情况下需cd到php-cgi.exe文件对应路径
运行命令:php-cgi.exe -b 127.0.0.1:9000-c
2.2.4.查看效果
在站点目录"www"下创建index.php文件,并添加下列代码
<?php
    echo phpinfo();
?>
重启nginx,打开浏览器查看效果