如果你调研服务器端渲染 (SSR) 只是用来改善少数营销页面(例如 /, /about, /contact 等)的 SEO,那么你可能需要预渲染。无需使用 web 服务器实时动态编译 HTML,而是使用预渲染方式,在构建时 (build time) 简单地生成针对特定路由的静态 HTML 文件。优点是设置预渲染更简单,并可以将你的前端作为一个完全静态的站点。
如果你使用 webpack,你可以使用 prerender-spa-plugin 轻松地添加预渲染。它已经被 Vue 应用程序广泛测试 - 事实上,作者是 Vue 核心团队的成员。
三种不同渲染方式的区别:
客户端渲染:用户访问 url,请求 html 文件,前端根据路由动态渲染页面内容。关键链路较长,有一定的白屏时间;
服务端渲染:用户访问 url,服务端根据访问路径请求所需数据,拼接成 html 字符串,返回给前端。前端接收到 html 时已有当前url下的完整页面;
预渲染:构建阶段生成匹配预渲染路径的 html 文件(注意:每个需要预渲染的路由都有一个对应的 html)。构建出来的 html 文件已经有静态数据,需要ajax数据的部分未构建。
预渲染解决的问题:
SEO:单页应用的网站内容是根据当前路径动态渲染的,html 文件中往往没有内容,网络爬虫不会等到页面脚本执行完再抓取;
弱网环境:当用户在一个弱环境中访问你的站点时,你会想要尽可能快的将内容呈现给他们。甚至是在 js 脚本被加载和解析前;
低版本浏览器:用户的浏览器可能不支持你使用的 js 特性,预渲染或服务端渲染能够让用户至少能够看到首屏的内容,而不是一个空白的网页。
demo地址:https://github.com/hwq888/VUE-SSR/tree/prerender-spa-plugin
接下来我们实现下预渲染
// 1、安装prerender-spa-plugin
npm install prerender-spa-plugin --save-dev

// 2、安装vue-meta-info
npm install vue-meta-info --save-dev


// 3、相关配置
<!-- webpack.prod.conf.js -->
// 预渲染配置:在webpack.prod.conf文件中加入
const PrerenderSPAPlugin = require('prerender-spa-plugin')
const Renderer = PrerenderSPAPlugin.PuppeteerRenderer

// 在 plugins 中加入
new PrerenderSPAPlugin({
      // 生成文件的路径,也可以与webpakc打包的一致。
      // 下面这句话非常重要!!!
      // 这个目录只能有一级,如果目录层次大于一级,在生成的时候不会有任何错误提示,在预渲染的时候只会卡着不动。
      staticDir: path.join(__dirname, '../dist'),

      // 对应自己的路由文件,比如a有参数,就需要写成 /a/param1。
      routes: ['/', '/first', '/second', '/third', '/fourth', '/userCenter/userFirst','/userCenter/userSecond','/userCenter/userThird'],

      // 这个很重要,如果没有配置这段,也不会进行预编译
      renderer: new Renderer({
        inject: {
          foo: 'bar'
        },
        // headless: false,
        renderAfterDocumentEvent: 'render-event', // 在 main.js 中 document.dispatchEvent(new Event('render-event')),两者的事件名称要对应上。
        args: ['--no-sandbox', '--disable-setuid-sandbox']
      })
    })

// 4、在main.js中
import MetaInfo from 'vue-meta-info'

new Vue({
  el: '#app',
  router,
  components: { App },
  template: '<App/>',
  // 添加mounted,不然不会执行预编译
  mounted () {
    document.dispatchEvent(new Event('render-event'))
  }
})
-
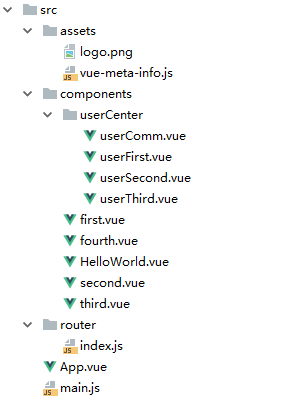
3、为了方便管理各个页面的标题、关键字和描述,创建vue-meta-info.js文件
export default {
  first: {
    title: '我是一个title[first]',
    meta: [
      {
        name: 'keywords',
        content: '关键字1,关键字1,关键字1'
      },
      {
        name: 'description',
        content: '这是一段网页的描述1'
      }
    ]
  },
  second: {
    title: '我是一个title[second]',
    meta: [
      {
        name: 'keywords',
        content: '关键字2,关键字2,关键字2'
      },
      {
        name: 'description',
        content: '这是一段网页的描述2'
      }
    ]
  },
  third: {
    title: '我是一个title[third]',
    meta: [
      {
        name: 'keywords',
        content: '关键字3,关键字3,关键字3'
      },
      {
        name: 'description',
        content: '这是一段网页的描述3'
      }
    ]
  }
}
-
4、相关路由文件:
import Vue from 'vue'
import Router from 'vue-router'
// import HelloWorld from '@/components/HelloWorld'
import first from '@/components/first'
import second from '@/components/second'
import third from '@/components/third'
import fourth from '@/components/fourth'

import userComm from '@/components/userCenter/userComm'
import userFirst from '@/components/userCenter/userFirst'
import userSecond from '@/components/userCenter/userSecond'
import userThird from '@/components/userCenter/userThird'

Vue.use(Router)

export default new Router({
<!-- 要用history模式 -->
  mode: 'history',
  routes: [
    { path: '/',
      name: 'first',
      component: first
    },
    {
      path: '/first',
      name: 'first',
      component: first
    },
    {
      path: '/second',
      name: 'second',
      component: second
    },
    {
      path: '/third',
      name: 'third',
      component: third
    },
    {
      path: '/fourth',
      name: 'fourth',
      component: fourth
    },
    {
      path: '/userCenter',
      component: userComm,
      meta: {name: '用户中心'},
      children: [
        {path: '/userCenter/userFirst', component: userFirst},
        {path: '/userCenter/userSecond', component: userSecond},
        {path: '/userCenter/userThird', component: userThird}
      ]
    }
  ]
})
相关页面情况 https://github.com/hwq888/VUE-SSR/tree/prerender-spa-plugin
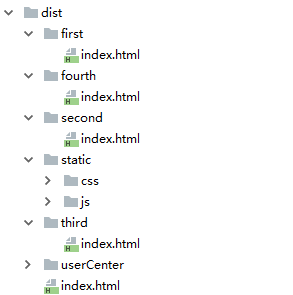
6、生成的目录结构
页面效果:

在研究过程中发现好几个疑难杂症:
1、在build生成静态文件之后,如果用router-link 跳转的话,刷新一下页面,a标签中的href发生变化(未解决)。
2、在config文件夹中index.js 如果把 assetsPublicPath 改成 相当路径 ./ build之后的文件路径不对(目前是 绝对路径 /)
3、prerender-spa-plugin 是基于 puppeteer 如果发现少了这个,手动安装一下(npm install puppeteer --save-dev)
————————————————
版权声明:本文为CSDN博主「RitchieWei」的原创文章,遵循 CC 4.0 BY-SA 版权协议,转载请附上原文出处链接及本声明。
原文链接:https://blog.csdn.net/u012878818/article/details/90751461