1.学习指南
- 官网学习--掌握思想和 API 的使用
- 实战--具体使用,巩固所学
- 较复杂项目--真正应用于实践中
- 源码学习
在这几个过程中都可以在网上查找优秀的博客文章辅助理解学习。
最后可以通过 5W1H 来检验自己对技术的掌握程度。
2.面试官问:你使用过 Vuex 吗?
对于 vuex 相关的面试题,我们可以从vuex 是什么?为什么要使用 vuex ? 适用于哪些场景?如何使用 vuex ? 它的实现原理是什么样的?这几个方面准备。以下是简洁描述,具体的需要参照 vuex 的官网进行学习。
2.1 vuex 是什么?
根据官网上的描述,vuex是一个专为vue.js应用程序开发的状态管理模式。
它采用集中式存储/管理 应用的所有组件的状态,并以相应的规则保证 状态以一种可预测的方式发生变化。
2.2 为什么使用 vuex?
当应用遇到多个组件共享状态的时候,可能会出现,多个视图依赖于同一状态,来自不用视图的行为需要变更同一状态;像这种比较复杂的数据传递问题,就可以使用 vuex 帮助我们进行开发。
2.3 如何使用 vuex?
- vuex 把组件的共享状态抽取出来,放到store(仓库)里边;它的状态存储是响应式的。
- 当 Vue 组件从 store 中读取状态的时候,若 store 中的状态发生变化,那么相应的组件也会相应地得到高效更新。
- 不能直接改变 store 中的状态。改变 store 中的状态的唯一途径就是显式地提交 (commit) mutation。这样我们可以方便地跟踪每一个状态的变化。
vuex有哪几种属性?
有五种,分别是 State、 Getter、Mutation 、Action、 Module
- state---state为单一状态树,在state中需要定义我们所需要管理的数组、对象、字符串等等,只有在这里定义了,在vue.js的组件中才能获取你定义的这个对象的状态。
- getter---getter有点类似vue.js的计算属性,当我们需要从store的state中派生出一些状态,那么我们就需要使用getter,getter会接收state作为第一个参数,而且getter的返回值会根据它的依赖被缓存起来,只有getter中的依赖值(state中的某个需要派生状态的值)发生改变的时候才会被重新计算。
- mutation---更改store中state状态的唯一方法就是提交mutation,就很类似事件。每个mutation都有一个字符串类型的事件类型和一个回调函数,我们需要改变state的值就要在回调函数中改变。我们要执行这个回调函数,那么我们需要执行一个相应的调用方法:store.commit。
- action---action可以提交mutation,在action中可以执行store.commit,而且action中可以有任何的异步操作。在页面中如果我们要用这个action,则需要执行store.dispatch
- module---module其实只是解决了当state中很复杂臃肿的时候,module可以将store分割成模块,每个模块中拥有自己的state、mutation、action和getter。
vuex的数据传递流程:
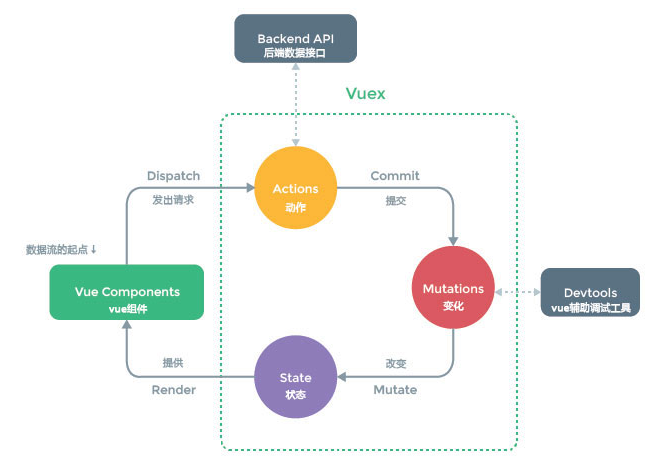
mutations 里面的每个函数都会有一个 state 参数,这样就可以在 mutations 里面进行 state 的数据修改,当数据修改完毕后,会传导给页面。页面的数据也会发生改变。
当组件进行数据修改的时候我们需要调用 dispatch 来触发 actions 里面的方法。actions 里面的每个方法中都会有一个 commit 方法,当方法执行的时候会通过 commit 来触发 mutations 里面的方法进行数据的修改。
3.简单项目
通过 vuex 基础知识的学习,根据官网的示例,我们可以进行实战训练。先来做一个简单的 demo。实现的效果很简单,直接看图。
首先创建一个vue项目
vue init webpack projectName
安装vuex
npm install vuex --save
在 src 下创建一个 store 目录, 新建以下文件:
- index.js
- state.js
- getters.js
- mutations.js
- actions.js
在 main.js 中引入和使用
import Vue from 'vue'
import App from './App'
import router from './router'
import Vuex from "vuex"
import store from "./store"

Vue.config.productionTip = false

Vue.use(Vuex)

/* eslint-disable no-new */
new Vue({
  el: '#app',
  router,
  store,
  components: { App },
  template: '<App/>'
})
在 index.js 中
import Vue from 'vue'
import Vuex from 'vuex'
import state from './state'
import getters from './getters'
import mutations from './mutations'
import actions from './actions'

Vue.use(Vuex)

export default new Vuex.Store({
  state,
  getters,
  mutations,
  actions
})
首先实现第一个,count1
在state.js中
export default {
  count1: 0
}
在 mutations.js 中
export default {
  countInc(state, v) {
    state.count1 = state.count1 + v
  }
}
在 App.vue 中
<template>
  <div id="app">
    <h1>count1: {{count1}}</h1>
    <button @click="countIncrease">点我+100</button>
  </div>
</template>

<script>
  export default {
    name: 'App',
    computed: {
      count1() {
        return this.$store.state.count1;
      }
    },
    methods: {
      countIncrease() {
        this.$store.commit("countInc", 100);
      }
	}
  }
</script>

<style>

</style>
使用 mapState, mapMutations 辅助函数简化代码
export default {
  name: 'App',
  computed: {
    /* count1() {
      return this.$store.state.count1;
    } */
    // 将 this.count1 为 this.$store.state.count1
    ...mapState(['count1'])
  },
  methods: {
    /* countIncrease() {
      this.$store.commit("countInc", 100);
    }, */
    // 将 `this.countInc(100)` 映射为 `this.$store.commit('countInc', 100)`
    ...mapMutations(['countInc']),
    countIncrease() {
      this.countInc(100);
    },
  }
}
实现 count2 和 count3
在state.js中增加
export default {
  count1: 0,
  count2: 0,
  count3: 0
}
在 mutations.js 中增加
export default {
  countInc(state, v) {
    state.count1 = state.count1 + v
  },
  increment(state) {
    state.count2++
  },
  incrementAsync(state) {
    state.count3++
  }
}
在 actions 中
export default {
  /* increment(context) {
    context.commit('increment')
  } */
  increment({
    commit
  }) {
    commit('increment')
  },
  incrementAsync({
    commit
  }) {
    setTimeout(() => {
      commit('incrementAsync')
    }, 1000)
  }
}
在 App.vue 中增加
<template>
  <div id="app">
    <h1>count1: {{count1}}</h1>
    <button @click="countIncrease">点我+100</button>
    <h1>count2: {{count2}}</h1>
    <button @click="incrementFn">点我+1</button>
    <h1>count3: {{count3}}</h1>
    <button @click="incrementAsyncFn">点我延时1秒+1</button>
    <h3>花名册</h3>
    <ul class="ul">
      <li v-for="item in people">姓名:{{item.name}}---年龄:{{item.age}}</li>
    </ul>
    <h3>年满十八</h3>
    <ul class="ul">
      <li v-for="item in adults">姓名:{{item.name}}---年龄:{{item.age}}</li>
    </ul>
  </div>
</template>

<script>
  import {
    mapState,
    mapMutations,
    mapActions
  } from 'vuex'
  export default {
    name: 'App',
    components: {},
    computed: {
      // 将 this.count 为 this.$store.state.count
      ...mapState([
        'count1',
        'count2',
        'count3'
      ])
    },
    methods: {
      // 将 `this.countInc(100)` 映射为 `this.$store.commit('countInc', 100)`
      ...mapMutations(['countInc']),
      countIncrease() {
        this.countInc(100);
      },

      // 将 `this.increment()` 映射为 `this.$store.dispatch('increment')`
      ...mapActions(['increment', 'incrementAsync']),
      incrementFn() {
        this.increment()
      },
      incrementAsyncFn() {
        this.incrementAsync()
      }
    }
  }
</script>

<style>

</style>
getter用法示例
在state.js中增加
export default {
  count1: 0,
  count2: 0,
  count3: 0,
  people: [{
      name: '小易',
      age: 20
    },
    {
      name: '小烊',
      age: 18
    },
    {
      name: '小千',
      age: 36
    },
    {
      name: '小玺',
      age: 27
    },
    {
      name: '小江',
      age: 24
    },
    {
      name: '小六',
      age: 8
    },
    {
      name: '小七',
      age: 6
    }
  ]
}
在 getters.js 中
export default {
  adults: (state) => {
    return state.people.filter(item => {
      if (item.age >= 18) {
        return true
      }
    })
  }
}
在 App.vue 中增加
<template>
  <div id="app">
    <h1>count1: {{count1}}</h1>
    <button @click="countIncrease">点我+100</button>
    <h1>count2: {{count2}}</h1>
    <button @click="incrementFn">点我+1</button>
    <h1>count3: {{count3}}</h1>
    <button @click="incrementAsyncFn">点我延时1秒+1</button>
    <h3>花名册</h3>
    <ul class="ul">
      <li v-for="item in people">姓名:{{item.name}}---年龄:{{item.age}}</li>
    </ul>
    <h3>年满十八</h3>
    <ul class="ul">
      <li v-for="item in adults">姓名:{{item.name}}---年龄:{{item.age}}</li>
    </ul>
  </div>
</template>

<script>
  import {
    mapState,
    mapGetters,
    mapMutations,
    mapActions
  } from 'vuex';
  export default {
    name: 'App',
    components: {},
    computed: {
      // 将 this.count 为 this.$store.state.count
      ...mapState([
        'count1',
        'count2',
        'count3',
        'people'
      ]),
      // 使用对象展开运算符将 getter 混入 computed 对象中
      ...mapGetters(['adults'])
    },
    methods: {
      // 将 `this.countInc(100)` 映射为 `this.$store.commit('countInc', 100)`
      ...mapMutations(['countInc']),
      countIncrease() {
        this.countInc(100);
      },

      // 将 `this.increment()` 映射为 `this.$store.dispatch('increment')`
      ...mapActions(['increment', 'incrementAsync']),
      incrementFn() {
        this.increment()
      },
      incrementAsyncFn() {
        this.incrementAsync()
      }
    }
  }
</script>

<style>

</style>
4.课程学习项目
4.1 项目简介
项目来源
vuex基础入门
目标
- 制作一个需要账号登录的课程学习项目
- 不同的课程需要不同的会员等级,实现购买会员功能,课程分享
功能
- 通过 state.userInfo 控制用户登录路由限制
- 多组件共享 state.userStatus 和 state.vipLevel 状态
- 多组件修改 state.userStatus 和 state.vipLevel
先看一下实现的效果
首先创建一个vue项目
vue init webpack projectName
安装 vuex vue-router less less-loader
npm install vuex --save
npm install vue vue-router --save
npm install less less-loader --save
在 src 下创建一个 store 目录, 新建以下文件:
- index.js
- state.js
- getters.js
- mutations.js
- actions.js
在 main.js 中引入和使用,同时创建全局的导航守卫
import Vue from "vue"
import App from "./App.vue"
import Vuex from "vuex"
import router from "./router"
import store from "./store"

Vue.config.productionTip = false

Vue.use(Vuex)

// 创建全局的导航守卫
router.beforeEach((to, from, next) => {
    if (store.state.userInfo || to.path === "/login") {
        next()
    } else {
        next({
            path: "/login"
        })
    }
})

new Vue({
  el: '#app',
  router,
  store,
  components: { App },
  template: '<App/>'
})
在 index.js 中
import Vue from 'vue'
import Vuex from 'vuex'
import state from './state'
import getters from './getters'
import mutations from './mutations'
import actions from './actions'

Vue.use(Vuex)

export default new Vuex.Store({
  state,
  getters,
  mutations,
  actions
})
router.js
import Vue from "vue"
import VueRouter from "vue-router"

Vue.use(VueRouter)

const router = new VueRouter({
    mode: "history",
    base: "/",
    routes: [
        {
            path: "/login",
            name: "login",
            component: () => import("./pages/login.vue")
        },
        {
            path: "/",
            name: "index",
            component: () => import("./pages/index.vue")
        },
        {
            path: "/userCenter",
            name: "userCenter",
            component: () => import("./pages/userCenter.vue")
        },
        {
            path: "/course/:id",
            name: "course",
            component: () => import("./pages/course.vue")
        }
    ]
})

export default router
在 state.js 中
export default {
    userInfo: "",
    userStatus: "",
    vipLevel: ""
}
userStatus 三种取值情况:0 -> 普通;1 -> vip;2-> 高级vip
getters.js
export default {
    memberInfo(state) {
        switch (state.userStatus) {
            case 0:
                return "普通会员"
            case 1:
                return "vip会员"
            case 2:
                return `高级V${state.vipLevel}会员`
            default:
                return "普通会员"
        }
    }
}
mutations.js
export default {
    login(state, v) {
        state.userInfo = v
    },
    // 创建用户信息
    setMemberInfo(state, v) {
        state.userStatus = v.userStatus
        state.vipLevel = v.vipLevel
    }
}
actions.js
import { resolve } from "any-promise"

export default {
    // 第二个参数表示要修改的数据
    buyVip({ commit }, e) {
      // 这里简单模拟一下异步操作, 模拟与后端的交互
        return new Promise((resolve, reject) => {
            // mock api 交互
            setTimeout(() => {
                // 修改本地state
                commit("setMemberInfo", {
                    userStatus: e.userStatus,
                    vipLevel: e.vipLevel
                })
                resolve("购买成功")
            }, 1000)
        })
    },
    getFreeVip({ commit, state }) {
        // mock api 交互
        return new Promise((resolve, reject) => {
            setTimeout(() => {
                if (state.userStatus === 0) {
                    commit("setMemberInfo", {
                        userStatus: 1,
                        vipLevel: 0
                    })
                    resolve("分享成功,您已获得一个月的高级vip会员")
                } else {
                    resolve("分享成功")
                }
            }, 1000)
        })
    }
}
4.2 登录页面 login.vue
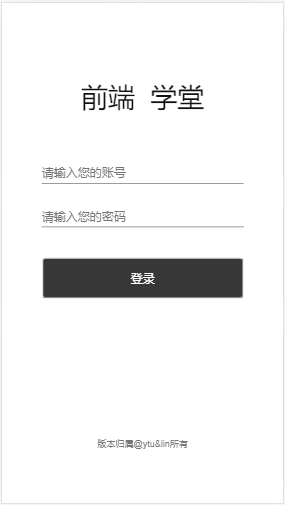
关键代码
<template>
  <div class="login">

    <button class="btn" @click="login">登录</button>

  </div>
</template>

<script>
  export default {
    data() {
      return {
        isHidden: false,
        isPassword: true,
        logs: [],
        form: {
          account: "",
          password: ""
        }
      };
    },
    methods: {
      login() {
        if (!this.form.account && !this.form.password) {
          alert("请填写账号密码");
          return false;
        }
        const that = this;
        setTimeout(() => {
          this.$store.commit("login", {
            account: that.form.account,
            password: that.form.password
          });
          // 假设拿到用户的数据,存到 store 里
          this.$store.commit("setMemberInfo", {
            userStatus: 0,
            vipLevel: 0
          });
          // 提交完成后,跳转到首页?
          that.$router.push("./");
        }, 500);
      }
    }
  };
</script>
与 mutations.js 结合看
export default {
    login(state, v) {
        state.userInfo = v
    },
    // 创建用户信息
    setMemberInfo(state, v) {
        state.userStatus = v.userStatus
        state.vipLevel = v.vipLevel
    }
}
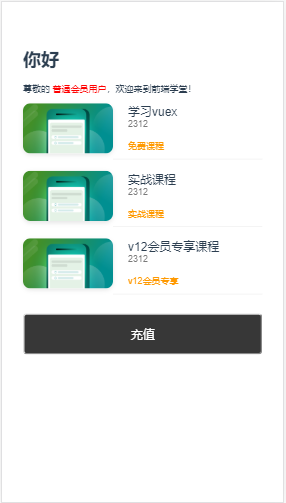
4.3 首页 index.vue
登录成功后,进入首页 index.vue
<template>
    <div class="index">
        <h1>你好</h1>
        <p class="text">
            尊敬的
            <!-- <span style="color: red;">{{this.$store.getters.memberInfo}}用户</span>,欢迎来到德莱联盟! -->
            <span style="color: red;">{{memberInfo}}用户</span>,欢迎来到前端学堂!
        </p>

        <button class="footer-opt btn" @click="recharge">充值</button>
    </div>
</template>

<script>
import card from "../components/card";
import { mapGetters, mapState } from "vuex";
export default {
    components: {
        card
    },
    data() {
        return {
            courseList: []
        };
    },
    computed: {
        ...mapState(["userStatus", "vipLevel"]),
        ...mapGetters(["memberInfo"])
    },
    mounted() {},
    methods: {
        recharge() {
            this.$router.push("./userCenter");
        },
        goVideoList(e) {
            const res = this.checkPermission(e);
            if (res) {
                this.$router.push({
                    name: "course",
                    params: {
                        id: e.id
                    }
                });
            } else {
                alert("权限不足,无法观看");
            }
        },
        checkPermission(e) {
            if (this.userStatus >= e.userStatus) {
                if (this.vipLevel >= e.vipLevel) {
                    return true;
                } else {
                    return false;
                }
            } else {
                return false;
            }
        }
    }
};
</script>
memberInfo 来自于
export default {
    memberInfo(state) {
        switch (state.userStatus) {
            case 0:
                return "普通会员"
            case 1:
                return "vip会员"
            case 2:
                return `高级V${state.vipLevel}会员`
            default:
                return "普通会员"
        }
    }
}
4.4 用户中心 userCenter.vue
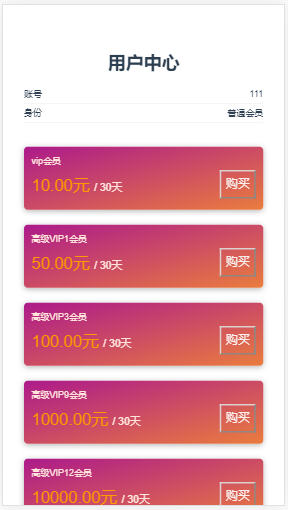
点击充值,进入用户中心 userCenter.vue
<template>
	<button class="item-content__btn" @click="buy(item)">购买</button>
</template>

<script>
import { mapState, mapGetters } from "vuex";
export default {
    data() {
        return {
            vipList: []
        };
    },
    computed: {
        ...mapState(["userInfo"]),
        ...mapGetters(["memberInfo"])
    },
    methods: {
        buy(e) {
            this.$store.dispatch("buyVip", e).then(res => {
                alert(res);
            });
        }
    }
};
</script>
触发 actions.js 中的
import { resolve } from "any-promise"

export default {
    // 第二个参数表示要修改的数据
    buyVip({ commit }, e) {
      // 这里简单模拟一下异步操作, 模拟与后端的交互
        return new Promise((resolve, reject) => {
            // mock api 交互
            setTimeout(() => {
                // 修改本地state
                commit("setMemberInfo", {
                    userStatus: e.userStatus,
                    vipLevel: e.vipLevel
                })
                resolve("购买成功")
            }, 1000)
        })
    }
}
4.5 课程页面 course.vue
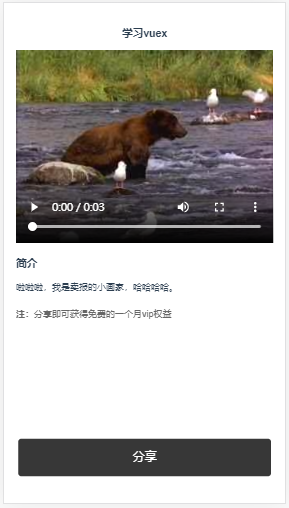
<template>
    <div class="course">
        <button class="share-btn" @click="share">分享</button>
    </div>
</template>

<script>
import { mapState, mapGetters } from "vuex";

export default {
    data() {
        return {};
    },
    methods: {
        share() {
            // 简单分享
            let c = confirm("课程分享,地址: http://www.muke.com");
            if (c) {
                // 修改state userStatus
                this.$store.dispatch("getFreeVip").then(res => {
                    alert(res);
                });
            } else {
                console.log("取消");
            }
        }
    }
};
</script>
这个页面要关注的是分享的功能,普通的会员用户点击分享按钮,确定后完成分享,即可获得免费的一个月的 VIP 权限,给它绑定一个 click 事件.
触发 actions.js 中的 getFreeVip
import { resolve } from "any-promise"

export default {
    getFreeVip({ commit, state }) {
        // mock api 交互
        return new Promise((resolve, reject) => {
            setTimeout(() => {
                if (state.userStatus === 0) {
                    commit("setMemberInfo", {
                        userStatus: 1,
                        vipLevel: 0
                    })
                    resolve("分享成功,您已获得一个月的高级vip会员")
                } else {
                    resolve("分享成功")
                }
            }, 1000)
        })
    }
}
完整的代码可以在我的仓库里查看。vuex-demo
5.项目中使用
可以参考我写的另一篇文章,Vue.js开发去哪儿网WebApp。
2.4 使用vuex实现数据共享
6.继续学习
- 源码的学习--可以参考黄轶老师的《vue.js揭秘》
- 掘金文章--Vuex面试题汇总