本着一个功能一个功能学习的心态,所以就这样写了!还有servlet的实现,后面再写,这样就可以对比学习了。
第一步,建立数据库:
代码就不写了,直接贴出字段:

第二步:建立数据库信息类:MySqlDBInfor类(用于存放数据库连接信息,以后便于修改)和连接ConnectDB类:
1.MySqlDBInfor类:
//数据库配置信息
public class MySqlDBInfor {
public static String driverName = "com.mysql.jdbc.Driver";
public static String url = "jdbc:mysql://localhost:3306/pethome";
public static String user = "root";
public static String pwd = "******";
}
2.ConnectDB类:
public class ConnectDB {
static Connection connection = null;//1.
//数据库连接
public static Connection getConnectDB(){
try {
Class.forName(MySqlDBInfor.driverName);//2.
connection = DriverManager.getConnection(MySqlDBInfor.url,MySqlDBInfor.user,MySqlDBInfor.pwd);//3.
return connection;
} catch (Exception e) {
System.out.println(e.getMessage());
}
return connection;
}
//数据库连接关闭
public void closeDB(){
try {
getConnectDB().close();
} catch (SQLException e) {
// TODO Auto-generated catch block
e.printStackTrace();
}
}
}
第三步建立User(bean)类:
public class User {
private int id;
private String uname;
private String pwd;
private String phone;
private String email;
//set和get方法略
}
第四步,建立UserDao(dao)类:
public class UserDao {
Connection connection = ConnectDB.getConnectDB();
//查询所有用户
public List<User> selectAllUsers(){
String sql = "select*from user;";
List<User> list = new ArrayList<User>();
try {
PreparedStatement statement = connection.prepareStatement(sql);
ResultSet set = statement.executeQuery();
while (set.next()) {
User user = new User();
int id = set.getInt("id");
String uname = set.getString("uname");
String pwd = set.getString("pwd");
user.setId(id);
user.setUname(uname);
user.setPwd(pwd);
user.setPhone(set.getString("phone"));
user.setEmail(set.getString("email"));
list.add(user);
}
} catch (SQLException e) {
// TODO Auto-generated catch block
e.printStackTrace();
}
return list;
}
}
第五步:实现UserAction类:
public class UserAction extends ActionSupport{
/**
*
*/
private static final long serialVersionUID = 1L;
//1.将得到的数据转化为json
UserDao dao = new UserDao();
@Override
public String execute() throws Exception {
// TODO Auto-generated method stub
json();
//这一句很重要*******告诉struts执行完action,不再去执行后面的步骤************************************
ActionContext.getContext().getActionInvocation().getProxy().setExecuteResult(false);
return null;
}
//2,将结果返回给页面
public void json() throws Exception{
//获取response对象
HttpServletResponse response = ServletActionContext.getResponse();
//设置响应头
response.setContentType("type=text/json;charset=utf-8");
PrintWriter writer = response.getWriter();
//将List<User>转化为json数据,并进行网页的写入
JSONArray array = JSONArray.fromArray(dao.selectAllUsers().toArray());
writer.write(""+array);
}
}
第六步:struts.xml配置(web.xml自行配置):
<?xml version="1.0" encoding="UTF-8"?>
<!DOCTYPE struts PUBLIC
"-//Apache Software Foundation//DTD Struts Configuration 2.0//EN"
"http://struts.apache.org/dtds/struts-2.0.dtd">
<struts>
<package name="webface" extends="struts-default">
<!-- 查询数据库pethome,查询用户,然后传到jsp -->
<action name="json" class="action.UserAction" method="execute">
<!-- 这两句在这里暂时是没有用滴 -->
<result name="json">/index.jsp</result>
<result name="json">/test.html</result>
</action>
</package>
</struts>
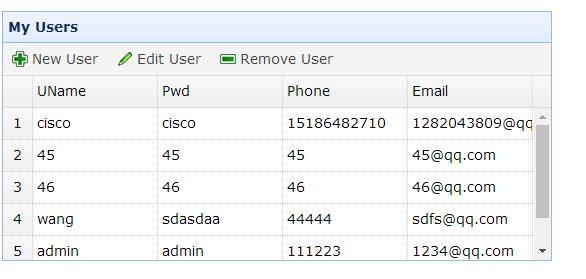
第七步:easyui的前端代码(注意url):
<%@ page language="java" contentType="text/html; charset=UTF-8"
pageEncoding="UTF-8"%>
<!DOCTYPE html PUBLIC "-//W3C//DTD HTML 4.01 Transitional//EN" "http://www.w3.org/TR/html4/loose.dtd">
<html>
<head>
<meta http-equiv="Content-Type" content="text/html; charset=UTF-8">
<title>Insert title here</title>
<link rel="stylesheet" type="text/css" href="./easyui/themes/default/easyui.css">
<link rel="stylesheet" type="text/css" href="./easyui/themes/icon.css">
<link rel="stylesheet" type="text/css" href="./easyui/demo/demo.css">
<script type="text/javascript" src="./easyui/jquery.min.js"></script>
<script type="text/javascript" src="./easyui/jquery.easyui.min.js"></script>
<script type="text/javascript" src="./easyui/locale/easyui-lang-zh_CN.js"></script>
</head>
<body>
<table id="dg" title="My Users" class="easyui-datagrid" style="550px;height:250px"
url="json"
toolbar="#toolbar"
rownumbers="true"
fitColumns="true"
singleSelect="true">
<thead>
<tr>
<th field="uname" width="50">UName</th>
<th field="pwd" width="50">Pwd</th>
<th field="phone" width="50">Phone</th>
<th field="email" width="50">Email</th>
</tr>
</thead>
</table>
<div id="toolbar">
<a href="#" class="easyui-linkbutton" iconCls="icon-add" plain="true" onclick="newUser()">New User</a>
<a href="#" class="easyui-linkbutton" iconCls="icon-edit" plain="true" onclick="editUser()">Edit User</a>
<a href="#" class="easyui-linkbutton" iconCls="icon-remove" plain="true" onclick="destroyUser()">Remove User</a>
</div>
</body>
</html>
总结:数据从后台到前端的代码,主要还是action那里,对于前端,只需要把field和json数据写正确就行。也就是说后台只需要把数据转化为JSON数据,并交给前端,然后前端就可以自己通过field去找到对应字段的值。