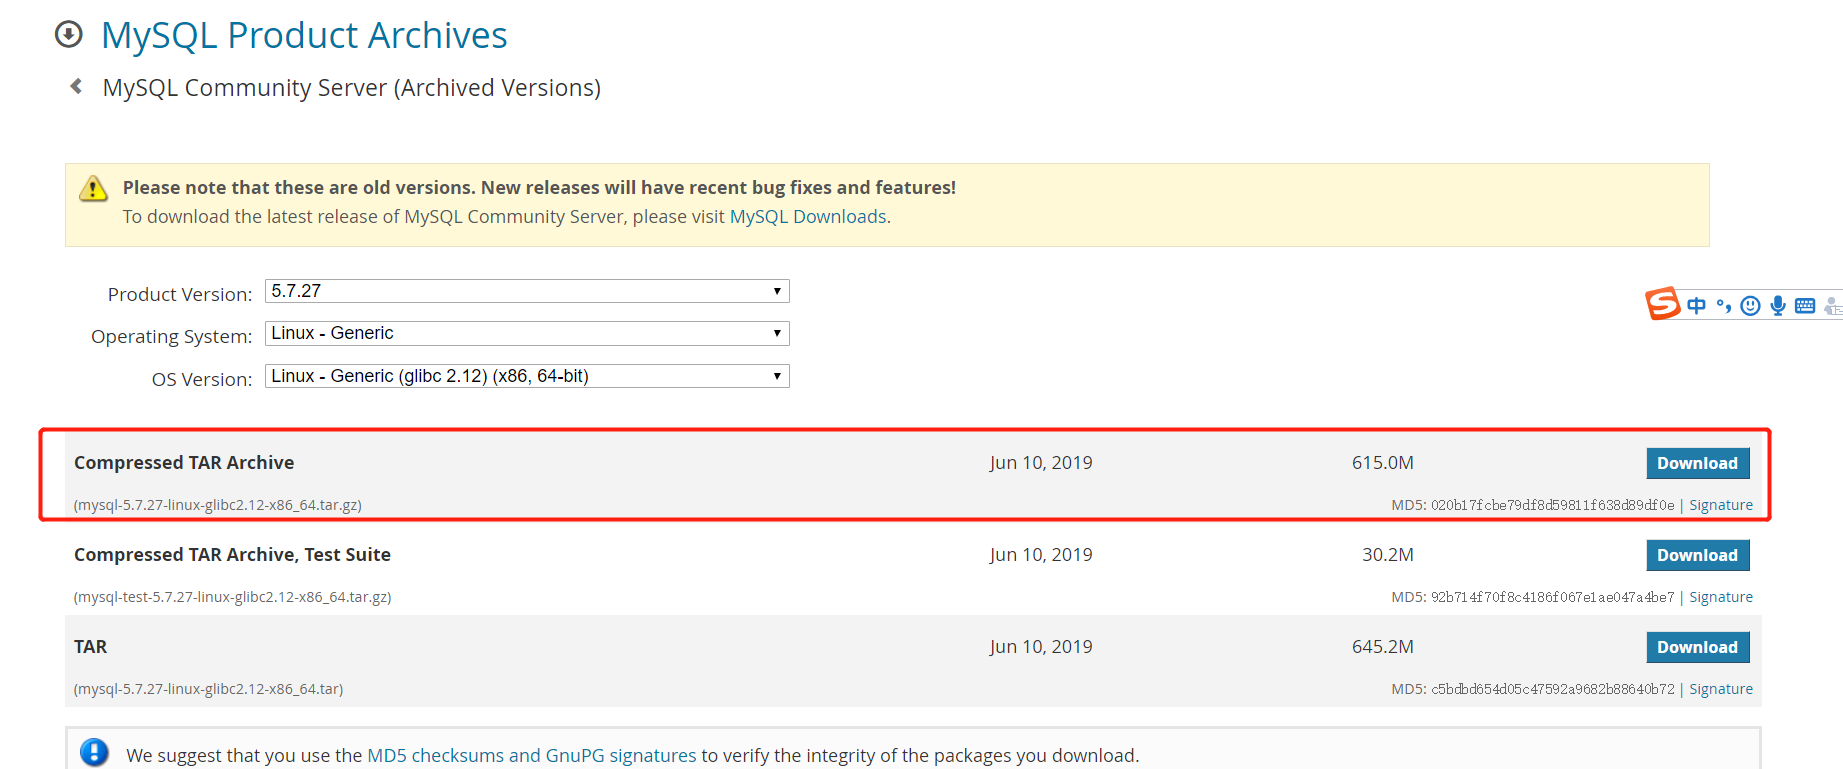
步骤一:下载安装包,打开Mysql官网,找到对应的
下载路径如下:https://downloads.mysql.com/archives/community/
wget https://downloads.mysql.com/archives/get/file/mysql-5.7.27-linux-glibc2.12-x86_64.tar.gz -O /usr/local/src/mysql-5.7.27-linux-glibc2.12-x86_64.tar.gz

步骤二:下载依赖包,Centos7自带不需要安装
[root@centos702 21:56:19]:/usr/local/src
#yum -y install libaio
已加载插件:fastestmirror, langpacks
Loading mirror speeds from cached hostfile
 * base: mirrors.aliyun.com
 * epel: mirrors.aliyun.com
 * extras: mirrors.aliyun.com
 * updates: mirrors.aliyun.com
软件包 libaio-0.3.109-13.el7.x86_64 已安装并且是最新版本
无须任何处理
步骤三:解压安装包
[root@centos702 21:58:45]:/usr/local/src
#tar -zxvf mysql-5.7.27-linux-glibc2.12-x86_64.tar.gz
步骤四:创建数据库用户,移动数据库文件到你想要放的位置,并创建mysql数据目录,最后修改属主为Mysql
[root@centos702 21:59:26]:/usr/local/src
#useradd -M -s /sbin/nologin -r mysql
#mv /usr/local/src/mysql-5.7.27-linux-glibc2.12-x86_64 /home/data/mysql
[root@centos702 22:02:09]:/usr/local/src
#mkdir -p /home/data/mysql
[root@centos702 22:02:18]:/usr/local/src
#chown -R mysql.mysql /home/data/mysql
步骤五:初始化数据库
[root@centos702 22:04:56]:/home/data
#/home/data/mysql/bin/mysqld --initialize --user=mysql --basedir=/home/data/mysql --datadir=/home/data/mysql/data
2019-11-09T14:06:56.634380Z 0 [Warning] TIMESTAMP with implicit DEFAULT value is deprecated. Please use --explicit_defaults_for_timestamp server option (see documentation for more details).
2019-11-09T14:06:57.063698Z 0 [Warning] InnoDB: New log files created, LSN=45790
2019-11-09T14:06:57.142365Z 0 [Warning] InnoDB: Creating foreign key constraint system tables.
2019-11-09T14:06:57.200813Z 0 [Warning] No existing UUID has been found, so we assume that this is the first time that this server has been started. Generating a new UUID: 30cc7a37-02fa-11ea-a548-000c29cbc202.
2019-11-09T14:06:57.202254Z 0 [Warning] Gtid table is not ready to be used. Table 'mysql.gtid_executed' cannot be opened.
2019-11-09T14:06:57.203612Z 1 [Note] A temporary password is generated for root@localhost: KaELVb2yol<4 #此次是生成的临时密码,用于第一次登陆,登陆后需要重新修改
步骤六:创建配置文件,这里只创建常见配置文件
cat > /etc/my.cnf <<EOF
[mysqld]
basedir=/home/data/mysql
datadir=/home/data/mysql/data
port=3306
socket=/home/data/mysql/mysql.sock
character-set-server=utf8
log-error=/var/log/mysqld.log
pid-file=/tmp/mysqld.pid
[mysql]
socket=/home/data/mysql/mysql.sock
[client]
socket=/home/data/mysql/mysql.sock
EOF
步骤七:配置环境变量,并刷新
cat >/etc/profile.d/mysql.sh <<EOF
export PATH=/home/data/mysql/bin:$PATH
EOF
source /etc/profile.d/mysql.sh
步骤八:生成启动脚本,并启动mysql
[root@centos702 22:14:40]:/home/data
#cp /home/data/mysql/support-files/mysql.server /etc/init.d/mysql
[root@centos702 22:16:42]:/home/data
#chmod +x /etc/init.d/mysql
[root@centos702 22:17:55]:/home/data
#vim /etc/init.d/mysql
#修改mysql启动配置文件,指定datadir和basedir路径,如不指定,默认是/usr/local/mysql
[root@centos702 22:18:31]:/home/data
#sed -i '46s#basedir=#basedir=/home/data/mysql#' /etc/init.d/mysql
[root@centos702 22:20:15]:/home/data
#sed -n '46p' /etc/init.d/mysql
basedir=/home/data/mysql
[root@centos702 22:20:30]:/home/data
#sed -i '47s#datadir=#datadir=/home/data/mysql/data#' /etc/init.d/mysql
[root@centos702 22:21:13]:/home/data
#sed -n '47p' /etc/init.d/mysql
datadir=/home/data/mysql/data
#启动mysql
[root@centos702 22:23:54]:/home/data
# /etc/init.d/mysql start
Starting MySQL. SUCCESS!
步骤九:登录mysql,并修改密码
[root@centos702 22:26:28]:/home/data
#mysql -uroot -p'KaELVb2yol<4'
mysql: [Warning] Using a password on the command line interface can be insecure.
Welcome to the MySQL monitor.  Commands end with ; or g.
Your MySQL connection id is 3
Server version: 5.7.27

Copyright (c) 2000, 2019, Oracle and/or its affiliates. All rights reserved.

Oracle is a registered trademark of Oracle Corporation and/or its
affiliates. Other names may be trademarks of their respective
owners.

Type 'help;' or 'h' for help. Type 'c' to clear the current input statement.

mysql> set password for root@localhost=password('cnhope');
Query OK, 0 rows affected, 1 warning (0.00 sec)

mysql> flush privileges;
Query OK, 0 rows affected (0.00 sec)
