1、关闭SELINUX:
[root@ELK /]# vim /etc/selinux/config
将SELINUX=enforcing修改为SELINUX=disabled
2、关闭防火墙:
[root@ELK /]# service iptables stop
[root@ELK /]# chkconfig iptables off
3、安装EPEL源:
[root@ELK /]# yum -y install epel-release
[root@ELK /]# yum clean all
[root@ELK /]# yum makecache
4、安装系统工具:
[root@ELK /]# yum -y install vim wget telnet
5、安装OpenJDK:
[root@ELK /]# yum -y install java-1.8.0-openjdk*
[root@ELK /]# java -version
openjdk version "1.8.0_121"
OpenJDK Runtime Environment (build 1.8.0_121-b13)
OpenJDK 64-Bit Server VM (build 25.121-b13, mixed mode)
6、安装ElasticSearch:
[root@ELK /]# wget -P/usr/local/src/ -c https://download.elastic.co/elasticsearch/release/org/elasticsearch/distribution/tar/elasticsearch/2.4.1/elasticsearch-2.4.1.tar.gz
[root@ELK /]# tar -xzvf /usr/local/src/elasticsearch-2.4.1.tar.gz -C /usr/local/src/
[root@ELK /]# mkdir -p /usr/local/elk
[root@ELK /]# mv /usr/local/src/elasticsearch-2.4.1 /usr/local/elk/elasticsearch
7、添加elk账户:
[root@ELK /]# groupadd elk
[root@ELK /]# useradd -g elk elk
[root@ELK /]# chown -R elk.elk /usr/local/elk/elasticsearch
8、编辑elasticsearch配置文件:
[root@ELK /]# vim /usr/local/elk/elasticsearch/config/elasticsearch.yml
找到对应项目,修改如下:
# ---------------------------------- Cluster -----------------------------------
cluster.name: elk-cluster
# ------------------------------------ Node ------------------------------------
node.name: elk01
# ----------------------------------- Paths ------------------------------------
path.data: /usr/local/elasticsearch-5.5.2/data/elasticsearch
path.logs: /usr/local/elasticsearch-5.5.2/data/logs
path.repo: /usr/local/elasticsearch-5.5.2/data/backup
# ----------------------------------- Memory -----------------------------------
bootstrap.memory_lock: false
bootstrap.system_call_filter: false
# ---------------------------------- Network -----------------------------------
network.host: 0.0.0.0
http.port: 9250
transport.tcp.port: 9350
# --------------------------------- Discovery ----------------------------------
discovery.zen.ping.unicast.hosts: ["172.16.1.141", "172.16.1.142", "172.16.1.143"]
# ---------------------------------- Various -----------------------------------
cluster.routing.allocation.disk.threshold_enabled: true
cluster.routing.allocation.disk.watermark.low: 15gb
cluster.routing.allocation.disk.watermark.high: 10gb
9、启动elasticsearch服务:
[root@ELK elk]# su - elk --command="/usr/local/elk/elasticsearch/bin/elasticsearch -d"
10、安装elasticsearch插件:
[root@ELK elk] #/usr/local/elk/elasticsearch/bin/plugin plugin install mobz/elasticsearch-head
[root@ELK elk] #/usr/local/elk/elasticsearch/bin/plugin install lmenezes/elasticsearch-kopf
11、安装logstash:
[root@ELK /]# wget -P/usr/local/src/ -c https://download.elastic.co/logstash/logstash/logstash-2.4.1.tar.gz
[root@ELK /]# tar -xzvf /usr/local/src/logstash-2.4.1.tar.gz -C /usr/local/src/
[root@ELK /]# mv /usr/local/src/logstash-2.4.1 /usr/local/elk/logstash
[root@ELK /]# chown -R elk.elk /usr/local/elk/logstash
12、创建logstash配置文件:
[root@ELK /]# vim /usr/local/elk/logstash/logstash-nginx.conf
logstash-nginx.conf:
input {
file {
type => "syslog"
tags => ["log"]
path => ["/var/log/messages","/log/*.log"]
start_position => beginning
ignore_older => 0
}
file {
type => "nginx_log"
tags => ["nginx"]
path => ["/var/log/nginx/access.log"]
start_position => beginning
ignore_older => 0
}
}


output
  {

elasticsearch {
hosts => [ "192.168.75.150:9200" ]
  }

}
13、启动logstash服务:
[root@ELK ~]# su - elk --command="/usr/local/elk/logstash/bin/logstash agent -f /usr/local/elk/logstash/logstash-nginx.conf &"
Settings: Default pipeline workers: 2
Pipeline main started
agent 表示运行Agent模式
-f 表示指定配置文件
-p 表示端口
14、安装kibana:
[root@ELK /]# wget -P/usr/local/src/ -c https://download.elastic.co/kibana/kibana/kibana-4.6.1-linux-x86_64.tar.gz
[root@ELK /]# tar -xzvf /usr/local/src/kibana-4.6.1-linux-x86_64.tar.gz -C /usr/local/src/
[root@ELK /]# mv /usr/local/src/kibana-4.6.1-linux-x86_64 /usr/local/elk/kibana
[root@ELK /]# chown -R elk.elk /usr/local/elk/kibana
15、编辑kibana配置文件:
[root@ELK /]# vim /usr/local/elk/kibana/config/kibana.yml
找到对应项目,修改如下:
server.port: 5602
server.host: "0.0.0.0"
elasticsearch.url: "http://localhost:9250"
logging.dest: /usr/local/kibana-5.5.2/log/kibana.log
16、启动kibana服务:
[root@ELK elk]# su - elk --command="/usr/local/elk/kibana/bin/kibana serve &"
17、测试:
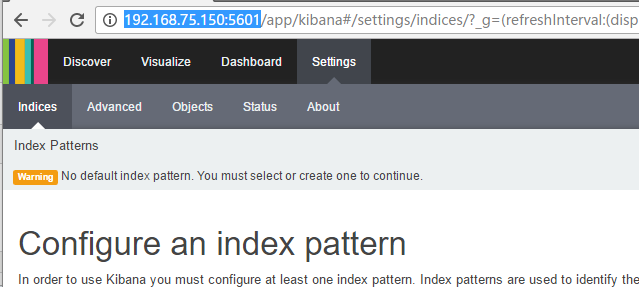
访问:http://192.168.75.150:5601/

18、清除ELK日志:
curl -XDELETE http://127.0.0.1:9200/access-restapi-2017.01.*
curl -XDELETE http://127.0.0.1:9200/*-2017.01.0*
curl -XDELETE http://127.0.0.1:9200/*-2017.01.*
[THE END]