--------------------------------------------------------------------------------------Ubuntu 18.04配置邮箱服务器(局域网)--------------------------------------------------------------------------------------
一、安装
Ubuntu 18.04附带了systemd-resolve,需要禁用它,因为它绑定到53端口,与Dnsmasq端口冲突。
运行以下命令以禁用已解析的服务:
root@base:$ systemctl disable systemd-resolved
root@base:$ systemctl stop systemd-resolved
删除符号链接resolv.conf文件
root@base:$ ls -lh /etc/resolv.conf
53端口占用:
root@base:$ lsof -i:53
root@base:$ kill -9 pid
安装:
root@base:$ apt-get install dovecot-common dovecot-imapd dovecot-pop3d
root@base:$ apt-get install postfix
root@base:$ apt-get install dnsmasq
对应服务:
Postfix------Smtp(发送邮件)
Dovecot------POP3/IMAP(接收邮件)
Dnsmasq------nameserver(域名服务器)
二、配置hostname
root@base:$ vim /etc/hostname
更改为:
mail.coodyz.com
重启后生效:
root@base:$ reboot
三、配置dnsmasq
在hosts文件中增加 本地IP到域名映射
root@mail:$ vim /etc/hosts
192.168.254.128 mail.coodyz.com # `192.168.254.128`更改为Ubuntu本机局域网IP
启动服务:
root@mail:$ /etc/init.d/dnsmasq start
将服务器的DNS服务器指向Dnsmasq服务器:
root@mail:$ vim /etc/resolv.conf
nameserver 127.0.0.1
nameserver 8.8.8.8
以上只是修改运行时文件,进行持久配置需编辑/etc/network/interfaces。
测试:
root@mail:$ dig A mail.coodyz.com
; <<>> DiG 9.11.3-1ubuntu1.11-Ubuntu <<>> A mail.coodyz.com
;; global options: +cmd
;; Got answer:
;; ->>HEADER<<- opcode: QUERY, status: NOERROR, id: 47993
;; flags: qr aa rd ra; QUERY: 1, ANSWER: 1, AUTHORITY: 0, ADDITIONAL: 1

;; OPT PSEUDOSECTION:
; EDNS: version: 0, flags:; udp: 4096
;; QUESTION SECTION:
;mail.coodyz.com.    IN    A

;; ANSWER SECTION:
mail.coodyz.com.    0    IN    A    192.168.254.128

;; Query time: 0 msec
;; SERVER: 127.0.0.1#53(127.0.0.1)
;; WHEN: Fri Dec 20 16:42:17 CST 2019
;; MSG SIZE rcvd: 60
四、配置postfix
root@mail:$ vim /etc/postfix/main.cf
参考配置:
home_mailbox = Maildir/

smtpd_banner = $myhostname ESMTP $mail_name (Ubuntu)
biff = no

# appending .domain is the MUA's job.
append_dot_mydomain = no

# Uncomment the next line to generate "delayed mail" warnings
#delay_warning_time = 4h

readme_directory = no

# See http://www.postfix.org/COMPATIBILITY_README.html -- default to 2 on
compatibility_level = 2

# TLS parameters
smtpd_tls_cert_file=/etc/ssl/certs/ssl-cert-snakeoil.pem
smtpd_tls_key_file=/etc/ssl/private/ssl-cert-snakeoil.key
smtpd_use_tls=yes
smtpd_tls_session_cache_database = btree:${data_directory}/smtpd_scache
smtp_tls_session_cache_database = btree:${data_directory}/smtp_scache

# See /usr/share/doc/postfix/TLS_README.gz in the postfix-doc package for
# information on enabling SSL in the smtp client.

smtpd_relay_restrictions = permit_mynetworks permit_sasl_authenticated defer_unauth_destination
myhostname = mail.coodyz.com
mydomain = coodyz.com
alias_maps = hash:/etc/aliases
alias_database = hash:/etc/aliases
myorigin = $mydomain
mydestination = $myhostname, coodyz.com, mail.coodyz.com, localhost.coodyz.com, localhost
relayhost =
mynetworks = 127.0.0.0/8 [::ffff:127.0.0.0]/104 [::1]/128
mailbox_size_limit = 0
recipient_delimiter = +
inet_interfaces = all
inet_protocols = ipv4

smtpd_sasl_auth_enable = yes
smtpd_sasl_security_options = noanonymous
smtpd_sasl_local_domain = $myhostname
smtpd_recipient_restrictions = permit_sasl_authenticated,permit_mynetworks, reject_unauth_destination
broken_sasl_auth_clients = yes
smtpd_sasl_type = dovecot
smtpd_sasl_path = private/auth
启动服务:
root@mail:$ /etc/init.d/postfix start
五、配置dovecot
编辑Dovecot主配置文件:
root@mail:# vim /etc/dovecot/dovecot.conf
取消注释并配置
listen = *
protocols = pop3 imap
mail_location = maildir:/home/%u/Maildir
pop3_uidl_format = %08Xu%08Xv
disable_plaintext_auth = no
指定电子邮件客户端向Dovecot进行身份验证的方式:
root@mail:# vim /etc/dovecot/conf.d/10-auth.conf
auth_mechanisms = plain login
指定用于存储电子邮件的文件夹:
root@mail:# vim /etc/dovecot/conf.d/10-mail.conf
mail_location = maildir:/home/%u/Maildir
编辑Postfix SMTP身份验证配置文件:
root@mail:$ vim /etc/dovecot/conf.d/10-master.conf
注释文件中的以下几行
#unix_listener auth-userdb {
#mode = 0600
#user =
#group =
#}
并确保未注释以下内容:
# Postfix smtp-auth
unix_listener /var/spool/postfix/private/auth {
mode = 0666
user = postfix
group = postfix
}
编辑POP3配置文件,并允许一些较旧的电子邮件客户端正确连接和传输::
root@mail:$ vim /etc/dovecot/conf.d/20-pop3.conf
pop3_uidl_format = %08Xu%08Xv
pop3_client_workarounds = outlook-no-nuls oe-ns-eoh
为了使Dovecot服务与Postfix服务一起使用,我们需要在Postfix配置文件中添加以下几行:
root@mail:$ vim /etc/postfix/main.cf
smtpd_sasl_auth_enable = yes
smtpd_sasl_security_options = noanonymous
smtpd_sasl_local_domain = $myhostname
smtpd_recipient_restrictions = permit_sasl_authenticated,permit_mynetworks, reject_unauth_destination
broken_sasl_auth_clients = yes
smtpd_sasl_type = dovecot
smtpd_sasl_path = private/auth
重启服务:
root@mail:$ /etc/init.d/postfix restart
root@mail:$ /etc/init.d/dovecot restart
测试服务功能:
root@mail:$ telnet localhost 143
Trying 127.0.0.1...
Connected to localhost.
Escape character is '^]'.
* OK [CAPABILITY IMAP4rev1 LITERAL+ SASL-IR LOGIN-REFERRALS ID ENABLE IDLE STARTTLS
AUTH=PLAIN AUTH=LOGIN] Dovecot (Ubuntu) ready.
root@mail:$ telnet localhost 110
服务器启动时自启:
root@mail:$ update-rc.d dovecot defaults
建立邮箱账户:
root@mail:$ adduser ted
Enter new UNIX password: ted
Retype new UNIX password: ted
passwd: password updated successfully
Changing the user information for test
Enter the new value, or press ENTER for the default
Full Name []:
Room Number []:
Work Phone []:
Home Phone []:
Other []:
Is the information correct? [Y/n] Y
重启服务:
root@mail:$ /etc/init.d/dovecot restart
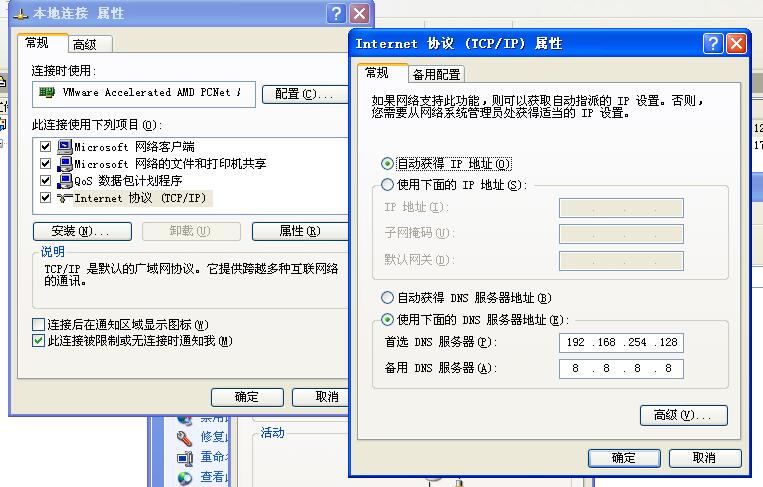
六、使用测试
注意:请确保两者在同一网段
邮件服务器IP 192.168.254.128
Windows XP 客户端IP 192.168.254.130
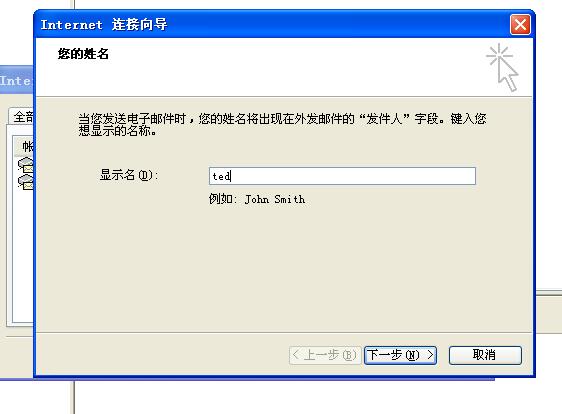
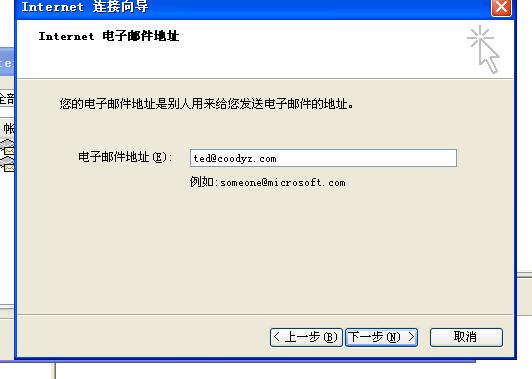
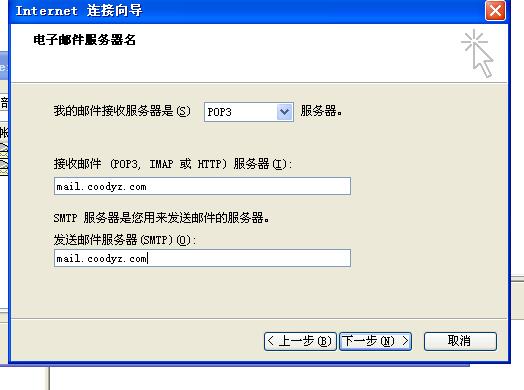
使用outlook测试:
工具->账户->添加
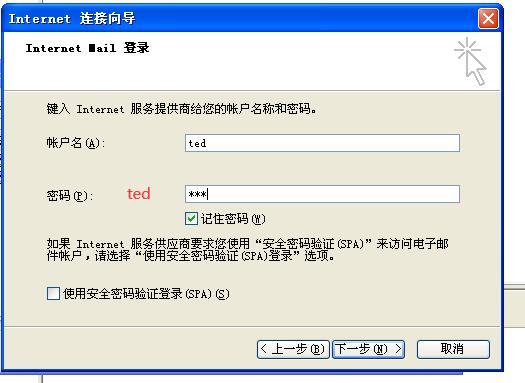


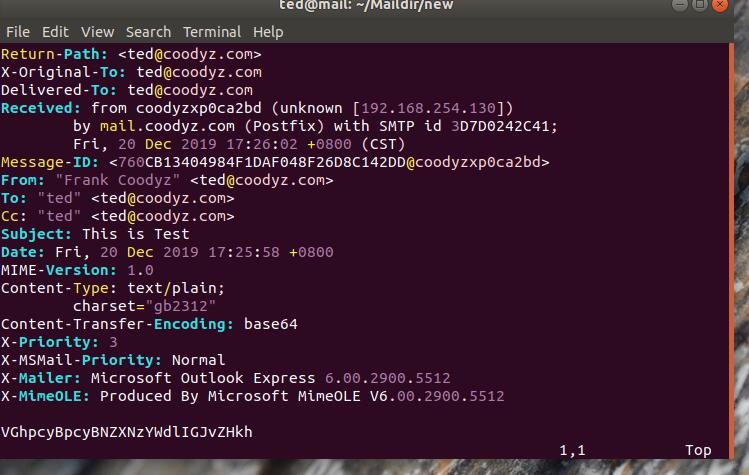
在Ubuntu端查看:
ted@mail:~$ cd ~/Maildir/new/
ted@mail:~/Maildir/new$ ls
1576825940.V801I10053cM500622.mail.coodyz.com
1576826245.V801I100544M69814.mail.coodyz.com
1576826459.V801I10054bM4159.mail.coodyz.com
1576833962.V801I10055bM300307.mail.coodyz.com
ted@mail:~/Maildir/new$ vim 1576833962.V801I10055bM300307.mail.coodyz.com
参考链接:https://www.linuxidc.com/Linux/2017-03/141392.htm
https://computingforgeeks.com/install-and-configure-dnsmasq-on-ubuntu-18-04-lts/