关键字:设计器源代码,Web设计器,工作流设计器,jQuery插件,组态设计器,SCADA系统设计器,流程图设计,表单设计建模,报表设计,可视化,设计时,运行时,轻量级开放平台。
上节讲到如何通过OOP思路设计设计器视图和元素,本节将重点讲述设计视图上的元素管理(创建组件,清除组件,打开文件,持久化设计),众所周知,设计器视图上的元素主要由组件和连线组成(连线也是组件),只是在创建时由于要先实例化组件,再在组件间连线,所以从管理上来说将它分开定义,这样我们在visualDesigner类中定义两个成员:nodes和lines,如下:
    var VisualDesigner = function (element, options) {
        this.init(element, options)
        this.nodes = {};//设计器上所有节点集合
        this.lines = {};//设计器上所有线条
    }
也许眼尖的读者已经看出来了,为啥不应该是数组集合的类型:this.nodes=[];呢?主要是为了后续通过组件id属性查找时方便,不用遍历所有节点,代码片断如下:
    /*增加元素*/
    VisualDesigner.prototype.addElement = function (e) {
        this.nodes[e.properties.id] = e;
    }
        VisualDesigner.prototype.createId = function() {
        var idx = 1;
         var name = "";
         while (true)
         {
           name = "e" + idx;
           var element = this.nodes[name]; //同名组件是否存在?
           if (element)
               idx++;
           else
               break;
         }
         return name;
    }
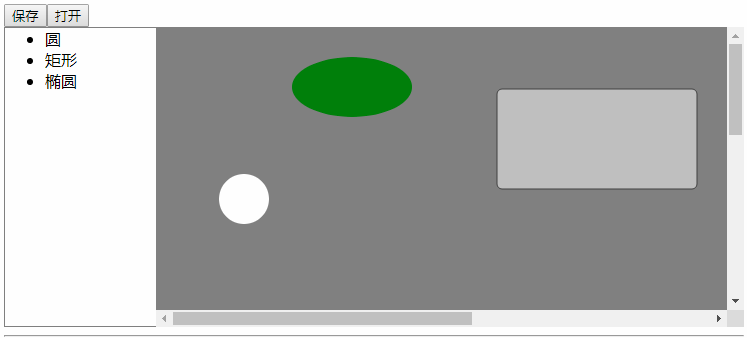
1.创建组件
页面上组件在两个地方会被创建,第一个是拖动工具面板中的组件到设计视图上(已经讲过:鼠标DRAG/DROP事件),第二个是打开保存的组件文件时,还原创建。笔者是有一些清洁代码强迫症的,只要是相同的代码,必须抽象,因此创建元素的代码可以抽象出来:
    VisualDesigner.prototype.createElement = function (typeName, options) {
        options.id = this.createId(); //为元素增加id属性
        switch (typeName) {
            case "圆":
                var circle = new Circle().init().render(options);
                this.addElement(circle);
                break;
            case "矩形":
                var rect = new Retangle().init().render(options);
                this.addElement(rect);
                break;
            case "椭圆":
                var path = new Ellipse().init().render(options);
                this.addElement(path);
                break;
        }
    }
而调用代码则简化为(传递要创建的元素类型和位置信息x/y):
        this.$element.on("drop", function (event) {
            event.preventDefault();
            var data = null;
            if (event.dataTransfer == undefined && event.originalEvent != undefined)
                data = event.originalEvent.dataTransfer.getData("text");
            else if (event.dataTransfer != undefined)
                data = event.dataTransfer.getData("text");
            var drag = false;
            me.createElement(data, { x: event.originalEvent.offsetX, y: event.originalEvent.offsetY });

        });
同样的对于不同的组件在render时也增加了一些默认属性(之前示例是在创建时指定,这是不合理的,因此移到子类组件中),比如typeName、大小、背景色等,如下示例:
    Retangle.prototype = $.extend(Retangle.prototype, {
        render: function (options) {
            this.properties.typeName = "矩形";
            this.properties.width = 200;
            this.properties.height = 100;
            this.properties.opacity = 0.5;
            this.properties = $.extend(this.properties, options);
            var rect = new paper.Path.Rectangle({
                point: [this.properties.x, this.properties.y],
                size: [this.properties.width, this.properties.height],
                radius: 5,
                strokeWidth: 1,
                strokeColor: this.properties.borderColor,
                fillColor: this.properties.backgroundColor,
                opacity: this.properties.opacity
            });
            this.group.addChild(rect);
            return this;
        }
    });
2.清除组件:
在打开一个现有设计视图时,必须将设计视图上的所有元素删除,这是如何做到的呢?
因为我们在设计视图中有一个nodes和lines对象保存了当前的所有元素,所以可以通过循环删除每一个图形化元素,实际就是通过最终的this.group.remove()方法。因此在Component基类中增加destroy方法:
    Component.prototype.destroy = function ()
    {
        this.group.remove();
    }
清除结点遍历的代码如下:
    VisualDesigner.prototype.clear = function () {
        var me = this;
        $.each(this.nodes, function (idx, item) {
            item.destroy();
            delete me.nodes[item.properties.id]
        })
    }
3.保存:
保存时,设计器的主要工作就是将当前设计视图上的所有元素和连线序列化成字符串,并返回,由用户决定这个返回的内容是存入数据库还是本地文件(本示例存到localStorage):
    VisualDesigner.prototype.getContent = function () {
        return JSON.stringify({ "nodes": this.nodes, "lines": this.lines });
    }
所以代码非常精简。
我们再看看前端index.htm中保存代码的逻辑(增加一个btnSave的button元素)
        $("#btnSave").on("click", function () {
            debugger;
            var content = view.getContent();
            localStorage.setItem("visualdesigner", content);
        })
4.打开现有的设计视图文件:
接上面,设计视图已经保存到localStorage的visualdesigner中,因此按打开(btnOpen)按钮时,先获取已存的内容,再调用设计器的open方法:
        $("#btnOpen").on("click", function () {
            var content = localStorage.getItem("visualdesigner");
            if (content)
                view.open(content);
        })
    VisualDesigner.prototype.open = function (content) {
        //此处打开操作:清除原来内容,并渲染新内容的代码
        this.clear();//先清除原来内容
        var contentObj = JSON.parse(content);
        for (var en in contentObj.nodes)
        {
            var el = contentObj.nodes[en];
            this.createElement(el.properties.typeName, el.properties)
        }
    }
完整的示例效果如下:
源代码:sample.1.4.rar
(本文为原创,在引用代码和文字时请注明出处)