本来打算继续研究Google Charts,但上头下了指示让看jqplot,无奈,只好先将Google Charts放一放,不过真心觉得Google Charts不错,现在先开始jqplot。
jqPlot是一个jQuery绘图插件,可以利用它制作漂亮的线状图和柱状图。jqPlot支持为图表设置各种不同的样式。提供Tooltips,数据点高亮显示等功能。
一、支持插件
1、jqplot.canvasAxisLabelRenderer.min.js:针对loable标签
2、jqplot.cursor.min.js:控制鼠标样式和可以放大缩小插件
二、数据的格式:
1、[300, 77, 59, 31, 85, 13, 8, 22, 95]:一维数组
2、[[[0,300], [1,77], [2,59], [3,31], [4,85]]]:二维数组,0,300:0是x坐标,1是y坐标
3、[[[0,300,"0.11"], [1,77,"0.22"], [2,59,"0.333"]]]:二维数组,0,300:0是x坐标,1是y坐标,"0.11"是鼠标移上tip的值
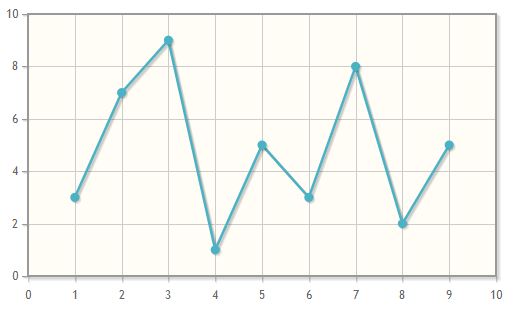
看一个简单的例子

<!DOCTYPE html>
<html>
    <head>
        <title>Line Charts</title>
        <!-- 引入jqplot的CSS-->
        <link class="include" rel="stylesheet" type="text/css" href="../jquery.jqplot.min.css" />
        <!--[if lt IE 9]><script language="javascript" type="text/javascript" src="../excanvas.js"></script><![endif]-->
        <!-- 引入jquery-->
        <script class="include" type="text/javascript" src="http://ajax.googleapis.com/ajax/libs/jquery/1.9.1/jquery.min.js"></script>
    </head>
    <body>
        <div id="chart1" style="height:300px; 500px;"></div>

        <script class="code" type="text/javascript">
            $(document).ready(function(){
              // 调用jqplot函数生成图表
              var plot1 = $.jqplot ('chart1', [[3,7,9,1,5,3,8,2,5]]);
            });
        </script>
        <!-- 引入jqplot-->
        <script class="include" type="text/javascript" src="../jquery.jqplot.min.js"></script>
    </body>
</html>
效果如下
jqPlot整的来说有三个地方需要配置。格式如:
$.jqplot('target', data, options);
target:要显示的位置,即要显示为HTML元素的ID。
data:显示的数据,一个数组的数组。
options:参数的配置项。
jqplot配置使用
参照官方文档:http://www.jqplot.com/docs/files/usage-txt.html
配置参数(参考博客)
var options =
{
    // 默认显示的分类颜色,如果分类的数量超过这里的颜色数量,则从该队列中第一个位置开始重新取值赋给相应的分类
    seriesColors: [ "#4bb2c5", "#c5b47f", "#EAA228", "#579575", "#839557", "#958c12",
        "#953579", "#4b5de4", "#d8b83f", "#ff5800", "#0085cc"],  // colors that will
         // be assigned to the series.  If there are more series than colors, colors
         // will wrap around and start at the beginning again.

    // 如果置为true并且有多个分类(如果是折线图,就必须多于一条折线),
    // 那么每个分类(折线)在纵轴上的值为其前所有分类纵轴值总和与其纵,轴值相加值
    // 例: 当前分类纵轴值为Y3,画出的值为Y1+Y2+Y3
    stackSeries: false, // if true, will create a stack plot.
                        // Currently supported by line and bar graphs.

    animate: true,          // 动画的形势,显示K线

    //设置当前图的标题
    title: '',      // Title for the plot.  Can also be specified as an object like:

    title: {
        // 设置当前图的标题
        text: '',   // title for the plot
        // 设置当前图的标题是否显示
        show: true,
    },

    axesDefaults: {
        // 是否自动显示坐标轴
        show: false,
        // 横(纵)轴最小刻度值
        min: null,      // minimum numerical value of the axis.  Determined automatically.
        // 横(纵)轴最大刻度值
        max: null,      // maximum numverical value of the axis.  Determined automatically.
        // 横(纵)轴度值增涨因子
        pad: 1.2,       // a factor multiplied by the data range on the axis to give the
                        // axis range so that data points don't fall on the edges of the axis.
        // 设置横(纵)坐标的刻度上的值,可为该ticks数组中的值
        // 设置刻度的数值

        ticks: [0,10,20], // 一、[0,10,20]:x和y轴的该度都为0,10,20  二、[[0,10],[1,45],[2,30]]:二维数组[0,10]为第一个该度的值,0是第一个该度,10为值
        // 一个相除因子,用于设置横(纵)坐标刻度间隔,横(纵)坐标刻度间隔值=横(纵)坐标区间长度/(numberTicks-1)
        numberTicks: undefined,
        // 设置横(纵)轴上数据加载的渲染器
        renderer: $.jqplot.LinearAxisRenderer,  // renderer to use to draw the axis,
        // 设置renderer的Option配置对象,线状图不需要设置
        rendererOptions: {},    // options to pass to the renderer.  LinearAxisRenderer
                                // has no options,
        tickOptions: {
            // 设置刻度在坐标轴上的显示方式:分为:坐标轴外显示,内显示,和穿过显示;其值分别为 'outside', 'inside' or 'cross'
            mark: 'outside',    // Where to put the tick mark on the axis
                                // 'outside', 'inside' or 'cross',
            // 设置是否显示刻度
            showMark: true,
            // 是否在图表区域显示刻度值网格
            showGridline: true, // wether to draw a gridline (across the whole grid) at this tick,
            // 每个刻度线顶点距刻度线在坐标轴上点距离(像素为单位)如果mark值为 'cross',
            // 那么每个刻度线都有上顶点和下顶点,刻度线与坐标轴在刻度线中间交叉,那么这时这个距离×2
            markSize: 4,        // length the tick will extend beyond the grid in pixels.  For
                                // 'cross', length will be added above and below the grid boundary,
            // 是否显示刻度线,与刻度线同方向的网格线,以及坐标轴上的刻度值
            show: true,         // wether to show the tick (mark and label),
            // 是否显示刻度线以及坐标轴上的刻度值
            showLabel: true,    // wether to show the text label at the tick,
            // 设置坐标轴上刻度值显示格式,例:'%b %#d, %Y'表示格式"月 日,年","AUG 30,2008"
            formatString: '',   // format string to use with the axis tick formatter
            // 刻度值的字体大小
            fontSize: '10px',
            // 刻度值上字体
            fontFamily: 'Tahoma',
            // 刻度值与坐标轴夹角,角度为坐标轴正向顺时针方向
            angle: 40,
            // 字体的粗细
            fontWeight: 'normal',
            // 刻度值在所在方向(坐标轴外)上的伸展(拉伸)度
            fontStretch: 1
        }
        // 是否显示刻度线以及坐标轴上的刻度值
        showTicks: true,        // wether or not to show the tick labels,
        // 设置是否显示刻度
        showTickMarks: true,    // wether or not to show the tick marks
        // 如果有多个纵(横)坐标轴,通过该属性设置这些坐标轴是否以不同颜色显示
        useSeriesColor: true
    },

    axes: {
        // 和axesDefaults中的参数相同
        xaxis: {
tickOptions:{ angle: -30 // 控制label显示的角度 }, tickOptions: {
showGridline: false // 隐藏x坐标线
}
},
        yaxis: {
            // same options as axesDefaults
        },
        x2axis: {
            // same options as axesDefaults
        },
        y2axis: {
            // same options as axesDefaults
        }
    },

    // 如果有多个分类,这可通过该配置属性设置各个分类的共性属性
    seriesDefaults: {
        // 设置是否渲染整个图表区域(即显示图表中内容)
        show: true,     // wether to render the series.
        xaxis: 'xaxis', // either 'xaxis' or 'x2axis'.
        yaxis: 'yaxis', // either 'yaxis' or 'y2axis'.
        // 用于显示在分类名称框中的分类名称
        label: '',      // label to use in the legend for this line.
        // 分类在图标中表示(折现,柱状图等)的颜色
        color: '',      // CSS color spec to use for the line.  Determined automatically.
        // 分类图(特别是折线图)的线宽
        lineWidth: 2.5, // Width of the line in pixels.
        // 各图在图表中是否显示阴影区域
        shadow: true,   // show shadow or not.
        // 设置阴影区域的角度,从x轴顺时针方向旋转
        shadowAngle: 45,    // angle (degrees) of the shadow, clockwise from x axis.
        // 设置阴影区域偏移出图片边框的距离
        shadowOffset: 1.25, // offset from the line of the shadow.
        // 设置影音区域重叠阴影的数量
        shadowDepth: 3,     // Number of strokes to make when drawing shadow.  Each
                            // stroke offset by shadowOffset from the last.
        // 设置阴影的透明度
        shadowAlpha: 0.1,   // Opacity of the shadow.
        // 是否显示图表中的折线(折线图中的折线)
        showLine: true,     // whether to render the line segments or not.
        // 是否强调显示图中的数据节点
        showMarker: true,   // render the data point markers or not.
        // 是否填充图表中折线下面的区域(填充颜色同折线颜色)
        fill: false,        // fill under the line,
        // 在fill为true的状态下,在填充区域最上面显示一条线(如果是折线图则显示该折线)
        fillAndStroke: false,       // *stroke a line at top of fill area.
        // 设置填充区域的颜色
        fillColor: undefined,       // *custom fill color for filled lines (default is line color).
        // 设置填充区域的透明度
        fillAlpha: undefined,       // *custom alpha to apply to fillColor.
        // 利用渲染器(这里是利用折线图LineRenderer)渲染现有图表,从而转换成所需图表
        renderer: $.jqplot.LineRenderer],    // renderer used to draw the series.
        // 传给上个属性所设置渲染器的option对象
        rendererOptions: {}, // options passed to the renderer.  LineRenderer has no options.
        markerRenderer: $.jqplot.MarkerRenderer,    // renderer to use to draw the data
                                                    // point markers.
        markerOptions: {
            // 是否在图中显示数据点
            show: true,             // wether to show data point markers.
            // 各个数据点在图中显示的方式,默认是"filledCircle"(实心圆点),
            //其他几种方式circle,diamond, square, filledCircle,filledDiamond or filledSquare.
            style: 'filledCircle',  // 节点的圆 circle 空心圆, diamond 菱形, square 空方块, filledCircle 实心圆.
                                    // filledDiamond or filledSquare.
            // 数据点各个的边的宽度(如果设置过大,会显示的类似于实心点)
            lineWidth: 2,       // width of the stroke drawing the marker.
            // 数据点的大小
            size: 9,            // size (diameter, edge length, etc.) of the marker.
            // 数据点的颜色
            color: '#666666'    // color of marker, set to color of line by default.
            // 是否为数据点显示阴影区(增加立体效果)
            shadow: true,       // wether to draw shadow on marker or not.
            // 设置阴影区域的角度,从x轴顺时针方向旋转
            shadowAngle: 45,    // angle of the shadow.  Clockwise from x axis.
            // 设置阴影区域偏移出图片边框的距离
            shadowOffset: 1,    // offset from the line of the shadow,
            // 设置阴影区域的宽度
            shadowDepth: 3,     // Number of strokes to make when drawing shadow.  Each stroke
                                // offset by shadowOffset from the last.
            // 设置阴影区域的透明度
            shadowAlpha: 0.07   // Opacity of the shadow
        },
        //是否允许拖动(如果dragable包已引入),默认可拖动
        isDragable: true
    },

    series:[
        // 如果有多个分类需要显示,这在此处设置各个分类的相关配置属性
        // 例:设置各个分类在分类名称框中的分类名称
        // series:[label: 'Traps Division'},{label: 'Decoy Division'},{label: 'Harmony Division'}]
        // 配置参数设置同seriesDefaults
        {Each series has same options as seriesDefaults},
        {You can override each series individually here}
    ],

    legend: {
        // 设置是否出现分类名称框(即所有分类的名称出现在图的某个位置)
        show: false,
        // 分类名称框出现位置,ewsn分别代表东西南北, nw, n, ne, e, se, s, sw, w.
        location: 'ne',     // compass direction, nw, n, ne, e, se, s, sw, w.
        // 分类名称框距图表区域与location指向的边框的x轴距离(单位px),若location为n或s,则该值不起作用
        xoffset: 12,        // pixel offset of the legend box from the x (or x2) axis.
        // 分类名称框距图表区域与location指向的边框的y轴的距离(单位px),若location为w或e,则该值不起作用
        yoffset: 12,        // pixel offset of the legend box from the y (or y2) axis.
        // 分类名称框距图表区域背景色
        background:'',
        // 分类名称框距图表区域内字体颜色
        textColor:''
    },

    grid: {
        // 是否显示网格线
        drawGridLines: true,        // wether to draw lines across the grid or not.
        // 设置整个图标区域网格线的颜色
        gridLineColor: '#cccccc'    // *Color of the grid lines.
        // 设置整个图表区域的背景色
        background: '#fffdf6',      // CSS color spec for background color of grid.
        // 设置图表的(最外侧)边框的颜色
        borderColor: '#999999',     // CSS color spec for border around grid.
        // 设置图表的(最外侧)边框宽度
        borderWidth: 2.0,           // pixel width of border around grid.
        // 为整个图标(最外侧)边框设置阴影,以突出其立体效果
        shadow: true,               // draw a shadow for grid.
        // 设置阴影区域的角度,从x轴顺时针方向旋转
        shadowAngle: 45,            // angle of the shadow.  Clockwise from x axis.
        // 设置阴影区域偏移出图片边框的距离
        shadowOffset: 1.5,          // offset from the line of the shadow.
        // 设置阴影区域的宽度
        shadowWidth: 3,             // width of the stroke for the shadow.
        // 设置影音区域重叠阴影的数量
        shadowDepth: 3,             // Number of strokes to make when drawing shadow.
                                    // Each stroke offset by shadowOffset from the last.
        // 设置阴影区域的透明度
        shadowAlpha: 0.07,          // Opacity of the shadow
        renderer: $.jqplot.CanvasGridRenderer,  // renderer to use to draw the grid.
        rendererOptions: {}         // options to pass to the renderer.  Note, the default
                                    // CanvasGridRenderer takes no additional options.
    },

    // Plugin and renderer options.

    // BarRenderer.
    // With BarRenderer, you can specify additional options in the rendererOptions object
    // on the series or on the seriesDefaults object.  Note, some options are respecified
    // (like shadowDepth) to override lineRenderer defaults from which BarRenderer inherits.
    // jqPlot各个不同插件的Option对象设置
    // BarRenderer(设置柱状图的Option对象)
    // 该Option对象适用与柱状图的series和seriesDefault属性的相关配置对象设置
    seriesDefaults: {
        rendererOptions: {
            // 设置同一分类两个柱状条之间的距离(px)
            barPadding: 8,      // number of pixels between adjacent bars in the same
                                // group (same category or bin).
            // 设置不同分类的两个柱状条之间的距离(px)(同一个横坐标表点上)
            barMargin: 10,      // number of pixels between adjacent groups of bars.
            // 设置柱状图显示的方向:垂直显示和水平显示,默认垂直显示
            barDirection: 'vertical', // vertical or horizontal.
            // 设置柱状图中每个柱状条的宽度
            barWidth: null,     // width of the bars.  null to calculate automatically.
            // 设置阴影区域偏移出图片边框的距离
            shadowOffset: 2,    // offset from the bar edge to stroke the shadow.
            // 设置影音区域重叠阴影的数量
            shadowDepth: 5,     // nuber of strokes to make for the shadow.
            // 设置阴影区域的透明度
            shadowAlpha: 0.8,   // transparency of the shadow.
        }
    },

    // Cursor 光标
    // Options are passed to the cursor plugin through the "cursor" object at the top
    // level of the options object.
    // 鼠标移动到图中时,鼠标在图中显示形式,常与和高亮功能同时使用
    // 此外,通过设置该属性的zoom相关属性来对图中某个区域钻取(就选定区域放大)
    // 该配置对象直接在option下配置

    cursor: {
        // 当鼠标移动到图片上时,鼠标的显示样式,该属性值为css类
        style: 'crosshair',     // A CSS spec for the cursor type to change the
                                // cursor to when over plot.
        //是否显示光标
        show: true,
     zoom:true,    // 是否可以放大缩小
        // 是否显示提示信息栏
        showTooltip: true,      // show a tooltip showing cursor position.
        // 光标的提示信息栏是否随光标(鼠标)一起移动
        followMouse: false,     // wether tooltip should follow the mouse or be stationary.
        // 光标提示信息栏的位置设置。如果followMouse=true,那么该位置为
        // 提示信息栏相对于光标的位置。否则,为光标提示信息栏在图标中的位置
        // 该属性可选值: n, ne, e, se, etc
        tooltipLocation: 'se',  // location of the tooltip either relative to the mouse
                                // (followMouse=true) or relative to the plot.  One of
                                // the compass directions, n, ne, e, se, etc.
        // 提示信息栏距鼠标(followMouse=true)或坐标轴(followMouse=false)的位置
        tooltipOffset: 6,       // pixel offset of the tooltip from the mouse or the axes.
        // 是否在信息提示栏中显示光标位置(取其据图标左和上边缘线像素距离)
        showTooltipGridPosition: false,     // show the grid pixel coordinates of the mouse
                                            // in the tooltip.
        // 是否显示提示光标所在位置(取其在横纵轴上数据值)的信息栏
        // 注: 此处与showTooltipGridPosition值区别,前者显示坐标值,该处显示的是数据值
        showTooltipUnitPosition: true,      // show the coordinates in data units of the mouse
                                            // in the tooltip.
        // 用于设置提示信息框中数据显示的格式前提条件是useAxesFormatters为false.
        // 此时信息提示框中数据格式不再与坐标轴一致,而是以此为准.同时,该属性还支持html格式字符串
        // 例:'<b><i><span style="color:red;" mce_style="color:red;">hello</span></i></b> %.2f'
        tooltipFormatString: '%.4P',    // sprintf style format string for tooltip values.
        // 提示信息框中数据显示的格式是否和该数据在坐标轴上显示格式一致
        useAxesFormatters: true,        // wether to use the same formatter and formatStrings
                                        // as used by the axes, or to use the formatString
                                        // specified on the cursor with sprintf.
        // 设定只有特殊的axes有tooltip提示
        tooltipAxesGroups: [],  // show only specified axes groups in tooltip.  Would specify like:
                                // [['xaxis', 'yaxis'], ['xaxis', 'y2axis']].  By default, all axes
                                // combinations with for the series in the plot are shown.

    },

    // Dragable 拖动
    // Dragable options are specified with the "dragable" object at the top level
    // of the options object.

    dragable: {
        // 当拖动数据点时,拖动线与拖动数据点颜色
        color: undefined,       // custom color to use for the dragged point and dragged line
                                // section. default will use a transparent variant of the line color.
        //设置拖动的的范围: 'x'(只能在横向上拖动), 'y'(只能在纵向上拖动), or 'none'(无限制)
        constrainTo: 'none',    // Constrain dragging motion to an axis: 'x', 'y', or 'none'.
    },

    // Highlighter 高亮
    // Highlighter options are specified with the "highlighter" object at the top level
    // of the options object.

    highlighter: {
        // 当鼠标移动到放大的数据点上时,设置增大的数据点的宽度
        // 目前仅适用于非实心数据点
        lineWidthAdjust: 2.5,   // pixels to add to the size line stroking the data point marker
                                // when showing highlight.  Only affects non filled data point markers.
        // 当鼠标移动到数据点上时,数据点扩大的增量增量
        sizeAdjust: 5,          // pixels to add to the size of filled markers when drawing highlight.
        // 是否显示提示信息栏
        showTooltip: true,      // show a tooltip with data point values.
        // 提示信息显示位置: n, ne, e, se, s, sw, w, nw
        tooltipLocation: 'nw',  // location of tooltip: n, ne, e, se, s, sw, w, nw.
        // 设置提示信息栏出现和消失的方式(是否淡入淡出)
        fadeTooltip: true,      // use fade effect to show/hide tooltip.
        // 设置提示信息栏淡入淡出的速度: slow, def, fast, 或者是一个毫秒数的值.
        tooltipFadeSpeed: "fast"// slow, def, fast, or a number of milliseconds.
        // 提示信息栏据被高亮显示的数据点的偏移位置,以像素计
        tooltipOffset: 2,       // pixel offset of tooltip from the highlight.
        // 提示信息框显示数据点那个坐标轴上的值,目前有横/纵/横纵三种方式,值分别为 x, y or both.
        tooltipAxes: 'both',    // which axis values to display in the tooltip, x, y or both.
        // 提示信息栏不同值之间的间隔符号
        tooltipSeparator: ', '  // separator between values in the tooltip.
        // 提示信息框中数据显示的格式是否和该数据在坐标轴上显示格式一致
        useAxesFormatters: true // use the same format string and formatters as used in the axes to
                                // display values in the tooltip.
        // 用于设置提示信息框中数据显示的格式,前提条件是useAxesFormatters为false.
        // 此时信息提示框中数据格式不再与坐标轴一致,而是以此为准,同时,该属性还支持html格式字符串
        // 例:'<b><i><span style="color:red;" mce_style="color:red;">hello</span></i></b> %.2f'
        tooltipFormatString: '%.5P' // sprintf format string for the tooltip.  only used if
                                    // useAxesFormatters is false.  Will use sprintf formatter with
                                    // this string, not the axes formatters.
    },

    // LogAxisRenderer 指数渲染器
    // LogAxisRenderer add 2 options to the axes object.  These options are specified directly on
    // the axes or axesDefaults object.
    // 该渲染器只有两个属性,指数渲染器通过axesDefaults和axes配置对象进行配置

    axesDefaults: {
        // 指数的底数
        base: 10,                   // the logarithmic base.
        // 坐标轴显示方式:'even' or 'power'
        // 'even' 产生的是均匀分布于坐标轴上的坐标刻度值
        // 而'power' 则是根据不断增大的增数来确定坐标轴上的刻度
        tickDistribution: 'even',   // 'even' or 'power'.  'even' will produce with even visiual (pixel)
                                    // spacing on the axis.  'power' will produce ticks spaced by
                                    // increasing powers of the log base.
    },

    // PieRenderer 饼状图
    // PieRenderer accepts options from the rendererOptions object of the series or seriesDefaults object.
    // 设置饼状图的OPtion对象
    // 饼状图通过seriesDefaults和series配置对象进行配置
    seriesDefaults: {
        rendererOptions: {
            // 设置饼的直径
            diameter: undefined, // diameter of pie, auto computed by default.
            // 饼距离其分类名称框或者图表边框的距离,变相该表饼的直径
            padding: 20,        // padding between pie and neighboring legend or plot margin.
            // 饼的每个部分之间的距离
            sliceMargin: 0,     // gap between slices.
            // 设置饼的每部分被填充的状态
            fill: true,         // render solid (filled) slices.
            // 为饼的每个部分的边框设置阴影,以突出其立体效果
            shadow:true,
            // 设置阴影区域偏移出饼的每部分边框的距离
            shadowOffset: 2,    // offset of the shadow from the chart.
            // 设置阴影区域的深度
            shadowDepth: 5,     // Number of strokes to make when drawing shadow.  Each stroke
                                // offset by shadowOffset from the last.
            // 设置阴影区域的透明度
            shadowAlpha: 0.07   // Opacity of the shadow
        }
    },

    // Trendline 趋势线
    // Trendline takes options on the trendline object of the series or seriesDefaults object.

    seriesDefaults: {
        trendline: {
            // 是否显示趋势线
            show: true,         // show the trend line
            // 趋势线颜色
            color: '#666666',   // CSS color spec for the trend line.
            // 趋势线名称
            label: '',          // label for the trend line.
            // 趋势线类型'linear'(直线), 'exponential'(幂值数线) or 'exp'
            type: 'linear',     // 'linear', 'exponential' or 'exp'
            // 是否设置阴影
            shadow: true,       // show the trend line shadow.
            // 趋势线宽度
            lineWidth: 1.5,     // width of the trend line.
            // 设置阴影区域的角度,从x轴顺时针方向旋转
            shadowAngle: 45,    // angle of the shadow.  Clockwise from x axis.
            // 设置阴影区域偏移出饼的每部分边框的距离
            shadowOffset: 1.5,  // offset from the line of the shadow.
            // 设置阴影区域的深度
            shadowDepth: 3,     // Number of strokes to make when drawing shadow.
                                // Each stroke offset by shadowOffset from the last.
            // 设置阴影区域的透明度
            shadowAlpha: 0.07   // Opacity of the shadow
        }
    }
}
相关渲染器
1. dateAxisRenderer
相关引用包:
<script type="text/javascript" src="../plugins/jqplot.dateAxisRenderer.min.js" />
该渲染器主要用于显示刻度为日期格式的坐标轴,它增强了javascript的本地数据处理能力,它几乎支持所有的日期格式。
另外,该渲染器还提供了强大的格式化功能,它能将数据中日期字符串格式化为你需要的格式并显示在坐标轴的刻度线上。
2. categoryAxisRenderer
相关引用包:
<script type="text/javascript" src="../plugins/jqplot.categoryAxisRenderer.min.js" />
该渲染器主要用于将显示于刻度处的值显示与两个刻度之间,当然其表达意思也发生变化,因为刻度值处值表示某个点处的值,而它则代表某个范围内的值。
该渲染器比较适合与柱状图联合使用。
3. barRenderer
相关引用包:
<script type="text/javascript" src="../plugins/jqplot.barRenderer.min.js" />
该渲染器主要用于显示柱状图,该渲染器能够很好的控制每个组(位于一个刻度值处的各个分类)内及组间距离,并且该柱状图能够水平显示。
4. cursor
相关引用包:
<script type="text/javascript" src="../plugins/jqplot.cursor.min.js" />
该渲染器主要用于鼠标移动到图中时,鼠标在图中显示形式,常用与和高亮功能同时使用。
该渲染器相关引用包一旦引用到当前页面会,该渲染器立即生效。
5. highlighter
相关引用包:
<script type="text/javascript" src="../plugins/jqplot.highlighter.min.js" />
该渲染器主要用于当鼠标移动到图中数据点上时,在鼠标附近显示提示栏,并将相关信息显示在提示栏。默认显示值是横纵坐标轴刻度值。当然,提示框中信息是可以根据自身需要定制的。
该渲染器相关引用包一旦引用到当前页面会,该渲染器立即生效。
6. logAxisRenderer
相关引用包:
<script type="text/javascript" src="../plugins/jqplot.logAxisRenderer.min.js" />
该渲染器主要用于以指数计算的方式生成坐标轴上刻度值。默认情况下,刻度值是均匀显示的,但是刻度值也可以按指数增长的方式显示。
7. ohlcRenderer
相关引用包:
<script type="text/javascript" src="../plugins/jqplot.ohlcRenderer.min.js" />
该渲染器主要用于显示甘特图。通常情况下,该渲染器与dateAxisRenderer一起使用较多
8. dragable
相关引用包:
<script type="text/javascript" src="../plugins/jqplot.dragable.min.js" />
通过该渲染器,用户能够拖动某个数据点,jqplot会自动重画拖动后的新图表。同时,被拖动的数据点的数据值也随着拖动发生变化。
9. trendline
相关引用包:
<script type="text/javascript" src="../plugins/jqplot.trendline.min.js" />
该渲染器主要用于对现有数据进行线性回归计算,并自动将计算结果以趋势线的形式展示出来,当用户拖动某个数据点时,趋势线亦随用户拖动而变化。
Hooks钩子
$.jqplot是jQuery的函数,当用户创建一个plot图表时,被调用。
jqPlot Pugin Hooks即下面这些钩子,都是数组,可以往里面添加方法,在触发相应的钩子时,依次取出钩子中的函数执行。
$.jqplot.eventListenerHooks有些例外,下面注释会做解释。
$.jqplot.preInitHooks                   // 在初始化之前执行  called before initialization.
$.jqplot.postInitHooks                  // 在初始化之后执行called after initialization.
$.jqplot.preParseOptionsHooks           // 在解析options参数之前执行  called before user options are parsed.
$.jqplot.postParseOptionsHooks          // 在解析options参数之后执行  called after user options are parsed.
$.jqplot.preDrawHooks                   // 在绘制图表之前执行  called before plot draw.
$.jqplot.postDrawHooks                  // 在绘制图表之后执行  called after plot draw.
$.jqplot.preDrawSeriesHooks             // 在绘制每个坐标轴之前执行  called before each series is drawn.
$.jqplot.postDrawSeriesHooks            // 在绘制每个坐标轴之后执行  called after each series is drawn.
$.jqplot.preDrawLegendHooks             // 在绘制图例之前执行,图例就是指图表中的标识 called before the legend is drawn.
$.jqplot.addLegendRowHooks              // 在绘制图例之后执行,所以插件可以在图例表里添加几行
                                        // called at the end of legend draw, so plugins can add rows to the legend table.
$.jqplot.preSeriesInitHooks             // 在数据线初始化之前执行  called before series is initialized.
$.jqplot.postSeriesInitHooks            // 在数据线初始化之后执行  called after series is initialized.
$.jqplot.preParseSeriesOptionsHooks     // 在解析数据线相关参数之前执行  called before series related options are parsed.
$.jqplot.postParseSeriesOptionsHooks    // 在解析数据线相关参数之后执行  called after series related options are parsed.
$.jqplot.eventListenerHooks             // 绘制结束后,将事件绑定到grid区域的顶部  例:$.jqplot.eventListenerHooks.push(['jqplotClick', function(){alert("event")}]);
                                        // called at the end of plot drawing, binds listeners to the event canvas which lays on top of the grid area.
$.jqplot.preDrawSeriesShadowHooks       // 当数据线有阴影时,在绘制数据线阴影之前执行  called before series shadows are drawn.
$.jqplot.postDrawSeriesShadowHooks      // 当数据线有阴影时,在绘制数据线阴影之后执行  called after series shadows are drawn.
使用钩子的小例子
<!DOCTYPE html>
<html>
    <head>
        <title>Line Charts</title>
        <meta charset="utf8">
        <!-- 引入jqplot的CSS-->
        <link class="include" rel="stylesheet" type="text/css" href="../jquery.jqplot.min.css" />
        <!--[if lt IE 9]><script language="javascript" type="text/javascript" src="../excanvas.js"></script><![endif]-->
        <!-- 引入jquery-->
        <script class="include" type="text/javascript" src="http://ajax.googleapis.com/ajax/libs/jquery/1.9.1/jquery.min.js"></script>
    </head>
    <body>
        <div id="chart1" style="height:300px; 500px;"></div>

        <script class="code" type="text/javascript">
            $(document).ready(function() {

              $.jqplot.preInitHooks.push(function() {
                alert("初始化之前");
              });
              $.jqplot.postInitHooks.push(function() {
                alert("初始化结束");
              });
              $.jqplot.preParseOptionsHooks.push(function() {
                alert("解析options参数之前");
              });
              $.jqplot.postParseOptionsHooks.push(function() {
                alert("解析options参数结束");
              });
              $.jqplot.preDrawHooks.push(function() {
                alert("绘制图表之前");
              });
              $.jqplot.postDrawHooks.push(function() {
                alert("绘制图表结束");
              });
              $.jqplot.preDrawSeriesHooks.push(function() {
                alert("绘制每条数据线之前");
              });
              $.jqplot.postDrawSeriesHooks.push(function() {
                alert("绘制一个数据线结束");
              });
              $.jqplot.preSeriesInitHooks.push(function() {
                alert("数据线初始化之前");
              });
              $.jqplot.postSeriesInitHooks.push(function() {
                alert("数据线初始化结束");
              });
              $.jqplot.eventListenerHooks.push(['jqplotClick', function(){
                alert("触发点击事件")
              }]);
              // 调用jqplot函数生成图表
              var plot1 = $.jqplot ('chart1', [[3,7,9,1,5,3,8,2,5]]);

            });
        </script>
        <!-- 引入jqplot-->
        <script class="include" type="text/javascript" src="../jquery.jqplot.min.js"></script>
    </body>
</html>