第一步下载linux环境下的安装包,并把安装包解压到/usr/local/目录下

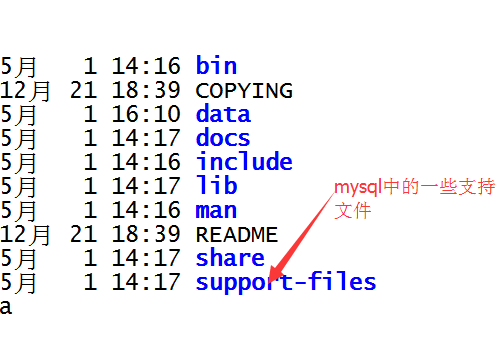
解压后的文件如下
第二步:安装前的一些准备工作
(1)建立软链接
#ln -s mysql-5.7.25-linux-glibc2.12-x86_64 mysql
(2)创建mysql组与mysql 用户
#groupadd msyql
创建的mysql用户不能登录只是用来启动mysql数据库,且其家目录为/usr/local/mysql,并不是/home/mysql
#useradd -r -s /sbin/nologin -g mysql mysql -d /usr/local/mysql
(3)在/user/local/目录下创建mysql-files目录,且赋予750权限
#mkdir mysql-file
#chmod 750 mysql-files

(4)把/user/local/mysql目录的所属用户设置成mysql用户,所属组都设置成mysql组

第三步:mysql的安装
(1)使用/usr/local/mysql/bin目录下的mysqld进行初始化
[root@slave1 mysql]# bin/mysqld --initialize --user=mysql --basedir=/usr/local/mysql --datadir=/usr/local/mysql/data
--user=mysql 代表初始化时,使用的linux用户是mysql用户
--basedir=/usr/local/mysql 代表mysql安装的目录是/usr/local/mysql
--datadir=/usr/local/mysql/data 代表mysql以后的数据库都存放在/usr/local/mysql/data
注意的一点就是如果/etc/my.cnf文件存在,一些配置信息会读取这个配置文件中的内容,如果在这个文件中配置了 log-error ,那么mysql的初始化过程不会打印到标准输出中,而是输出到log-error配置的文件中。初始化中会给出一个root的初始化密码,要记住

(2)在/etc/目录下创建配置文件,/etc/my.cnf
[mysqld]
basedir=/usr/local/mysql
datadir=/usr/local/mysql/data
user=mysql
# Disabling symbolic-links is recommended to prevent assorted security risks
symbolic-links=0
default-storage-engine=InnoDB
innodb-file-per-table=1
character_set_server=utf8mb4

[mysqld_safe]

[client]
default-character-set=utf8mb4
(3)启动mysql
方法一:手动启动
#mysqld_safe --user=mysql &
方法二:使用安装包中的mysql.server脚本启动
首先把脚本复制到linux的/etc/init.d/ 目录下,然后把mysql.server重命名为mysqld

再重命名后的mysqld设置成开机启动

[root@slave1 mysql]# cp ./support-files/mysql.server /etc/init.d/
[root@slave1 mysql]# mv /etc/init.d/mysql.server /etc/init.d/mysqld
[root@slave1 mysql]# chkconfig --add mysqld
[root@slave1 mysql]# chkconfig mysqld on
启动mysql
[root@slave1 mysql]# service mysqld start
Starting MySQL.Logging to '/usr/local/mysql/data/slave1.err'.
 SUCCESS!
查看一些mysqld的启动情况
[root@slave1 mysql]# ps aux| grep mysqld
root      1689  0.1  0.1  11436  1540 pts/2    S    18:12   0:00 /bin/sh /usr/local/mysql/bin/mysqld_safe --datadir=/usr/local/mysql/data --pid-file=/usr/local/mysql/data/slave1.pid
mysql     1861  4.0 17.6 1168192 180332 pts/2  Sl   18:12   0:00 /usr/local/mysql/bin/mysqld --basedir=/usr/local/mysql --datadir=/usr/local/mysql/data --plugin-dir=/usr/local/mysql/lib/plugin --user=mysql --log-error=slave1.err --pid-file=/usr/local/mysql/data/slave1.pid
root      1891  0.0  0.0 103248   868 pts/2    S+   18:12   0:00 grep mysqld
可以看到,其实采用脚本启动调用的也是mysqld_safe命令
(4)把/usr/local/mysql/bin目录加入到linux的PATH变量,这样在使用/usr/local/mysql/bin目录下的命令时,就不需要进入到bin目录,或者写上路径名
export MYSQL_HOME=/usr/local/mysql/
export PATH=$PATH:$MYSQL_HOME/bin
或者
[root@slave1 mysql]# echo "export PATH=$PATH:/usr/local/mysql/bin" >> /etc/profile
(5)使/etc/profile 配置文件重新生效
[root@slave1 mysql]# source /etc/profile
(6) 此时就可以登录通过 #mysql -uroot -p'密码'登录了
[root@slave1 mysql]# mysql -uroot -p
Enter password:
Welcome to the MySQL monitor.  Commands end with ; or g.
Your MySQL connection id is 2
Server version: 5.7.25

Copyright (c) 2000, 2019, Oracle and/or its affiliates. All rights reserved.

Oracle is a registered trademark of Oracle Corporation and/or its
affiliates. Other names may be trademarks of their respective
owners.

Type 'help;' or 'h' for help. Type 'c' to clear the current input statement.
首次登录需要重置密码
mysql> show databases;
ERROR 1820 (HY000): You must reset your password using ALTER USER statement before executing this statement.
mysql> alter user root@'localhost' identified by '********';
通过alter语句对密码进行重置,密码要复核一些原则,数字,字母,大小写,特殊字符等.