Adis Jugo
The Southern Side – SharePoint thoughts and bytes // SharePoint MVP
Visual Guide: Setting up My Sites in SharePoint 2013
One of the SharePoint 2013 puzzle pieces which got some major improvements are My Sites, User Profiles and news feeds. This article describes step-by-step process of setting up the my site infrastructure in the SharePoint Farm.
Prerequisite for setting up My Sites is having user profiles import or sync up and running. You can read more on user profiles sync in my previous article.
When this has been configured, we can start configuring my sites:
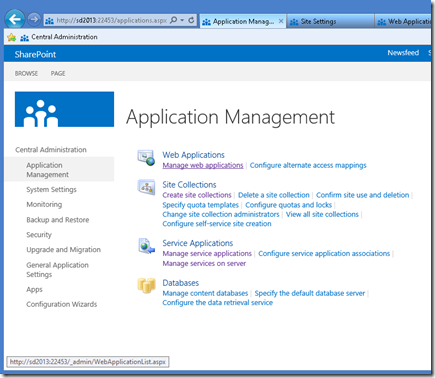
The first step us to go create (according to the best practices) own web application for hosting my sites. Go to the central administration, Application management, “Manage web applications”
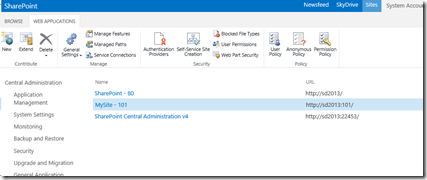
And create a dedicated web application (sd2013:101 in my example here)
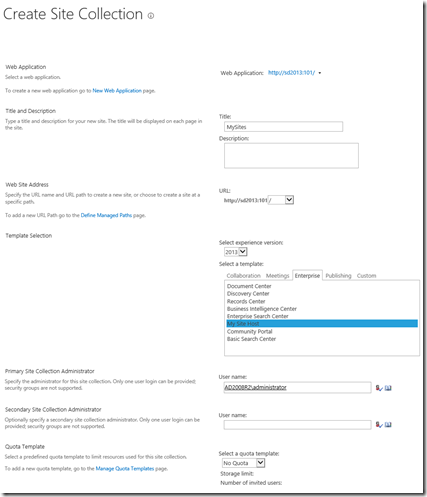
Now, the next step would be to create a site collection in the root of the newly created web application. You can of course create it inside some other managed path other than root, but since we have dedicated Web Application, root seems like an obvious choice.
Site Collection must have “2013” experience and use “My Site Host” template.
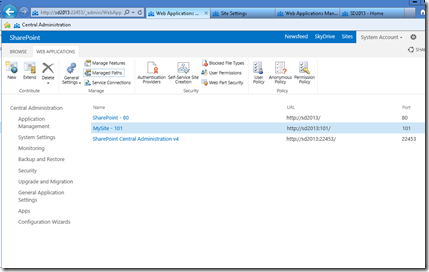
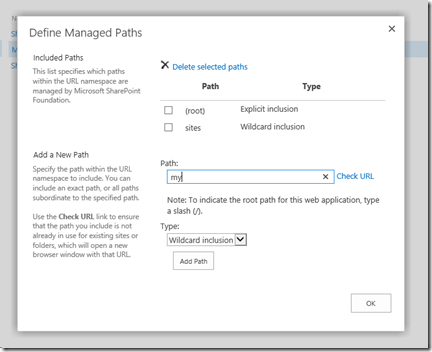
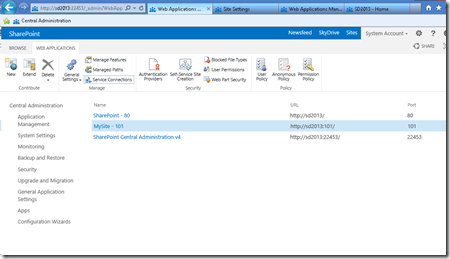
After Site Collection has been created, click on the “Managed Paths” in the web application that you created to host My Sites.
Add a new managed path with wildcard inclusion. I prefer to use “my” as the My Site managed path, but you can of course pick up anything else.
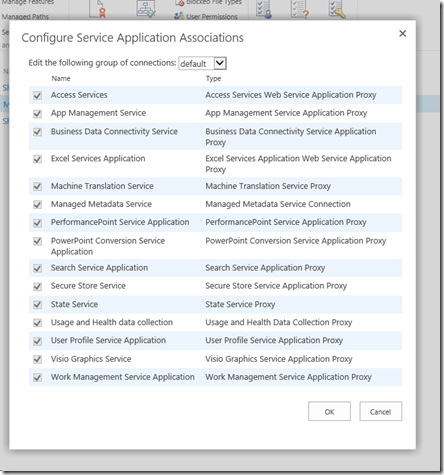
The next thing is to check service connections for the Web Application which will host my sites. Click on the “Service Connections” button to…
..see if right service applications are set up.
If you choose “Custom” (instead of the “Default”) in the Edit the following group of connections drop down, select any service applications to which you want to connect the web application. The most important ones re User Profile service application, the managed metadata service application, and the Search service application.
In my case, I’ll just proceed with “default”
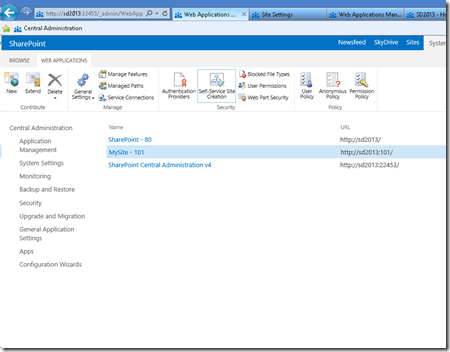
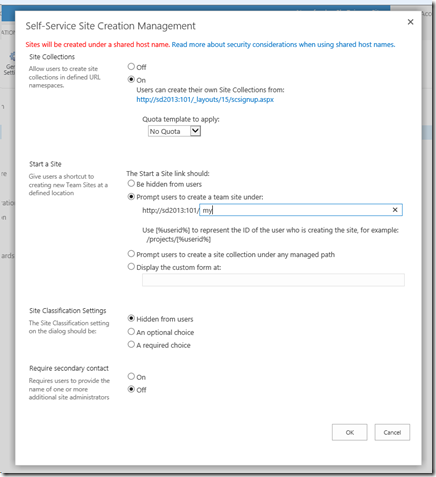
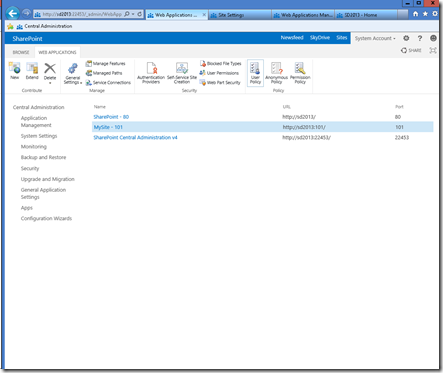
Now it’s time to set up the self service site creation. Go back to the Web application management, chose the application that you created to host My Sites, and click on the “Self Service Site Creation” button.
Click “On” in the “Site Collections” radio box, and enter your managed path in the “Start a Site” field (with “Prompt users to create a team site under” chosen)
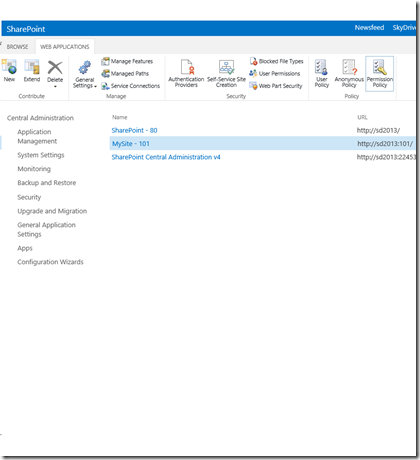
Now, the next step is to grant users permission to create new site collections (for my sites). Click on the “Permission Policy” button in the Web Application management, with the web application which hosts the my sites selected.
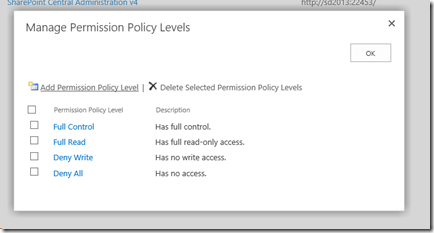
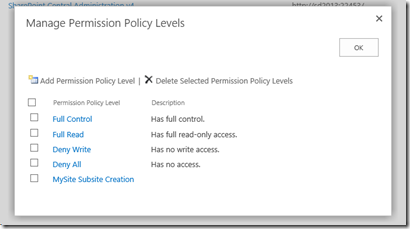
In the”Manage Permission Policy Levels”, click on the “Add Permission Policy Level”
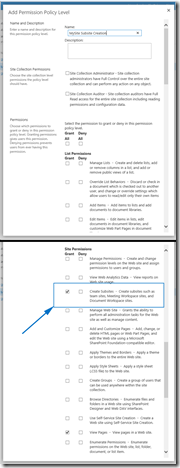
Call it however you want (“MySite Subsite Creation” in my case), and grant the “Create Subsites” permission.
Now, the new permission policy level should appear among other policy levels…
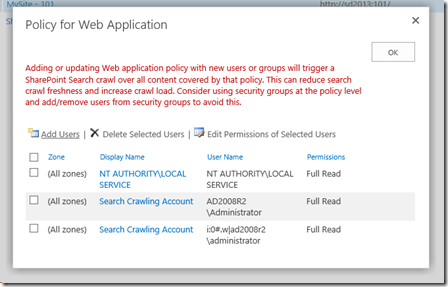
And we need to grant that policy level to the users. Click on the “Users Policy” button in the Web Application management, with the web application that you created to host My Sites selected…
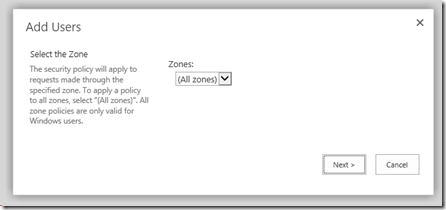
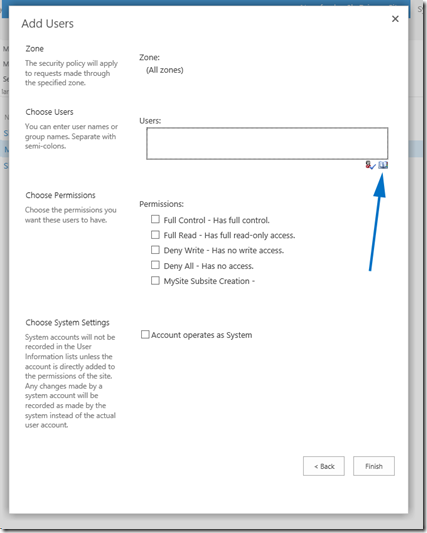
Click on the “Add users” link…
From all zones…
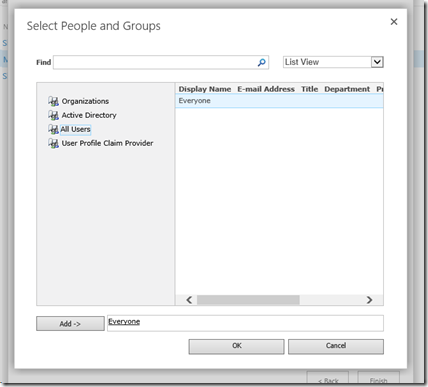
And select the users which you want to have rights to create my sites. On my case, it will be “Everyone”.
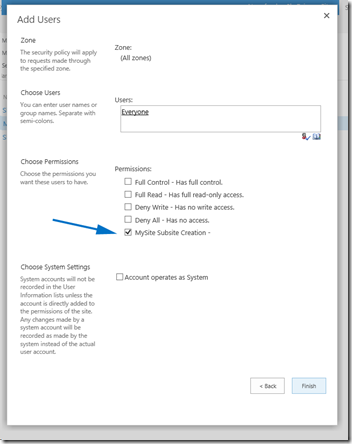
Select your newly created policy level…
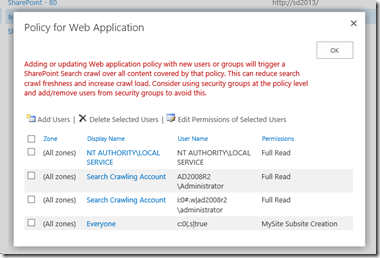
And now you should see “Everyone” with the new policy selected.
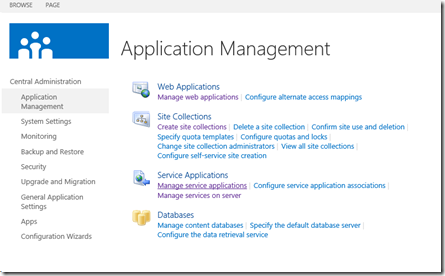
OK, everything has been set up and prepared so far. Now, finally, let’s set up the my sites. Go to the Central Administration –> Application Management, and select “Manage service applications”.
Then select the “User Profile Service Application”
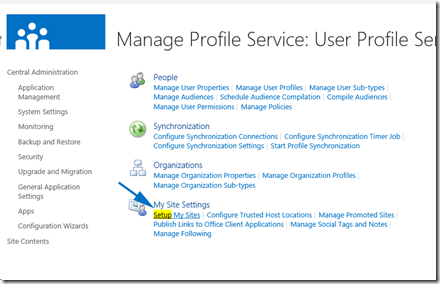
In the “User Profile Service Application”, click on “Setup My Sites”
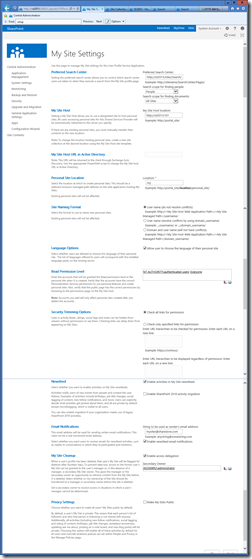
This is where you need to set up the search center, my host location (in my case – root site collection of the Web Application that serves as the host) and personal site location (managed path within the host web application – “my” in my case). Take a look at the screenshot for all the other fields (which I have used in my case):
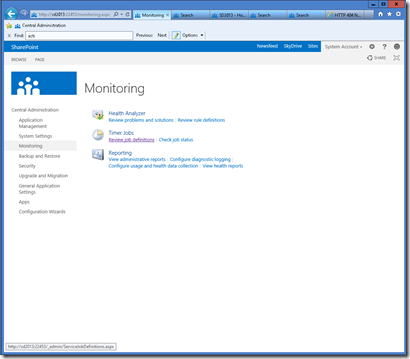
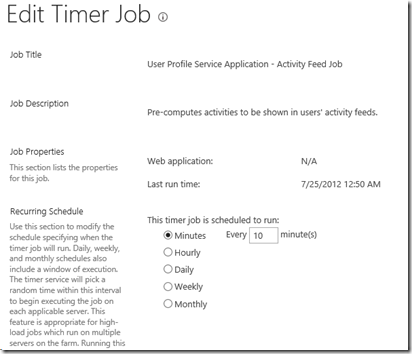
The only remaining thing would be to set up the timer job for activity feed. Go to the Central Administration –> Monitoring –>Timer Job –> Review job definitions
Find the “User Profile Service Application – Activity Feed Job”, and set up the activity feed sync timer according to your needs.
And, that’s it.
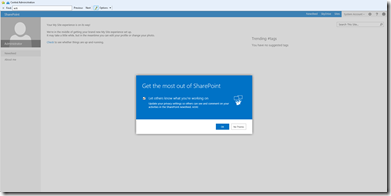
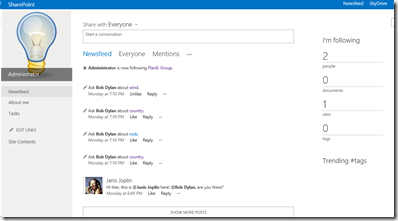
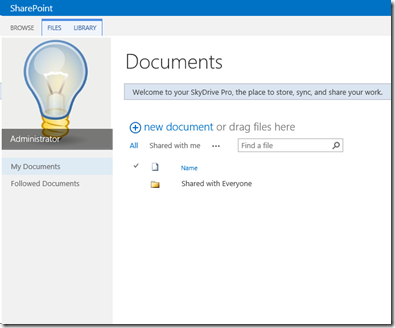
Go to the my site now, and you will be notified of my site creation for your self. Take care of your profile, follow people. Upload you private documents, share documents, follow documents – enjoy being social! ![]()
Comments
14 comments
Calendar
| M | T | W | T | F | S | S |
|---|---|---|---|---|---|---|
| « Jun | Aug » | |||||
| 1 | ||||||
| 2 | 3 | 4 | 5 | 6 | 7 | 8 |
| 9 | 10 | 11 | 12 | 13 | 14 | 15 |
| 16 | 17 | 18 | 19 | 20 | 21 | 22 |
| 23 | 24 | 25 | 26 | 27 | 28 | 29 |
| 30 | 31 | |||||
Categories
Contact
MS & Community
- 1SUG BiH
- Microsoft SharePoint
- MS Community BiH
- Nothing but SharePoint
- Planet SharePoint
- SharePoint Magazine
Quick links
