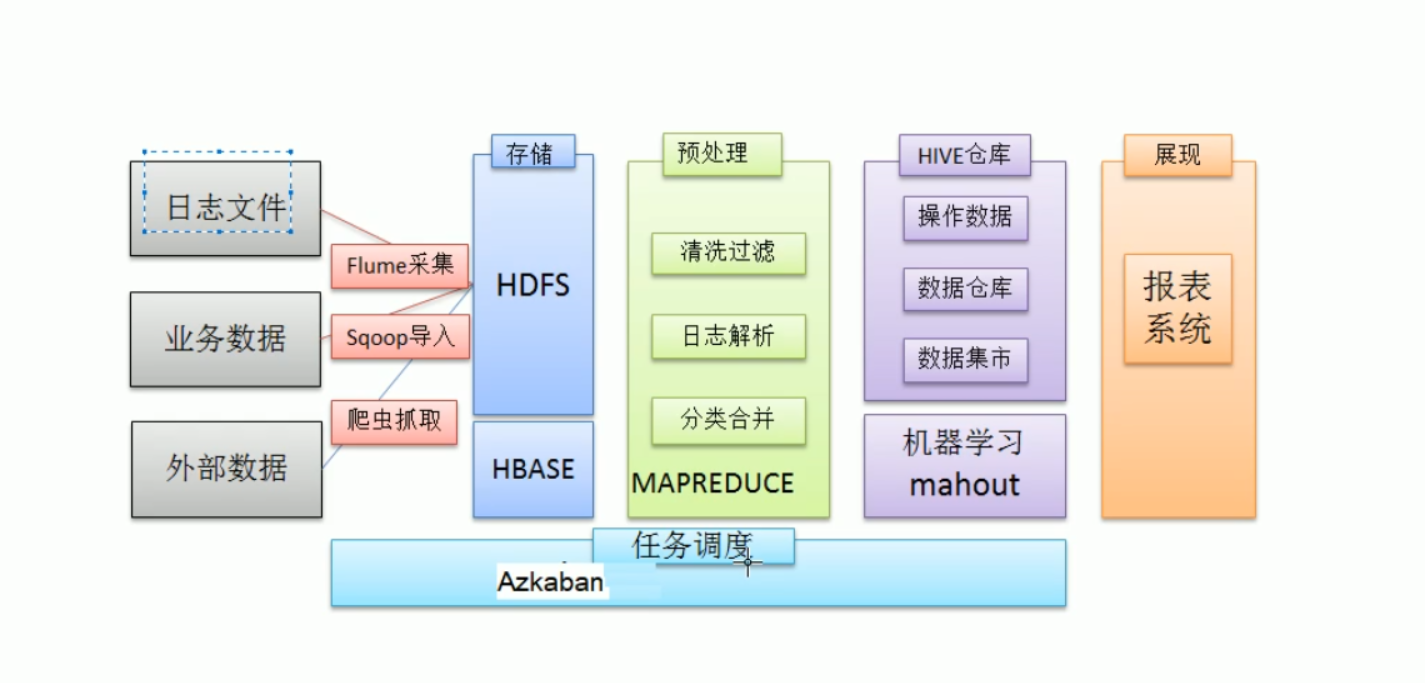
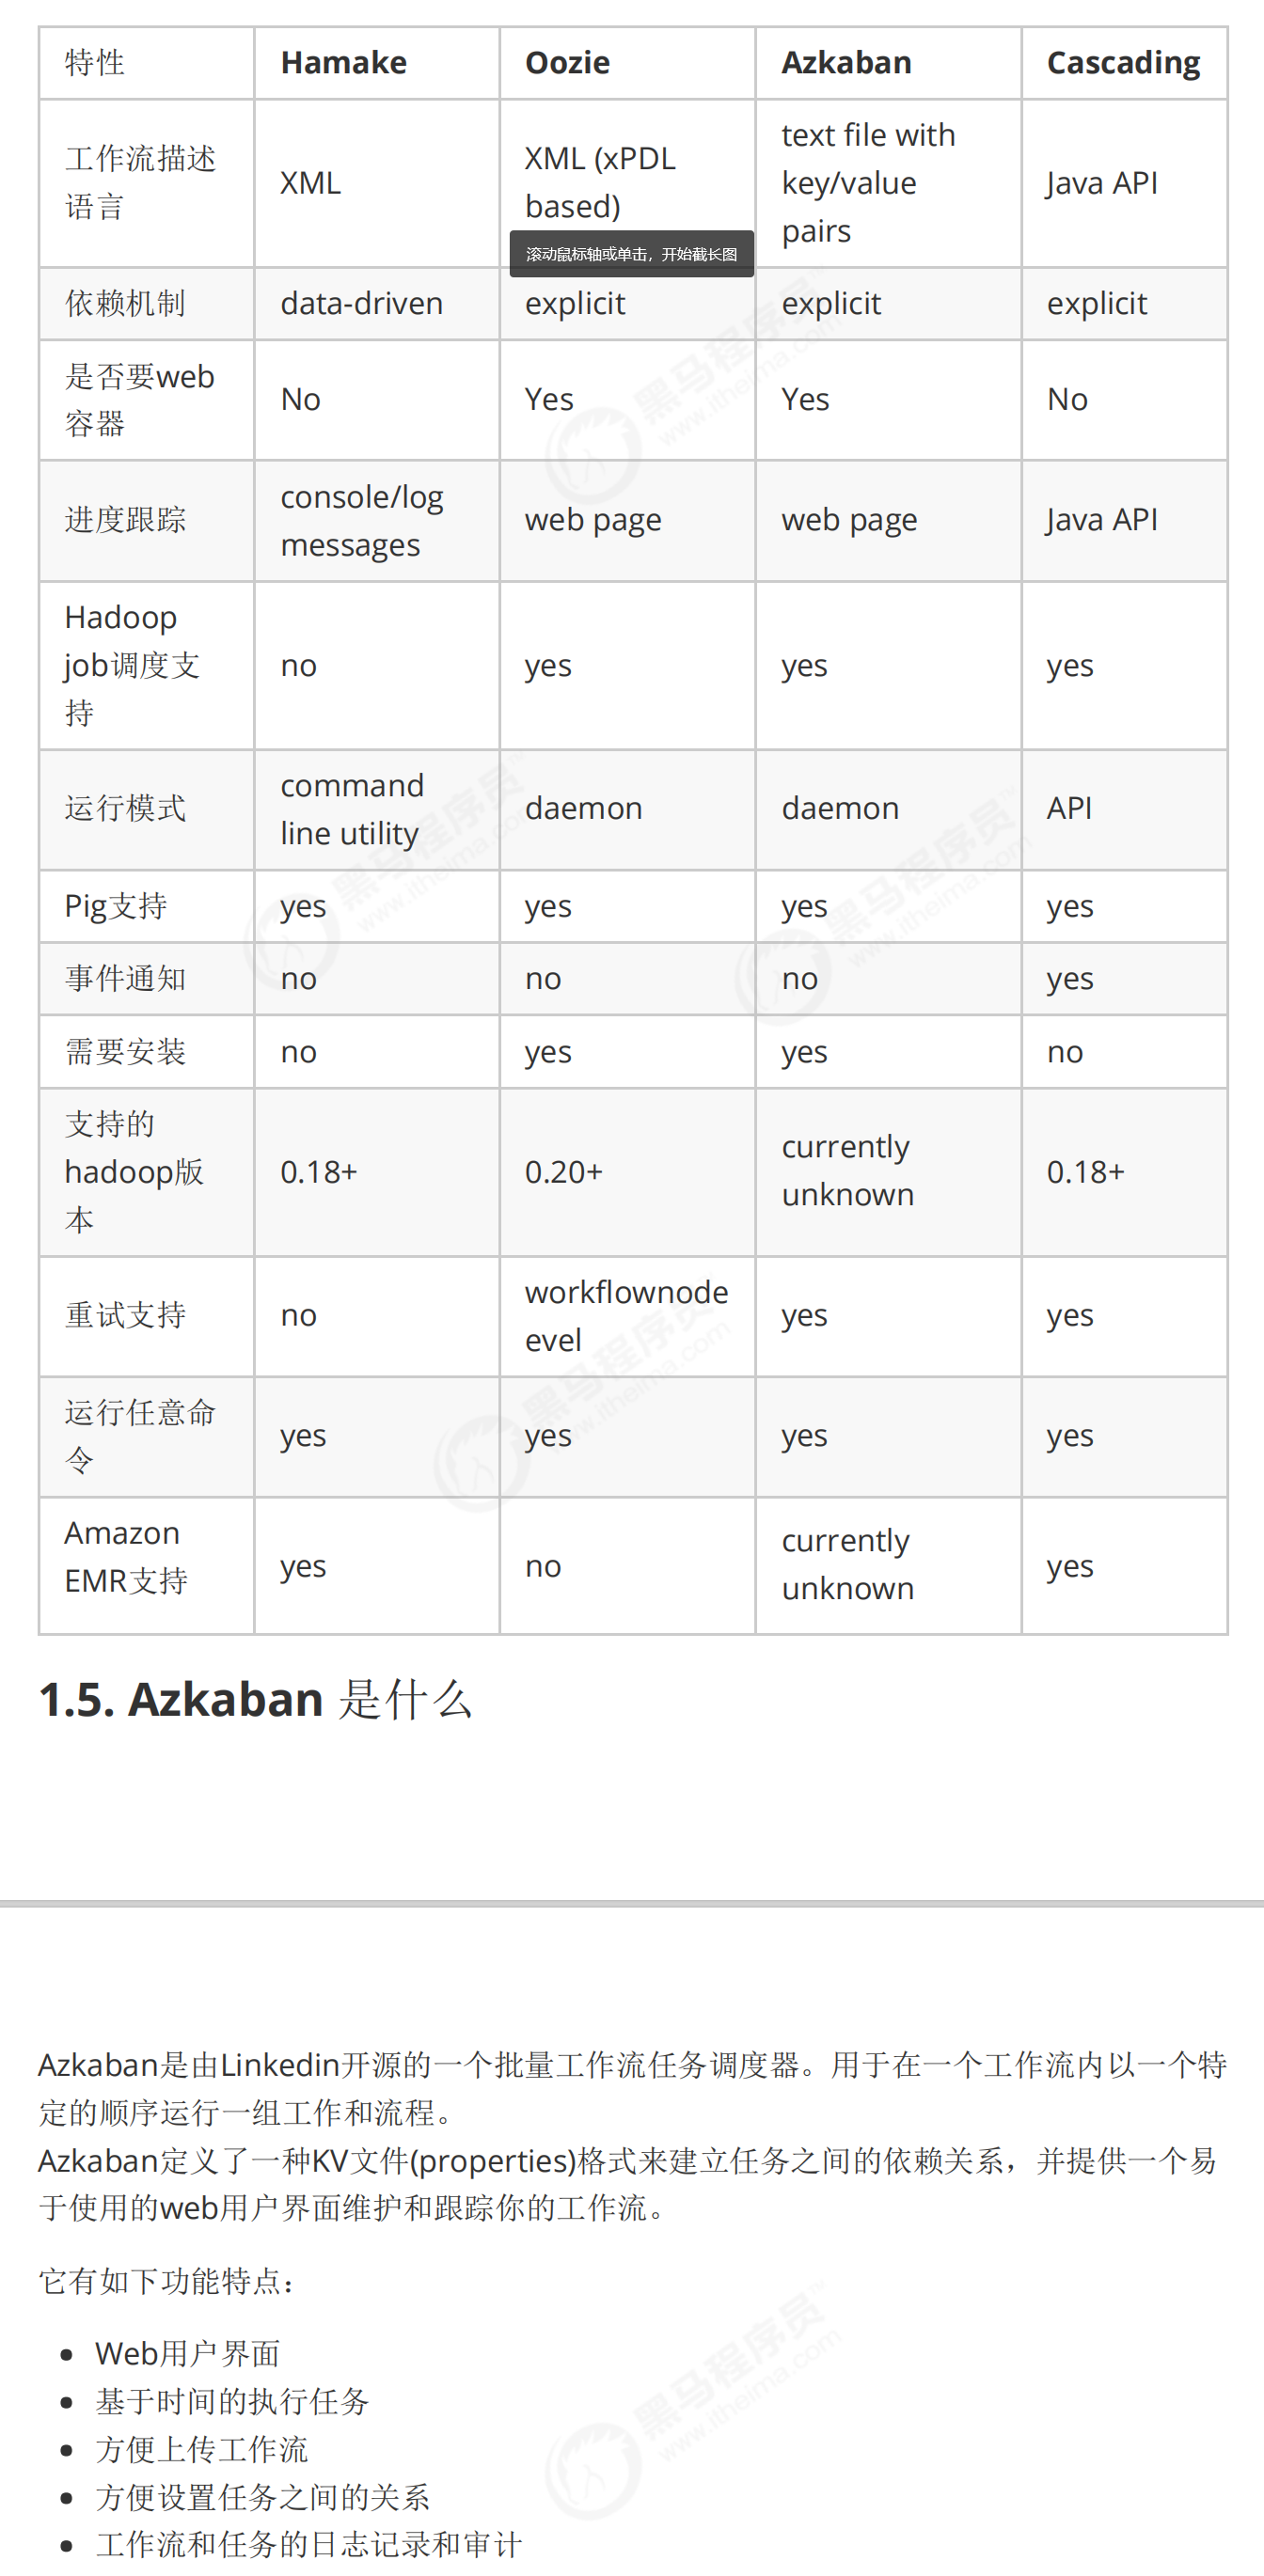
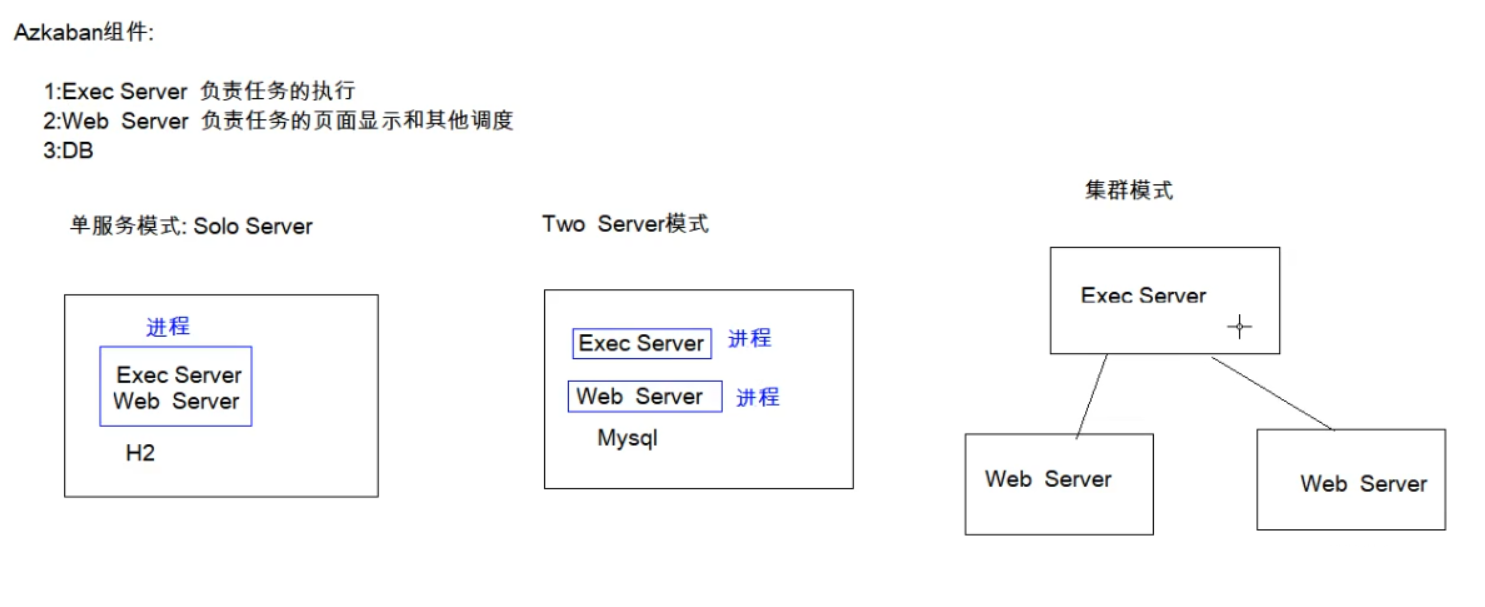
1-Azkaban介绍

============================================================================================================================================================
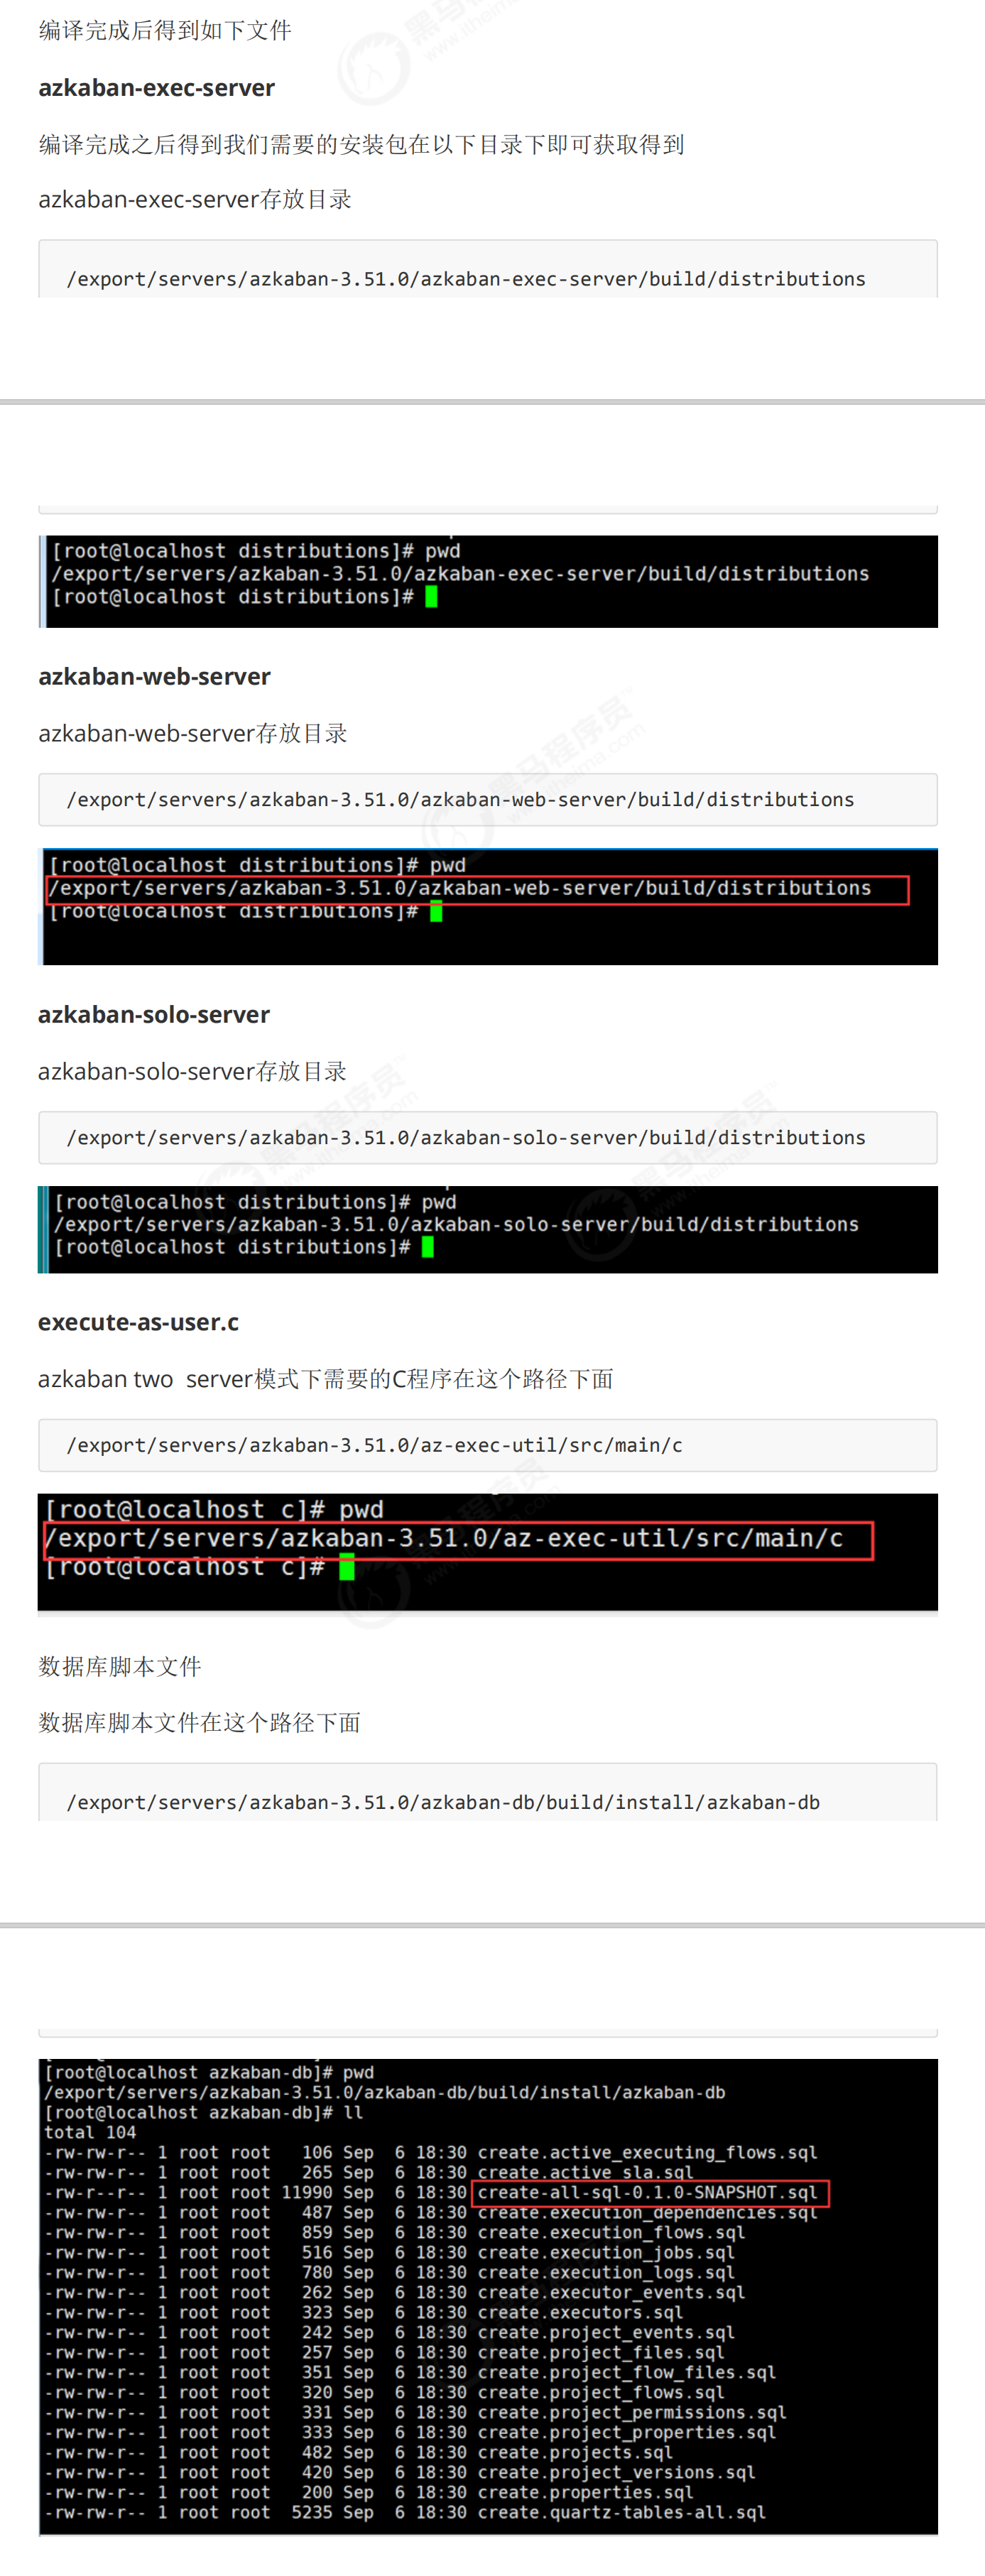
2-Azkaban编译和安装模式


==========================================================================================================================================================
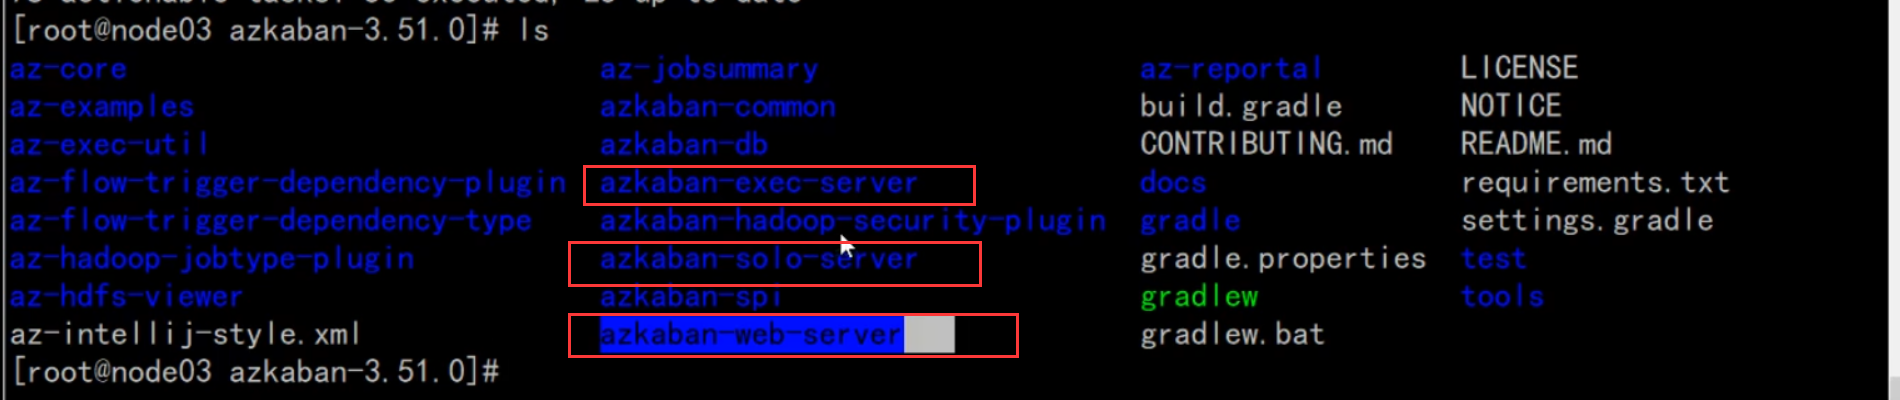
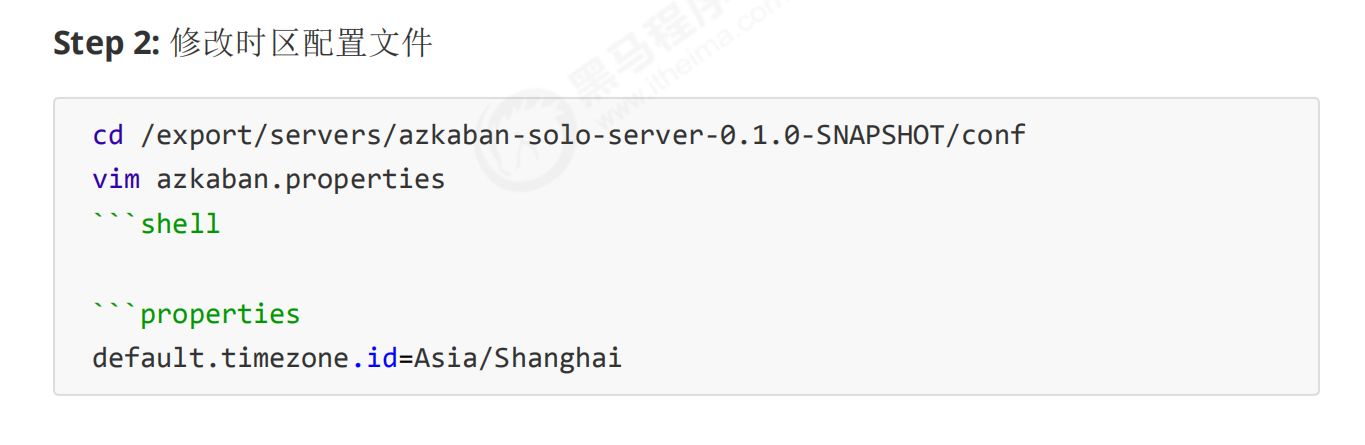
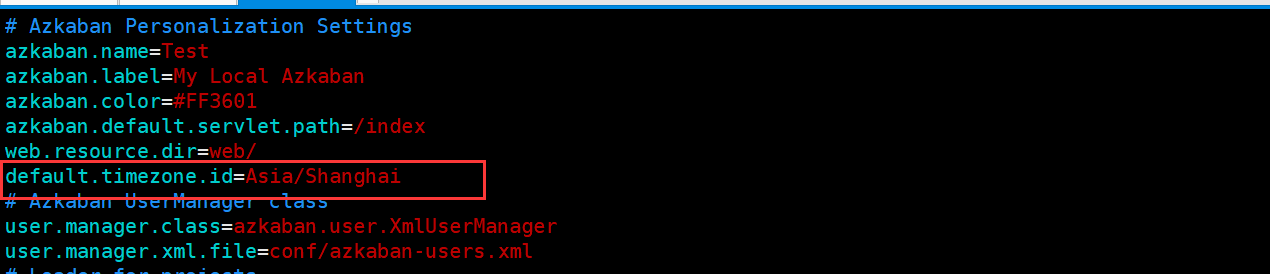
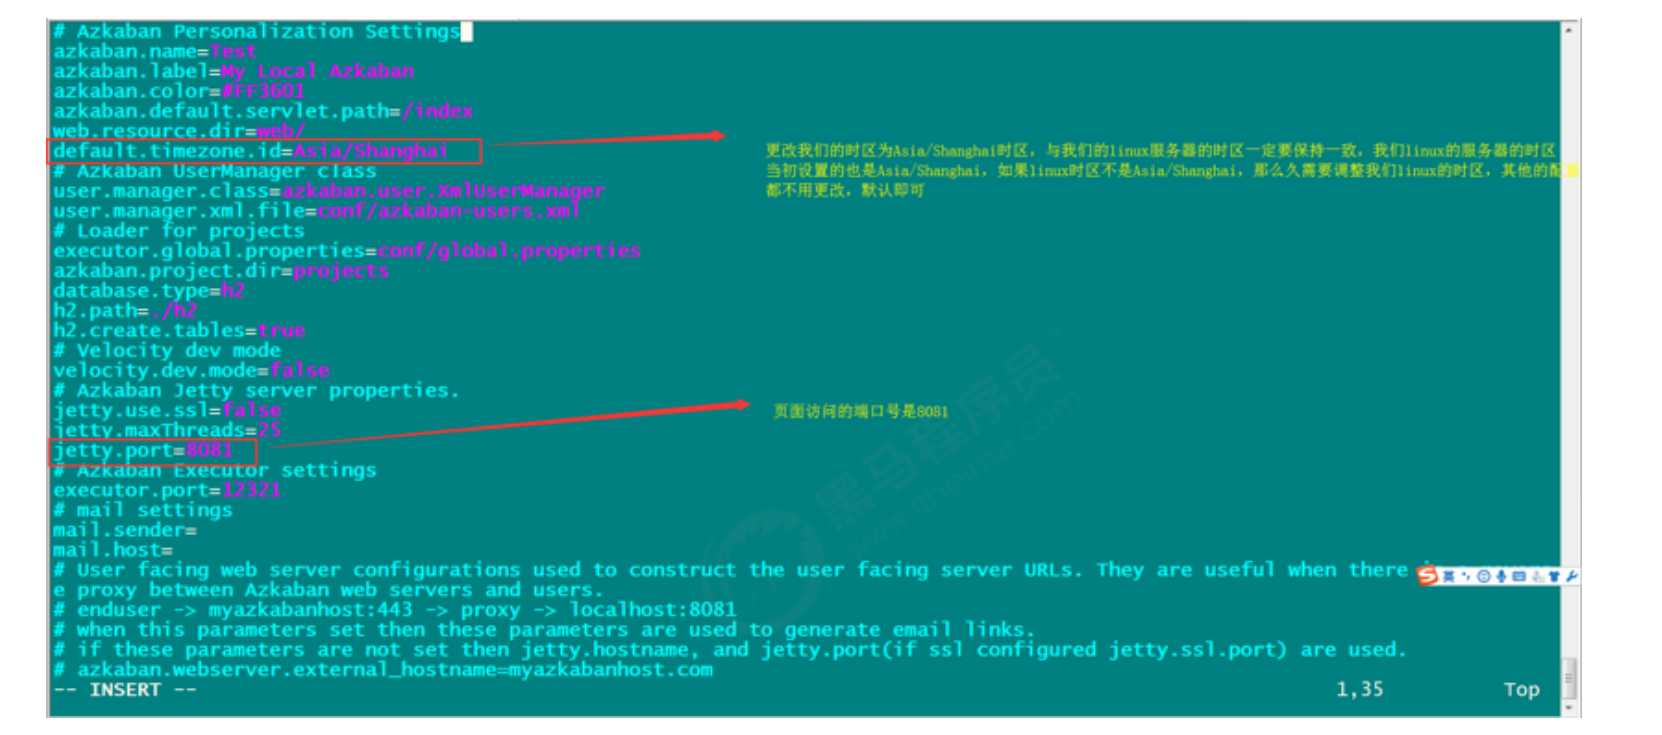
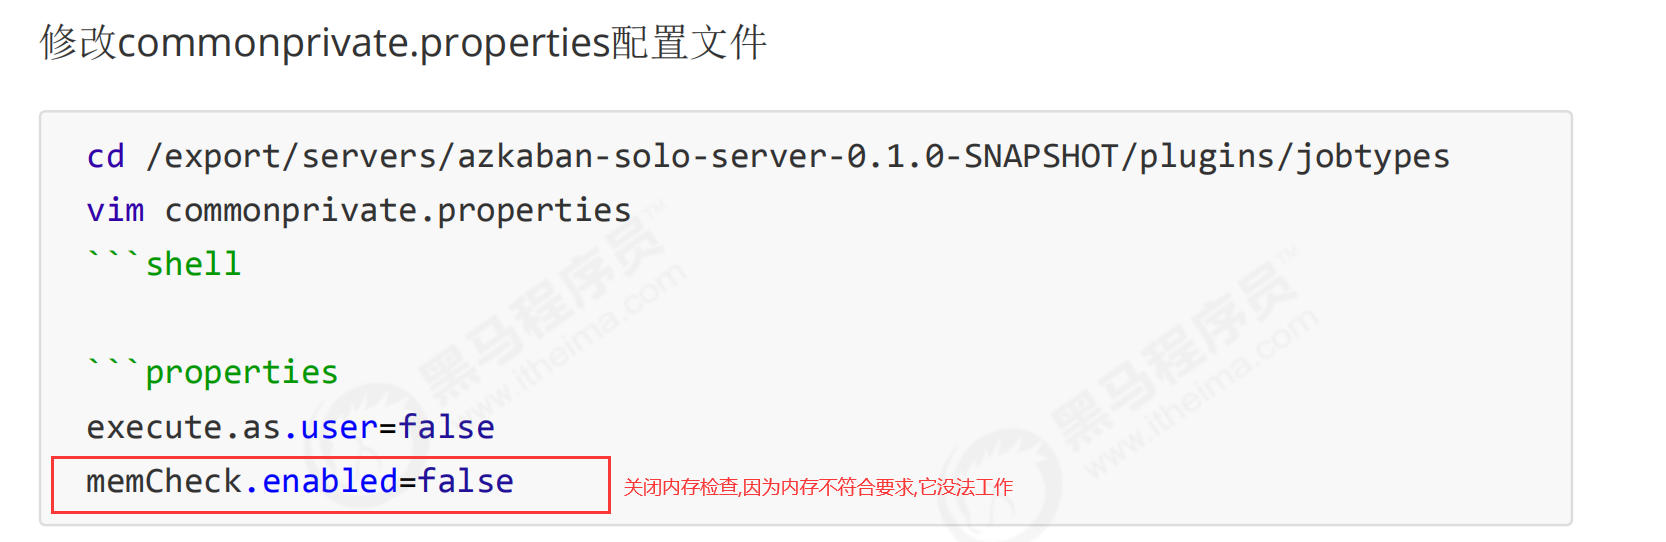
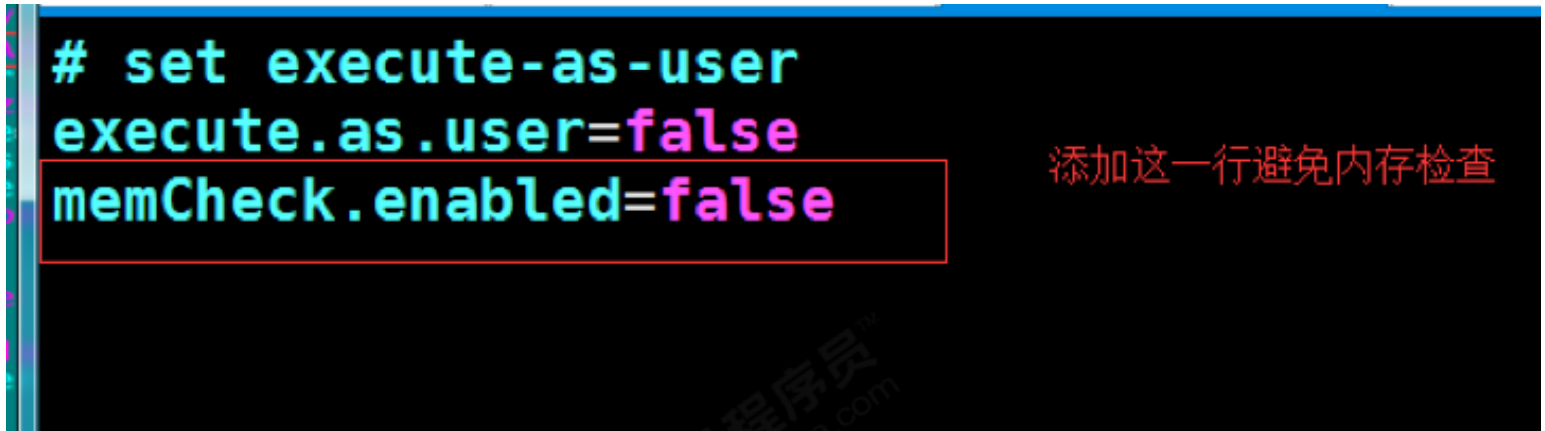
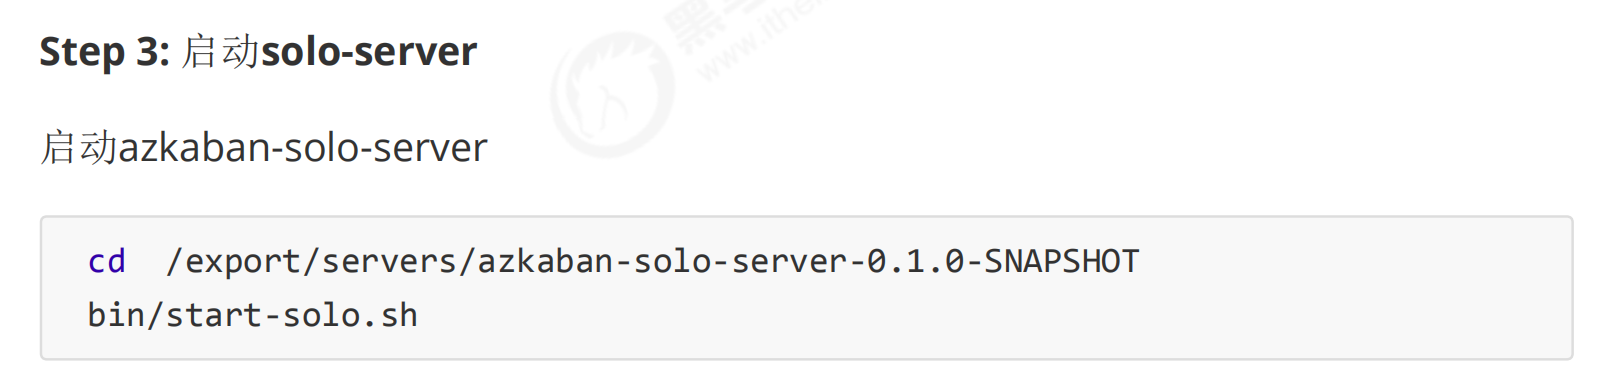
3-Azkaban-solo模式-安装


------------------------------------------------------------------------------------------------------------------------------------------------------------------------------------------------------------------------------------------------------------------------------
--------------------------------------------------------------------------------------------------------------------------------------------------------------------------------------------------------------------------------------------------------------------------------

----------------------------------------------------------------------------------------------------------------------------------------------------------------------------------------------------------------------------------------------------------------

------------------------------------------------------------------------------------------------------------------------------------------------------------------------------------------------------------------------------------------------------


===========================================================================================================================================================
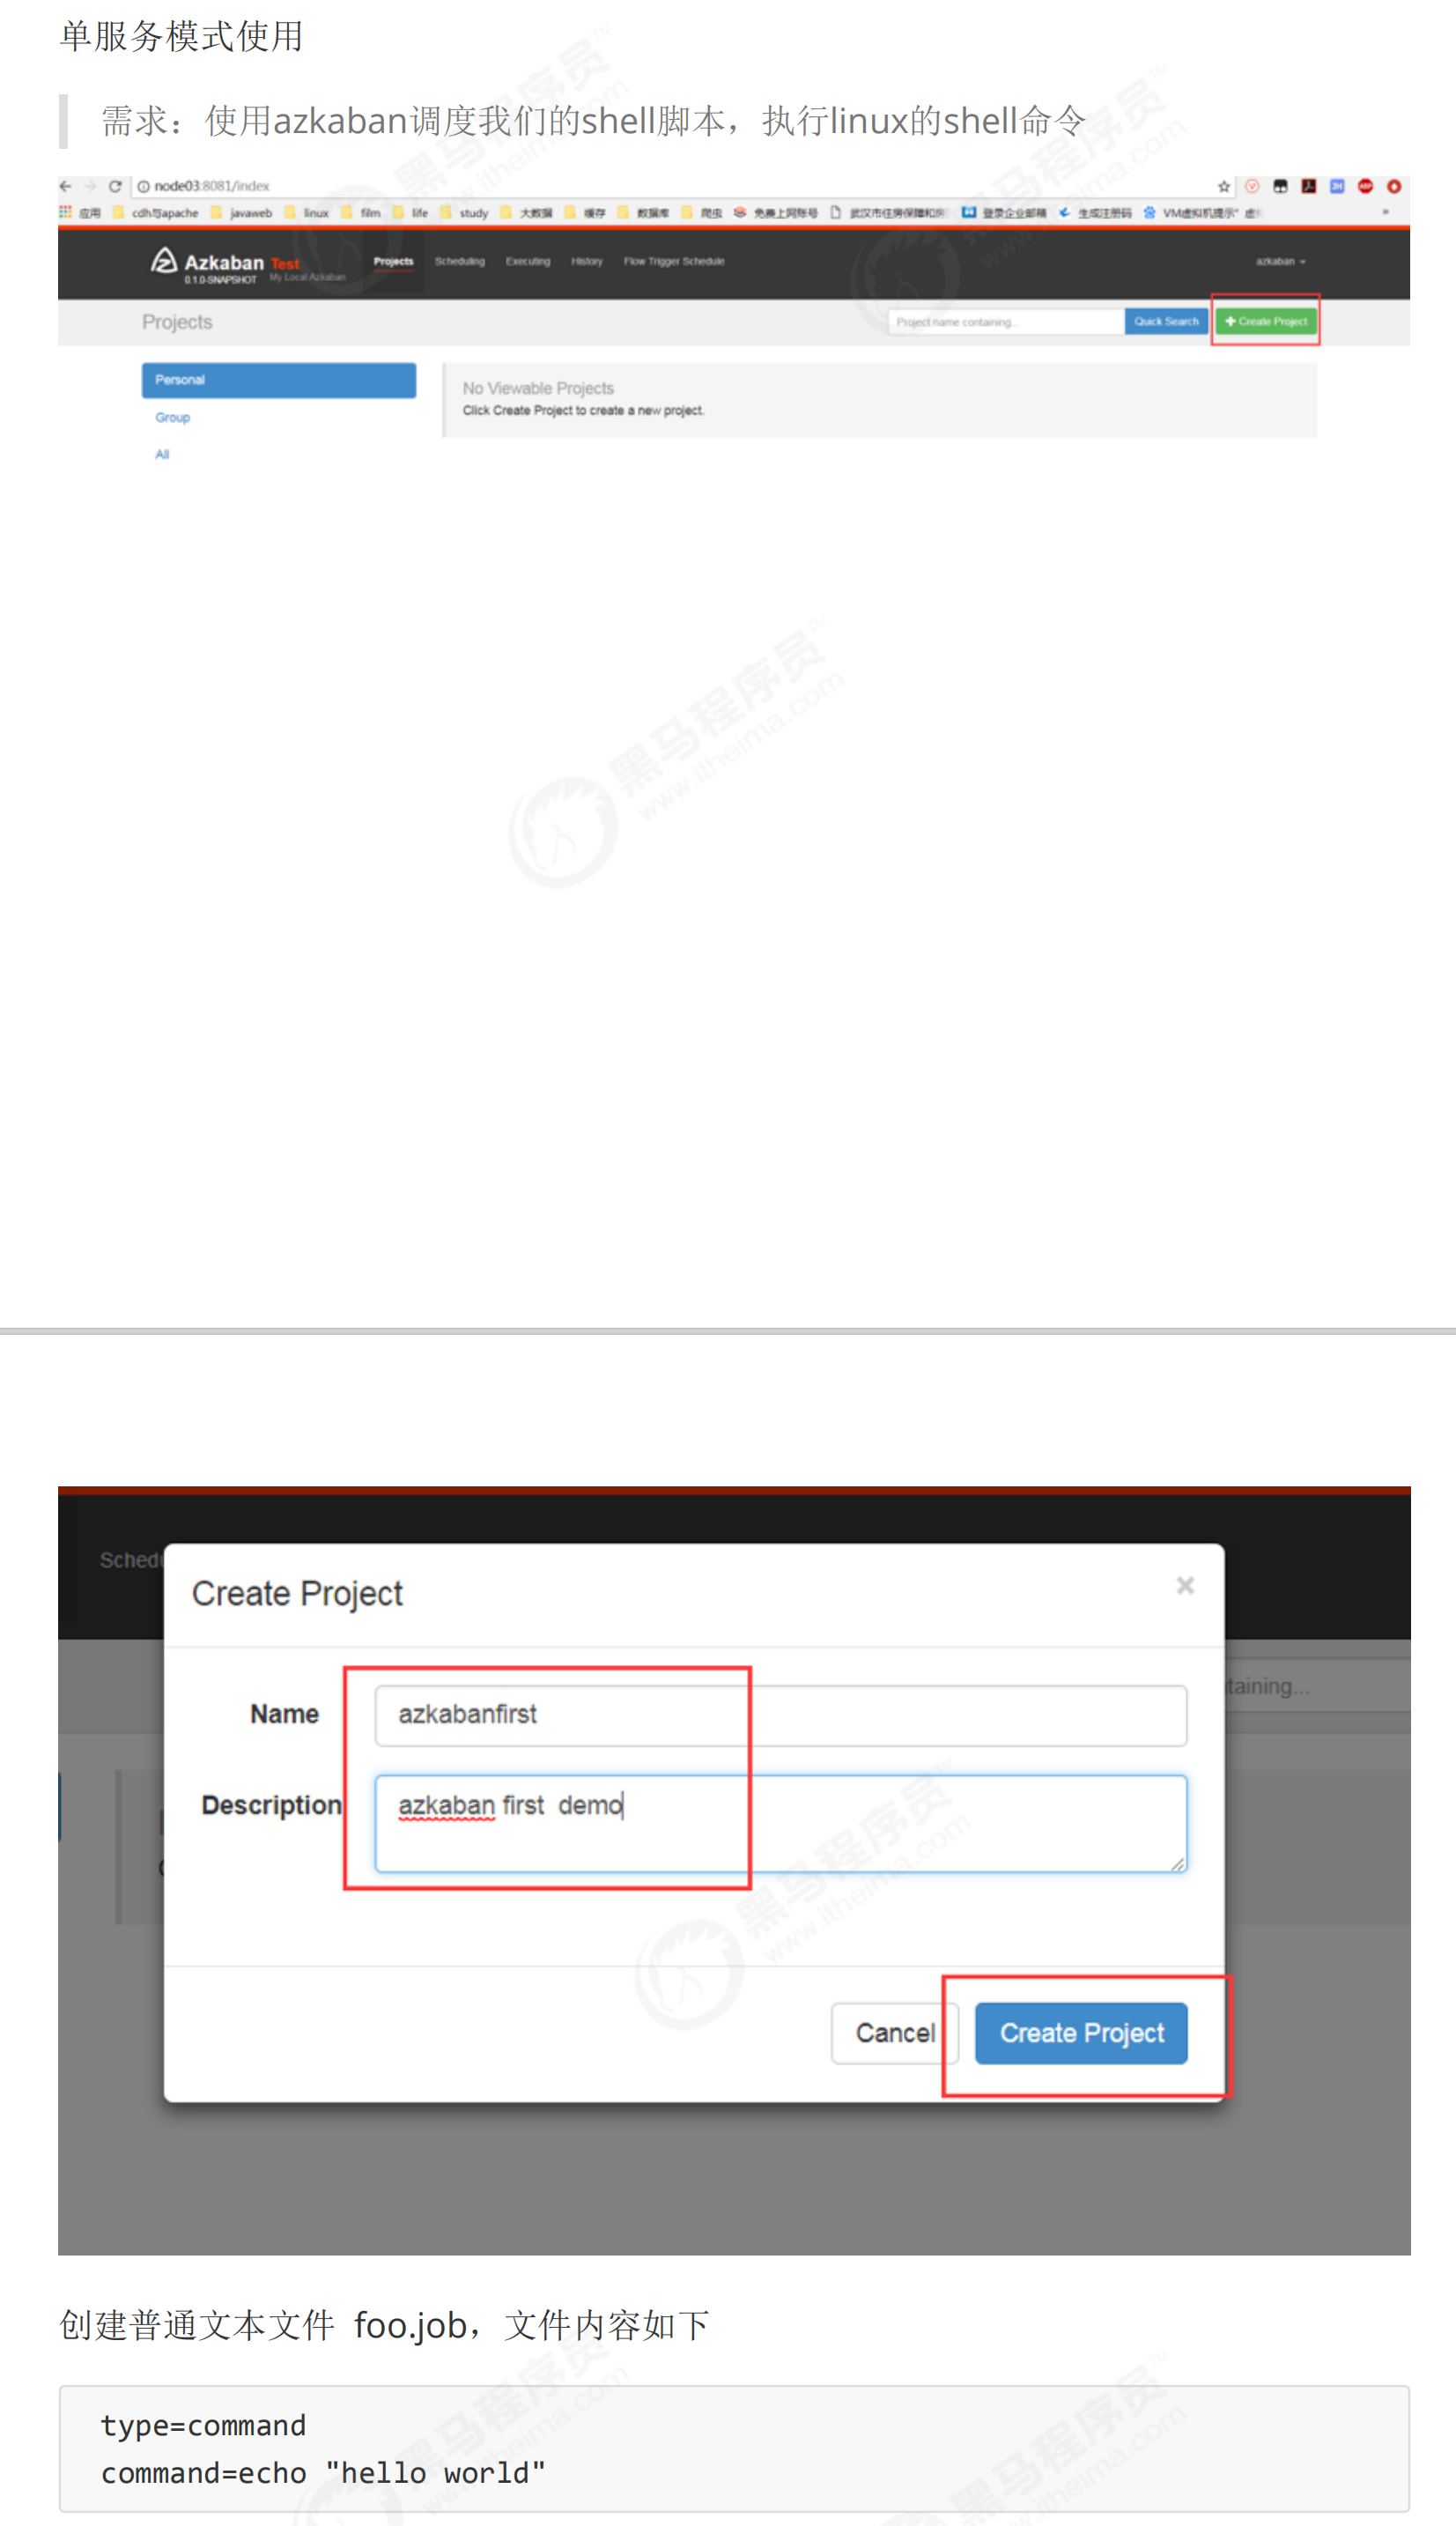
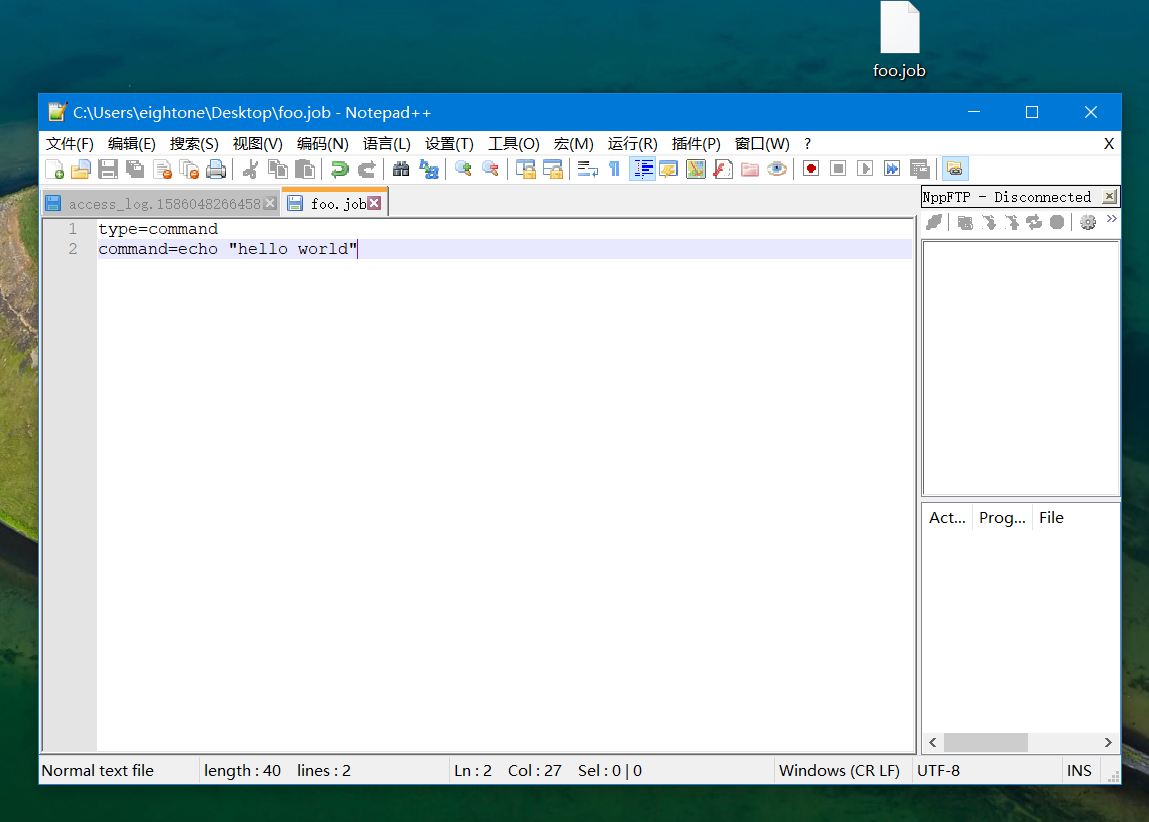
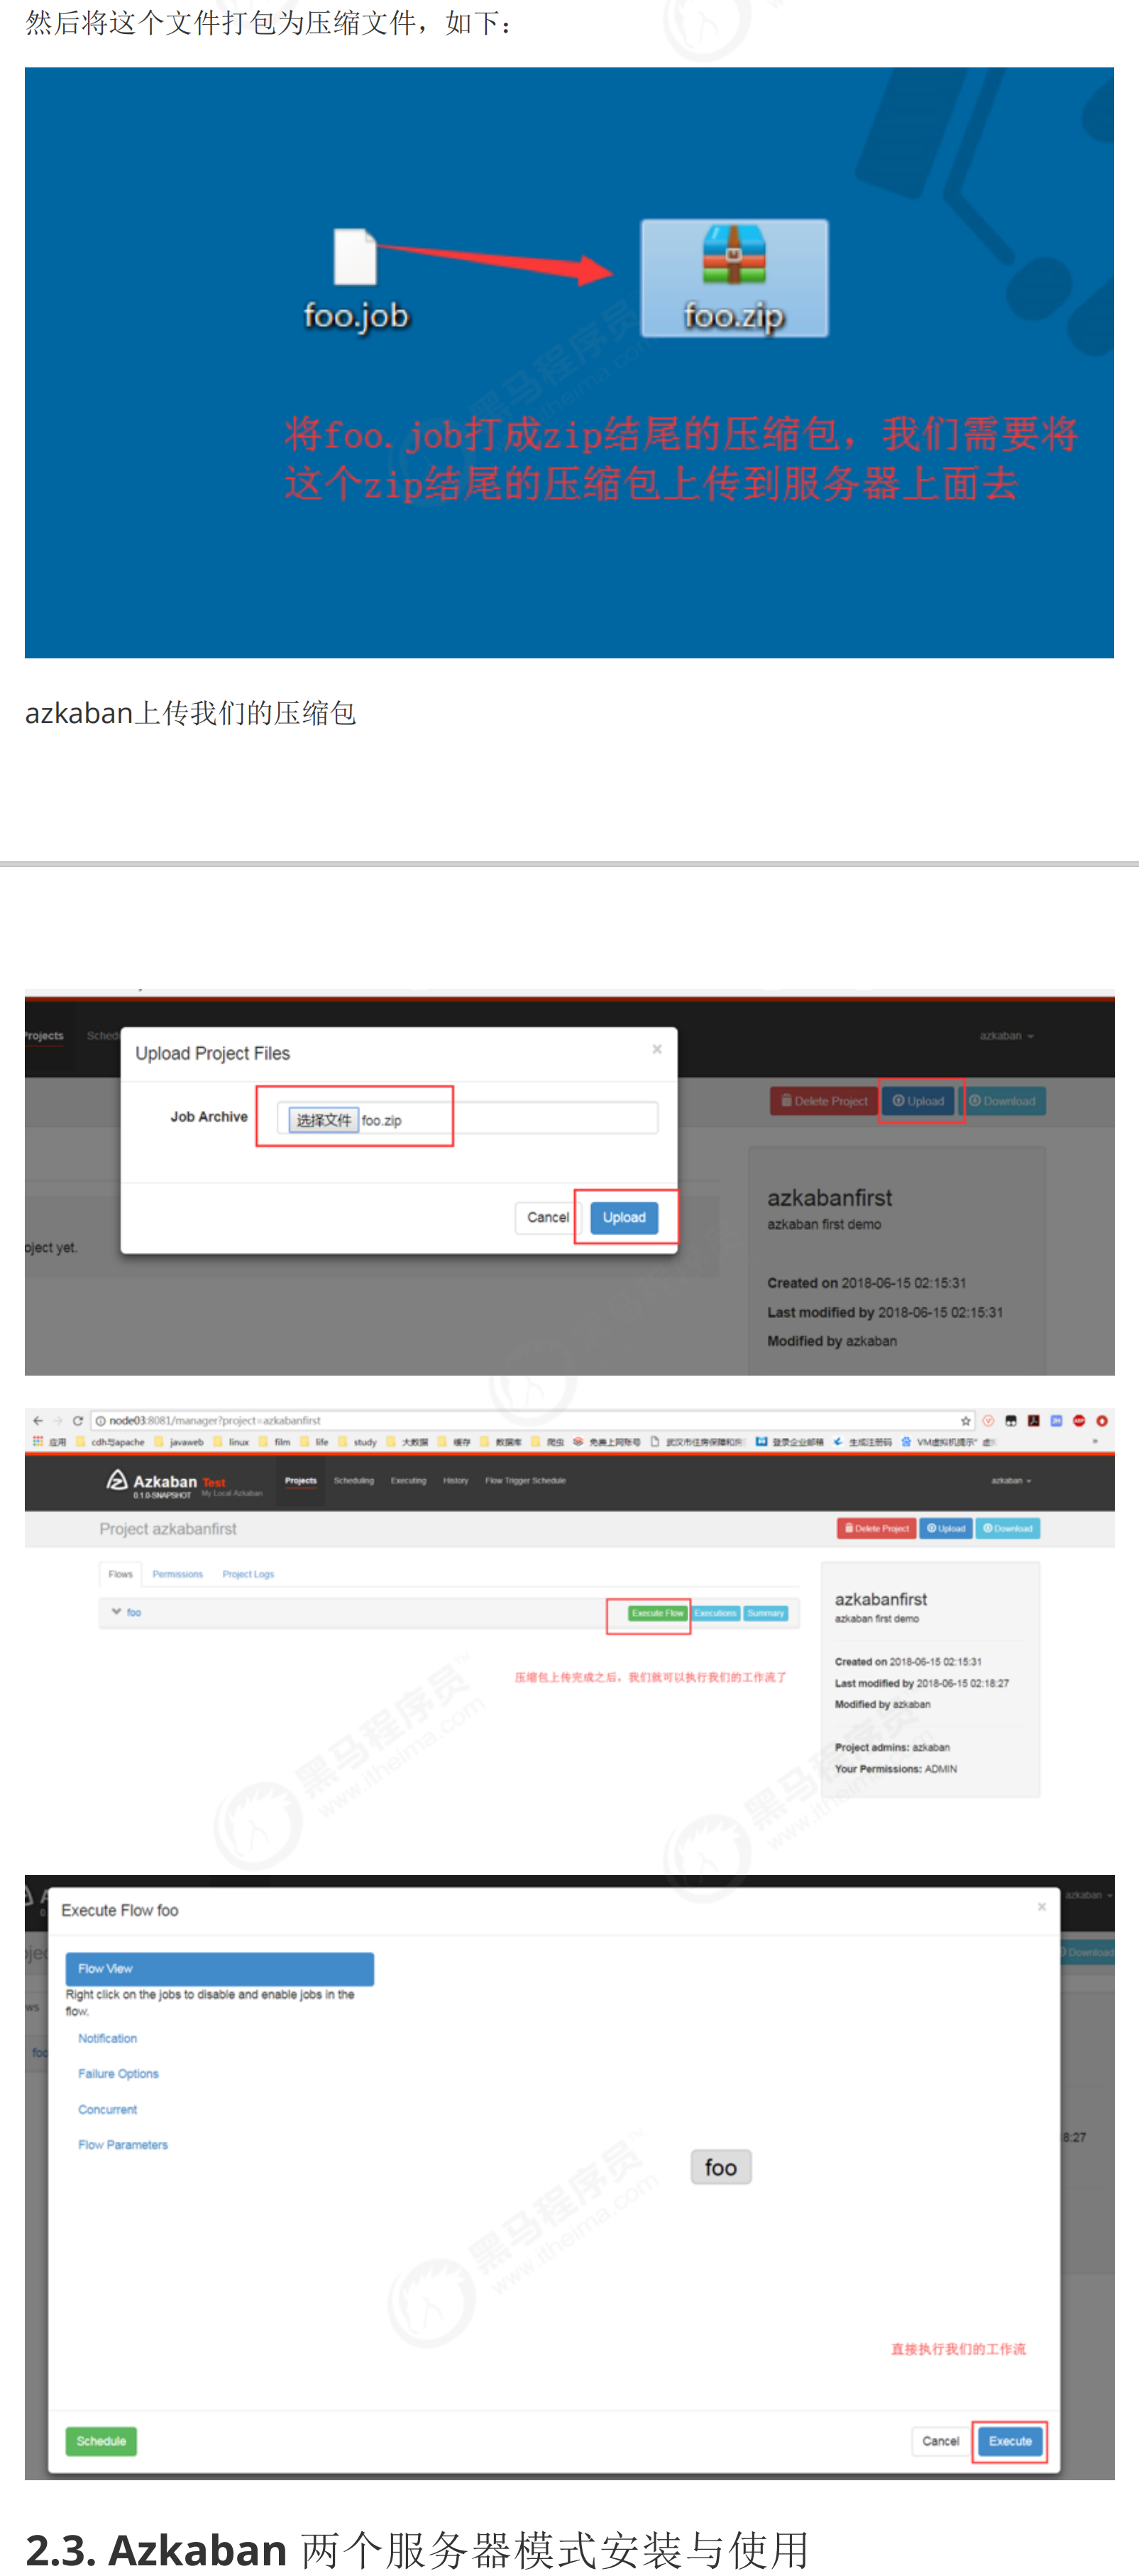
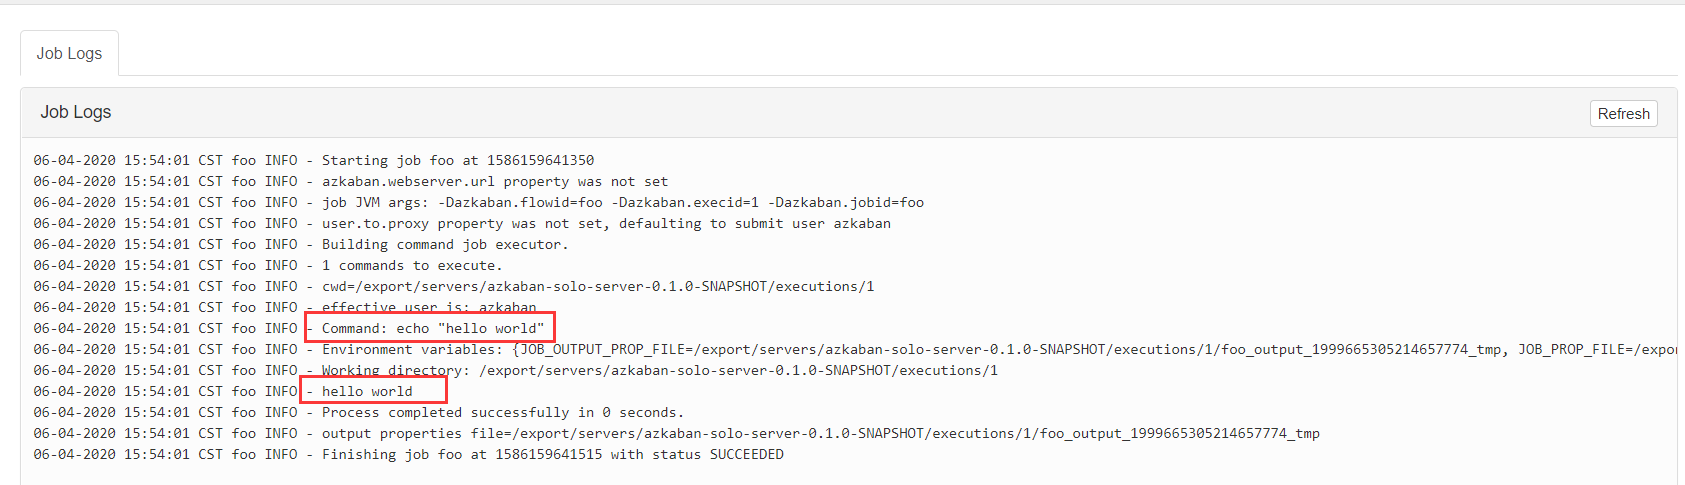
4-Azkaban-solo模式-使用


=============================================================================================================================================================
5-Azkaban-two_server模式-安装1
需要登录mysql: MYSQL的作用是用来存储azkaban中间产生的数据


重新打开一个终端:


回到前一个终端:


------------------------------------------------------------------------------------------------------------------------------------------------------------------------------------------------------------------


----------------------------------------------------------------------------------------------------------------------------------------------------------------------------------------------------------------------------------------------------


===============================================================================================================================================================
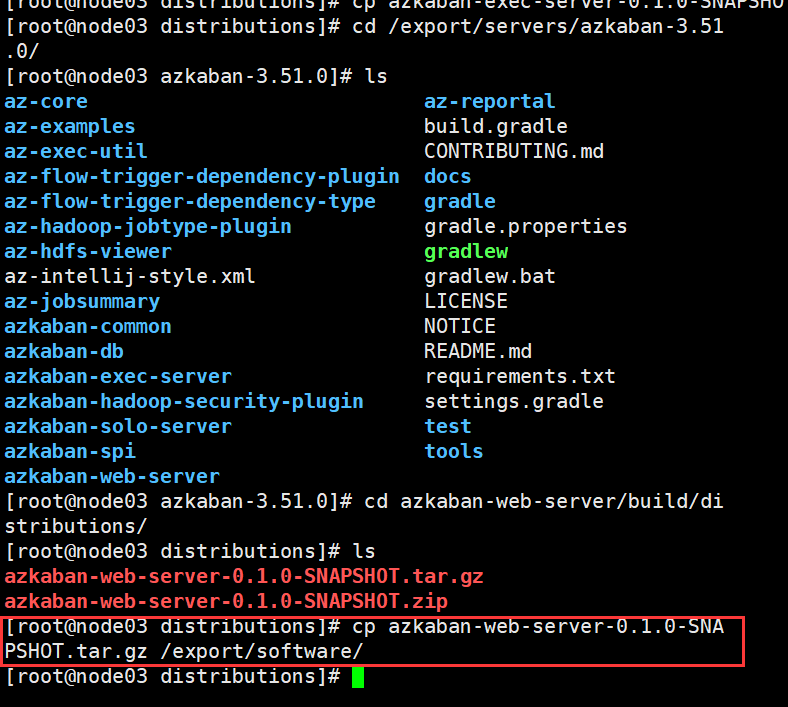
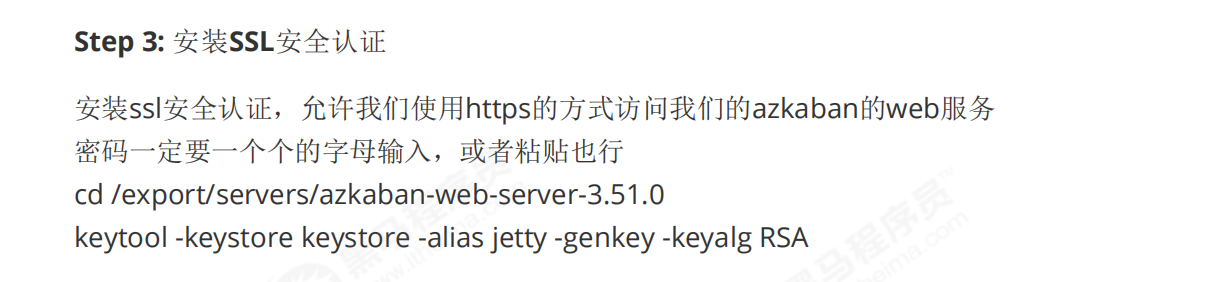
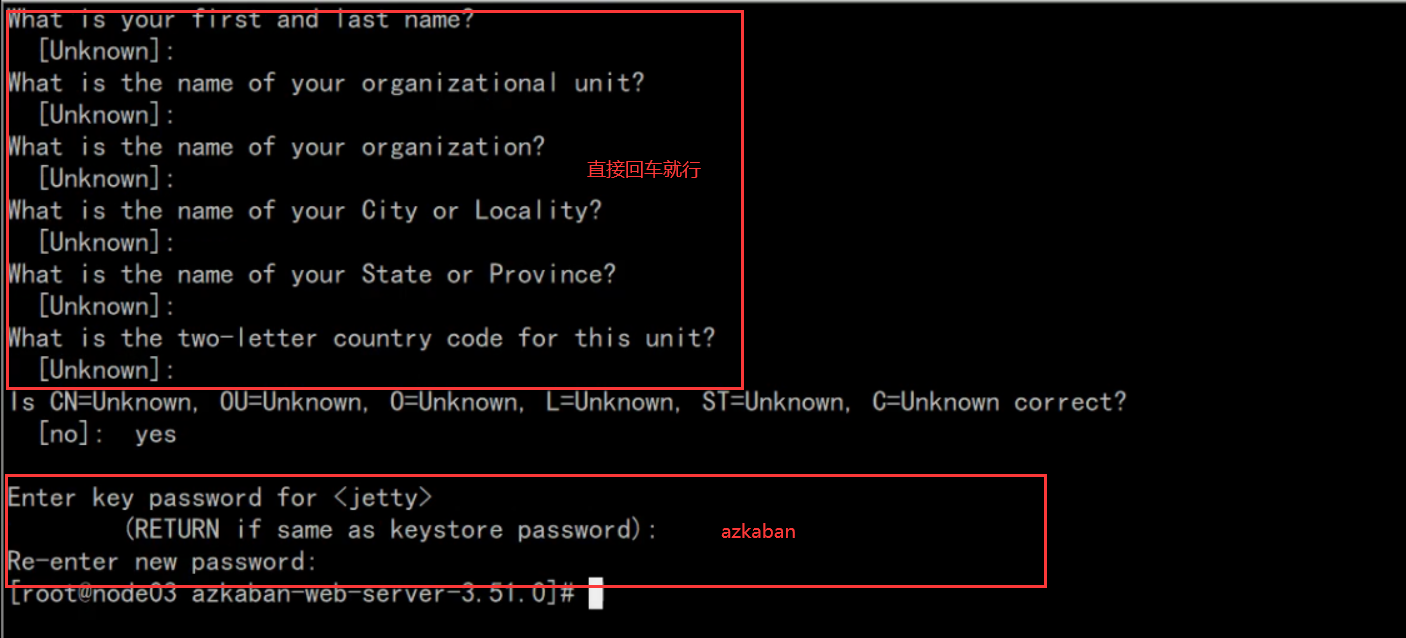
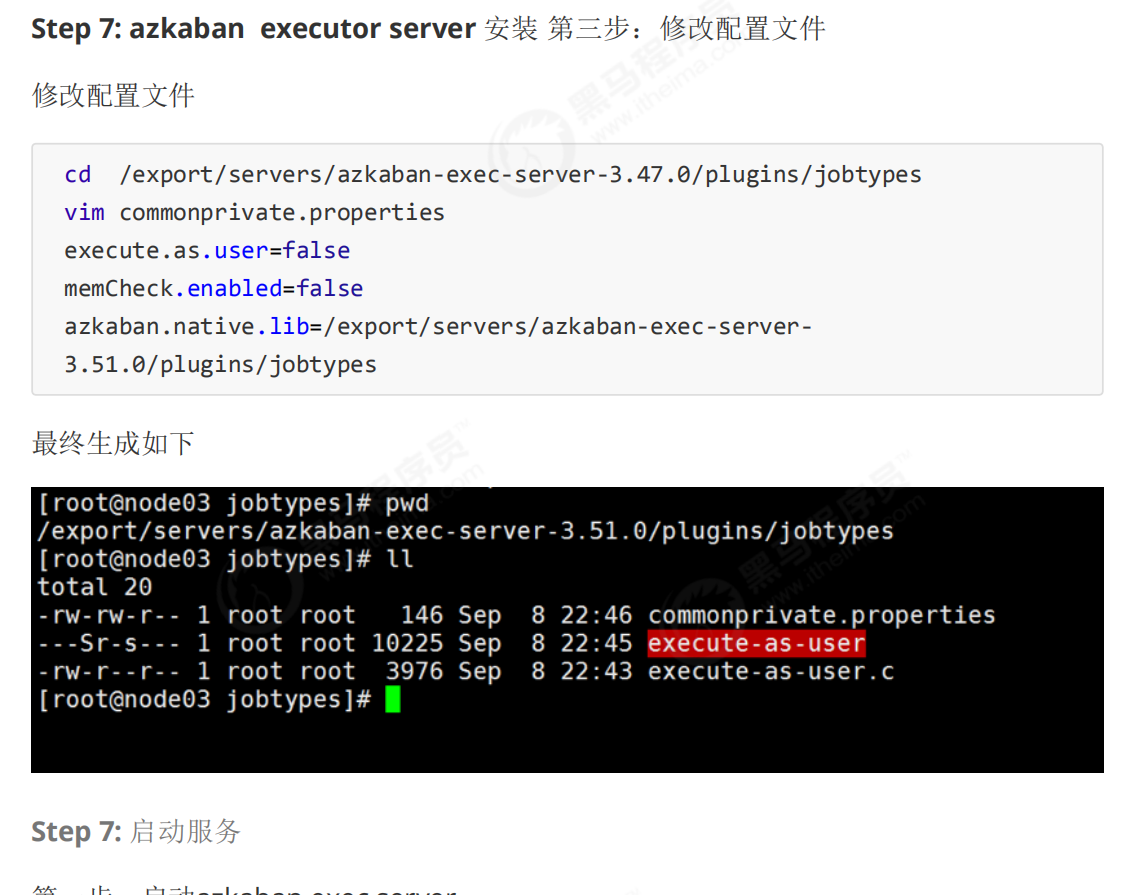
6-Azkaban-two_server模式-安装2

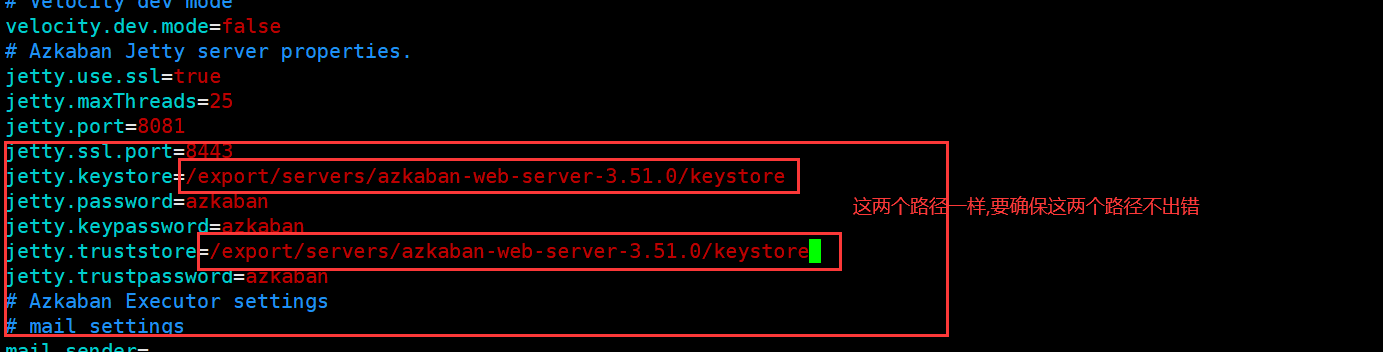
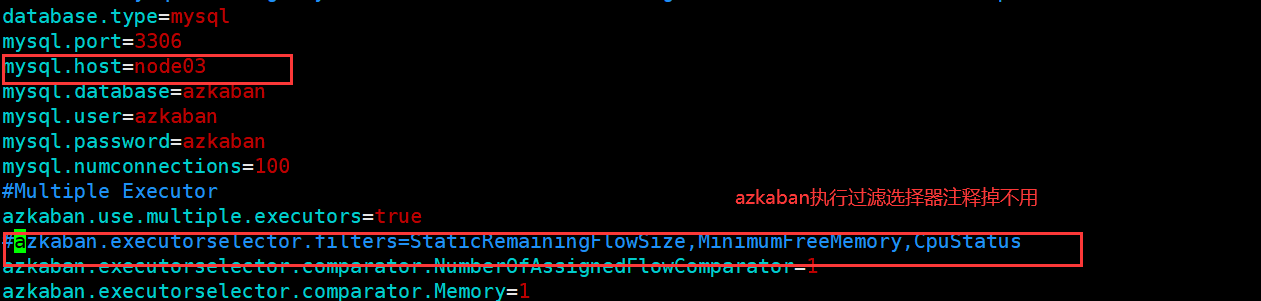

---------------------------------------------------------------------------------------------------------------------------------------------------------------------------------------------------------------------------------

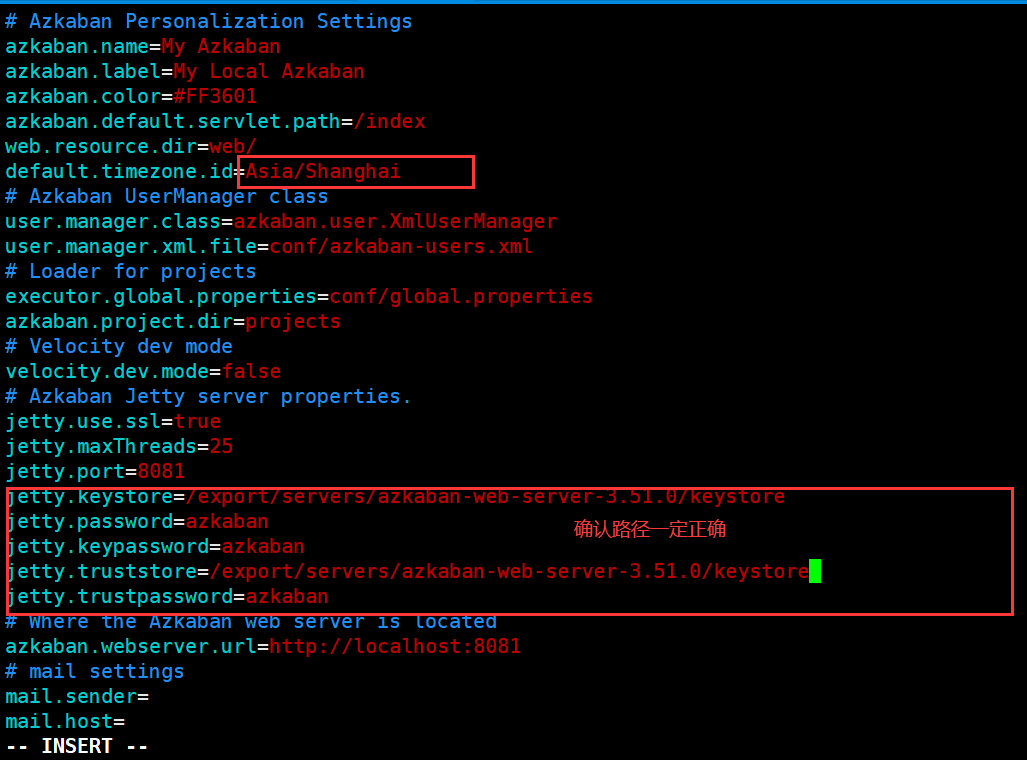

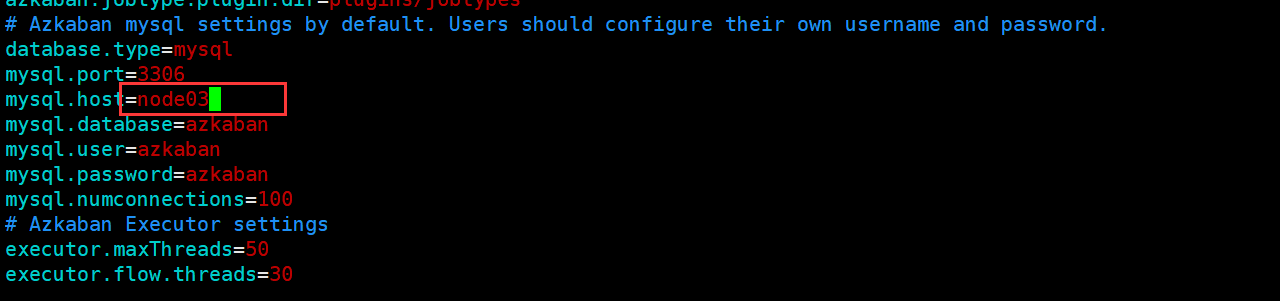


---------------------------------------------------------------------------------------------------------------------------------------------------------------------------------------------------------------------------------------------------------------------------------

---------------------------------------------------------------------------------------------------------------------------------------------------------------------------------------------------------------------------------------------------------------------------
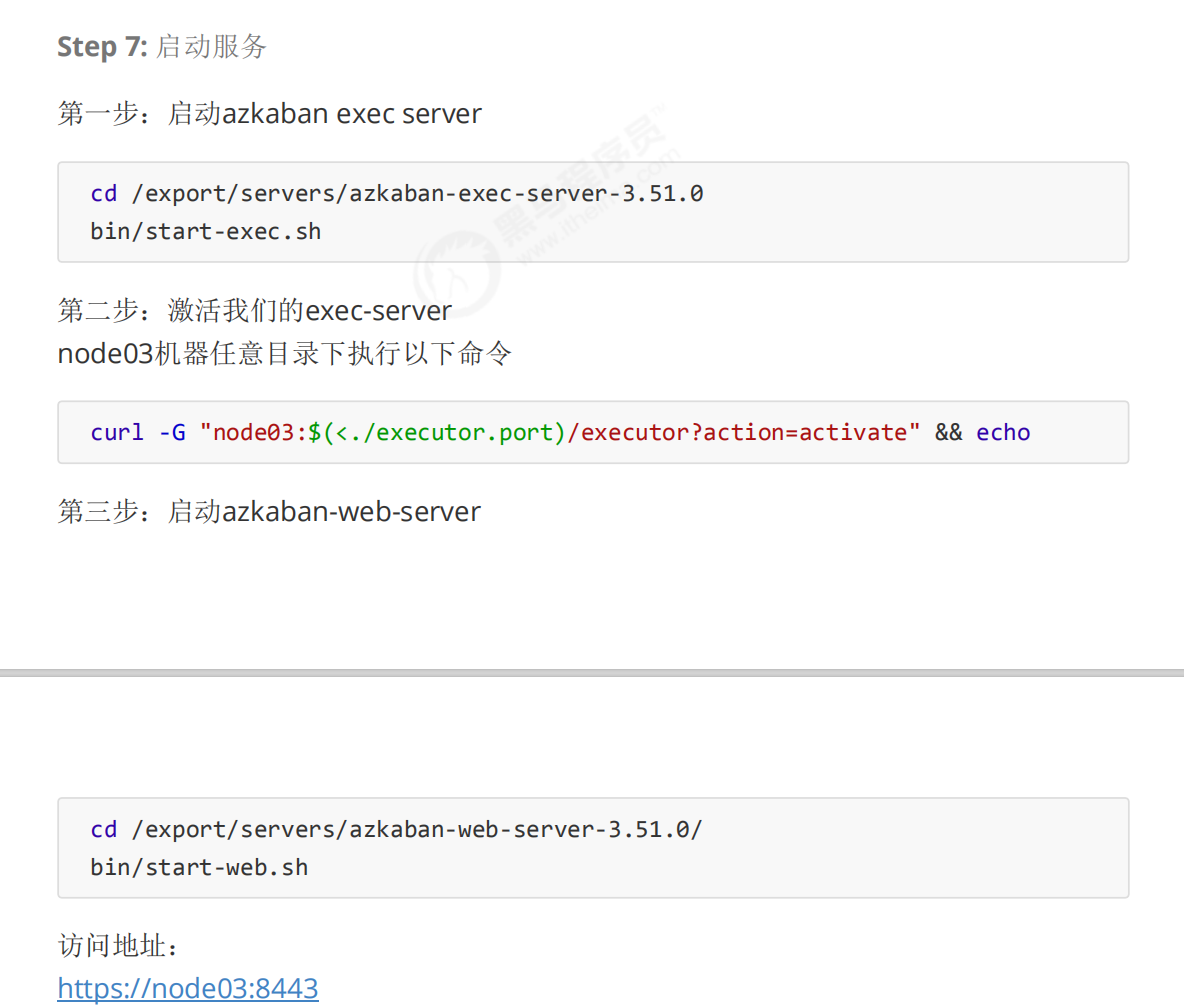
(1)第一步:启动azkaban exec server

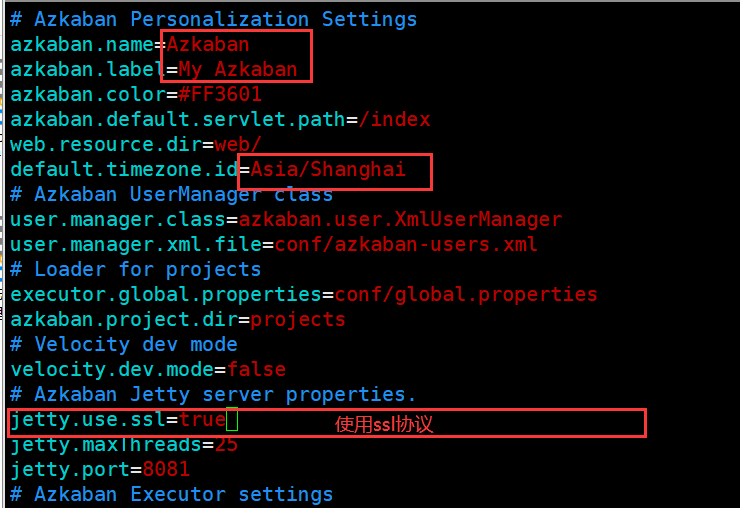
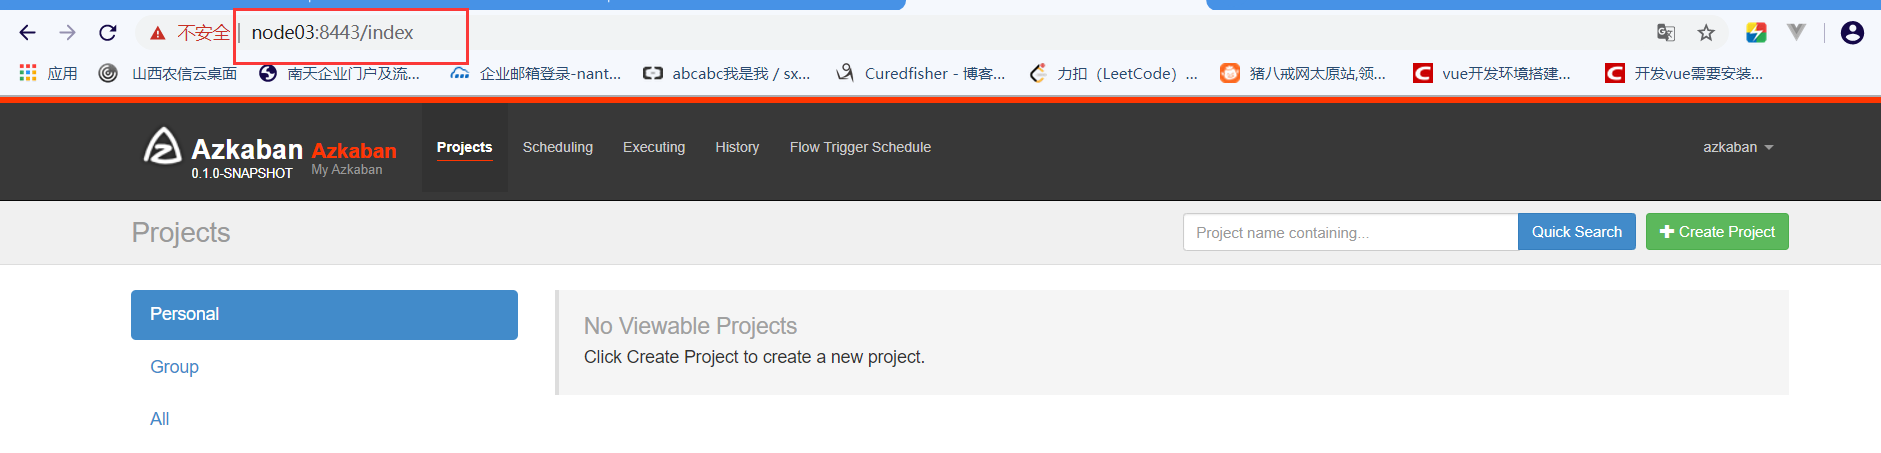
(3)第三步:启动azkaban-web-server
============================================================================================================================================================