模块,用一砣代码实现了某个功能的代码集合。
类似于函数式编程和面向过程编程,函数式编程则完成一个功能,其他代码用来调用即可,提供了代码的重用性和代码间的耦合。而对于一个复杂的功能来,可能需要多个函数才能完成(函数又可以在不同的.py文件中),n个 .py 文件组成的代码集合就称为模块。
如:os 是系统相关的模块;file是文件操作相关的模块
模块分为三种:
- 自定义模块
- 内置标准模块(又称标准库)
- 开源模块
自定义模块 和开源模块的使用参考 http://www.cnblogs.com/wupeiqi/articles/4963027.html
time & datetime模块
 1 import time
 2 import datetime
 3
 4 print(time.clock()) #返回处理器时间,3.3开始已废弃
 5 print(time.process_time()) #返回处理器时间,3.3开始已废弃
 6 print(time.time()) #返回当前系统时间戳
 7 print(time.ctime()) #输出Tue Jan 26 18:23:48 2016 ,当前系统时间
 8 print(time.ctime(time.time()-86640)) #将时间戳转为字符串格式
 9 print(time.gmtime(time.time()-86640)) #将时间戳转换成struct_time格式
10 print(time.localtime(time.time()-86640)) #将时间戳转换成struct_time格式,但返回 的本地时间
11 print(time.mktime(time.localtime())) #与time.localtime()功能相反,将struct_time格式转回成时间戳格式
12 #time.sleep(4) #sleep
13 print(time.strftime("%Y-%m-%d %H:%M:%S",time.gmtime()) ) #将struct_time格式转成指定的字符串格式
14 print(time.strptime("2016-01-28","%Y-%m-%d") ) #将字符串格式转换成struct_time格式
15
16 #datetime module
17
18 print(datetime.date.today()) #输出格式 2016-01-26
19 print(datetime.date.fromtimestamp(time.time()-864400) ) #2016-01-16 将时间戳转成日期格式
20 current_time = datetime.datetime.now() #
21 print(current_time) #输出2016-01-26 19:04:30.335935
22 print(current_time.timetuple()) #返回struct_time格式
23
24 #datetime.replace([year[, month[, day[, hour[, minute[, second[, microsecond[, tzinfo]]]]]]]])
25 print(current_time.replace(2014,9,12)) #输出2014-09-12 19:06:24.074900,返回当前时间,但指定的值将被替换
26
27 str_to_date = datetime.datetime.strptime("21/11/06 16:30", "%d/%m/%y %H:%M") #将字符串转换成日期格式
28 new_date = datetime.datetime.now() + datetime.timedelta(days=10) #比现在加10天
29 new_date = datetime.datetime.now() + datetime.timedelta(days=-10) #比现在减10天
30 new_date = datetime.datetime.now() + datetime.timedelta(hours=-10) #比现在减10小时
31 new_date = datetime.datetime.now() + datetime.timedelta(seconds=120) #比现在+120s
32 print(new_date)
| Directive | Meaning | Notes |
|---|---|---|
%a |
Locale’s abbreviated weekday name. | |
%A |
Locale’s full weekday name. | |
%b |
Locale’s abbreviated month name. | |
%B |
Locale’s full month name. | |
%c |
Locale’s appropriate date and time representation. | |
%d |
Day of the month as a decimal number [01,31]. | |
%H |
Hour (24-hour clock) as a decimal number [00,23]. | |
%I |
Hour (12-hour clock) as a decimal number [01,12]. | |
%j |
Day of the year as a decimal number [001,366]. | |
%m |
Month as a decimal number [01,12]. | |
%M |
Minute as a decimal number [00,59]. | |
%p |
Locale’s equivalent of either AM or PM. | (1) |
%S |
Second as a decimal number [00,61]. | (2) |
%U |
Week number of the year (Sunday as the first day of the week) as a decimal number [00,53]. All days in a new year preceding the first Sunday are considered to be in week 0. | (3) |
%w |
Weekday as a decimal number [0(Sunday),6]. | |
%W |
Week number of the year (Monday as the first day of the week) as a decimal number [00,53]. All days in a new year preceding the first Monday are considered to be in week 0. | (3) |
%x |
Locale’s appropriate date representation. | |
%X |
Locale’s appropriate time representation. | |
%y |
Year without century as a decimal number [00,99]. | |
%Y |
Year with century as a decimal number. | |
%z |
Time zone offset indicating a positive or negative time difference from UTC/GMT of the form +HHMM or -HHMM, where H represents decimal hour digits and M represents decimal minute digits [-23:59, +23:59]. | |
%Z |
Time zone name (no characters if no time zone exists). | |
%% |
A literal '%' character. |
random模块
随机数
 1 mport random
 2 print random.random()
 3 print random.randint(1,2)
 4 print random.randrange(1,10)
 5
 6 生成随机验证码
 7
 8 import random
 9 checkcode = ''
10 for i in range(4):
11     current = random.randrange(0,4)
12     if current != i:
13         temp = chr(random.randint(65,90))
14     else:
15         temp = random.randint(0,9)
16     checkcode += str(temp)
17 print checkcode
OS模块
提供对操作系统进行调用的接口
 1 os.getcwd() 获取当前工作目录,即当前python脚本工作的目录路径
 2 os.chdir("dirname")  改变当前脚本工作目录;相当于shell下cd
 3 os.curdir  返回当前目录: ('.')
 4 os.pardir  获取当前目录的父目录字符串名:('..')
 5 os.makedirs('dirname1/dirname2')    可生成多层递归目录
 6 os.removedirs('dirname1')    若目录为空,则删除,并递归到上一级目录,如若也为空,则删除,依此类推
 7 os.mkdir('dirname')    生成单级目录;相当于shell中mkdir dirname
 8 os.rmdir('dirname')    删除单级空目录,若目录不为空则无法删除,报错;相当于shell中rmdir dirname
 9 os.listdir('dirname')    列出指定目录下的所有文件和子目录,包括隐藏文件,并以列表方式打印
10 os.remove()  删除一个文件
11 os.rename("oldname","newname")  重命名文件/目录
12 os.stat('path/filename')  获取文件/目录信息
13 os.sep    输出操作系统特定的路径分隔符,win下为"\",Linux下为"/"
14 os.linesep    输出当前平台使用的行终止符,win下为"
",Linux下为"
"
15 os.pathsep    输出用于分割文件路径的字符串
16 os.name    输出字符串指示当前使用平台。win->'nt'; Linux->'posix'
17 os.system("bash command")  运行shell命令,直接显示
18 os.environ  获取系统环境变量
19 os.path.abspath(path)  返回path规范化的绝对路径
20 os.path.split(path)  将path分割成目录和文件名二元组返回
21 os.path.dirname(path)  返回path的目录。其实就是os.path.split(path)的第一个元素
22 os.path.basename(path)  返回path最后的文件名。如何path以/或结尾,那么就会返回空值。即os.path.split(path)的第二个元素
23 os.path.exists(path)  如果path存在,返回True;如果path不存在,返回False
24 os.path.isabs(path)  如果path是绝对路径,返回True
25 os.path.isfile(path)  如果path是一个存在的文件,返回True。否则返回False
26 os.path.isdir(path)  如果path是一个存在的目录,则返回True。否则返回False
27 os.path.join(path1[, path2[, ...]])  将多个路径组合后返回,第一个绝对路径之前的参数将被忽略
28 os.path.getatime(path)  返回path所指向的文件或者目录的最后存取时间
29 os.path.getmtime(path)  返回path所指向的文件或者目录的最后修改时间
sys模块
1 sys.argv           命令行参数List,第一个元素是程序本身路径
2 sys.exit(n)        退出程序,正常退出时exit(0)
3 sys.version        获取Python解释程序的版本信息
4 sys.maxint         最大的Int值
5 sys.path           返回模块的搜索路径,初始化时使用PYTHONPATH环境变量的值
6 sys.platform       返回操作系统平台名称
7 sys.stdout.write('please:')
8 val = sys.stdin.readline()[:-1]
subprocess 模块
替代os.system
执行系统命令:
1 >>> import subprocess
2 >>> cont = subprocess.run("ipconfig")
3
4 Windows IP ����
#返回的cont 是 命令 和执行结果状态:

5 >>> print(cont)
CompletedProcess(args='ipconfig', returncode=0)
#要接受执行结果
cont = subprocess.Popen("df -h",shell=True,stdout=subprocess.PIPE)
cont.stdout.read()
#检出执行的命令执行异常
subprocess.check_call("sdf",shell=True) #会报:subprocess.CallProcessError:Command 'sdf' returned non-zero exit status 127
check_output
执行命令,如果状态码是 0 ,则返回执行结果,否则抛异常
1 subprocess.check_output(["echo", "Hello World!"])
2 subprocess.check_output("exit 1", shell=True)
subprocess.Popen(...)
用于执行复杂的系统命令
参数:
- args:shell命令,可以是字符串或者序列类型(如:list,元组)
- bufsize:指定缓冲。0 无缓冲,1 行缓冲,其他 缓冲区大小,负值 系统缓冲
- stdin, stdout, stderr:分别表示程序的标准输入、输出、错误句柄
- preexec_fn:只在Unix平台下有效,用于指定一个可执行对象(callable object),它将在子进程运行之前被调用
- close_sfs:在windows平台下,如果close_fds被设置为True,则新创建的子进程将不会继承父进程的输入、输出、错误管道。
所以不能将close_fds设置为True同时重定向子进程的标准输入、输出与错误(stdin, stdout, stderr)。 - shell:同上
- cwd:用于设置子进程的当前目录
- env:用于指定子进程的环境变量。如果env = None,子进程的环境变量将从父进程中继承。
- universal_newlines:不同系统的换行符不同,True -> 同意使用
- startupinfo与createionflags只在windows下有效
将被传递给底层的CreateProcess()函数,用于设置子进程的一些属性,如:主窗口的外观,进程的优先级等等 -
1 import subprocess
2 ret1 = subprocess.Popen(["mkdir","t1"])
3 ret2 = subprocess.Popen("mkdir t2", shell=True)
终端输入的命令分为两种:
- 输入即可得到输出,如:ifconfig
- 输入进行某环境,依赖再输入,如:python
-
 View Code
import subprocess

obj = subprocess.Popen("mkdir t3", shell=True, cwd='/home/dev',)
View Codeimport subprocess obj = subprocess.Popen(["python"], stdin=subprocess.PIPE, stdout=subprocess.PIPE, stderr=subprocess.PIPE) obj.stdin.write('print 1 ') obj.stdin.write('print 2 ') obj.stdin.write('print 3 ') obj.stdin.write('print 4 ') obj.stdin.close() cmd_out = obj.stdout.read() obj.stdout.close() cmd_error = obj.stderr.read() obj.stderr.close() print cmd_out print cmd_error
View Codeimport subprocess obj = subprocess.Popen(["python"], stdin=subprocess.PIPE, stdout=subprocess.PIPE, stderr=subprocess.PIPE) obj.stdin.write('print 1 ') obj.stdin.write('print 2 ') obj.stdin.write('print 3 ') obj.stdin.write('print 4 ') out_error_list = obj.communicate() print out_error_list
View Codeimport subprocess obj = subprocess.Popen(["python"], stdin=subprocess.PIPE, stdout=subprocess.PIPE, stderr=subprocess.PIPE) out_error_list = obj.communicate('print "hello"') print out_error_list

更多猛击这里
shutil 模块
高级的 文件、文件夹、压缩包 处理模块
shutil.copyfileobj(fsrc, fdst[, length])
将文件内容拷贝到另一个文件中,可以部分内容
1 def copyfileobj(fsrc, fdst, length=16*1024):
2     """copy data from file-like object fsrc to file-like object fdst"""
3     while 1:
4         buf = fsrc.read(length)
5         if not buf:
6             break
7         fdst.write(buf)
shutil.copyfile(src, dst)
 1 def copyfile(src, dst):
 2     """Copy data from src to dst"""
 3     if _samefile(src, dst):
 4         raise Error("`%s` and `%s` are the same file" % (src, dst))
 5
 6     for fn in [src, dst]:
 7         try:
 8             st = os.stat(fn)
 9         except OSError:
10             # File most likely does not exist
11             pass
12         else:
13             # XXX What about other special files? (sockets, devices...)
14             if stat.S_ISFIFO(st.st_mode):
15                 raise SpecialFileError("`%s` is a named pipe" % fn)
16
17     with open(src, 'rb') as fsrc:
18         with open(dst, 'wb') as fdst:
19             copyfileobj(fsrc, fdst)
shutil.copymode(src, dst)
仅拷贝权限。内容、组、用户均不变
1 def copymode(src, dst):
2     """Copy mode bits from src to dst"""
3     if hasattr(os, 'chmod'):
4         st = os.stat(src)
5         mode = stat.S_IMODE(st.st_mode)
6         os.chmod(dst, mode)
shutil.copystat(src, dst)
拷贝状态的信息,包括:mode bits, atime, mtime, flags
shutil.copy(src, dst)
拷贝文件和权限
View Codeshutil.copy2(src, dst)
拷贝文件和状态信息
View Codeshutil.ignore_patterns(*patterns)
shutil.copytree(src, dst, symlinks=False, ignore=None)
递归的去拷贝文件
例如:copytree(source, destination, ignore=ignore_patterns('*.pyc', 'tmp*'))
View Codeshutil.rmtree(path[, ignore_errors[, onerror]])
递归的去删除文件
View Codeshutil.move(src, dst)
递归的去移动文件
View Codeshutil.make_archive(base_name, format,...)
创建压缩包并返回文件路径,例如:zip、tar
- base_name: 压缩包的文件名,也可以是压缩包的路径。只是文件名时,则保存至当前目录,否则保存至指定路径,
如:www =>保存至当前路径
如:/Users/wupeiqi/www =>保存至/Users/wupeiqi/ - format: 压缩包种类,“zip”, “tar”, “bztar”,“gztar”
- root_dir: 要压缩的文件夹路径(默认当前目录)
- owner: 用户,默认当前用户
- group: 组,默认当前组
- logger: 用于记录日志,通常是logging.Logger对象
#将 /Users/wupeiqi/Downloads/test 下的文件打包放置当前程序目录
1 import shutil
2 ret = shutil.make_archive("wwwwwwwwww", 'gztar', root_dir='/Users/wupeiqi/Downloads/test')
#将 /Users/wupeiqi/Downloads/test 下的文件打包放置 /Users/wupeiqi/目录
1 import shutil
2 ret = shutil.make_archive("/Users/wupeiqi/wwwwwwwwww", 'gztar', root_dir='/Users/wupeiqi/Downloads/test')
shutil 对压缩包的处理是调用 ZipFile 和 TarFile 两个模块来进行的,详细:
zipfile 压缩解压 tarfile 压缩解压 ZipFile TarFile hashlib模块
用于加密相关的操作,3.x里代替了md5模块和sha模块,主要提供 SHA1, SHA224, SHA256, SHA384, SHA512 ,MD5 算法
 1 import hashlib
 2
 3 m = hashlib.md5()
 4 m.update(b"Hello")
 5 m.update(b"It's me")
 6 print(m.digest())
 7 m.update(b"It's been a long time since last time we ...")
 8
 9 print(m.digest()) #2进制格式hash
10 print(len(m.hexdigest())) #16进制格式hash
11 '''
12 def digest(self, *args, **kwargs): # real signature unknown
13     """ Return the digest value as a string of binary data. """
14     pass
15
16 def hexdigest(self, *args, **kwargs): # real signature unknown
17     """ Return the digest value as a string of hexadecimal digits. """
18     pass
19
20 '''
21 import hashlib
22
23 # ######## md5 ########
24
25 hash = hashlib.md5()
26 hash.update('admin')
27 print(hash.hexdigest())
28
29 # ######## sha1 ########
30
31 hash = hashlib.sha1()
32 hash.update('admin')
33 print(hash.hexdigest())
34
35 # ######## sha256 ########
36
37 hash = hashlib.sha256()
38 hash.update('admin')
39 print(hash.hexdigest())
40
41
42 # ######## sha384 ########
43
44 hash = hashlib.sha384()
45 hash.update('admin')
46 print(hash.hexdigest())
47
48 # ######## sha512 ########
49
50 hash = hashlib.sha512()
51 hash.update('admin')
52 print(hash.hexdigest())
还不够吊?python 还有一个 hmac 模块,它内部对我们创建 key 和 内容 再进行处理然后再加密
import hmac
h = hmac.new('wueiqi')
h.update('hellowo')
print h.hexdigest()
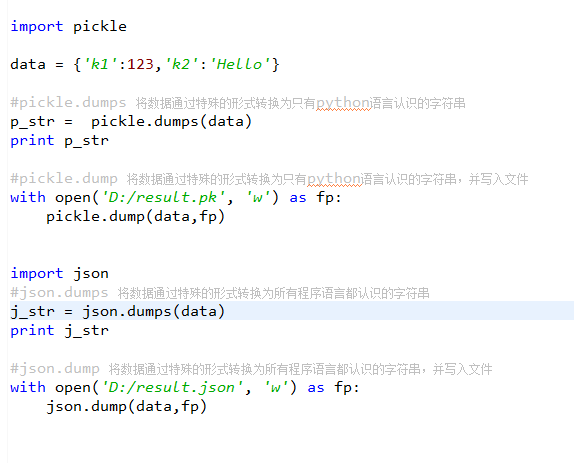
json 和 pickle
用于序列化的两个模块
- json,用于字符串 和 python数据类型间进行转换
- pickle,用于python特有的类型 和 python的数据类型间进行转换
Json模块提供了四个功能:dumps、dump、loads、load
pickle模块提供了四个功能:dumps、dump、loads、load
shelve 模块
shelve模块是一个简单的k,v将内存数据通过文件持久化的模块,可以持久化任何pickle可支持的python数据格式
 1 import shelve
 2
 3 d = shelve.open('shelve_test') #打开一个文件
 4
 5 class Test(object):
 6     def __init__(self,n):
 7         self.n = n
 8
 9
10 t = Test(123)
11 t2 = Test(123334)
12
13 name = ["alex","rain","test"]
14 d["test"] = name #持久化列表
15 d["t1"] = t      #持久化类
16 d["t2"] = t2
17
18 d.close()
logging模块
很多程序都有记录日志的需求,并且日志中包含的信息即有正常的程序访问日志,还可能有错误、警告等信息输出,python的logging模块提供了标准的日志接口,你可以通过它存储各种格式的日志,logging的日志可以分为 debug(), info(), warning(), error() and critical() 5个级别,下面我们看一下怎么用。
最简单用法
import logging

logging.warning("user [alex] attempted wrong password more than 3 times")
logging.critical("server is down")

#输出
WARNING:root:user [alex] attempted wrong password more than 3 times
CRITICAL:root:server is down
看一下这几个日志级别分别代表什么意思
| Level | When it’s used |
|---|---|
DEBUG |
Detailed information, typically of interest only when diagnosing problems. |
INFO |
Confirmation that things are working as expected. |
WARNING |
An indication that something unexpected happened, or indicative of some problem in the near future (e.g. ‘disk space low’). The software is still working as expected. |
ERROR |
Due to a more serious problem, the software has not been able to perform some function. |
CRITICAL |
A serious error, indicating that the program itself may be unable to continue running. |
如果想把日志写到文件里,也很简单
import logging

logging.basicConfig(filename='example.log',level=logging.INFO)
logging.debug('This message should go to the log file')
logging.info('So should this')
logging.warning('And this, too')
其中下面这句中的level=loggin.INFO意思是,把日志纪录级别设置为INFO,也就是说,只有比日志是INFO或比INFO级别更高 的日志才会被纪录到文件里,在这个例子, 第一条日志是不会被纪录的,如果希望纪录debug的日志,那把日志级别改成DEBUG就行了。
logging.basicConfig(filename='example.log',level=logging.INFO)
感觉上面的日志格式忘记加上时间啦,日志不知道时间怎么行呢,下面就来加上!
import logging
logging.basicConfig(format='%(asctime)s %(message)s', datefmt='%m/%d/%Y %I:%M:%S %p')
logging.warning('is when this event was logged.')

#输出
12/12/2010 11:46:36 AM is when this event was logged.