一、准备环境
准备环境:
| 角色 | IP地址 |
| k8s-master | 192.168.56.21 |
| k8s-node01 | 192.168.56.25 |
| k8s-node02 | 192.168.56.26 |
所有节点环境初始化:
关闭防火墙:
systemctl stop firewalld
systemctl disable firewalld

关闭selinux:
sed -i 's/enforcing/disabled/' /etc/selinux/config
setenforce 0

关闭swap:
swapoff -a
sed -ri 's/.*swap.*/#&/' /etc/fstab

按IP分别设置主机名:
hostnamectl set-hostname k8s-master
hostnamectl set-hostname k8s-node01
hostnamectl set-hostname k8s-node02

仅在master添加hosts:
cat >> /etc/hosts << EOF
192.168.56.21 k8s-master
192.168.56.25 k8s-node01
192.168.56.26 k8s-node02
EOF

将桥接的IPv4流量传递到iptables的链:
cat > /etc/sysctl.d/k8s.conf << EOF
net.bridge.bridge-nf-call-ip6tables = 1
net.bridge.bridge-nf-call-iptables = 1
EOF

sysctl --system

时间同步:
yum install ntpdate -y
ntpdate time.windows.com
echo "*/5 * * * * /usr/sbin/ntpdate time.windows.com" >>/var/spool/cron/root
二、在所有节点安装Docker、kubeadm、kubectl、kubelet
2.1 安装docker
wget https://mirrors.aliyun.com/docker-ce/linux/centos/docker-ce.repo -O /etc/yum.repos.d/docker-ce.repo
yum install -y yum-utils device-mapper-persistent-data lvm2
yum -y install docker-ce
systemctl enable docker && systemctl start docker
2.2 配置阿里云yum源
cat > /etc/yum.repos.d/kubernetes.repo << EOF
[kubernetes]
name=Kubernetes
baseurl=https://mirrors.aliyun.com/kubernetes/yum/repos/kubernetes-el7-x86_64
enabled=1
gpgcheck=0
repo_gpgcheck=0
gpgkey=https://mirrors.aliyun.com/kubernetes/yum/doc/yum-key.gpg
https://mirrors.aliyun.com/kubernetes/yum/doc/rpm-package-key.gpg
EOF
2.3 三个节点安装kubeadmin、kubelet,仅在k8s-master节点上安装kubectl
yum install -y kubelet-1.19.0 kubeadm-1.19.0 kubectl-1.19.0
systemctl enable kubelet
三、部署kubernetes master
kubeadm init
  --apiserver-advertise-address=192.168.56.21
  --image-repository registry.aliyuncs.com/google_containers
  --kubernetes-version v1.19.0
  --service-cidr=10.96.0.0/12
  --pod-network-cidr=10.244.0.0/16
  --ignore-preflight-errors=all

mkdir -p $HOME/.kube
sudo cp -i /etc/kubernetes/admin.conf $HOME/.kube/config
sudo chown $(id -u):$(id -g) $HOME/.kube/config


#  kubeadm init
>   --apiserver-advertise-address=192.168.56.21
>   --image-repository registry.aliyuncs.com/google_containers
>   --kubernetes-version v1.19.0
>   --service-cidr=10.96.0.0/12
>   --pod-network-cidr=10.244.0.0/16
>   --ignore-preflight-errors=all
W1005 15:41:47.137328   25574 configset.go:348] WARNING: kubeadm cannot validate component configs for API groups [kubelet.config.k8s.io kubeproxy.config.k8s.io]
[init] Using Kubernetes version: v1.19.0
[preflight] Running pre-flight checks  # 检查环境
    [WARNING IsDockerSystemdCheck]: detected "cgroupfs" as the Docker cgroup driver. The recommended driver is "systemd". Please follow the guide at https://kubernetes.io/docs/setup/cri/
    [WARNING SystemVerification]: this Docker version is not on the list of validated versions: 20.10.9. Latest validated version: 19.03
[preflight] Pulling images required for setting up a Kubernetes cluster
[preflight] This might take a minute or two, depending on the speed of your internet connection
[preflight] You can also perform this action in beforehand using 'kubeadm config images pull'
[certs] Using certificateDir folder "/etc/kubernetes/pki"  # 生成k8s和etcd证书
[certs] Generating "ca" certificate and key
[certs] Generating "apiserver" certificate and key
[certs] apiserver serving cert is signed for DNS names [k8s-master kubernetes kubernetes.default kubernetes.default.svc kubernetes.default.svc.cluster.local] and IPs [10.96.0.1 192.168.56.21]
[certs] Generating "apiserver-kubelet-client" certificate and key
[certs] Generating "front-proxy-ca" certificate and key
[certs] Generating "front-proxy-client" certificate and key
[certs] Generating "etcd/ca" certificate and key
[certs] Generating "etcd/server" certificate and key
[certs] etcd/server serving cert is signed for DNS names [k8s-master localhost] and IPs [192.168.56.21 127.0.0.1 ::1]
[certs] Generating "etcd/peer" certificate and key
[certs] etcd/peer serving cert is signed for DNS names [k8s-master localhost] and IPs [192.168.56.21 127.0.0.1 ::1]
[certs] Generating "etcd/healthcheck-client" certificate and key
[certs] Generating "apiserver-etcd-client" certificate and key
[certs] Generating "sa" key and public key
[kubeconfig] Using kubeconfig folder "/etc/kubernetes"  # 生成kubeconfig文件
[kubeconfig] Writing "admin.conf" kubeconfig file
[kubeconfig] Writing "kubelet.conf" kubeconfig file
[kubeconfig] Writing "controller-manager.conf" kubeconfig file
[kubeconfig] Writing "scheduler.conf" kubeconfig file
[kubelet-start] Writing kubelet environment file with flags to file "/var/lib/kubelet/kubeadm-flags.env"  # 生成kubelet配置文件
[kubelet-start] Writing kubelet configuration to file "/var/lib/kubelet/config.yaml"
[kubelet-start] Starting the kubelet
[control-plane] Using manifest folder "/etc/kubernetes/manifests"  # 部署管理节点组件,用镜像启动 kubectl get pod -n kube-system
[control-plane] Creating static Pod manifest for "kube-apiserver"
[control-plane] Creating static Pod manifest for "kube-controller-manager"
[control-plane] Creating static Pod manifest for "kube-scheduler"
[etcd] Creating static Pod manifest for local etcd in "/etc/kubernetes/manifests"  # 部署etcd数据库用镜像启动
[wait-control-plane] Waiting for the kubelet to boot up the control plane as static Pods from directory "/etc/kubernetes/manifests". This can take up to 4m0s
[apiclient] All control plane components are healthy after 14.006837 seconds
[upload-config] Storing the configuration used in ConfigMap "kubeadm-config" in the "kube-system" Namespace  # 上传配置文件到k8s中
[kubelet] Creating a ConfigMap "kubelet-config-1.19" in namespace kube-system with the configuration for the kubelets in the cluster
[upload-certs] Skipping phase. Please see --upload-certs
[mark-control-plane] Marking the node k8s-master as control-plane by adding the label "node-role.kubernetes.io/master=''"  # 给管理节点打一个标签
[mark-control-plane] Marking the node k8s-master as control-plane by adding the taints [node-role.kubernetes.io/master:NoSchedule]  # 将给管理节点打一个污点
[bootstrap-token] Using token: 46x35t.q5wjyktnsjdeu7gk  # 自动为kubelet颁发证书
[bootstrap-token] Configuring bootstrap tokens, cluster-info ConfigMap, RBAC Roles
[bootstrap-token] configured RBAC rules to allow Node Bootstrap tokens to get nodes
[bootstrap-token] configured RBAC rules to allow Node Bootstrap tokens to post CSRs in order for nodes to get long term certificate credentials
[bootstrap-token] configured RBAC rules to allow the csrapprover controller automatically approve CSRs from a Node Bootstrap Token
[bootstrap-token] configured RBAC rules to allow certificate rotation for all node client certificates in the cluster
[bootstrap-token] Creating the "cluster-info" ConfigMap in the "kube-public" namespace
[kubelet-finalize] Updating "/etc/kubernetes/kubelet.conf" to point to a rotatable kubelet client certificate and key
[addons] Applied essential addon: CoreDNS  # 部署插件coredns和kube-proxy
[addons] Applied essential addon: kube-proxy

Your Kubernetes control-plane has initialized successfully!

To start using your cluster, you need to run the following as a regular user:

# 接下来需要在master执行的命令
  mkdir -p $HOME/.kube
  sudo cp -i /etc/kubernetes/admin.conf $HOME/.kube/config
  sudo chown $(id -u):$(id -g) $HOME/.kube/config

# 还需要部署一个网络组件
You should now deploy a pod network to the cluster.
Run "kubectl apply -f [podnetwork].yaml" with one of the options listed at:
  https://kubernetes.io/docs/concepts/cluster-administration/addons/

Then you can join any number of worker nodes by running the following on each as root:

# 将node节点加入master的命令
kubeadm join 192.168.56.21:6443 --token 46x35t.q5wjyktnsjdeu7gk
    --discovery-token-ca-cert-hash sha256:8d44716e10fc9c16a45cb988cee767f0d4e59f1885e71914cc0ad94ba065aaf4
初始化报错解决方法
[kubelet-check] Initial timeout of 40s passed.
error execution phase upload-config/kubelet: Error writing Crisocket information for the control-plane node: timed out waiting for the condition

解决方法:
swapoff -a && kubeadm reset  && systemctl daemon-reload && systemctl restart kubelet  && iptables -F && iptables -t nat -F && iptables -t mangle -F && iptables -X
四、将node节点加入k8s集群中
]# kubeadm join 192.168.56.21:6443 --token 46x35t.q5wjyktnsjdeu7gk
>     --discovery-token-ca-cert-hash sha256:8d44716e10fc9c16a45cb988cee767f0d4e59f1885e71914cc0ad94ba065aaf4
[preflight] Running pre-flight checks
    [WARNING IsDockerSystemdCheck]: detected "cgroupfs" as the Docker cgroup driver. The recommended driver is "systemd". Please follow the guide at https://kubernetes.io/docs/setup/cri/
    [WARNING SystemVerification]: this Docker version is not on the list of validated versions: 20.10.9. Latest validated version: 19.03
[preflight] Reading configuration from the cluster...
[preflight] FYI: You can look at this config file with 'kubectl -n kube-system get cm kubeadm-config -oyaml'
[kubelet-start] Writing kubelet configuration to file "/var/lib/kubelet/config.yaml"
[kubelet-start] Writing kubelet environment file with flags to file "/var/lib/kubelet/kubeadm-flags.env"
[kubelet-start] Starting the kubelet
[kubelet-start] Waiting for the kubelet to perform the TLS Bootstrap...

This node has joined the cluster:
* Certificate signing request was sent to apiserver and a response was received.
* The Kubelet was informed of the new secure connection details.

Run 'kubectl get nodes' on the control-plane to see this node join the cluster.
默认token有效期为24小时,当过期之后,该token就不可用了。这时就需要重新创建token,操作如下:
[root@k8s-master ~]# kubeadm token create
W1005 16:00:31.481430   31411 configset.go:348] WARNING: kubeadm cannot validate component configs for API groups [kubelet.config.k8s.io kubeproxy.config.k8s.io]
i376x3.lw9aepx6ldbzrj5c
[root@k8s-master ~]# kubeadm token list
TOKEN                     TTL         EXPIRES                     USAGES                   DESCRIPTION             EXTRA GROUPS
i376x3.lw9aepx6ldbzrj5c   23h         2021-10-06T16:00:31+08:00   authentication,signing   <none>                  system:bootstrappers:kubeadm:default-node-token
[root@k8s-master ~]# openssl x509 -pubkey -in /etc/kubernetes/pki/ca.crt | openssl rsa -pubin -outform der 2>/dev/null | openssl dgst -sha256 -hex | sed 's/^.* //'
8d44716e10fc9c16a45cb988cee767f0d4e59f1885e71914cc0ad94ba065aaf4
[root@k8s-master ~]# kubeadm join 192.168.56.21:6443 --token i376x3.lw9aepx6ldbzrj5c
--discovery-token-ca-cert-hash sha256:8d44716e10fc9c16a45cb988cee767f0d4e59f1885e71914cc0ad94ba065aaf4
或者直接用命令生成也可以
kubeadm token create --print-join-command
五、部署网络组件(CNI)
此时查看node节点是NotReady状态
# kubectl get node
NAME         STATUS     ROLES    AGE   VERSION
k8s-master   NotReady   master   27m   v1.19.0
k8s-node01   NotReady   <none>   12m   v1.19.0
k8s-node02   NotReady   <none>   12m   v1.19.0
https://kubernetes.io/docs/concepts/cluster-administration/addons/
注意:只需要部署下面其中一个,推荐Calico。
Calico是一个纯三层的数据中心网络方案,Calico支持广泛的平台,包括Kubernetes、OpenStack等。
Calico 在每一个计算节点利用 Linux Kernel 实现了一个高效的虚拟路由器( vRouter) 来负责数据转发,而每个 vRouter 通过 BGP 协议负责把自己上运行的 workload 的路由信息向整个 Calico 网络内传播。
https://docs.projectcalico.org/getting-started/kubernetes/quickstart
wget https://docs.projectcalico.org/manifests/calico.yaml --no-check-certificate
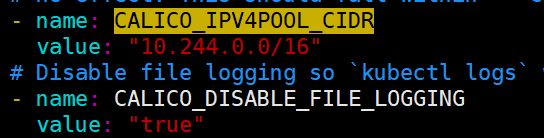
下载完后还需要修改里面定义Pod网络(CALICO_IPV4POOL_CIDR),与前面kubeadm init指定的一样
# vim calico.yaml

修改后
当calico的pod都启动成功之后,node节点就会变成ready状态
# kubectl get pod -n kube-system -l k8s-app=calico-node -o wide
NAME                READY   STATUS     RESTARTS   AGE     IP              NODE         NOMINATED NODE   READINESS GATES
calico-node-4dcl8   1/1     Running    0          12m     192.168.56.25   k8s-node01   <none>           <none>
calico-node-kjs86   1/1     Running    0          12m     192.168.56.26   k8s-node02   <none>           <none>

# kubectl get node
NAME         STATUS   ROLES    AGE   VERSION
k8s-master   Ready    master   39m   v1.19.0
k8s-node01   Ready    <none>   24m   v1.19.0
k8s-node02   Ready    <none>   24m   v1.19.0
将kube-proxy改为ipvs,因为在初始化集群的时候注释了ipvs配置,所以需要自行修改一下
# 在master节点执行
# kubectl edit cm kube-proxy -n kube-system
    mode: "ipvs"

# 更新kube-proxy的pod
# kubectl patch daemonset kube-proxy -p "{"spec":{"template":{"metadata":{"annotations":{"date":"`date +'%s'`"}}}}}" -n kube-system

# 验证
# curl 127.0.0.1:10249/proxyMode
ipvs
六、部署Dashboard
官方GitHub地址:https://github.com/kubernetes/dashboard
6.1 创建管理员用户
# cat admin.yaml
apiVersion: v1
kind: ServiceAccount
metadata:
  name: admin-user
  namespace: kube-system
---
apiVersion: rbac.authorization.k8s.io/v1
kind: ClusterRoleBinding
metadata:
  name: admin-user
  annotations:
    rbac.authorization.kubernetes.io/autoupdate: "true"
roleRef:
  apiGroup: rbac.authorization.k8s.io
  kind: ClusterRole
  name: cluster-admin
subjects:
- kind: ServiceAccount
  name: admin-user
  namespace: kube-system

# kubectl apply -f admin.yaml
6.2 部署dashboard

kubectl apply -f https://raw.githubusercontent.com/kubernetes/dashboard/v2.4.0/aio/deploy/recommended.yaml

kubectl edit svc kubernetes-dashboard -n kubernetes-dashboard
将type类型由ClusterIP修改为NodePort类型
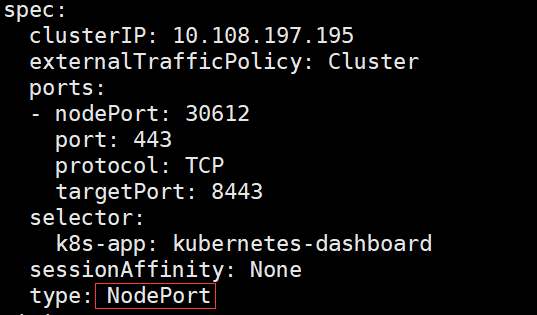
查看nodeport端口
# kubectl get svc -n kubernetes-dashboard
NAME                        TYPE        CLUSTER-IP       EXTERNAL-IP   PORT(S)         AGE
dashboard-metrics-scraper   ClusterIP   10.96.158.70     <none>        8000/TCP        154m
kubernetes-dashboard        NodePort    10.108.197.195   <none>        443:30612/TCP   154m
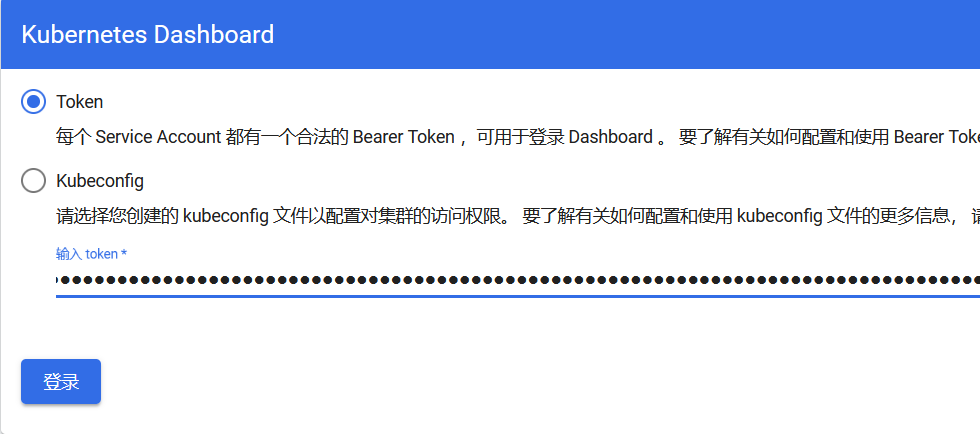
使用node节点的IP:30612登录dashboard
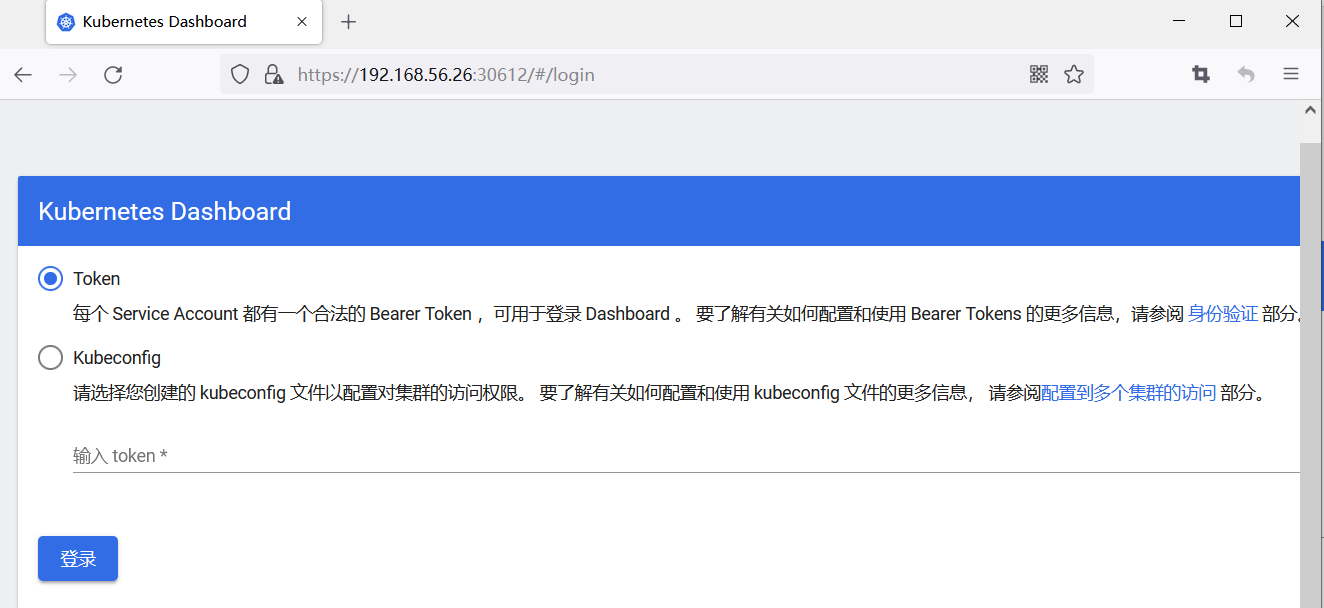
查看admin用户的token登录dashboard
# kubectl get secret -n kube-system | grep admin-user
admin-user-token-qxvpl                           kubernetes.io/service-account-token   3      8m25s
# kubectl describe secret -n kube-system admin-user-token-qxvpl
Name:         admin-user-token-qxvpl
Namespace:    kube-system
Labels:       <none>
Annotations:  kubernetes.io/service-account.name: admin-user
              kubernetes.io/service-account.uid: 889b134a-a6e3-4306-999e-3a19cb91d95a

Type:  kubernetes.io/service-account-token

Data
====
ca.crt:     1066 bytes
namespace:  11 bytes
token:      eyJhbGciOiJSUzI1NiIsImtpZCI6InI3ODFQaTBzR19OeUpMQnhNQm5Lem5GSlpjZ0VzWXNITGY5dHI2bVlOUjgifQ.eyJpc3MiOiJrdWJlcm5ldGVzL3NlcnZpY2VhY2NvdW50Iiwia3ViZXJuZXRlcy5pby9zZXJ2aWNlYWNjb3VudC9uYW1lc3BhY2UiOiJrdWJlLXN5c3RlbSIsImt1YmVybmV0ZXMuaW8vc2VydmljZWFjY291bnQvc2VjcmV0Lm5hbWUiOiJhZG1pbi11c2VyLXRva2VuLXF4dnBsIiwia3ViZXJuZXRlcy5pby9zZXJ2aWNlYWNjb3VudC9zZXJ2aWNlLWFjY291bnQubmFtZSI6ImFkbWluLXVzZXIiLCJrdWJlcm5ldGVzLmlvL3NlcnZpY2VhY2NvdW50L3NlcnZpY2UtYWNjb3VudC51aWQiOiI4ODliMTM0YS1hNmUzLTQzMDYtOTk5ZS0zYTE5Y2I5MWQ5NWEiLCJzdWIiOiJzeXN0ZW06c2VydmljZWFjY291bnQ6a3ViZS1zeXN0ZW06YWRtaW4tdXNlciJ9.BHgiNSelW14pijLcO9BPP0WVkNT6--63CobSoG-eEydPfEhmQRSCmmkzFb9pmk3r0C9HURfmHlZ-FkEPs4RSolraso28iCbGz3xF-rwQ6e6HfpP6s5d3-i_yQJR74bIlkxKfYgZvMscmYu_1UP1PEuwnGQoBhhedGOMHnsFRNX4Fmzi50IitTHtef9ZzSCMDwmwZtOomybH0NpW2eTKHPINvou-NQaHSEhn38V14KgpeB8siPoSlxHrbEn9a-bKilWsU8XQakpWCvV5FImD6np1aMwLj-wIi7Y85Y1u19ieu5E1ovayY5al8fINjY1beLjHCLQfCp1qiQt_lMB2DcA