一、gitlab简介
gitlab是一个用于仓库管理系统的开源项目,使用git作为代码管理工具,并在此基础上搭建web服务。
【管理命令】 gitlab-ctl stop
gitlab-ctl start
gitlab-ctl restart
二、gitlab私有仓库的搭建
安装配置,搭建web服务
[root@localhost ~]# rz             #上传安装包

[root@localhost ~]# ls             #查看安装是否上传
gitlab-ce-8.9.5-ce.0.el7.x86_64.rpm
[root@localhost ~]# yum install gitlab-ce-8.9.5-ce.0.el7.x86_64.rpm -y           #安装软件包
[root@localhost ~]# vim /etc/gitlab/gitlab.rb               #编辑配置文件

                    external_url 'http://192.168.42.9'           #将localhost改为主机ip

[root@localhost ~]# gitlab-ctl reconfigure               #重新配置gitlab
Running handlers:
Running handlers complete
Chef Client finished, 226/314 resources updated in 02 minutes 15 seconds
gitlab Reconfigured!


【注意】一定要关闭httpd,因为gitlab也用80端口
三、gitlab使用演示
浏览器访问ip地址
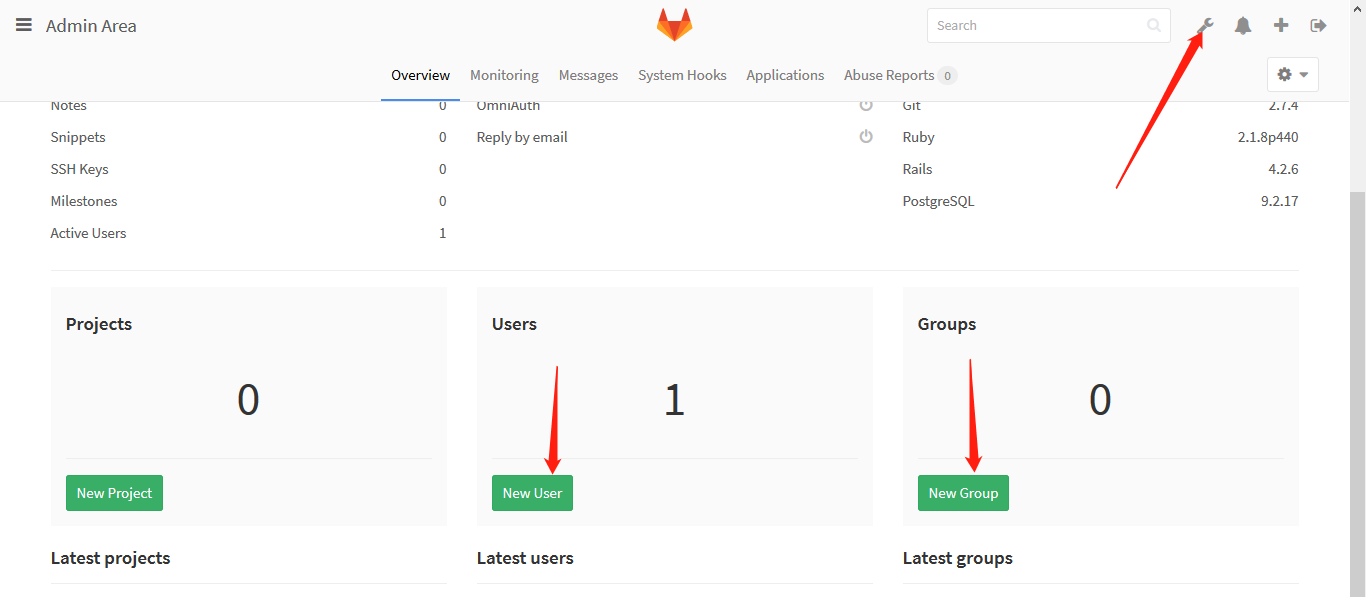
创建用户,创建组,这里就不多加赘述了
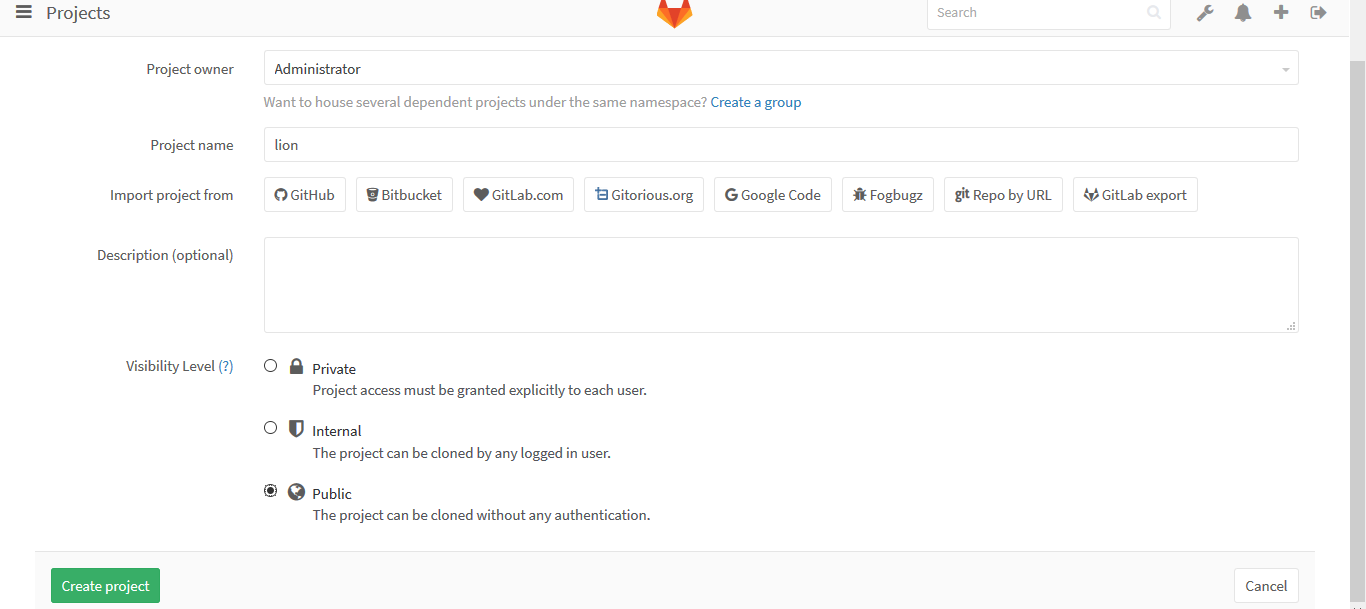
创建new project
shell端执行操作命令,去web端查看
[root@localhost lion]# git clone http://192.168.42.9/root/lion.git           #克隆远程主机仓库
[root@localhost lion]# cd lion                 #切换目录,创建文件并提交
[root@localhost lion]# ls -a
.  ..  .git
[root@localhost lion]# touch he
[root@localhost lion]# echo 'hepang' >> he
[root@localhost lion]# git add .
[root@localhost lion]# git commit -m v1
[master (root-commit) f502b87] v1
 1 file changed, 1 insertion(+)
 create mode 100644 he
[root@localhost lion]# git log
commit f502b8792b5c054de4fff7f5628317d7b559ebf8
Author: Your Name <you@example.com>
Date:   Thu May 23 23:02:07 2019 -0400

    v1
[root@localhost lion]# cat he
hepang
[root@localhost lion]# git push -u origin master              #推送到远程主机

(gnome-ssh-askpass:8551): Gtk-WARNING **: cannot open display:
error: unable to read askpass response from '/usr/libexec/openssh/gnome-ssh-askpass'
Username for 'http://192.168.42.9': root

(gnome-ssh-askpass:8559): Gtk-WARNING **: cannot open display:
error: unable to read askpass response from '/usr/libexec/openssh/gnome-ssh-askpass'
Password for 'http://root@192.168.42.9':
Counting objects: 3, done.
Writing objects: 100% (3/3), 204 bytes | 0 bytes/s, done.
Total 3 (delta 0), reused 0 (delta 0)
To http://192.168.42.9/root/lion.git
 * [new branch]      master -> master
Branch master set up to track remote branch master from origin.
三、Linux免密使用gitlab
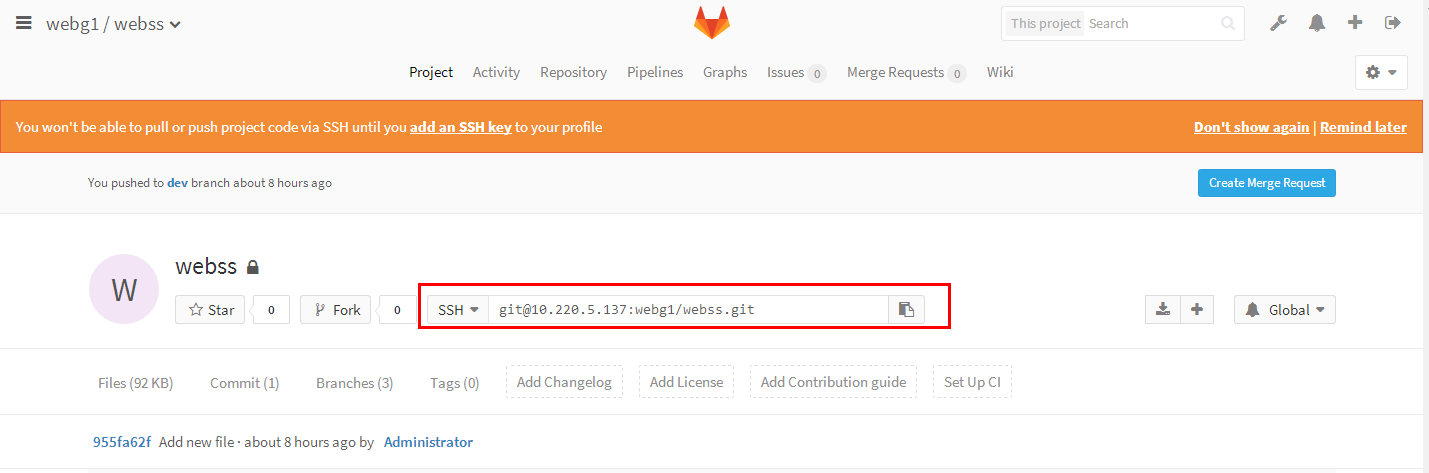
第一步:查看web端gitlab的秘钥地址

第二步:在本机生成秘钥文件并查看公钥

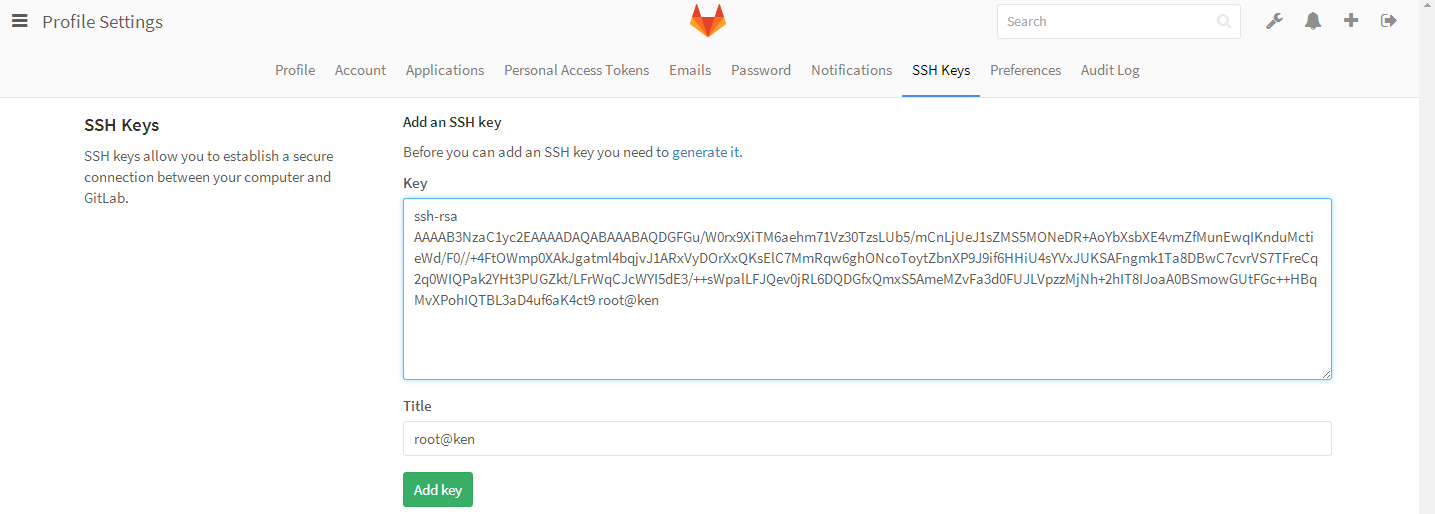
[root@ken webss]# ssh-keygen
[root@ken webss]# cat /root/.ssh/id_rsa.pub
ssh-rsa AAAAB3NzaC1yc2EAAAADAQABAAABAQDGFGu/W0rx9XiTM6aehm71Vz30TzsLUb5/mCnLjUeJ1sZMS5MONeDR+AoYbXsbXE4vmZfMunEwqIKnduMctieWd/F0//+4FtOWmp0XAkJgatml4bqjvJ1ARxVyDOrXxQKsElC7MmRqw6ghONcoToytZbnXP9J9if6HHiU4sYVxJUKSAFngmk1Ta8DBwC7cvrVS7TFreCq2q0WIQPak2YHt3PUGZkt/LFrWqCJcWYI5dE3/++sWpalLFJQev0jRL6DQDGfxQmxS5AmeMZvFa3d0FUJLVpzzMjNh+2hIT8IJoaA0BSmowGUtFGc++HBqMvXPohIQTBL3aD4uf6aK4ct9 root@ken
第三步:复制秘钥信息填写进web服务端


第四步:点击提交之后再次下载仓库信息
注意这里git clone之后写的是ssh的信息,不是http的连接信息了
回车之后可以看到没有输入任何东西就直接下载完成
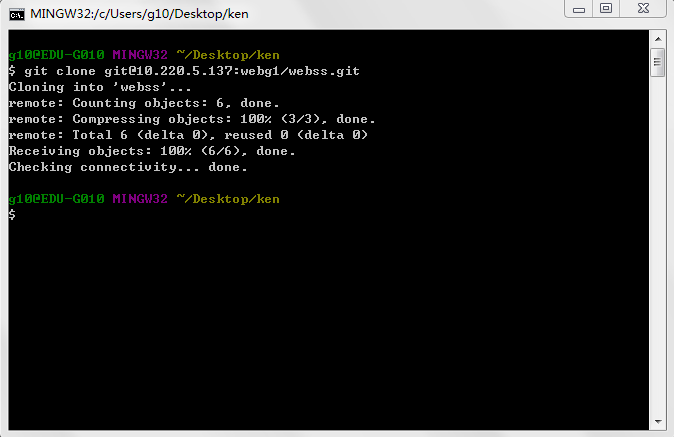
[root@ken k]# git clone git@10.220.5.137:webg1/webss.git
Cloning into 'webss'...
remote: Counting objects: 6, done.
remote: Compressing objects: 100% (3/3), done.
remote: Total 6 (delta 0), reused 0 (delta 0)
Receiving objects: 100% (6/6), done.
[root@ken k]# ls
webss
Gitlab在window中的使用
第一步:准备文件
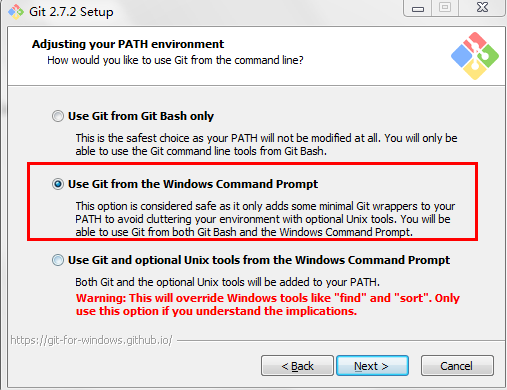
你需要首先在网上下载下面的这个客户端工具

![]()
第二步:安装
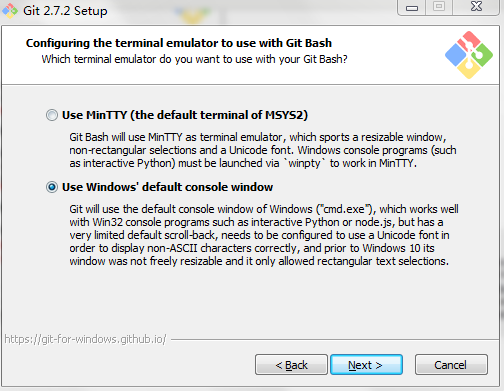


第三步:创建一个文件夹作为工作目录并进入目录之后
右击鼠标有两个选项,一个是bash一个是图形化,我选择bash,会出现如下的界面


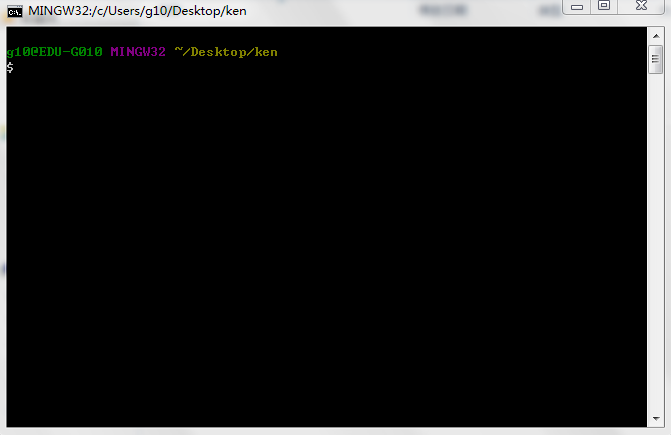

第四步:生成秘钥信息,进行免密登录
在这个界面输入ssh-keygen一直点回车生成秘钥信息
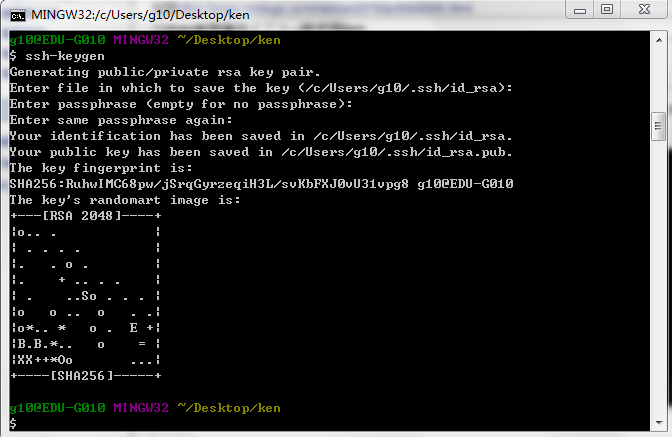

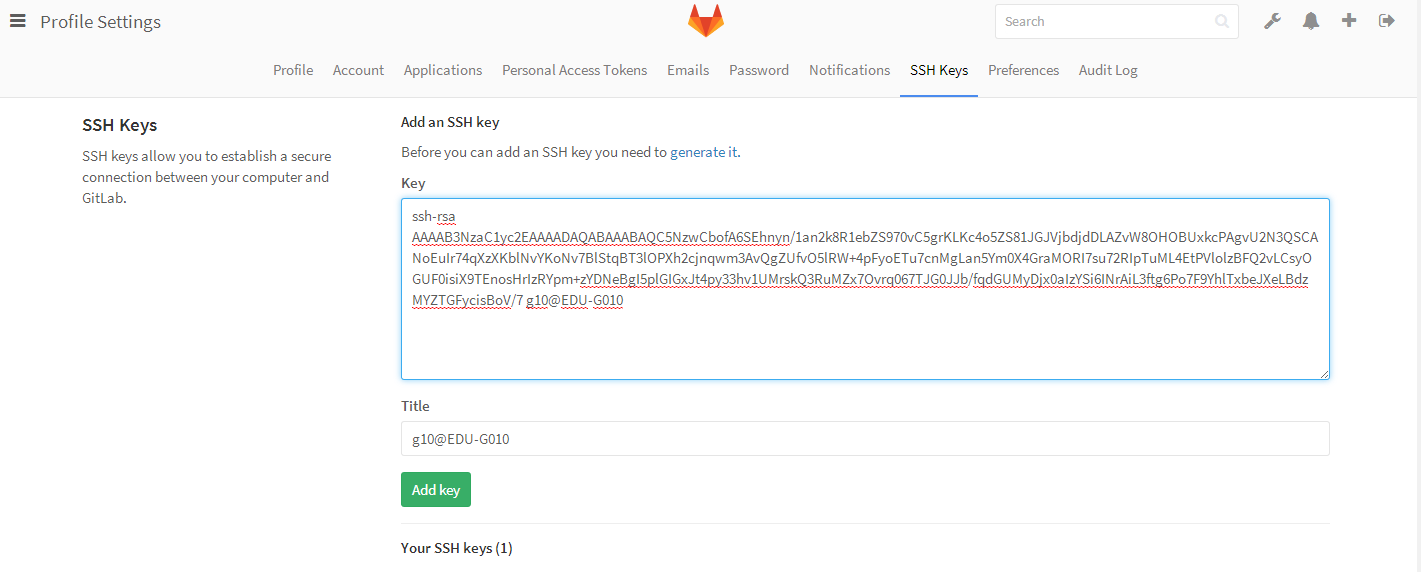
第五步:把公钥信息输入到web服务端
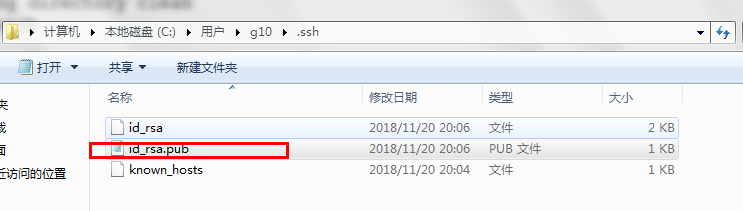
可以从上面的信息中看到秘钥信息保存在哪了,现在我们去c盘找
复制这个公钥里面的信息


第六步:本地下载仓库
使用git clone 加上你的项目ssh信息

第七步:本地查看
发现已经有了仓库信息了,现在你就可以开始写程序了


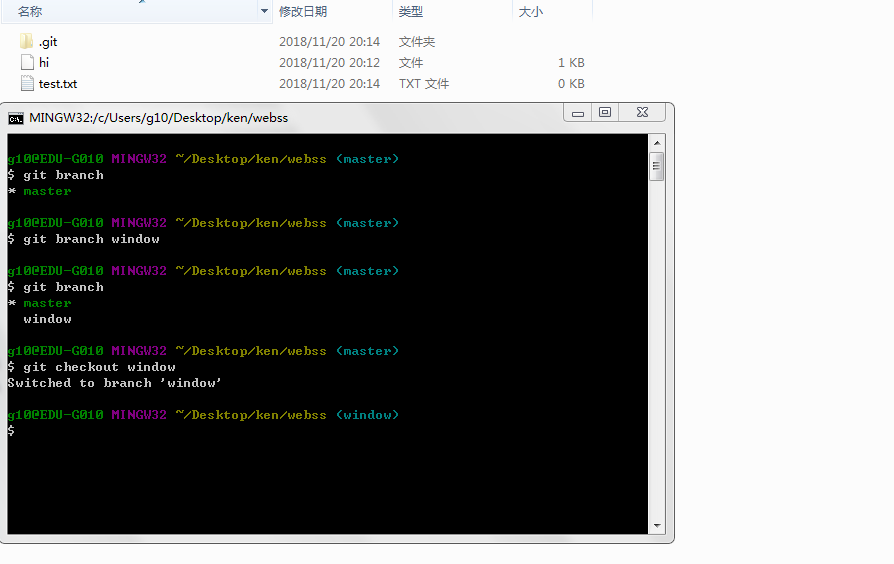
第八步:测试
进入到包含.git的目录并在此右击打开bash,执行创建分支操作,并建立test.txt测试文件

第九步:上传文件
和linux中一样执行如下命令
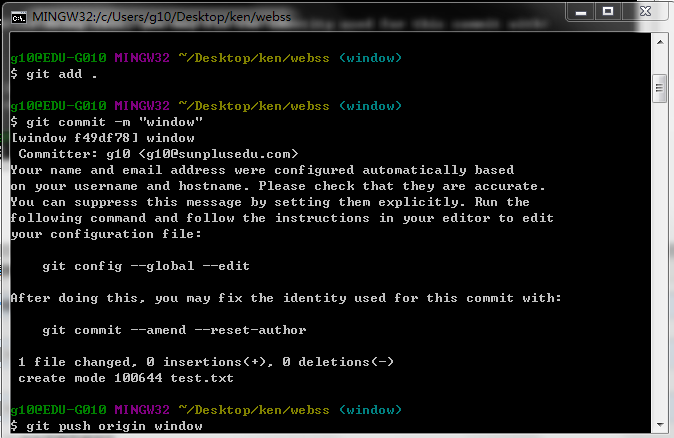

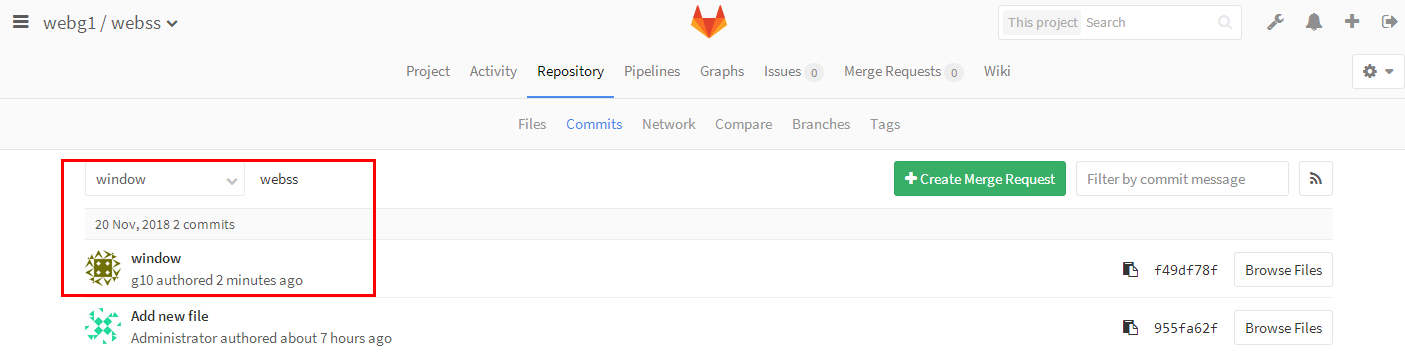
第十步:在web中查看
可以看到我们刚才在window中创建的文件也已经被上传上来了