HBox和VBox布局
- HBox只是一个水平布局包装类。 HBox里面所有的孩子节点都会水平排列成一行
- VBox仅仅是对垂直布局的一个简便的类封装。 VBox把它的子节点布局在一竖列中。
Layout容器下布局
ccui.LayoutType =
{
ABSOLUTE = 0, --绝对布局 默认 子元素按照绝对位置排列
VERTICAL = 1, --垂直平铺
HORIZONTAL = 2, --横向平铺
RELATIVE = 3, --相对布局
}
ccui.LinearGravity =
{
none = 0,
left = 1, --左侧对齐
top = 2, --顶部对齐
right = 3, --右侧对齐
bottom = 4, --底部对齐
centerVertical = 5, --垂直居中对齐线性布局
centerHorizontal = 6, --水平居中对齐线性布局
}
Layout之绝对布局
代码如下
local layout = ccui.Layout:create()
layout:setLayoutType(ccui.LayoutType.ABSOLUTE)
Layout之相对布局
代码如下
local layout = ccui.Layout:create()
layout:setLayoutType(ccui.LayoutType.RELATIVE)
Layout之垂直平铺
代码如下
local layout = ccui.Layout:create()
layout:setLayoutType(ccui.LayoutType.VERTICAL)
这段代码决定了子控件在垂直方向的布局规则,即Y坐标落点规则。
子控件代码
local button = ccui.Button:create()
button:setTitleText("Text Button 1")
button:setTouchEnabled(true)
button:loadTextures("cocosui/animationbuttonnormal.png", "cocosui/animationbuttonpressed.png", "")
layout:addChild(button)

local lp1 = ccui.LinearLayoutParameter:create()
button:setLayoutParameter(lp1)
lp1:setGravity(ccui.LinearGravity.centerHorizontal)
lp1:setMargin({ left = 0, top = 5, right = 0, bottom = 10 })

local textButton = ccui.Button:create()
textButton:setTouchEnabled(true)
textButton:loadTextures("cocosui/backtotopnormal.png", "cocosui/backtotoppressed.png", "")
textButton:setTitleText("Text Button 2")
layout:addChild(textButton)

local lp2 = ccui.LinearLayoutParameter:create()
textButton:setLayoutParameter(lp2)
lp2:setGravity(ccui.LinearGravity.centerHorizontal)
lp2:setMargin({left = 0, top = 10, right = 0, bottom  = 10} )

local button_scale9 = ccui.Button:create()
button_scale9:setTouchEnabled(true)
button_scale9:setTitleText("Text Button 3")
button_scale9:loadTextures("cocosui/button.png", "cocosui/buttonHighlighted.png", "")
button_scale9:setScale9Enabled(true)
button_scale9:setContentSize(cc.size(100, button_scale9:getVirtualRendererSize().height))
layout:addChild(button_scale9)

local lp3 = ccui.LinearLayoutParameter:create()
button_scale9:setLayoutParameter(lp3)
lp3:setGravity(ccui.LinearGravity.centerHorizontal)
lp3:setMargin({ left = 0, top = 10, right = 0, bottom  = 10 } )
LinearLayoutParameter线性布局参数 它是专门为线性排列元素用线性布局管理器,通过该类可以指示子控件在水平方向的定位规则,即X坐标。如果垂直方向Layout容器中已定,那么只有决定X坐标的,Left,Right,Center有效。
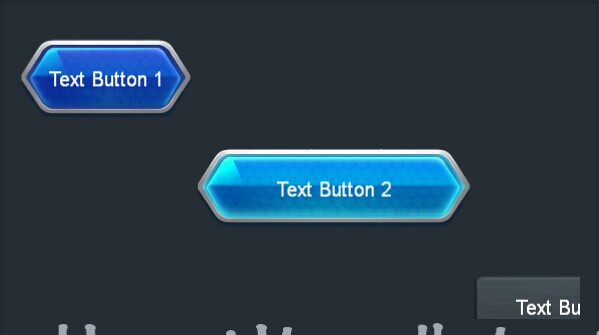
示例图如下

Layout之横向平铺
代码如下
local layout = ccui.Layout:create()
layout:setLayoutType(ccui.LayoutType.HORIZONTAL)
这段代码决定了子控件在水平方向的布局规则,即X坐标落点规则。
子控件代码
local button = ccui.Button:create()
button:setTouchEnabled(true)
button:setTitleText("Text Button 1")
button:loadTextures("cocosui/animationbuttonnormal.png", "cocosui/animationbuttonpressed.png", "")
layout:addChild(button)

local lp1 = ccui.LinearLayoutParameter:create()
button:setLayoutParameter(lp1)
lp1:setGravity(ccui.LinearGravity.top)
lp1:setMargin({left = 0, top  = 10, right = 0, bottom = 10} )

local textButton = ccui.Button:create()
textButton:setTouchEnabled(true)
textButton:loadTextures("cocosui/backtotopnormal.png", "cocosui/backtotoppressed.png", "")
textButton:setTitleText("Text Button 2")
layout:addChild(textButton)

local lp2 = ccui.LinearLayoutParameter:create()
textButton:setLayoutParameter(lp2)
lp2:setGravity(ccui.LinearGravity.centerVertical)
lp2:setMargin({left = 0,top = 10,right = 0,bottom = 50})

local button_scale9 = ccui.Button:create()
button_scale9:setTouchEnabled(true)
button_scale9:loadTextures("cocosui/button.png", "cocosui/buttonHighlighted.png", "")
button_scale9:setTitleText("Text Button 2")
button_scale9:setScale9Enabled(true)
button_scale9:setContentSize(cc.size(100, button_scale9:getVirtualRendererSize().height))
layout:addChild(button_scale9)

local lp3 = ccui.LinearLayoutParameter:create()
button_scale9:setLayoutParameter(lp3)
lp3:setGravity(ccui.LinearGravity.bottom)
lp3:setMargin({left = 0, top = 10, right = 0, bottom = 10})
LinearLayoutParameter线性布局参数 它是专门为线性排列元素用线性布局管理器,通过该类可以指示子控件在垂直方向的定位规则,即Y坐标。如果水平方向Layout容器中已定,那么只有决定Y坐标的,Top,Bottom,Center有效。
