一、点对点
1、提供者目录展示
2、导入依赖
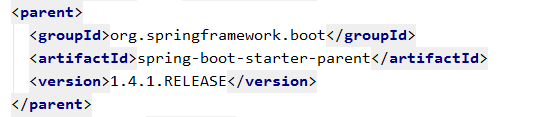
<dependency>
      <groupId>org.springframework.boot</groupId>
      <artifactId>spring-boot-starter</artifactId>
    </dependency>
    <!-- spring boot web支持:mvc,aop... -->
    <dependency>
      <groupId>org.springframework.boot</groupId>
      <artifactId>spring-boot-starter-web</artifactId>
    </dependency>
    <dependency>
      <groupId>org.springframework.boot</groupId>
      <artifactId>spring-boot-starter-test</artifactId>
      <scope>test</scope>
    </dependency>
    <dependency>
      <groupId>org.springframework.boot</groupId>
      <artifactId>spring-boot-starter-activemq</artifactId>
    </dependency>
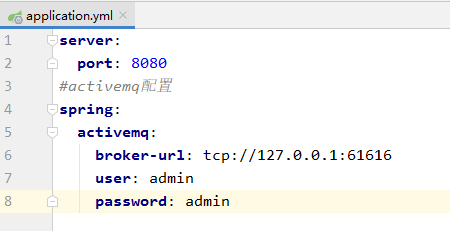
3、生产者application.yml配置文件
4、生产者MyProvider,通过JMSTemplate模板发送消息
package com.zn.p2p;

import org.apache.activemq.command.ActiveMQQueue;
import org.springframework.jms.core.JmsTemplate;
import org.springframework.stereotype.Component;

import javax.annotation.Resource;

/**
 * 生产者,通过JMSTemplate模板发送消息
 */
@Component
public class MyProvider {
    //注入JMSTemplate模板
    @Resource
    private JmsTemplate jmsTemplate;
    //创建方法
    public void sendMessage(){
        //点对点,创建队列
        ActiveMQQueue queue=new ActiveMQQueue("SpringBoot_Queue");
        //发送消息
        jmsTemplate.convertAndSend(queue,"生产者产生的消息!");
    }
}
5、客户端访问ProviderController
package com.zn.p2p;

import org.springframework.web.bind.annotation.RequestMapping;
import org.springframework.web.bind.annotation.RestController;

import javax.annotation.Resource;

/**
 * 客户端访问的方法
 */
@RestController
public class ProvideController {
    @Resource
    private MyProvider provider;

    @RequestMapping("/sendMessage")
    public String sendMessage(){
        provider.sendMessage();
        return "sucess!!";
    }
}
6、provider启动类StartProvider
package com.zn;

import org.springframework.boot.SpringApplication;
import org.springframework.boot.autoconfigure.SpringBootApplication;

@SpringBootApplication
public class StartProvider {
    public static void main(String[] args) {
        SpringApplication.run(StartProvider.class,args);
    }
}
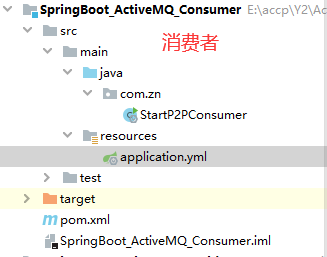
7、消费者目录展示
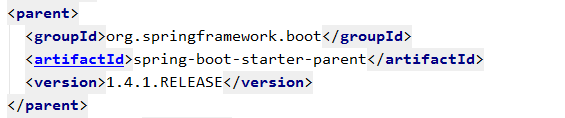
8、导入依赖
<dependency>
      <groupId>org.springframework.boot</groupId>
      <artifactId>spring-boot-starter</artifactId>
    </dependency>
    <!-- spring boot web支持:mvc,aop... -->
    <dependency>
      <groupId>org.springframework.boot</groupId>
      <artifactId>spring-boot-starter-web</artifactId>
    </dependency>
    <dependency>
      <groupId>org.springframework.boot</groupId>
      <artifactId>spring-boot-starter-test</artifactId>
      <scope>test</scope>
    </dependency>
    <dependency>
      <groupId>org.springframework.boot</groupId>
      <artifactId>spring-boot-starter-activemq</artifactId>
    </dependency>
9、消费者application.yml配置文件

10、consumer启动类StartP2PConsumer
package com.zn;

import org.springframework.boot.SpringApplication;
import org.springframework.boot.autoconfigure.SpringBootApplication;
import org.springframework.jms.annotation.JmsListener;
import org.springframework.jms.annotation.JmsListeners;

import javax.jms.JMSException;
import javax.jms.TextMessage;

@SpringBootApplication
public class StartP2PConsumer {
    public static void main(String[] args) {
        SpringApplication.run(StartP2PConsumer.class,args);
    }


    //消费者消费
    @JmsListener(destination = "SpringBoot_Queue")
    public void getMessage(TextMessage message) throws JMSException {
        System.out.println("消费者获取到消息:"+message.getText());
    }
}
二、发布订阅
1、消费者目录展示

2、导入依赖
<dependency>
      <groupId>org.springframework.boot</groupId>
      <artifactId>spring-boot-starter</artifactId>
    </dependency>
    <!-- spring boot web支持:mvc,aop... -->
    <dependency>
      <groupId>org.springframework.boot</groupId>
      <artifactId>spring-boot-starter-web</artifactId>
    </dependency>
    <dependency>
      <groupId>org.springframework.boot</groupId>
      <artifactId>spring-boot-starter-test</artifactId>
      <scope>test</scope>
    </dependency>
    <dependency>
      <groupId>org.springframework.boot</groupId>
      <artifactId>spring-boot-starter-activemq</artifactId>
    </dependency>
3、消费者application.yml配置文件

4、consumer启动类StartTopicConsumer
package com.zn;

import org.springframework.boot.SpringApplication;
import org.springframework.boot.autoconfigure.SpringBootApplication;
import org.springframework.context.annotation.Bean;
import org.springframework.jms.annotation.JmsListener;
import org.springframework.jms.config.DefaultJmsListenerContainerFactory;
import org.springframework.jms.config.JmsListenerContainerFactory;

import javax.jms.ConnectionFactory;
import javax.jms.JMSException;
import javax.jms.TextMessage;

@SpringBootApplication
public class StartTopicConsumer {
    public static void main(String[] args) {
        SpringApplication.run(StartTopicConsumer.class,args);
    }


    //springboot默认只配置queue类型消息,如果要使用topic类型的消息,则需要配置该bean
    @Bean
    public JmsListenerContainerFactory jmsTopicListenerContainerFactory(ConnectionFactory connectionFactory){
        DefaultJmsListenerContainerFactory factory = new DefaultJmsListenerContainerFactory();
        factory.setConnectionFactory(connectionFactory);
        //这里必须设置为true,false则表示是queue类型
        factory.setPubSubDomain(true);
        return factory;
    }


    //消费者消费  destination队列或者主题的名字
    @JmsListener(destination = "SpringBoot_Topic",containerFactory = "jmsTopicListenerContainerFactory")
    public void getMessage(TextMessage message) throws JMSException {

        System.out.println("消费者获取到消息:"+message.getText());
    }
}

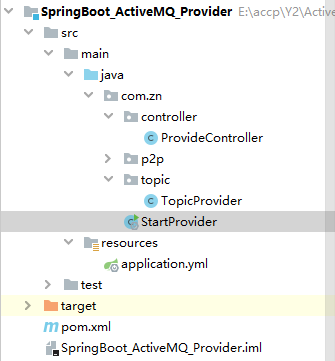
5、提供者目录展示
6、导入依赖
<dependency>
      <groupId>org.springframework.boot</groupId>
      <artifactId>spring-boot-starter</artifactId>
    </dependency>
    <!-- spring boot web支持:mvc,aop... -->
    <dependency>
      <groupId>org.springframework.boot</groupId>
      <artifactId>spring-boot-starter-web</artifactId>
    </dependency>
    <dependency>
      <groupId>org.springframework.boot</groupId>
      <artifactId>spring-boot-starter-test</artifactId>
      <scope>test</scope>
    </dependency>
    <dependency>
      <groupId>org.springframework.boot</groupId>
      <artifactId>spring-boot-starter-activemq</artifactId>
    </dependency>
7、TopicProvider
package com.zn.topic;

import org.apache.activemq.command.ActiveMQQueue;
import org.apache.activemq.command.ActiveMQTopic;
import org.springframework.jms.core.JmsTemplate;
import org.springframework.stereotype.Component;

import javax.annotation.Resource;

/**
 * 生产者,通过JMSTemplate模板发送消息
 */
@Component
public class TopicProvider {
    //注入JMSTemplate模板
    @Resource
    private JmsTemplate jmsTemplate;
    //创建方法
    public void sendMessage(){
        //发布订阅,创建主题
        ActiveMQTopic topic=new ActiveMQTopic("SpringBoot_Topic");
        //springboot默认是queue
        jmsTemplate.setPubSubDomain(true);
        //发送消息
        jmsTemplate.convertAndSend(topic,"生产者产生topic的消息");
    }
}
8、ProvideController
package com.zn.controller;

import com.zn.p2p.MyProvider;
import com.zn.topic.TopicProvider;
import org.springframework.web.bind.annotation.RequestMapping;
import org.springframework.web.bind.annotation.RestController;

import javax.annotation.Resource;

/**
 * 客户端访问的方法
 */
@RestController
public class ProvideController {

    //topic调用
    @Resource
    private TopicProvider topicProvider;

    @RequestMapping("/sendMessage")
    public String sendMessage(){
        topicProvider.sendMessage();
        return "success";
    }
}