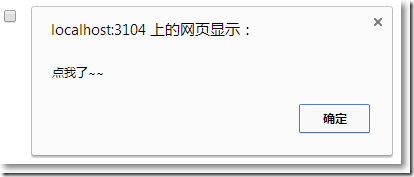
可以通过以下几种方式动态创建html元素:
1、使用jQuery创建元素的语法
2、把动态内容存放到数组中,再遍历数组动态创建html元素
3、使用模版
□ 使用jQuery动态创建元素追加到jQuery对象上。
1: <meta http-equiv="Content-Type" content="text/html; charset=utf-8"/>
2: <title></title>
3: <script src="Scripts/jquery-1.10.2.js"></script>
4: <script type="text/javascript">
5: $(function() {
6: $('<input />', {
7: id: 'cbx',
8: name: 'cbx',
9: type: 'checkbox',
10: checked: 'checked',
11: click: function() {
12: alert("点我了~~");
13: }
14: }).appendTo($('#wrap'));
15: });
16: </script>
17: </head>
18: <body>
19: <div id="wrap"></div>
20: </body>
□ 先把内容放到数组中,然后遍历数组拼接成html
1: <head>
2: <meta http-equiv="Content-Type" content="text/html; charset=utf-8"/>
3: <title></title>
4: <script src="Scripts/jquery-1.10.2.js"></script>
5: <style type="text/css">
6: table {
7: border: solid 1px red;
8: border-collapse: collapse;
9: }
10:
11: td {
12: border: solid 1px red;
13: }
14: </style>
15: <script type="text/javascript">
16: $(function () {
17: var data = ["a", "b", "c", "d"];
18: var html = '';
19: for (var i = 0; i < data.length; i ++) {
20: html += "<td>" + data[i] + "</td>";
21: }
22: $("#row").append(html);
23: });
24: </script>
25: </head>
26: <body>
27: <table>
28: <tr id="row"></tr>
29: </table>
30: </body>
31: </html>
32:
□ 使用模版生成html
1: <meta http-equiv="Content-Type" content="text/html; charset=utf-8"/>
2: <title></title>
3: <script src="Scripts/jquery-1.10.2.js"></script>
4: <script type="text/javascript">
5: $(function () {
6: var a = buildHTML("a", "我是由模版生成的", {
7: id: "myLink",
8: href: "http://www.baidu.com"
9: });
10:
11: $('#wrap1').append(a);
12:
13: var input = buildHTML("input", {
14: id: "myInput",
15: type: "text",
16: value: "我也是由模版生成的~~"
17: });
18:
19: $('#wrap2').append(input);
20: });
21:
22: buildHTML = function(tag, html, attrs) {
23: // you can skip html param
24: if (typeof (html) != 'string') {
25: attrs = html;
26: html = null;
27: }
28: var h = '<' + tag;
29: for (attr in attrs) {
30: if (attrs[attr] === false) continue;
31: h += ' ' + attr + '="' + attrs[attr] + '"';
32: }
33: return h += html ? ">" + html + "</" + tag + ">" : "/>";
34: };
35: </script>
36: </head>
37: <body>
38: <div id="wrap1"></div>
39: <div id="wrap2"></div>
40: </body>
41:
参考资料


